

Sending Event Email Journeys before a Profile Sync
Problem Statement
For certain AJO use cases, an email delivery may need to be sent, where the profile may not yet exist in AJO. As an example, let's say you are sending an order confirmation email to a new subscriber. The confirmation email needs to be sent immediately, but the customer registration went to your CRM, which might only sync to AJO daily. This could also apply to other use cases like registrations and double opt-in.
If your journey uses profile data, but the profile doesn't exist yet, you won't have an email address to send to. So you'll need another method to deliver the email.

Solution Overview
This guide will cover how to execute an event-based delivery in a journey, which can handle both scenarios where the profile does or doesn't exist yet. As a result, you will be able to deliver an email regardless of if the profile has synced from another source like a CRM.
To enable this, we will need to specify the Email Address used in the journey. While you'd usually use the email address attached to a profile, in this case, we need to solve for when the profile might not yet exist. So we'll use the incoming email address from the event. This can be setup within the Email of your Journey.
Additionally, your email content will likely include some personalization data which we’ll also cover. Finally, if a delivery was sent where the profile arrives later, we would want this delivery to be attributed back to that profiles events. This guide will explain how that would work and what is required to close the loop.
Alternative Approach: API-Based Campaign
As an alternative, this use case can also be achieved with an API-Based Campaign, however it would require a simpler use case. Executing via a Journey offers more flexibility and customization options. For example, automating an SMS if the recipient didn't open the email, or storing data on the Profile following the delivery. So consider your use case to determine the most suitable approach. This guide will focus on the journey based approach.
Prerequisites
In order to achieve this solution, there are some prerequisites which should already be setup:
- An Event setup in AJO
- Must be a Unitary Event
- Must be linked to an ExperienceEvent Schema
- In the Event configuration, make sure you've selected any relevant fields. This includes email address which is required for this use case
- An external API to trigger the event
Typically event-based deliveries are transactional and don't require any sort of opt-in, which is an assumption of this guide.
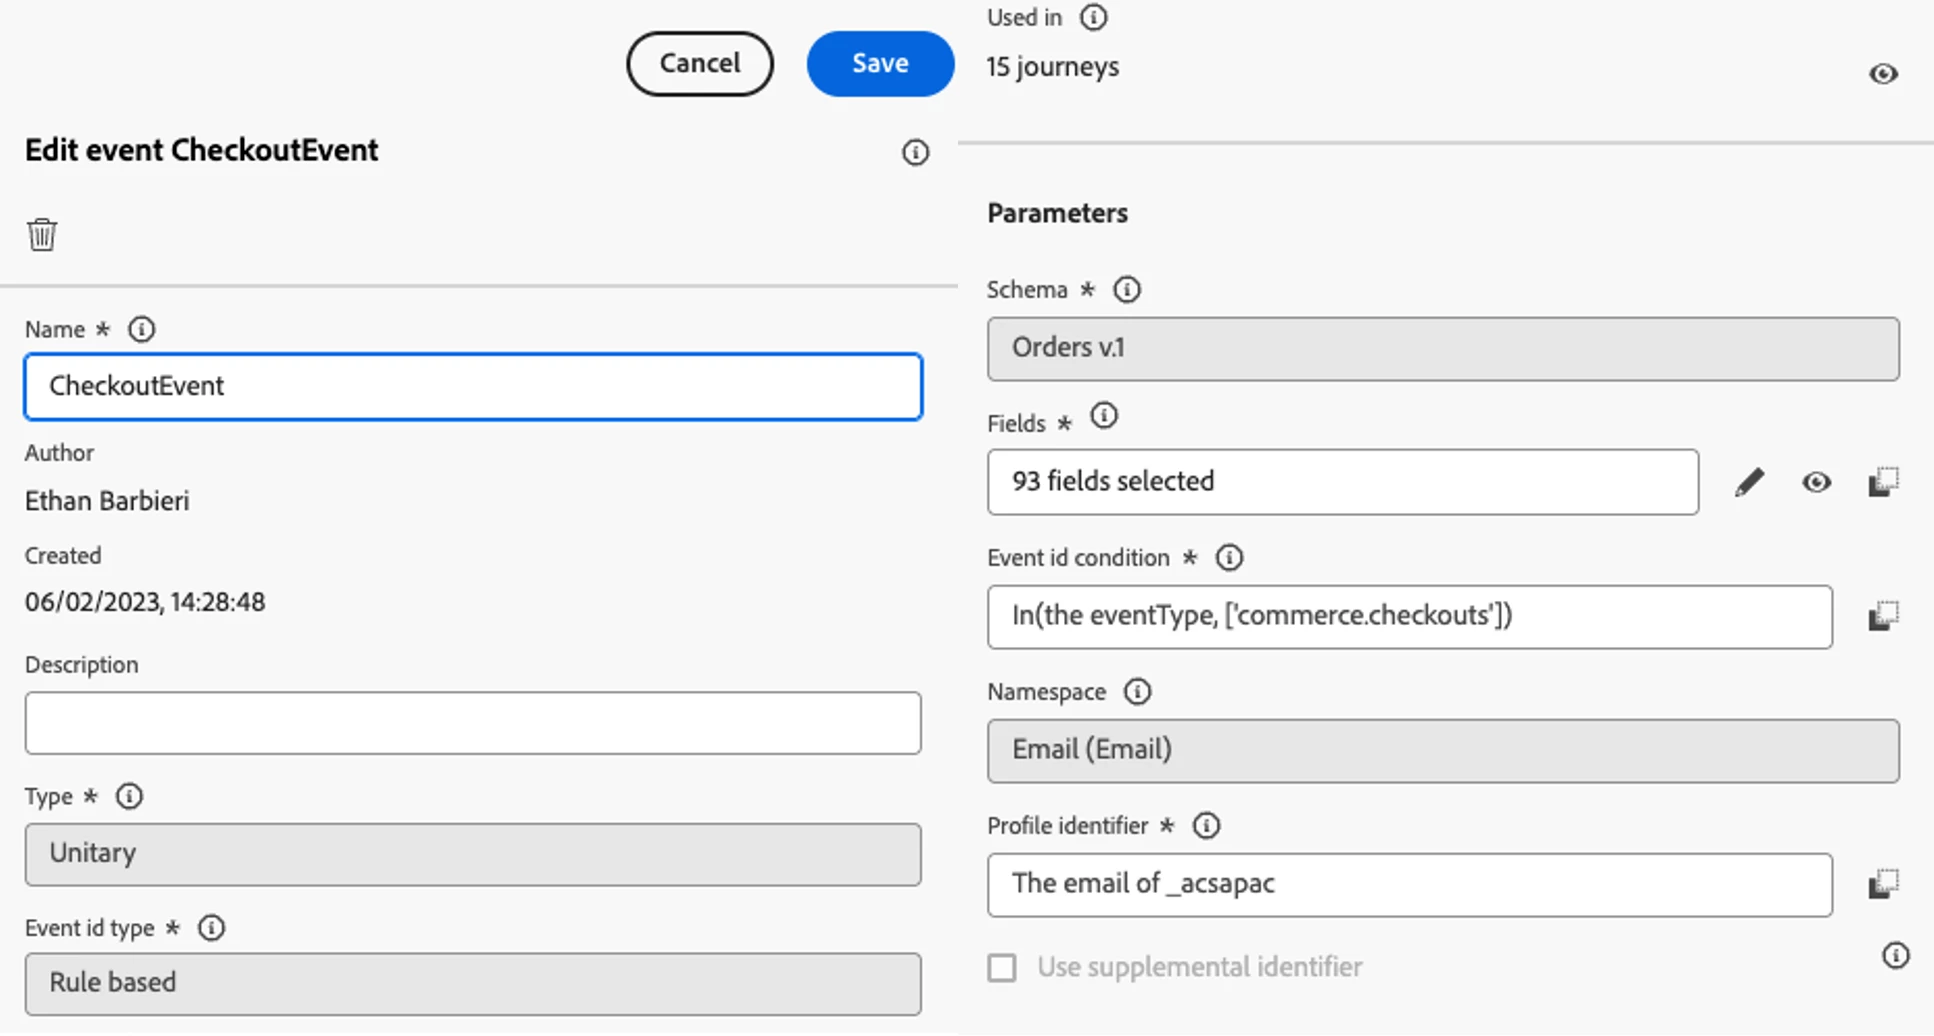
Image: Sample Event for this demo
Implementation
Let's set up a journey which can deliver to an email address where the profile may or may not exist yet. This approach will define the email address at a journey level, which offers more flexibility.
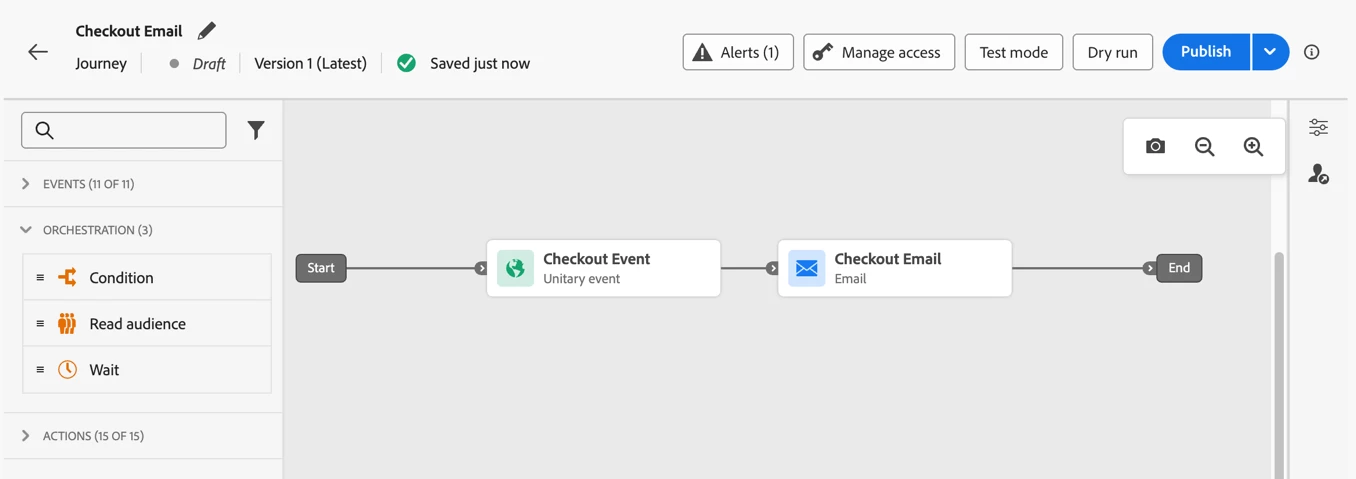
- Firstly, create a fresh journey
- Next, begin the journey with an Event activity, using the one from this guides Prerequisites
- Add an Email activity to the journey
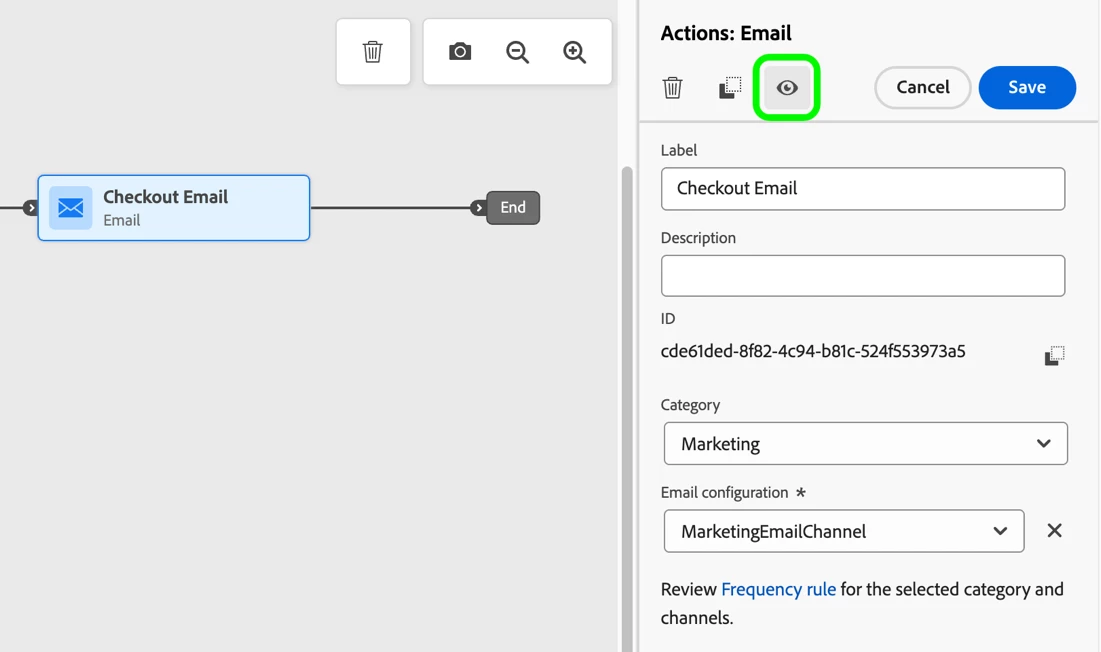
- Click your Email to open the pane, and select your usual Email Configuration from the drop down
- This pane has some hidden fields which you'll need to access, so make sure they are showing (click the eye icon at the top)
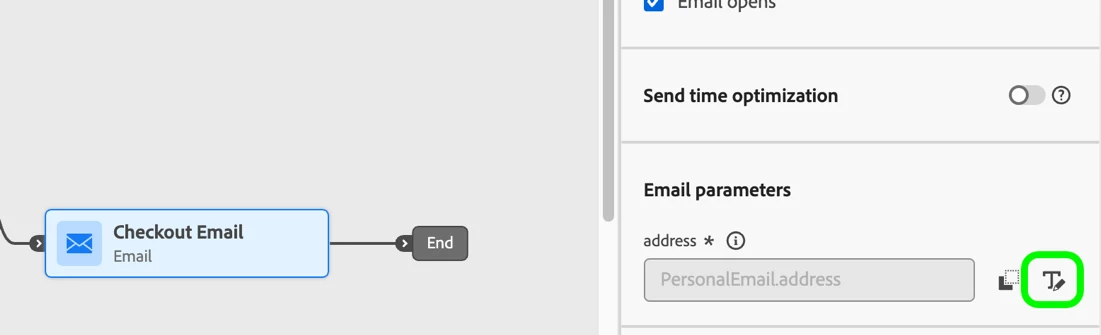
- Scroll down to find the Email Parameters > Address field, which you’ll need to edit. By default, this field will be locked. Click the Edit icon to unlock it. Then click on the field to open a window to edit it.
- In this window you’ll need to define the Email Address to use. In the left navigation, find your events Email Address field. As the Email Address is coming from the event, you should find it under Context. In this use case, we're trying to solve for if the profile may not exist yet, so it's important to ensure you haven’t selected the Email Address located on the Profile.
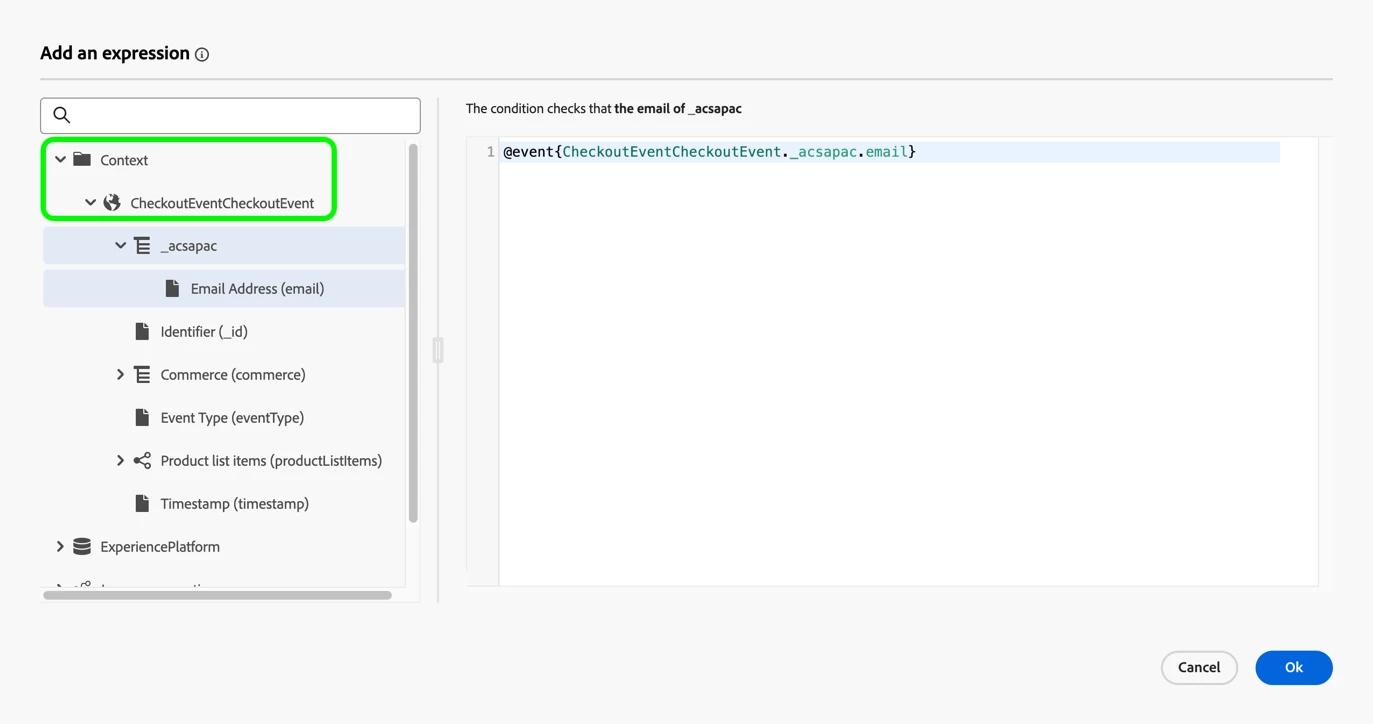
- Click Ok and Save. Now your journey will deliver the email using the incoming Events Email Address rather than the one located on the Profile
- With the main functionality for delivering emails defined, setup the rest of your journey and email content as needed. See the below section for recommendations on how to setup Email Personalization in your email content
- Finally, publish the journey, and test end-to-end to confirm the configuration works
Testing & Validation
Once the journey is complete and published, run an API to trigger the Event for testing. When the Event API arrives, it should execute the journey immediately. The Email delivery should be sent to the email address from the Event in the API. This should work whether or not the incoming event matches to an existing Profile. So run a test where the identity matches, and another where the identity doesn’t match, and both should successfully deliver.
Any personalization data should come from the Event, rather than the Profile. For example this could be a first name in your email content. Test this by running a test event which does match to a profile, and have a different first name between the Profile and the Event. In this case, the Events first name should show in the email delivery.
See the below section Identity Stitching to see how the data will look on the Profile.
Email Personalization
This use case is built around the concept that an email can be sent to a recipient where the Profile may not exist. So far we've focused on getting the delivery sent, by using an Email Address from Context rather than Profile. If the Profile may not exist, then we need to make sure we're also pulling any Personalization data from the Context as well. Otherwise, if the profile isn't found, the personalization value would be empty.
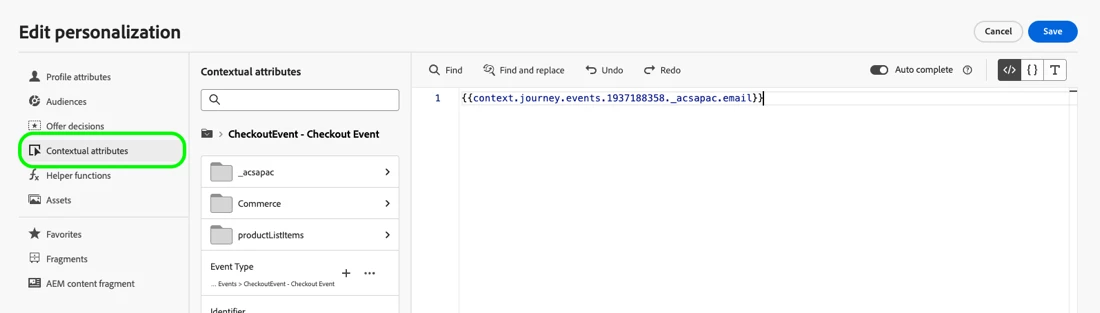
To start, find where you want to insert the personalization field in your email content, and click Add Personalization.
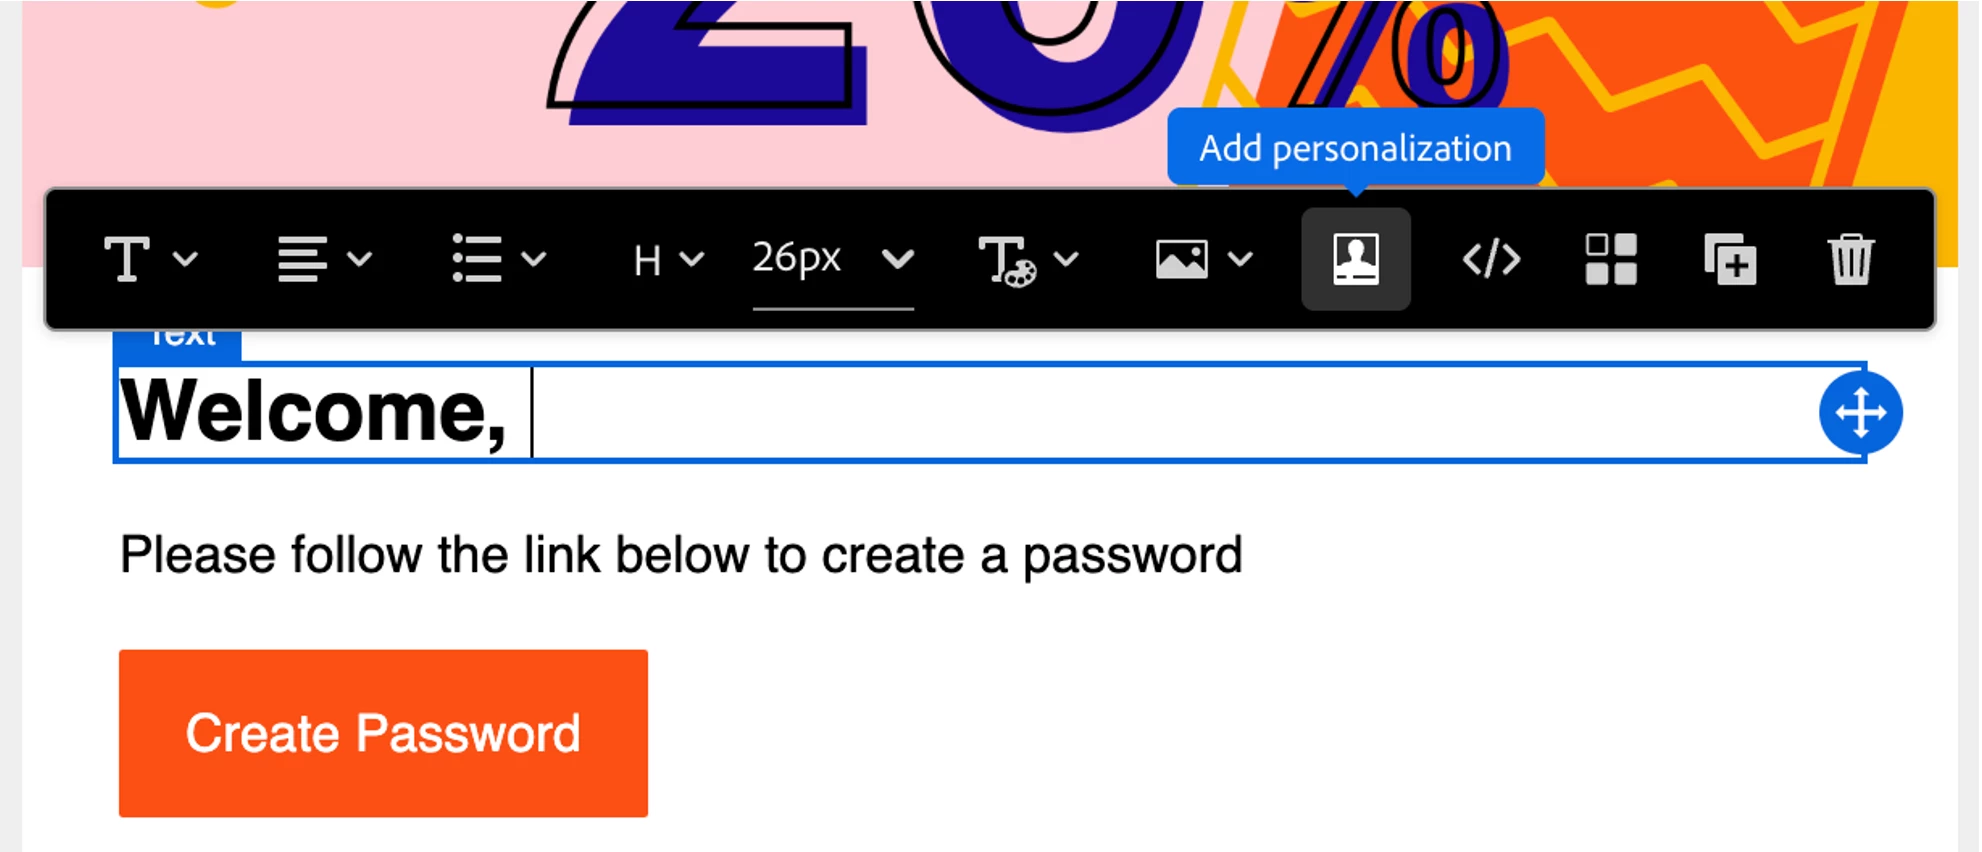
In your email content, when you set up any personalization, make sure you're also referring to the Context Attributes rather than Profile Attributes. This can be found in the left navigation when adding personalization. Be sure that the field you’re referring to is included in the Event payload, and is being populated.
For testing, any personalization you use from Context data won't show in the Proofing feature, as it only supports Profile data. So be sure to test the journey using API, or run the journey in Test Mode.
Identity Stitching
This use case solves for the possibility that the profile may not exist when the delivery is sent. But that profile will eventually be created, for example later being migrated from a CRM. So what would you expect to see?
The Event data will have an Identifier for the Profile, which is also referenced in the Journey. For example this could be the Email Address. Ensure this Identity matches to one which will be ingested from the CRM later, so the two profile fragments can be stitched.
- Match: If the incoming events Identifier matches to an existing profile, the Event and Delivery data will be appended to that profile
- No Match: If a match isn’t found, a shell profile will be created with only the Identity, plus the Event and Delivery Log under the Events tab. As there isn’t any CRM data to match to, there would be no attribute data at this stage
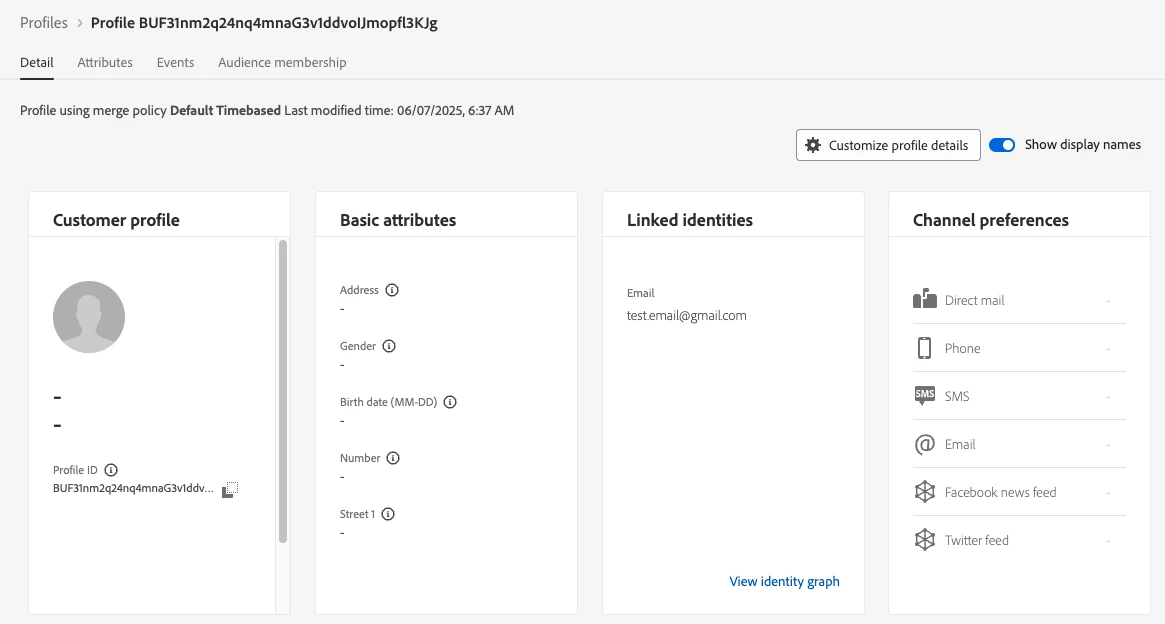
Image: Sample shell profile
Later, the profile can be properly created from the CRM data. Assuming it includes the same Identity as the Event, this data will stitch to the shell profile, creating a complete picture of the Profile. This will include the new Profile Attributes from the CRM, and also pull in the Event and Delivery Logs.