Streamlining Campaign Creation: Centralized Content with Fragments
Marketers are constantly looking for ways to simplify creating deliveries. It can be difficult to add content to your delivery which complies with your template, and keep deliveries up to date as the template changes over time. Adobe Journey Optimizers Fragments feature streamlines this process.
So, what is a Fragment? It’s a reusable component that can be added or referred to in deliveries sent from Adobe Journey Optimizer. They’re designed for content, so your email templates header could be set up as a fragment. By having the fragment centralized and then referenced in many delivery templates, it allows you to update the content in one spot and instantly have those changes propagate across all linked templates.
For example, updating your company logo in your email templates header. Usually, you would have to go into each template and update the same image in all of them. However, if the template header was saved as a Fragment, you would be able to simply update the Fragments logo once and have that change automatically applied to all templates using that Fragment.
Fragments can also be used as building blocks for a template. Although they have the capability to centralize content, sometimes you may want to use the fragment as a starting point and make changes without affecting other templates. This can be achieved using the Break Inheritance feature. The example above uses a Fragment to create a structure with an image on the left, and text on the right, complete with the businesses branding and fonts. As breaking inheritance treats the fragment as a new version, modifying the text and images won't impact other templates using the original fragment. By taking this approach, it's much easier to add new content which complies with your template. This will be covered in detail later in this guide.
Let's dive in and see how to get the most out of Fragments. We'll go through some handy use cases, which types of Fragments to use, plus how to create, update, and maintain them.
Fragment Types and Use Cases
Below are the fragment types used for content.
Fragment Type | Content Type |
Visual Fragment | Content is visual, allowing you to use the drag and drop editor. Designed for the email channel. |
Expression Fragment: Text | Content is text only. Best for chunks of text, or SMS/Push deliveries. |
Expression Fragment: HTML | Content is HTML code. Best for HTML based templates. |
Let’s go through each fragment type in detail. We’ll cover their strengths and best use cases, as well as how to add them to your templates.
Fragment types available when creating a new one from scratch
Visual Fragment
Visual Fragments are designed for email deliveries. As they use the email designer tool, it can incorporate a mixture of images and text, and you can create or maintain it with the drag and drop editor. As an example, you can use a Fragment as your email templates header, and when the Fragment is updated, any templates which refer to it will also inherit the new header ongoing.
The below example is of an email template header as a fragment. In this case, the logo and links have been updated. Once saved, all templates referring to this fragment would begin using this new version.

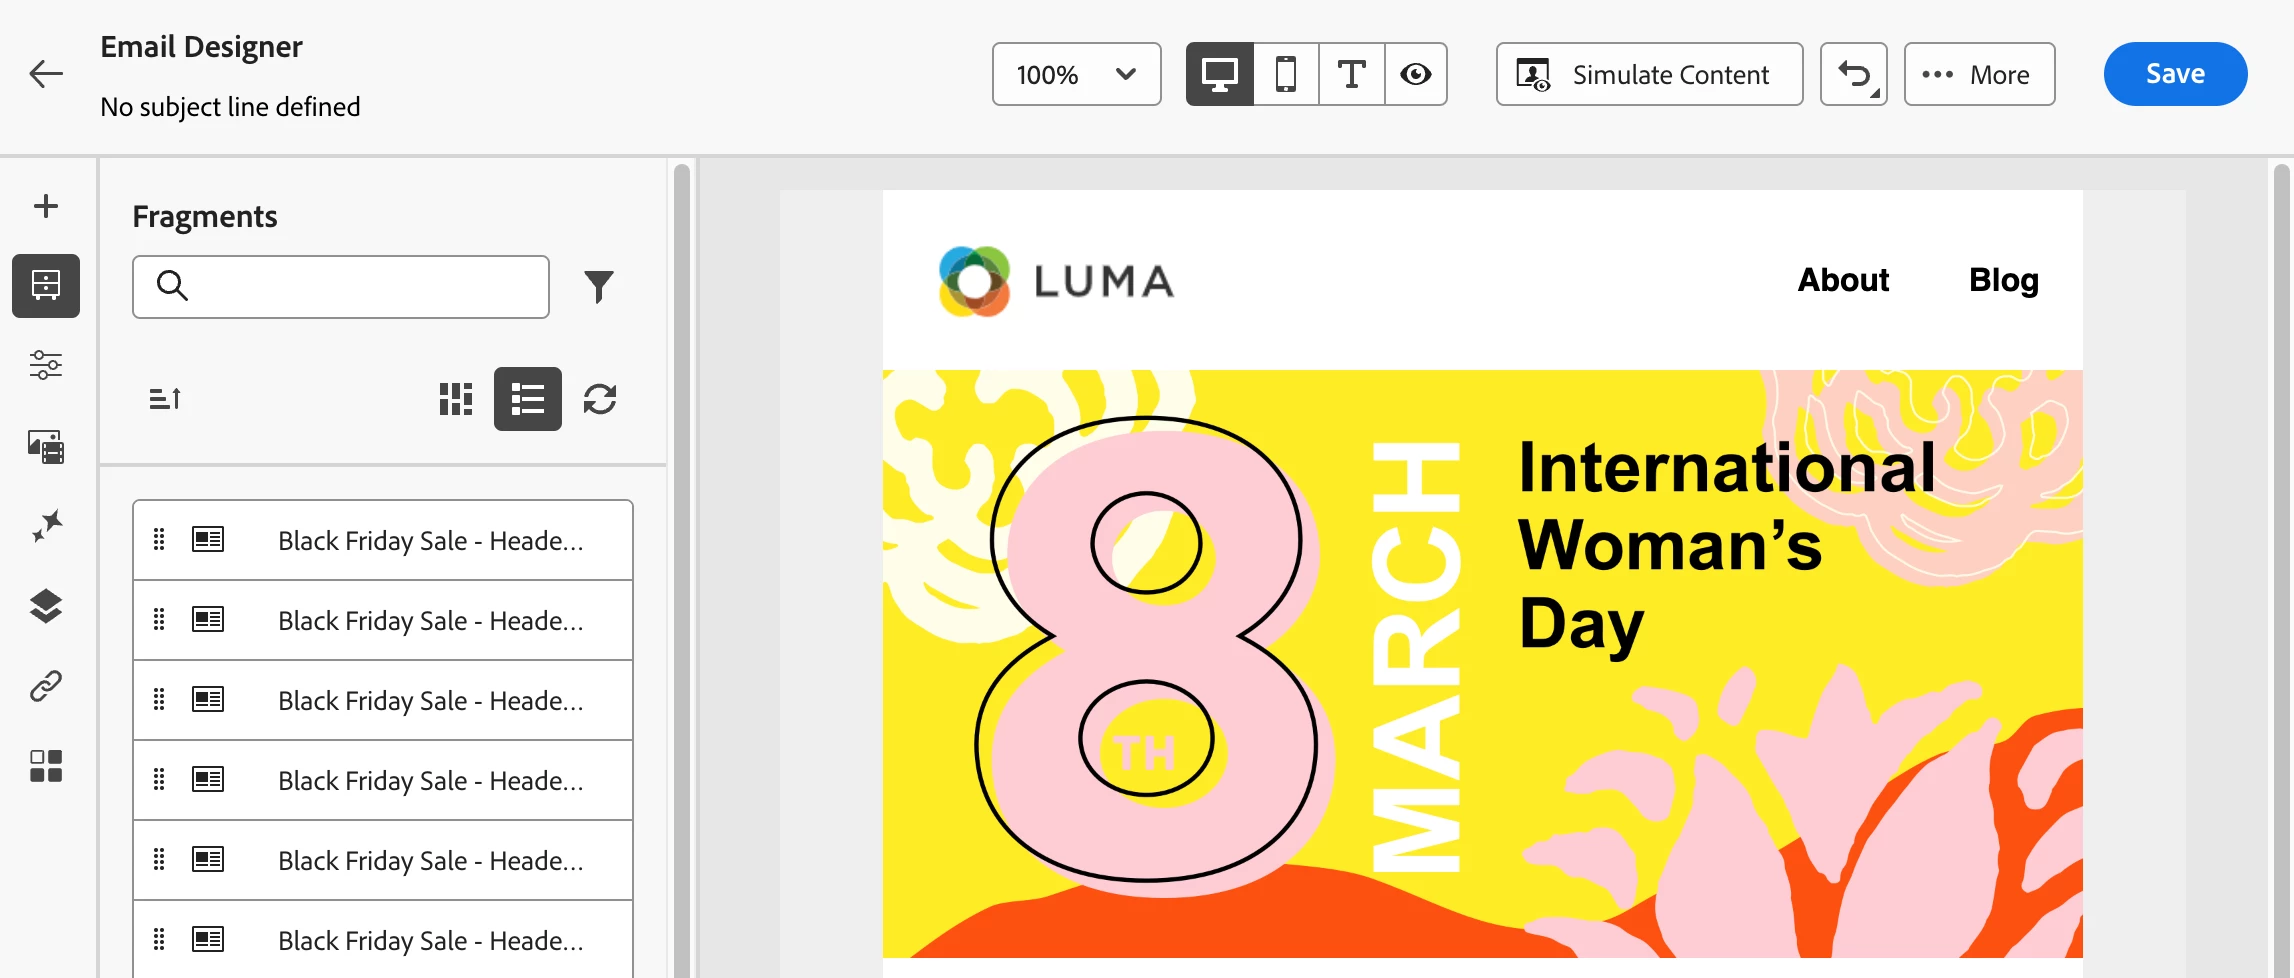
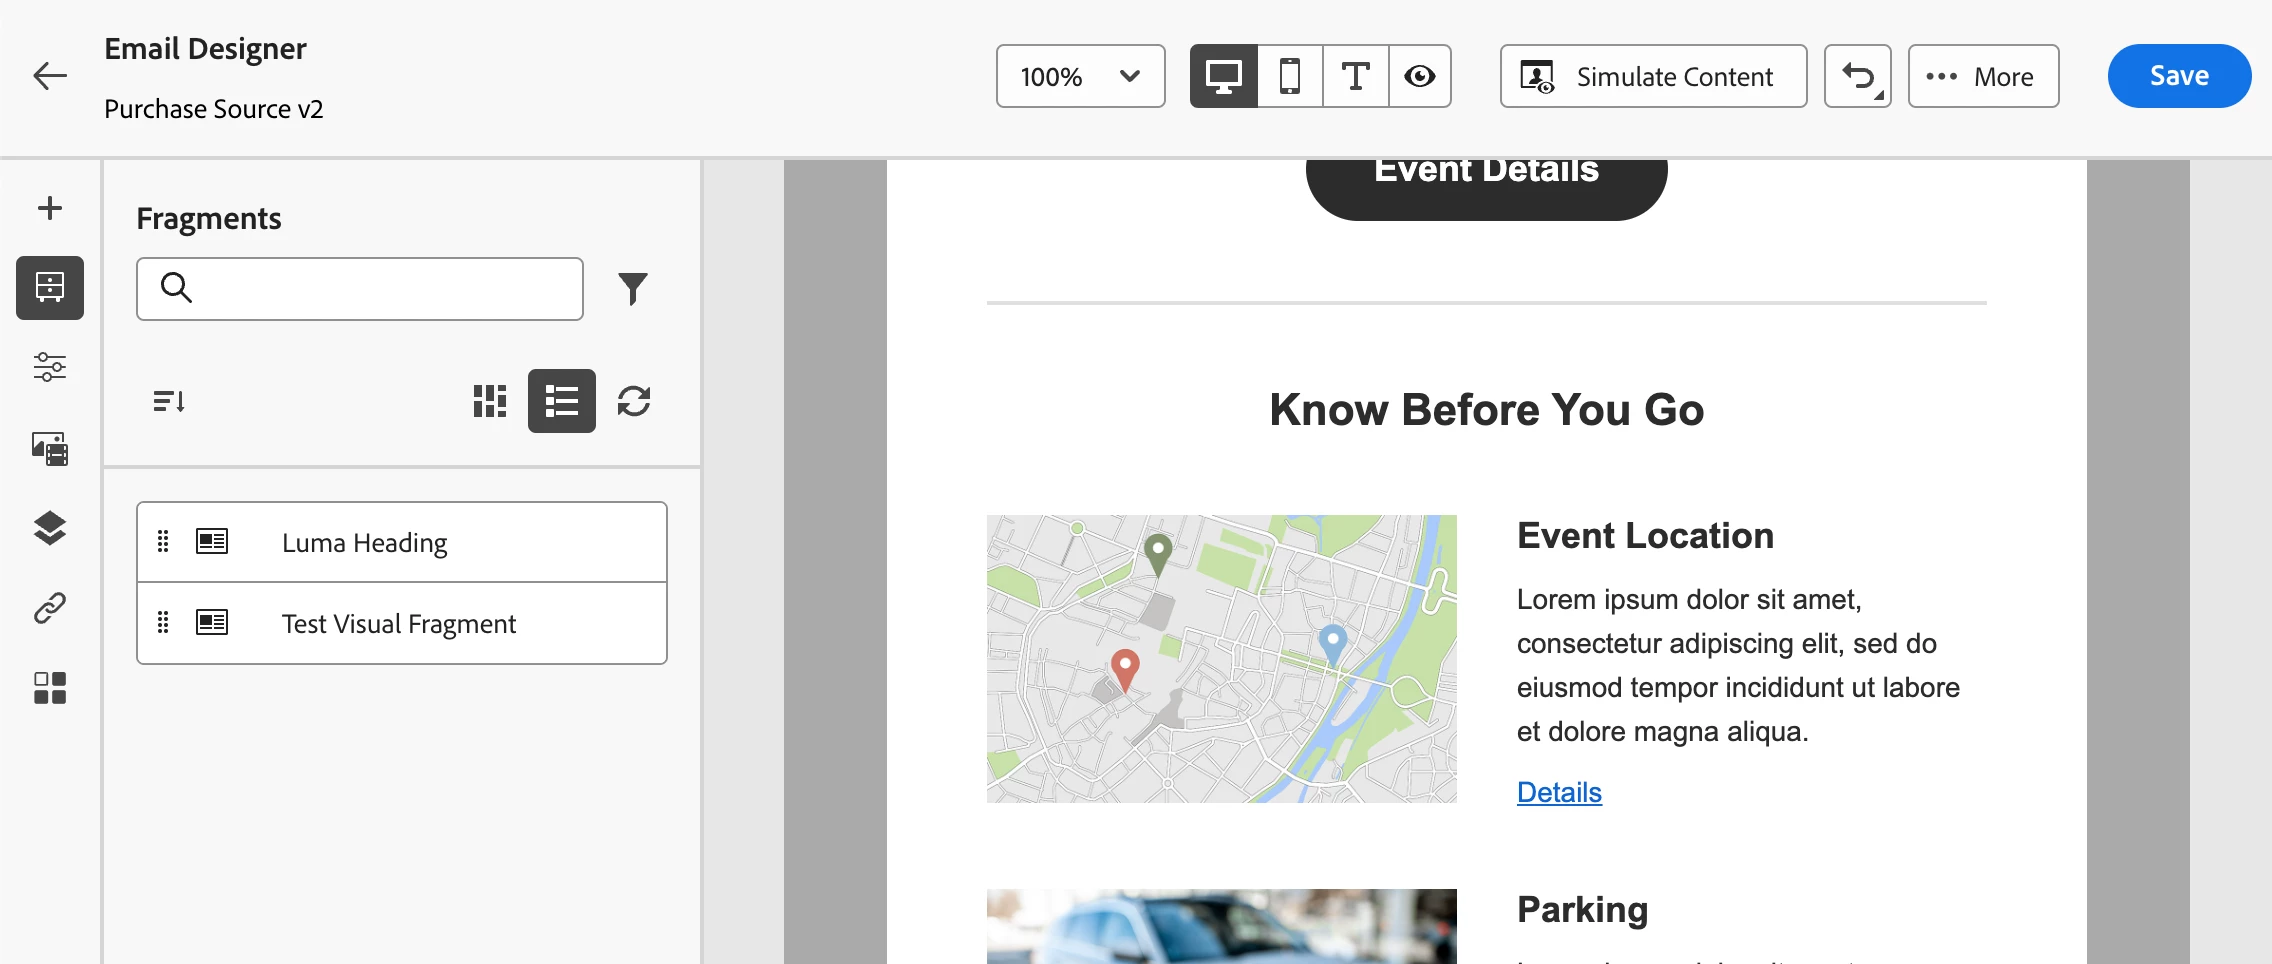
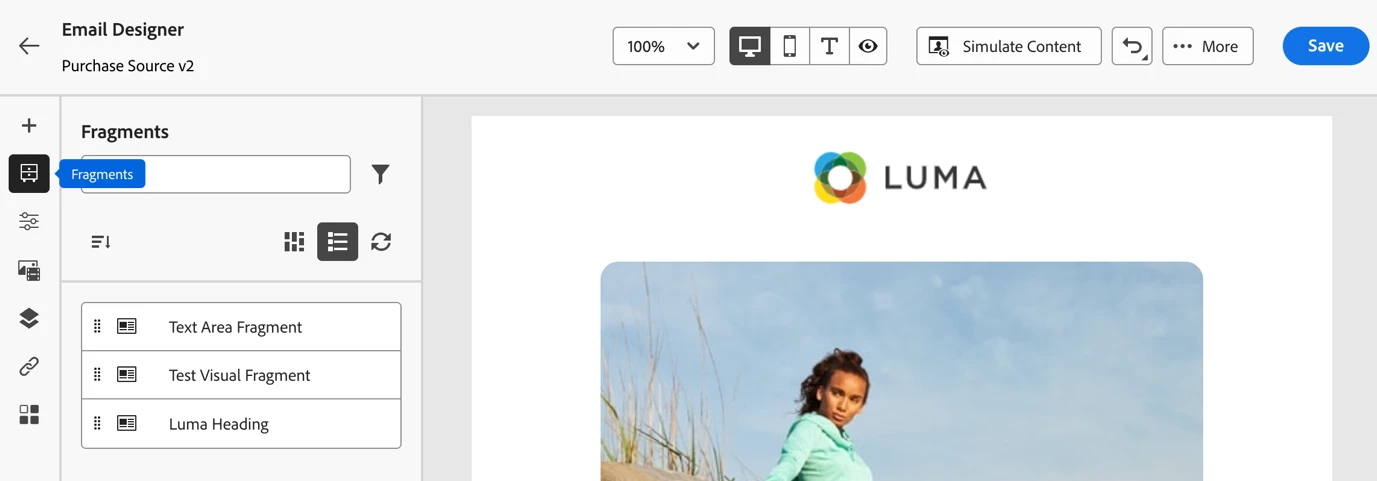
To add a visual fragment to your email delivery, click the Fragments icon  on the left sidebar of your template, click and drag using the grab tool
  next to your fragments name, and place it where it should be in the template.
Expression Fragment: Text
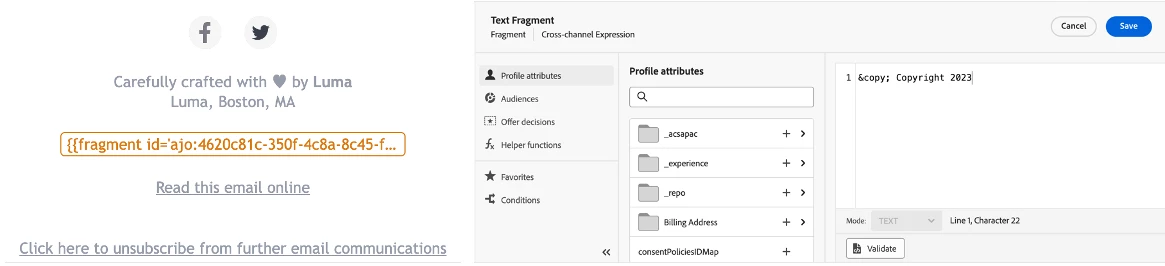
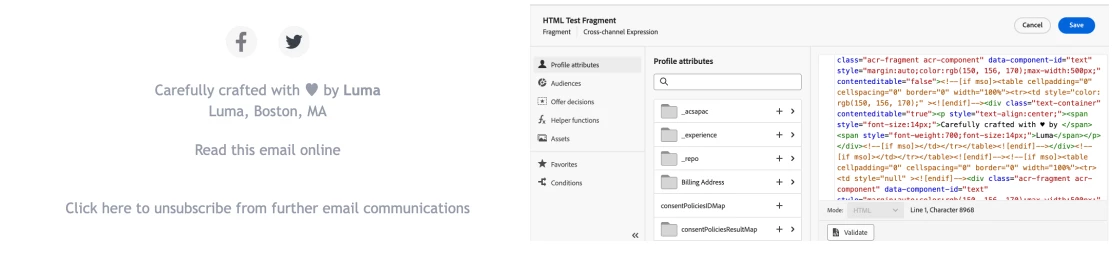
A Text based Expression Fragment is best suited when you only need text. Text is flexible so it can be used in Push and SMS channels along with email. For example, many businesses have © Copyright 2024 in their email footer and need to update it each year. Although this can be achieved in the Visual Fragment, setting it as a Text type maximises the flexibility as it can be nested into multiple templates with different footers.
In the example below, the image on the left shows the tag which gets replaced by “© Copyright 2023” when the email is sent. The right image is the content within the fragment which can be updated as needed.
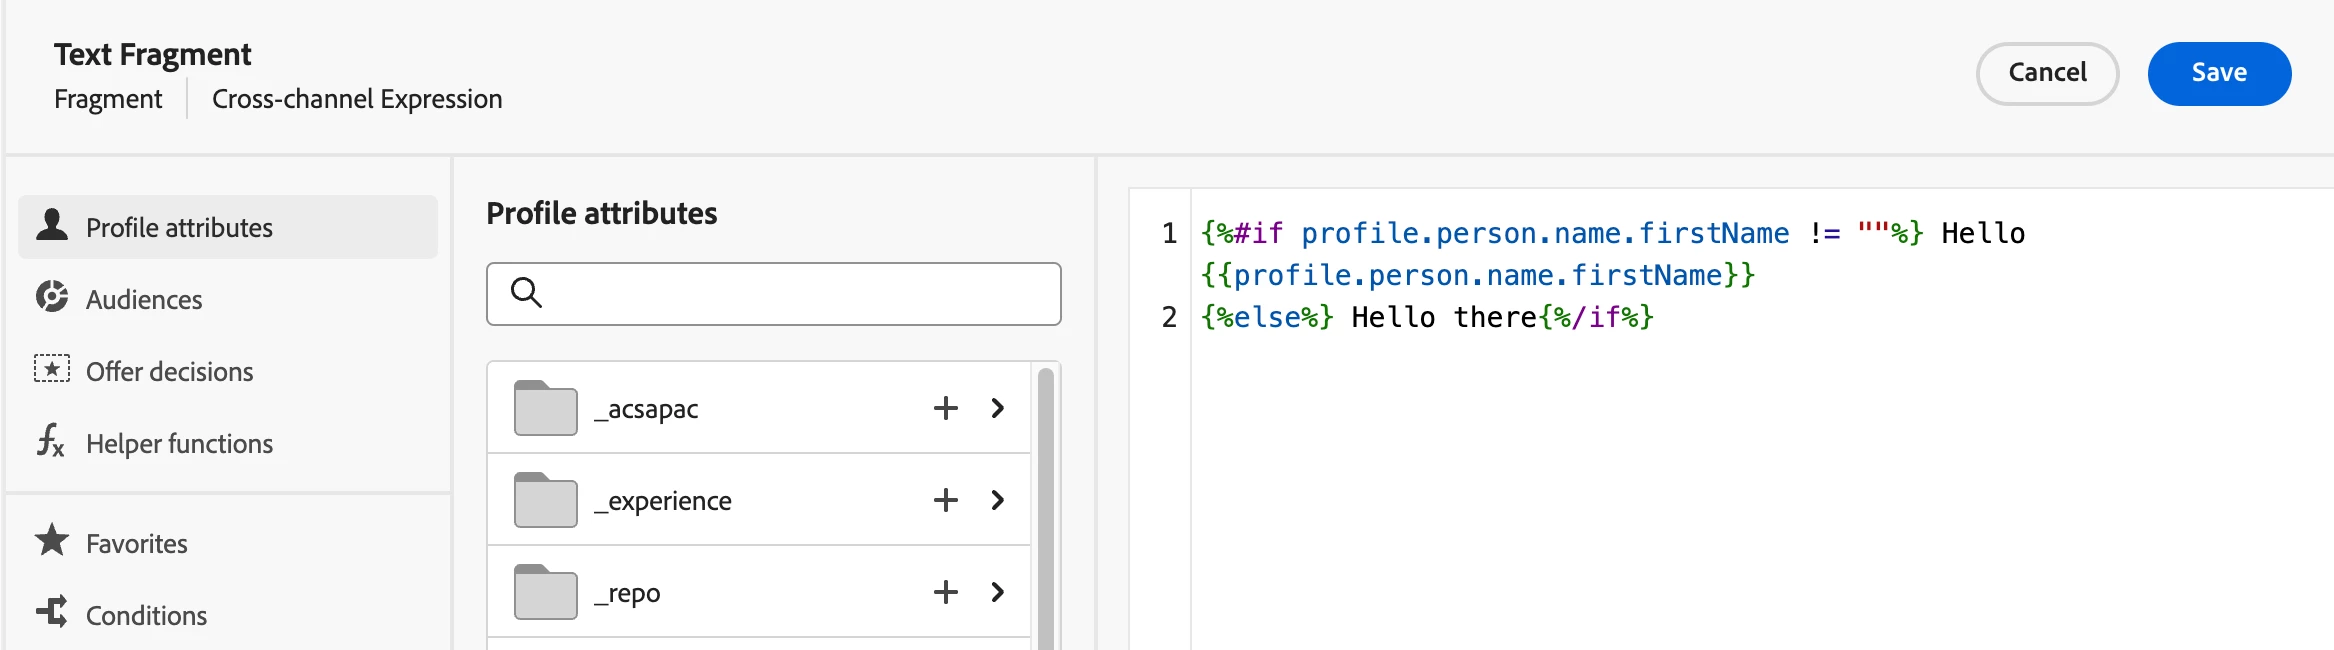
Text can also be a smart choice for reusable personalization and conditional content. For example, you can create a greeting for your customers as a reusable fragment and display the greeting differently depending on their attributes. The greeting could read ‘Hello there’ or ‘Hello Fred’ depending on if the profiles first name exists. These rules can be created in the text-based fragment. As its text based, the custom greeting can easily be reused across different templates and channels, and you don’t need to recreate it each time.
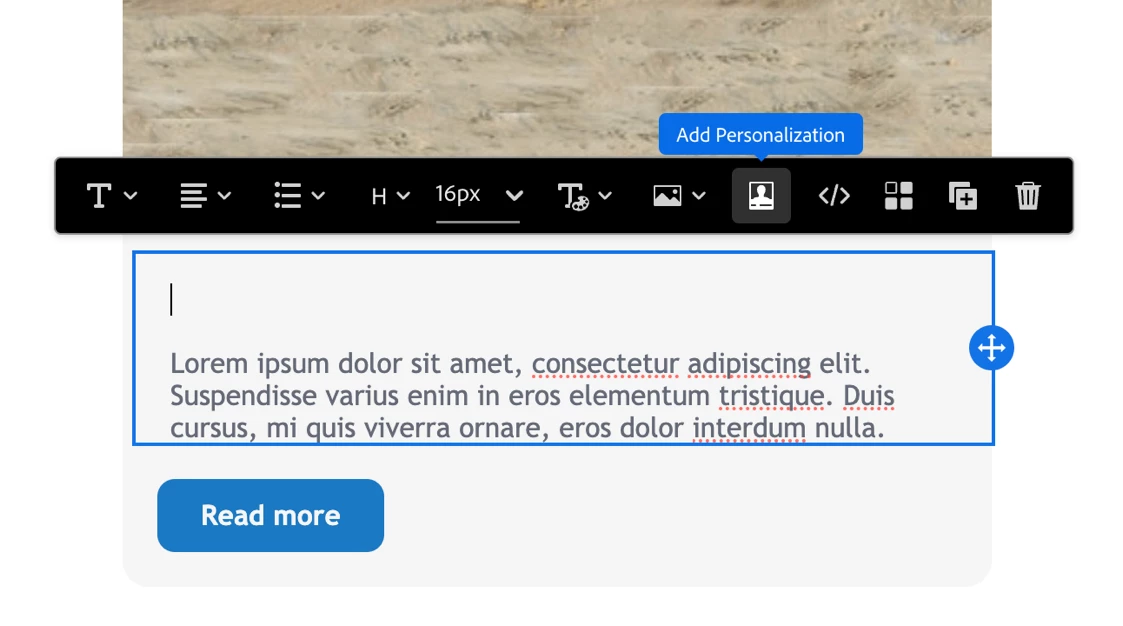
To add a Text fragment to your delivery, click the Personalization button  where you’d like your fragment to be added. In this window, click the Fragments icon
  on the left sidebar, select where you would like it to be placed, then click the + icon next to your fragment. The tag will be added to the text where you selected.
Expression Fragment: HTML
The HTML Expression Fragment would be used when your template is created with HTML, rather than using the in-built drag and drop editor. This allows you to align the content with your custom HTML template, and make sure it displays correctly. Rather than being visual, your fragment will be HTML code.
In the example below, on the right is the HTML of the template footer, and on the left is how it looks when tested in the email delivery. As this is using HTML, be cautious when updating the code as it could break your template rendering.
When the Fragment is added to your template, it will be assigned a tag. Within your HTML, a tag like the one below will be included, and replaced with the HTML of the fragment when the delivery is sent.
{{fragment id='ajo:681cda1a-1135-42ef-8dda-c3a3666e9106' mode='inline'}}
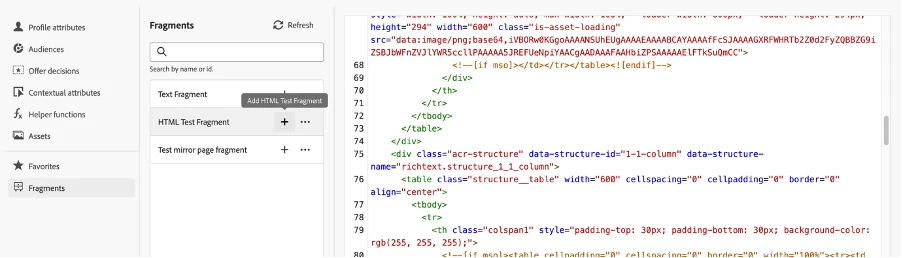
To add a HTML fragment into your deliveries HTML content, start by clicking the Fragments icon  on the left sidebar. Next, select where you would like it to be placed, then click the + icon next to your fragment. The tag will appear where you selected.
Fragment Creation Shortcuts
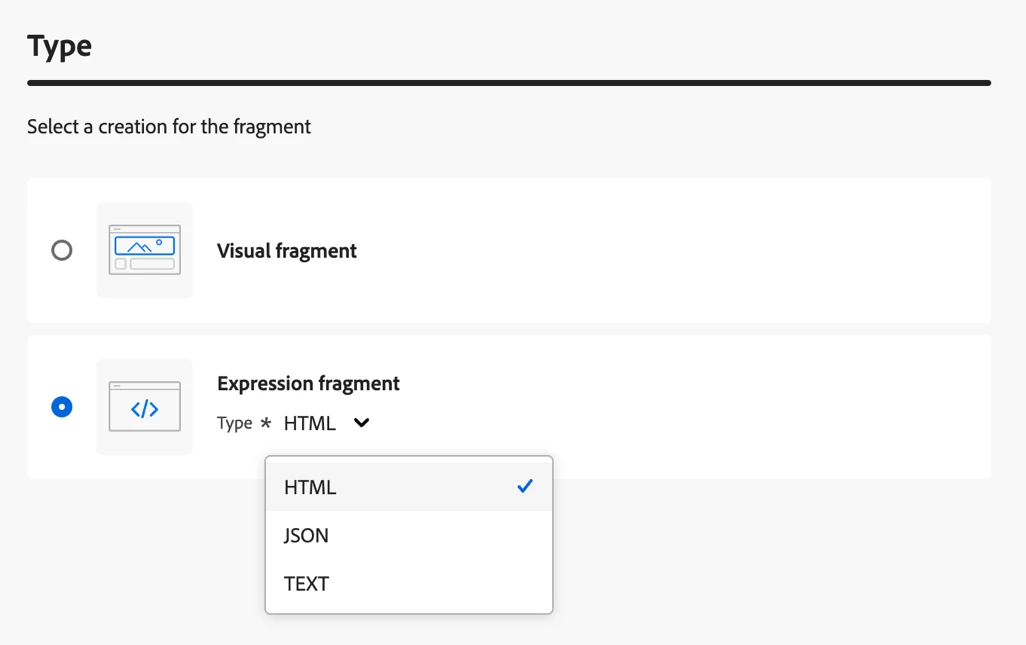
Fragments have a few ways of being created. To create one from scratch, navigate to the Fragments page on Adobe Journey Optimizers main left navigation. You will be able to select whether it’s Visual or Expression based. Otherwise, below are some shortcuts to create them based on existing content, which in most cases will be the easiest and most accurate method.
Visual Fragment
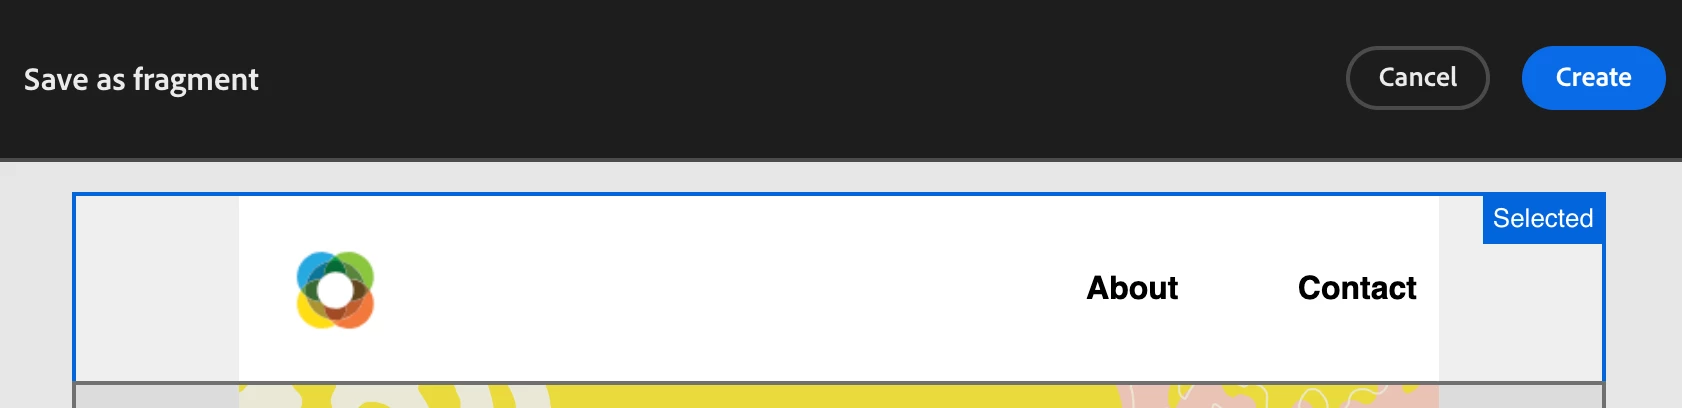
If your content is already setup in an existing template or delivery, you may not need to rebuild anything to set it up as a Fragment. Open that template to view the editor, click More at the top right, then Save Fragment. From here you’ll be able to click on a section of the content to be stored as a Fragment, then click Create and save. This is the recommended way to build rather than creating from scratch as it’s based on the template, automatically inheriting styling, dimensions, etc. Once saved, it will then be available for reuse in your Fragments list when editing templates.
Expression Fragments: HTML or Text
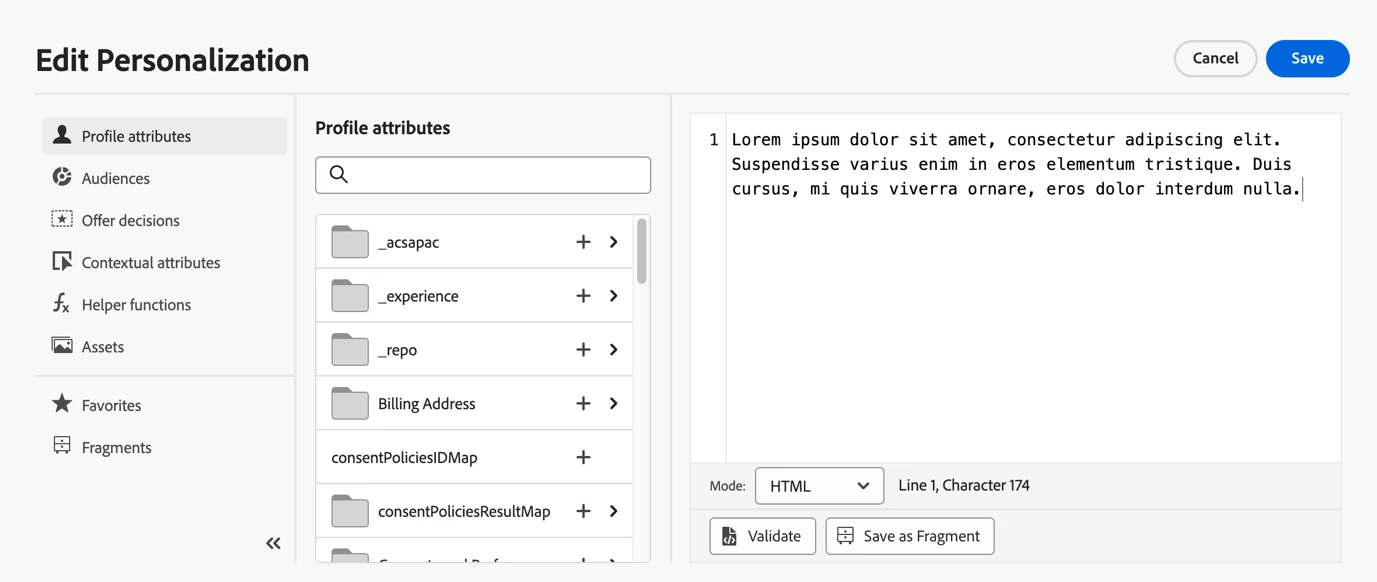
Fragments can also be saved directly in the Expression window. This could be in a HTML or Text format. Click ‘Save as Fragment’ at the bottom to save it. By default, it will store the full contents of the input box, otherwise you can select part of the text to be saved. This works well with HTML blocks. Once saved, it will be available under Fragments on the left navigation.
Updating Fragments
When a Fragment is updated, that change automatically takes effect, unless the fragment is used in a live delivery. Below is how to ensure the change takes effect, including some tips to simplify the process and ensure everything is covered.
Scenario 1: Delivery not yet sent
If you’ve updated your fragment, the change will automatically apply to any deliveries which use the fragment but are not already sent. For example, this could be next month's newsletter. No changes need to be made, although it’s worth testing to ensure the change has been included.
Scenario 2: Delivery is live
If your fragment is included in a live delivery or journey, that change will not be reflected until the content has been refreshed. For example, this could be an always-on order confirmation email. The best way to do this is to go into the live journey, create a new version of it, check the updated fragments content is now in the delivery, then publish the new version of the journey. If done properly, the delivery shouldn’t need any changes, simply republish the journey. Testing is always recommended. Any deliveries sent after being republished will contain the changes.
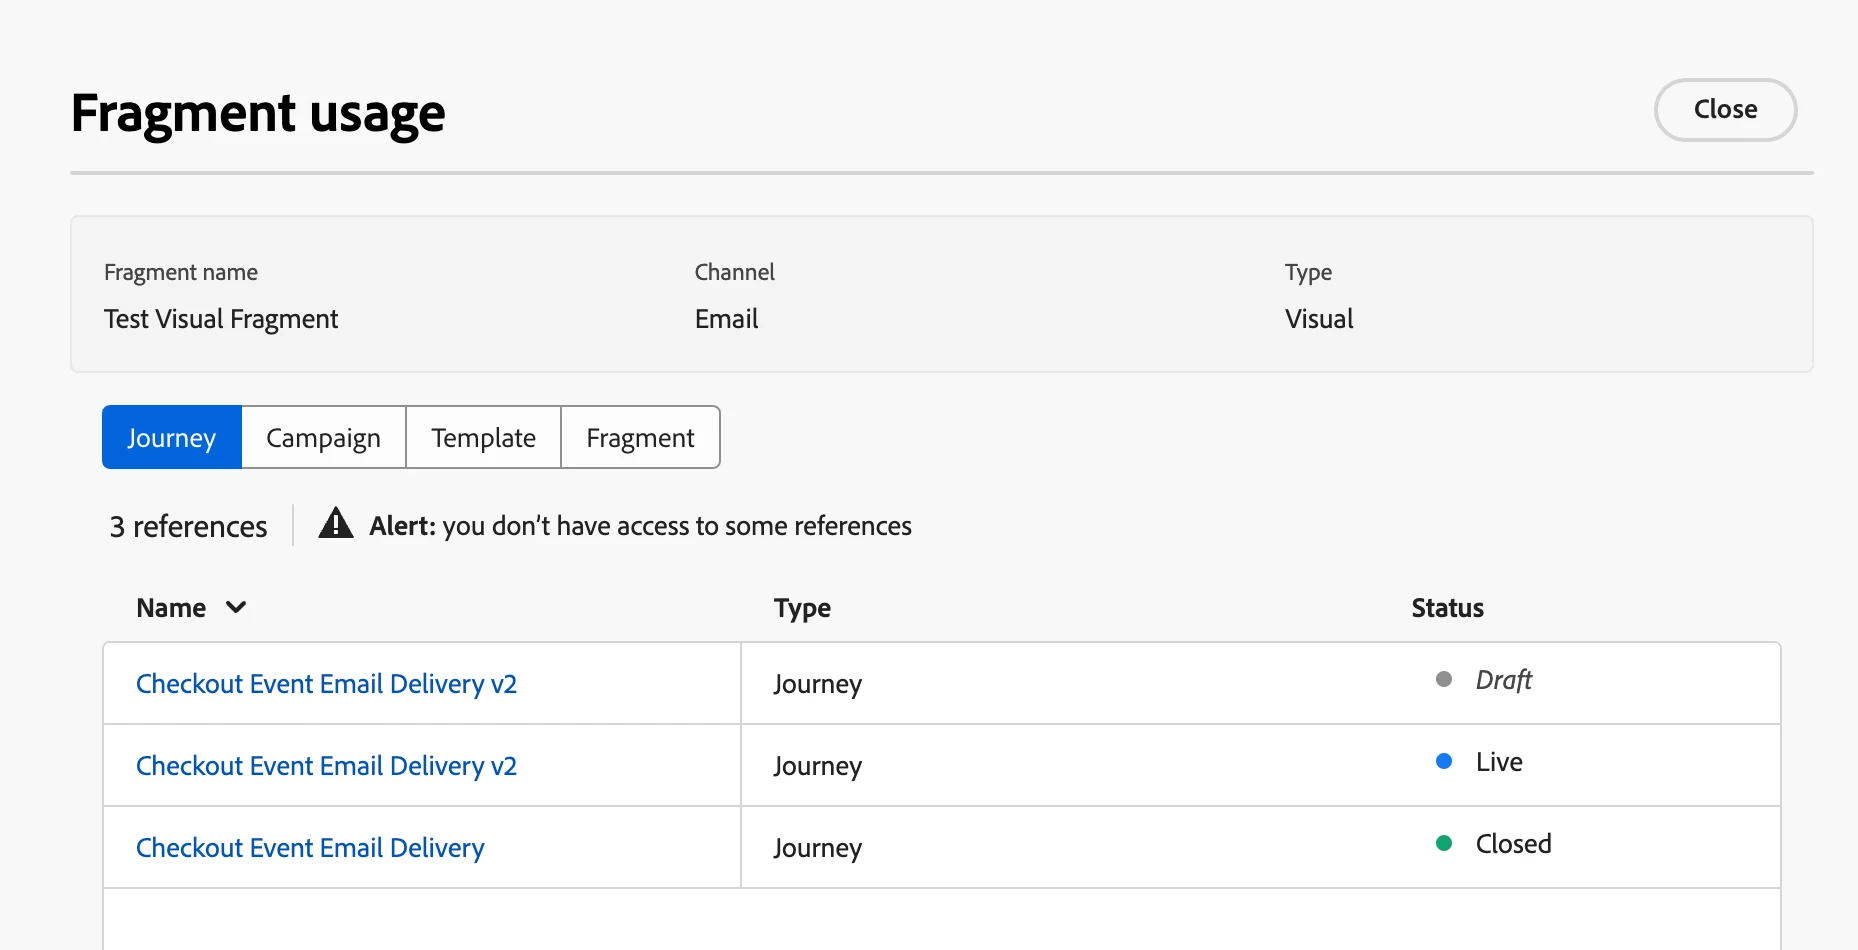
Finding Fragments in Use
When updating a Fragment, it’s important to validate and make sure the change has been reflected where it’s used. Adobe Journey Optimizer makes it simple to find places where that Fragment is included. A dedicated page will show you which journeys include it and are live, which would need to be republished to reflect the changes.
To access it, navigate to the Fragments page on the left navigation, and open your Fragment. At the top of the page, open the link ‘Explore references’. This will open a list of where your Fragment used. Any uses which have a status of Live wouldn’t be updated automatically, so this is a simple way to see what needs to be republished. Note that the screenshot below has the Journey tab selected, however there are other places which may need to be reviewed – Campaigns, Templates, and other Fragments where it may be nested.
Breaking Inheritance
As you’re creating content, you may want to use a fragment as a starting point, then make changes to it. However, you may not want this change to be applied to all other templates referring to the same Fragment. This is where the ability to Break Inheritance becomes useful.
The benefit is that you will be able to edit the content of your Fragment in this delivery alone, without modifying the original fragment which other templates may be referring to. When using this, be mindful that this creates another version outside of the original Fragment, so any changes made to the core Fragment will not be applied where you’ve broken inheritance. Once the inheritance is broken, it can’t be reverted, so you would need to delete the new content and add the original Fragment back in.
Below is how to break inheritance in both Fragment types.
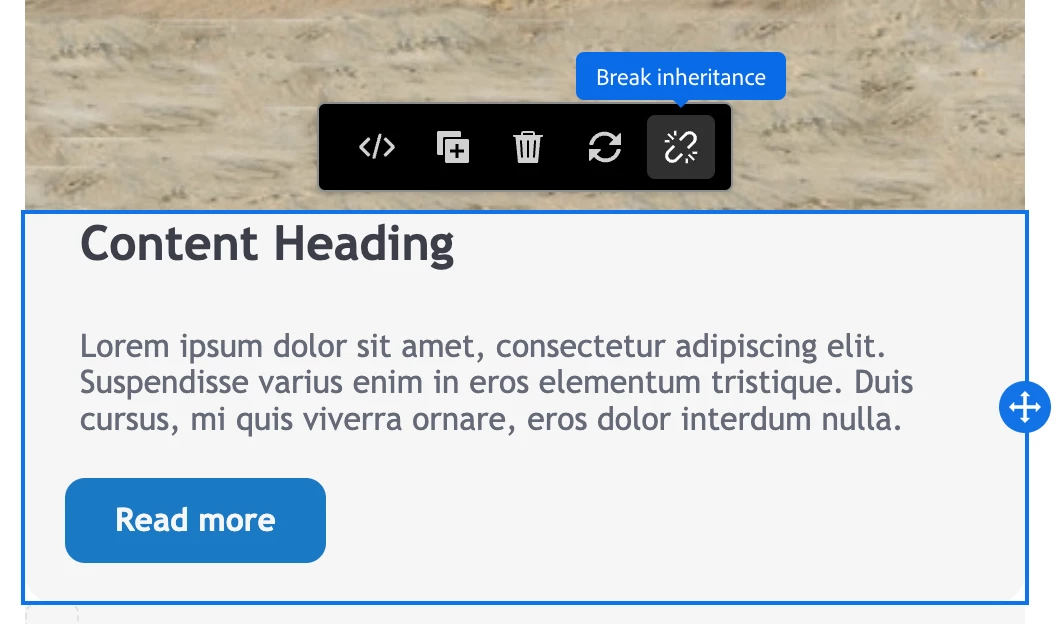
Visual Fragment
In a visual fragment, simply select the fragment in the editor, and click ‘Break inheritance’. From here you can modify as needed. In the example below you could update the heading, body content, and button.
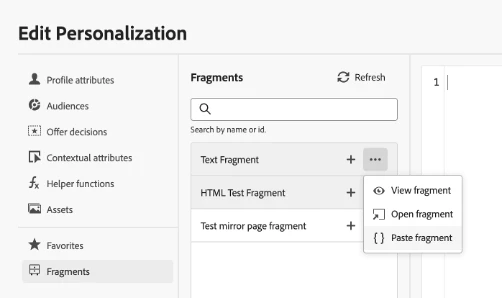
Expression Fragments
The example below shows how to add a fragment into your content for HTML or Text based deliveries. Rather than clicking the + which would add in a reference to the fragment, select ‘…’ then ‘Paste Fragment’. This will paste the contents of the Fragment into the expression editor, without a link to the Fragment itself. As a result, it will not have any inheritance and can be modified as needed.