
Using Postman to Test Adobe API’s
As an Adobe Target consultant I am frequently involved in engaging projects and through the years you tend to build up a suite of tools that help you work most efficiently.
One aspect I tend to focus on in my role are APIs. In layman’s terms it’s the interface that allows one set of products or services to communicate with another set without having to put in the heavy lifting to build something brand new every time. The focus of this article is going to demonstrate how I use one particular tool called Postman to help me in my role.
In the context of my role Postman is a great tool for testing out and troubleshooting API calls. One particular scenario where I’ve found Postman handy is using it with the Adobe Target Admin API. For the Admin APIs I’ve found it particular useful in building custom tools for my client as it provides Adobe IO Integration to manage items such as activities, audiences and offers.
For these APIs I’ll provide a high level example which will hopefully allow you to see how they work and also how you can leverage the Postman tool in your testing and troubleshooting.
Once you have Postman ( https://www.postman.com/ ) you can use a sample request for the Admin API here ( https://www.getpostman.com/collections/faa0cb00c6323ee024a6 ). This request will allow us to see all the audiences in my sandbox.
Creating a Project in the Developer Console
Before I test out an Admin API call I’m going to create a test project in the Adobe Developer Console so I can generate the credentials required to plug into the call. Navigate to the Adobe Developer Console where you will need to log in.
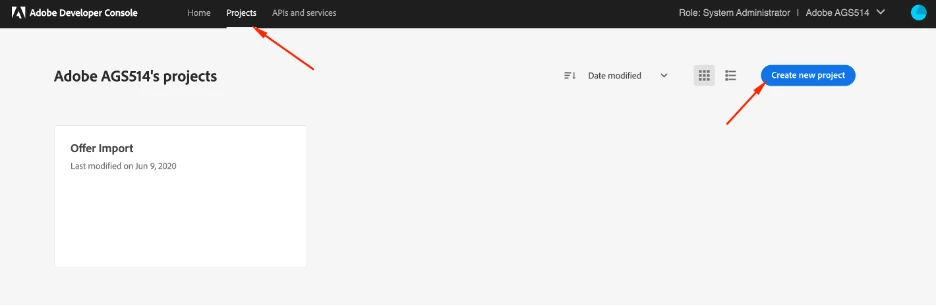
- Go to ‘Projects’ at the top
- Then ‘Create new project’
- By default, your project will be called ‘Project # ( next numeric value available )’
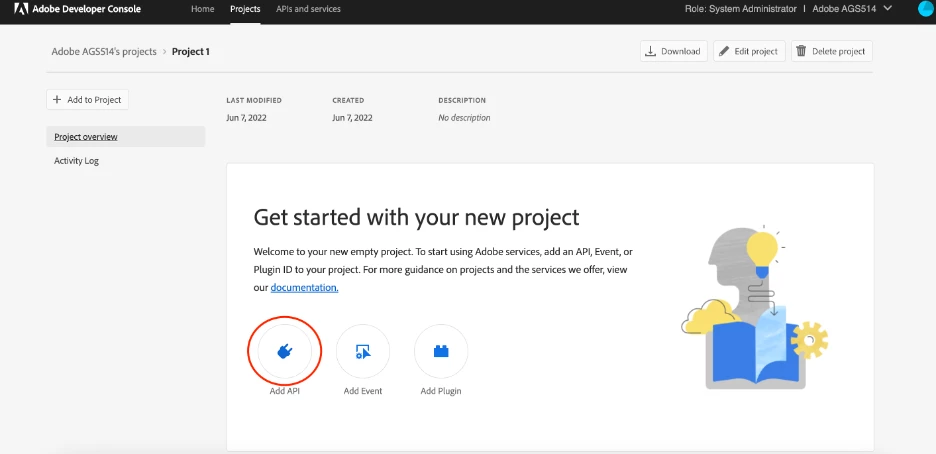
- Next, let’s add an API, so select ‘Add API’
- Then select ‘Experience Cloud’ and then ‘Adobe Target’
- Select ‘Next’ then let’s go for ‘Option 1 Generate a key pair’
- Once that’s complete a config.zip will be downloaded
- Select ‘Next’ then let’s use the ‘Default Workspace’ product profile
- Once you hit ‘Save configured API’ you’re all set
Testing Out an Admin API call
Now that we have a key pair generated from our project we can test out an Admin API call.
- Unzip the config.zip from earlier and open up the private.key in a text editor
- Paste your private key into the ‘Generate access token’ section and select ‘Generate Token’
- Using the sample cURL command, you can run this in a terminal window
- Copy your access token for later
Let’s open up the example collection supplied for Postman.
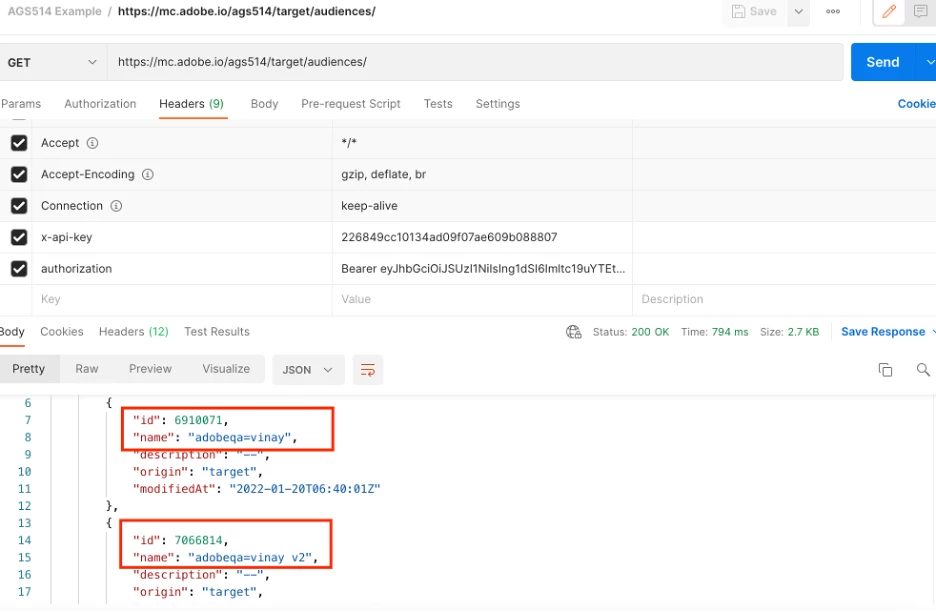
- Select ‘Headers’ and look for ‘Authorization’
- Let’s replace the {{access_token}} with the access token we generated earlier
- Also, make sure to replace {{client_id}} with the client id from your project
- Lastly, you’ll want to make sure you have the right tenant supplied where {tenant} is
- Click ‘Send’ in the example Postman collection supplied
This particular example will list all the audiences in my sandbox. You can find documentation for all the available API methods here.
To conclude, I hope these high-level overviews have been helpful. As a consultant, I find examples go a long way in helping one learn about a particular feature or tool. From there, I’m able to take those learnings and expand upon them.
Vinay Sodha
Senior Technical Consultant, Adobe Target
Vinay has 15+ years of experience in the optimization space working both on the client side and vendor side. He is able to determine clients’ business objectives and design customized solutions using technical strategies to meet the requirements. Most recently, Vinay has been focused on advanced implementations of Adobe Target ranging from using machine learning to leveraging REST APIs. He has worked with clients across a wide spectrum of industries in the US, EMEA, and Australia.