Adobe Target: Tuesday Tech Bytes: Building Safe and Secure Engaging Experiences - The Importance of Controlled Access in Experience Optimisation
In today's digital age, brands across various industries like Retail, Banks, Telecoms, and Energy providers are increasingly relying on both mobile apps and websites to serve their customers. According to one survey by Fingent, 62% of businesses utilise both platforms to stay competitive and meet the diverse needs of their users.
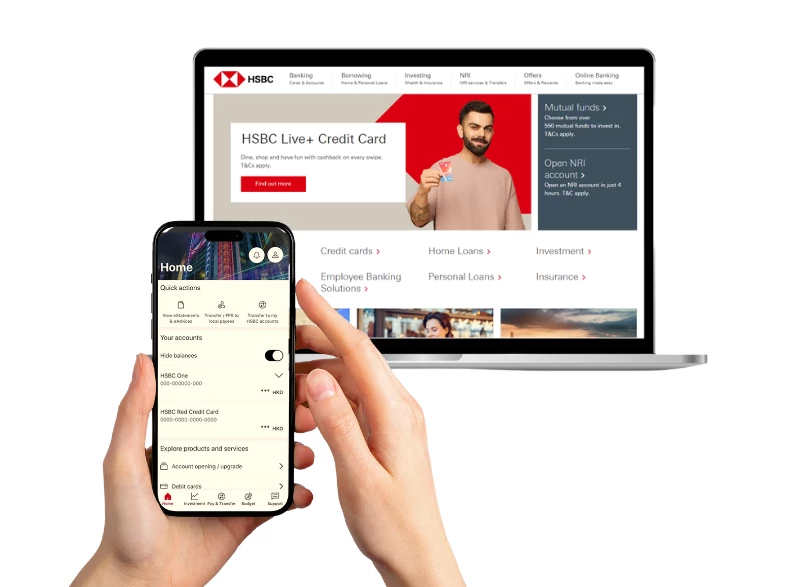
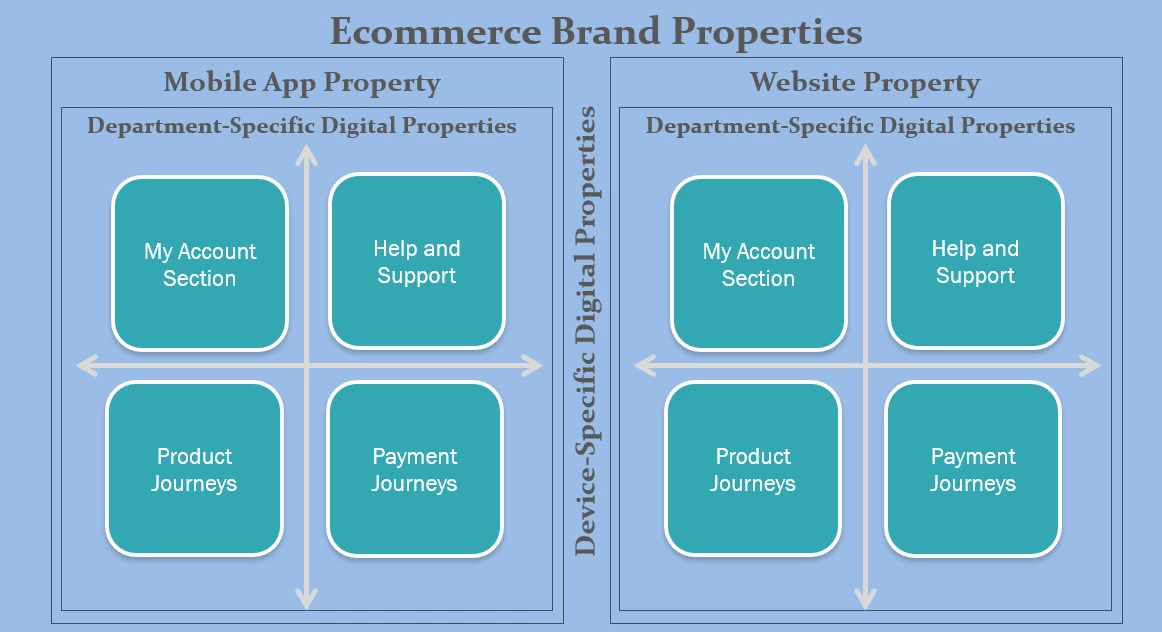
For instance, a major retail chain like Walmart may offer an e-commerce website alongside a mobile shopping app, while a bank like HSBC might provide online banking services through both a web portal and a mobile application. These digital properties are often divided into specific areas like My Account, Help & Support, and various product journeys, each managed by different specialised teams to ensure that every aspect of the customer experience is addressed.

Managing these varied digital experiences effectively is essential to delivering a seamless user journey and ensuring that all workflows are aligned. Proper management involves coordinating between different teams, ensuring that every aspect of the user experience from browsing products to managing accounts is optimised for performance and personalisation. Misalignment or inefficiencies can lead to a fragmented experience, which can negatively impact user satisfaction and brand loyalty. This blog will guide you through managing each digital property of your app or website in Adobe Target, including creating workspaces and properties for different configurations, to help you maintain a consistent and high-quality user experience across all platforms.
This article explains how Adobe Target uses the concepts of Properties and Workspaces to create a robust and flexible governance structure to experience optimisation across manage multiple - in a safe and secure way.
This article is work of my learned colleague @vaibhav_mathur - thanks Vaibhav for sharing your leanings through this insightful piece!
Understanding Multiple Digital Properties
Multiple digital properties of an app or website refer to different versions or segments that serve unique purposes or audiences. For instance, an e-commerce brand might have:
-
Department-Specific Digital Properties: Digital properties designed for specific departments within a company, such as marketing, sales, or customer service, each focusing on different aspects of the business.
-
Audience-Specific Digital Properties: Variations to cater to specific user groups, such as B2B and B2C customers.
-
Device-Specific Digital Properties: A separate mobile app and a website catering to different devices.
-
Geo-location Based Digital Properties: Different websites or apps tailored to various geographic regions to meet local market needs and comply with regional regulations.

Importance of Optimising Experiences Across Diverse Digital Properties
Managing multiple digital properties within a digital ecosystem requires robust governance to prevent accidental updates and ensure that each area operates smoothly. Without proper oversight, changes made in one property could inadvertently affect others, especially when different teams manage separate parts of a website or app.
This risk becomes even more pronounced in experimentation and personalisation tools like Adobe Target, where the same codebase such as the target-global-mbox is often used across multiple properties. This shared code can lead to unintentional updates or overlaps, potentially disrupting user experiences in areas beyond your immediate control.
Given this interconnected nature, having multiple digital properties of your app or website necessitates a well-structured approach to management. Properly managing these properties helps ensure that experiments, personalisations, and other updates remain targeted and effective, reducing the risk of errors and maintaining the integrity of each digital property.
Benefits of Optimising Experiences Across Diverse Digital Properties
Managing multiple digital properties effectively can provide several advantages for businesses:
-
Enhanced Security: By managing multiple digital properties separately within Adobe Target, you can enforce stricter access controls and permissions. This ensures that sensitive data and configurations are only accessible to authorised teams, reducing the risk of accidental or malicious changes.
-
Improved Quality Assurance (QA): Separate properties allow for more targeted and efficient QA processes. Each property can be tested independently, ensuring that updates or experiments do not inadvertently impact other parts of your digital ecosystem.
-
Operational Efficiency: Managing multiple digital properties within Adobe Target reduces the complexity of managing a large digital ecosystem, streamlining workflows, and improving productivity. Teams can focus on their specific tasks, leading to faster implementation of updates and experiments.
-
Enhanced Analytics: By segmenting your digital properties, you can generate more granular and accurate analytics. This detailed insight helps in making data-driven decisions tailored to each segment of your digital ecosystem, leading to more effective personalisation and optimisation strategies.
Example
Dexata Academy, a leading MarTech learning platform, provides a clear illustration of how multiple properties can be effectively managed to meet specific use cases. At Dexata Academy, we handle a diverse set of properties, including apps and websites tailored for industries like telecom and eCommerce. These properties are essential for creating learning videos that are customised to the specific needs of our users.
Each property is carefully managed to ensure that the content and experiments are relevant to the particular use case, whether it is for an advanced eCommerce strategy or a telecom focused marketing solution. This approach allows us to deliver precise, targeted learning experiences that align with the unique requirements of each industry.
Our approach in Optimising Experiences Across Digital Properties
In our team, we’ve effectively implemented a multi-property strategy within Adobe Target to cater to our diverse business needs across different platforms. Here's how we've managed this:
We’ve established four distinct workspaces/product profiles in Adobe Target, each dedicated to a specific segment of our business:
-
Arena Ecommerce Mobile App
-
Arena Ecommerce Web
-
Arena Telecom Mobile App
-
Arena Telecom Web
These workspaces allow us to organise our activities based on the platform and business segment, ensuring that our targeting strategies are precisely aligned with our goals.
For example, when we need to create a Target activity for the Arena Ecommerce website where the configuration is done through Adobe Launch, we utilise the "Arena Ecommerce Web" workspace and create the activity using the Launch property within that workspace. This clear separation allows us to manage different configurations efficiently, without overlap or confusion.
This approach has been instrumental in maintaining organised and effective targeting strategies across our various digital platforms, ensuring that each property operates seamlessly within its specific context.

Setting Up Adobe Target for Multiple Digital Properties
Adobe Target enables you to create multiple workspaces and properties, making it easier to manage various digital properties. Here’s a step-by-step guide to setting up and managing each property:

Step 1: Identify Digital Properties
Before diving into the configuration of Adobe Target, it’s crucial to first identify the distinct digital properties your business manages. As discussed earlier, these could include various properties like a website, mobile app, or different sections within these platforms. Understanding the scope of your digital properties is essential for setting up a robust and organised framework within Adobe Target.
Step 2: Set Up Properties
Properties in Adobe Target will represent the specific configurations for each property, such as mobile app or the e-commerce website.
-
Navigate to Properties:
-
In Adobe Target, go to the 'Administration' section and select 'Properties'.
-
-
Create a New Property:
-
Click on the 'Create Property' button.
-
Enter a name and description for the property (e.g., "Property for eCommerce Mobile App").
-
Choose the relevant channel (e.g., Web, Mobile, etc.).
-
Save the property.
-
After creating the property, ensure you copy the
at_propertytoken. This token is crucial as it needs to be embedded in your website pages or app configurations. Passing theat_propertytoken ensures that Adobe Target recognises and correctly associates your pages with the corresponding property, allowing for accurate targeting and reporting.
-
Step 3: Create Workspaces/Product Profiles
Workspaces in Adobe Target help segregate activities and resources for different properties. Each workspace can be dedicated to a specific app or website property.
Users of Adobe Target can be assigned to specific workspaces using the Admin profile. This way administrators can ensure that users have access to relevant digital properties and therefore they can configure activities for just those websites or apps.
-
Navigate to Admin Console:
-
Log in to Adobe Target.
-
Go to the 'Admin Console' section and select 'Products'.
-
In Products section, select Adobe Target.
-
-
Create a New Workspace/Profile:
-
Click on the 'New Profile' button.
-
Enter a name and description for the Workspace/Product Profile (e.g., "Mobile App - Tealium Property").
-
Save the workspace.
-
-
Configure User Permissions:
-
Click on your Product Profile.
-
Add users and configure their Product Role as required.
-
Click on Save to save the user permissions.
-
Step 4: Assign properties to workspaces
After creating properties, you need to assign them to the appropriate workspaces to ensure that each digital property is correctly configured in Adobe Target. Product Profiles allow you to assign specific properties to different teams or departments, ensuring that each group only has access to the areas they need to manage.
-
Navigate to Workspace Settings:
-
In the 'Properties' section, click on the “Assign properties to workspace” button.
-
-
Access Product Profiles:
-
In the Admin Console, select Products from the top navigation bar.
-
Click on Adobe Target to view all the product profiles associated with your Target instance.
-
-
Select a Product Profile:
-
From the list of product profiles, select the one you want to configure.
-
Click on the product profile name to open its configuration settings.
-
-
Assign Properties to the Product Profile:
-
Once inside the product profile settings, navigate to the Permissions tab.
-
Here, you'll see a section for Properties. This section lists all available properties that have been created in Adobe Target.
-
-
Add Properties to the Profile:
-
To assign a property to this product profile, check the box next to the desired property name. You can select multiple properties if the team needs access to more than one.
-
If a property is not listed, ensure that it has been correctly created in the Admin section under "Properties" in Adobe Target.
-
-
Save the Configuration:
-
After selecting the properties, scroll down and click Save to apply the changes.
-
Users assigned to this product profile will now have access to the selected properties when they log in to Adobe Target.
-
Step 5: Configuring activities within workspaces
After creating properties, you need to assign them to the appropriate workspaces to ensure that each digital property is correctly configured in Adobe Target. Product Profiles allow you to assign specific properties to different teams or departments, ensuring that each group only has access to the areas they need to manage.
- Select the Workspace:
- Choose the workspace that corresponds to the digital property you want to configure (e.g., "Mobile App - Tealium Property").

- Choose the workspace that corresponds to the digital property you want to configure (e.g., "Mobile App - Tealium Property").
- Create an Activity:
-
Go to the 'Activities' tab and click on 'Create Activity'.
-
Choose the type of activity (e.g., A/B Test, Experience Targeting).
-
Configure the activity settings, ensuring you select the correct property (Tealium or Adobe Launch).
-
- Test and Publish:
-
Test the activity to ensure it’s working correctly with the selected property.
-
Once tested, publish the activity to go live.
-
Best Practices for Managing Multiple Digital Properties
-
Consistent Naming Conventions: Use clear and consistent naming conventions for workspaces and properties to avoid confusion.
-
Documentation: Maintain detailed documentation of configurations and activities for each digital property.
-
Collaboration: Ensure that team members working on different digital properties have access to relevant workspaces.
Conclusion
Managing multiple digital properties in Adobe Target can streamline your personalisation efforts and improve user experiences. By creating dedicated workspaces and properties for each digital workspace, you can efficiently configure and manage activities, ensuring that each property meets its specific needs. Adobe Target provides the flexibility and tools needed to optimise your digital strategy.

