

Leveraging External Data Platforms in Adobe Experience Platform Journey Orchestration
Author: Gowtami Mohanty

Adobe Experience Platform applications provide a way to easily extend the capabilities of the popular Real-Time Customer Data Platform (RTCDP) via Journey Orchestration. The flexibility provided by Journey Orchestration is the ability to communicate with external systems to extend the current functionality of Adobe Experience Platform.
This blog details how to leverage the Custom Action feature in Journey Orchestration to directly communicate with external data platforms such as Microsoft Dynamics 365 CRM and ERP.
Important Note: For production deployments to integrate with real ERPs there would be for sure some level of authentication.
Prerequisites
Before starting, you should have the below ready:
- Set up MS Dynamics 365 trial account
- Setup Azure Active Directory and have the client credentials ready.
- Setup Journey Orchestration.
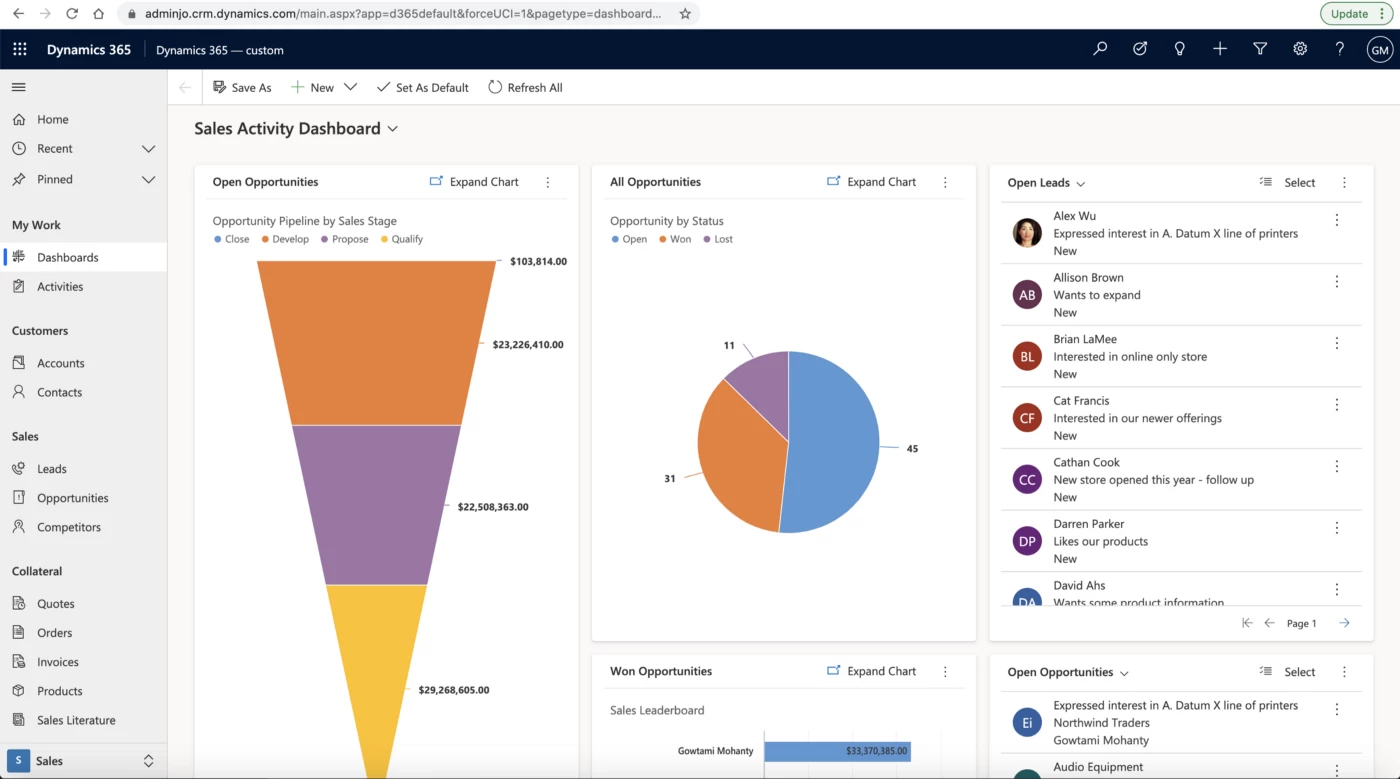
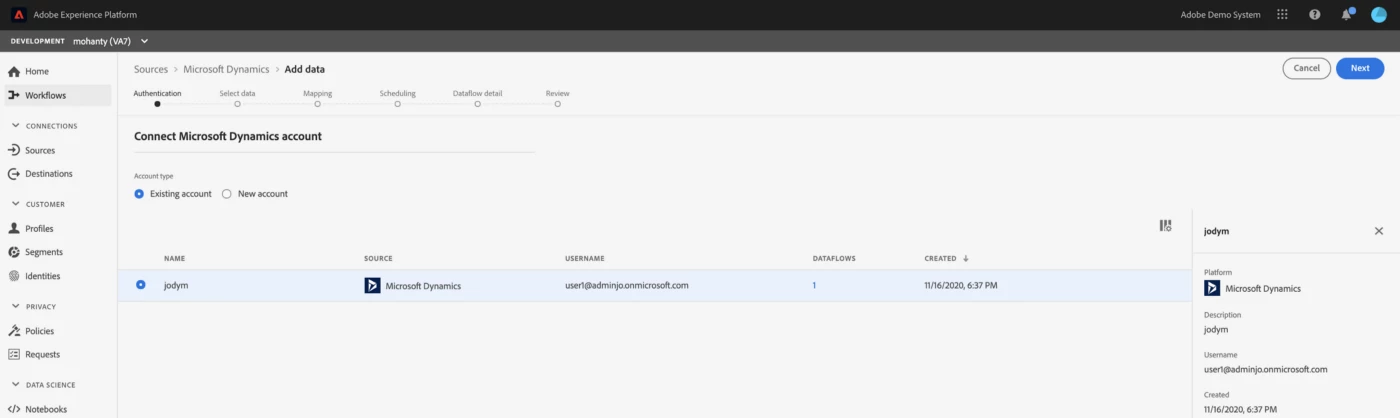
Setup MS Dynamics 365 Account
- Visit the below link to create an MS Dynamics 365 trial account.
- Setup the account by selecting ‘Dynamics 365 — Custom’.
- Note down the details of Username, password, and custom domain URL, we will be using these details in Journey Orchestration later.
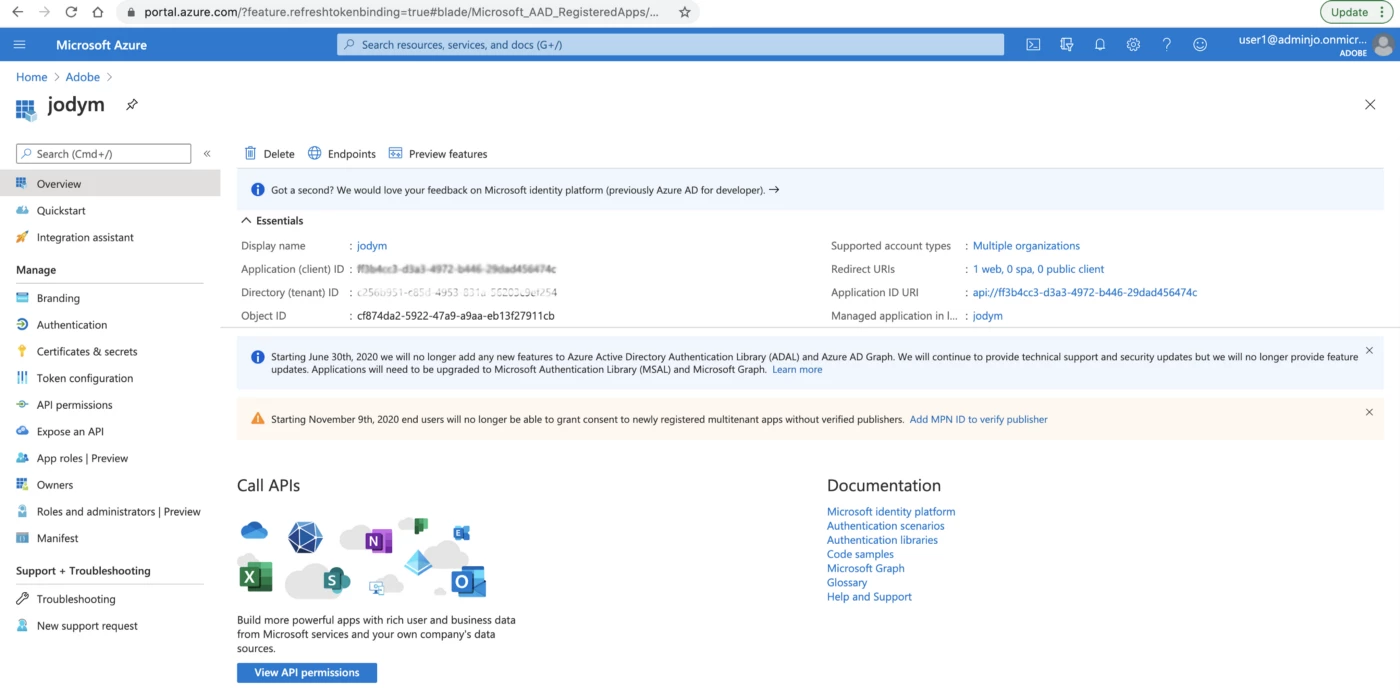
Setup Azure Active Directory
- Register an application in Azure Directory for multi-tenant organizations.
- Add permissions for Dynamics CRM API. After which your client credentials like client ID, tenant ID will be generated, we will be using these details in Journey Orchestration later.
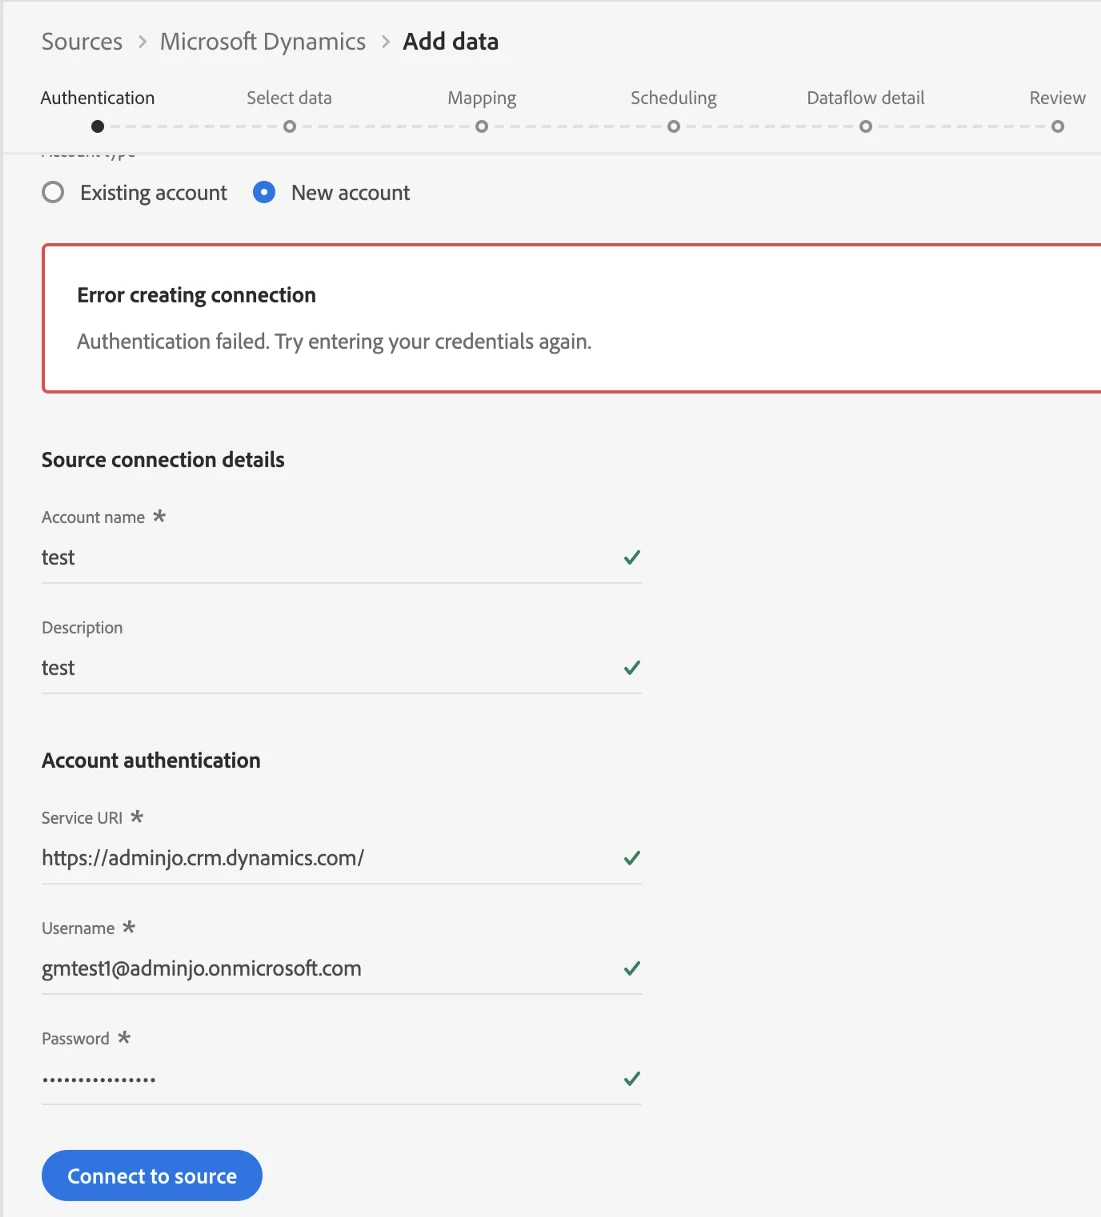
Important Note: Azure Multi-Factor Authentication(MFA) works by requiring multiple forms of verification to prove your identity when signing into an application. You need to disable the same to proceed else you will be thrown errors such as this in Experience Platform and Journey Orchestration applications.
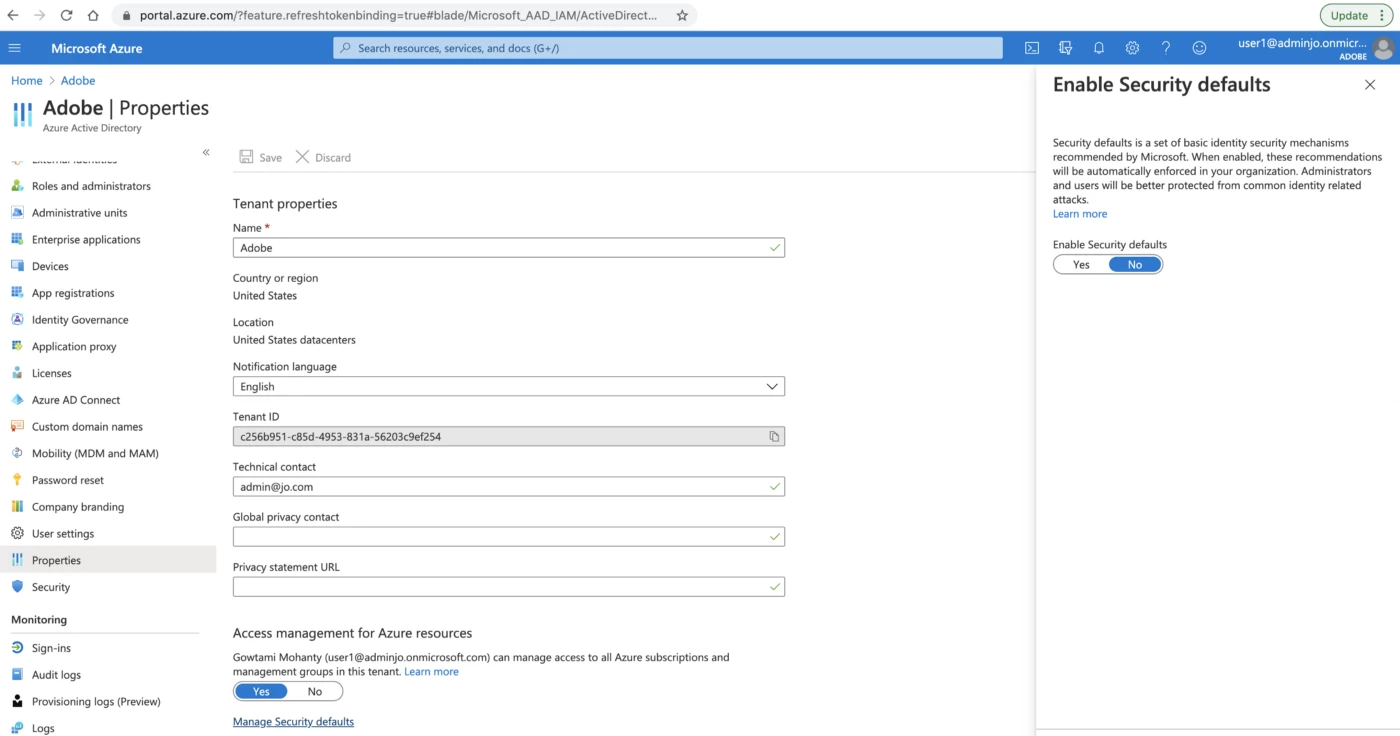
To disable MFA, visit Microsoft Azure > Home > Properties > Manage Security Defaults > ‘No’ like shown in the image below.
After making the above changes, you should be able to connect to MS Dynamics CRM successfully from both Experience Platform and Journey Orchestration.
Setup Journey Orchestration
Set up two custom actions in Journey Orchestration:
- One to create a simulation of record creation in any public simulator
- Then, to create/update a real record in an External system like MS Dynamics CRM
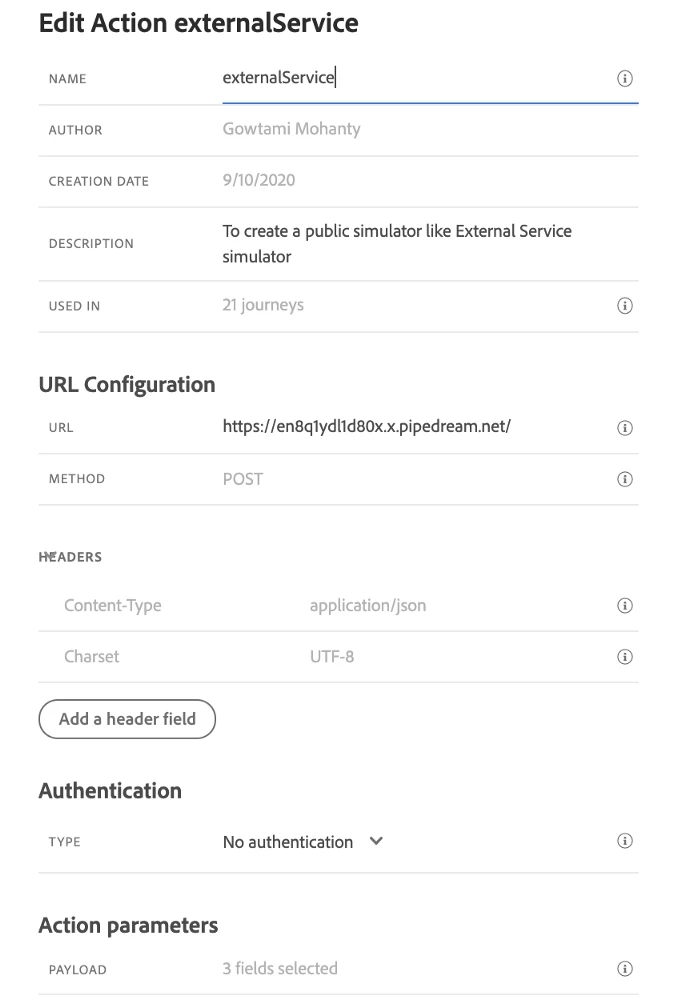
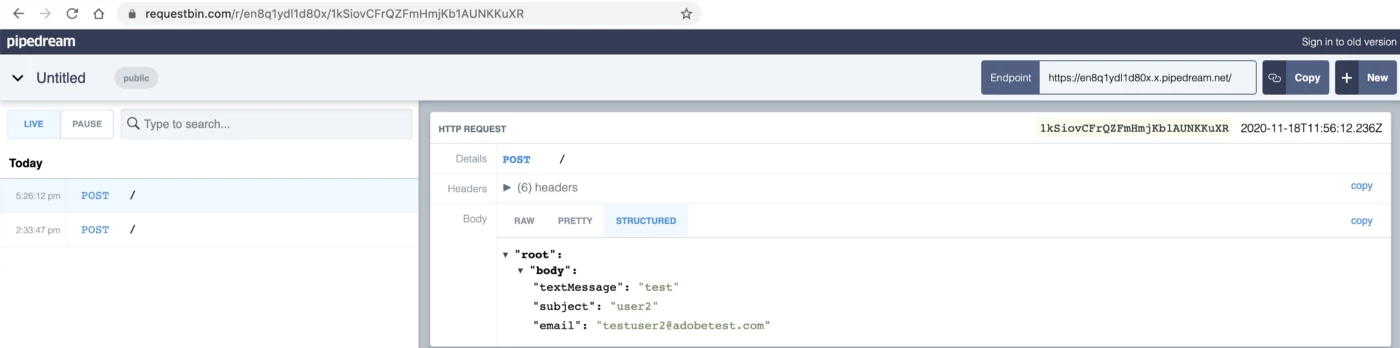
Firstly, visit any external endpoint simulator like RequestBin to create a public endpoint to simulate integration with an external data platform.
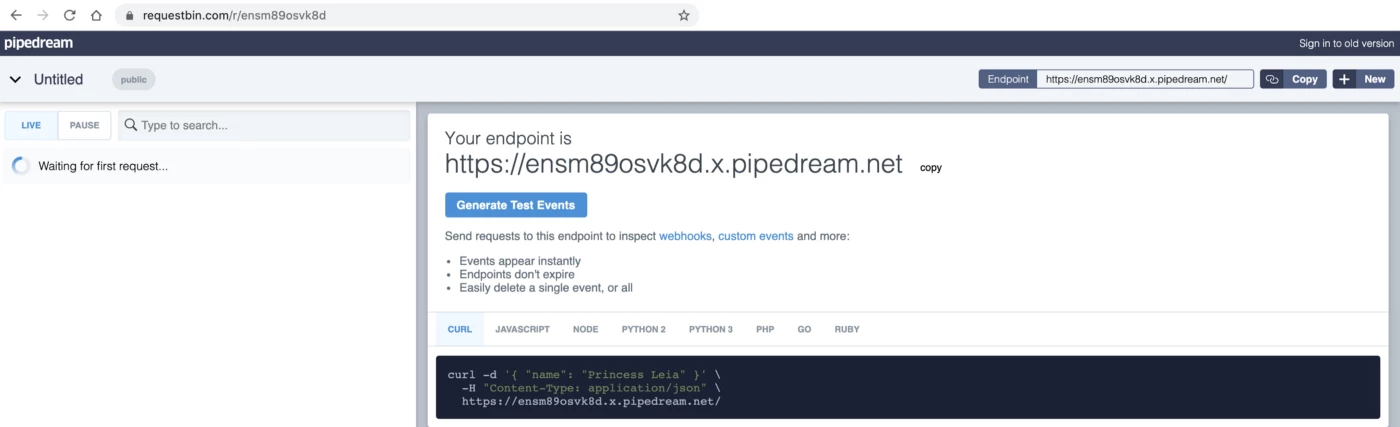
Create a new Custom Action with the endpoint details we generated in the above step. As it is a public endpoint, select No authentication and select the information fields which you would like to share with the external platform. For sample payload, refer here.
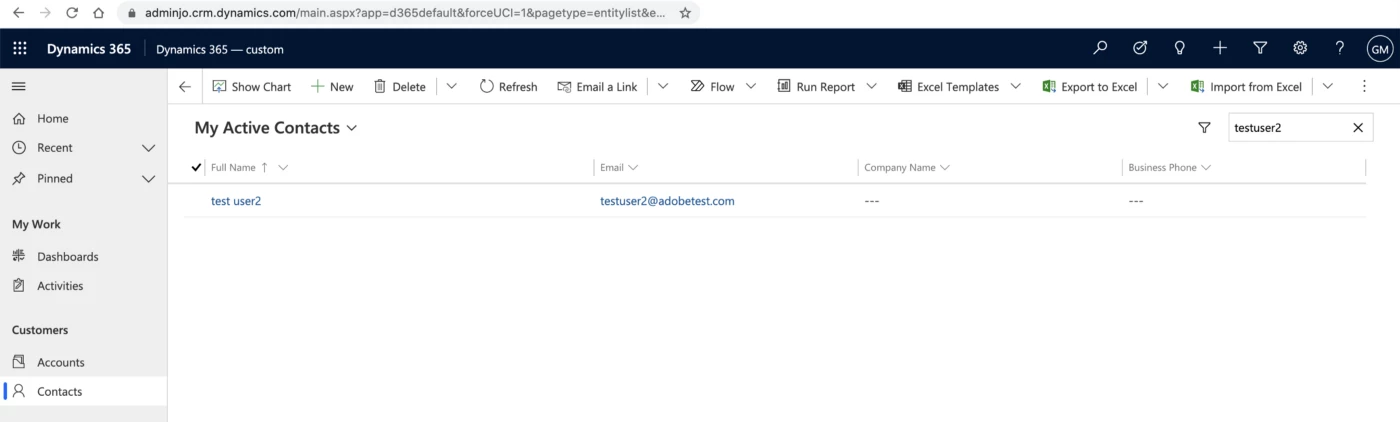
Secondly, let’s try to connect to an external data platform in real like MS Dynamics CRM 365.
Steps
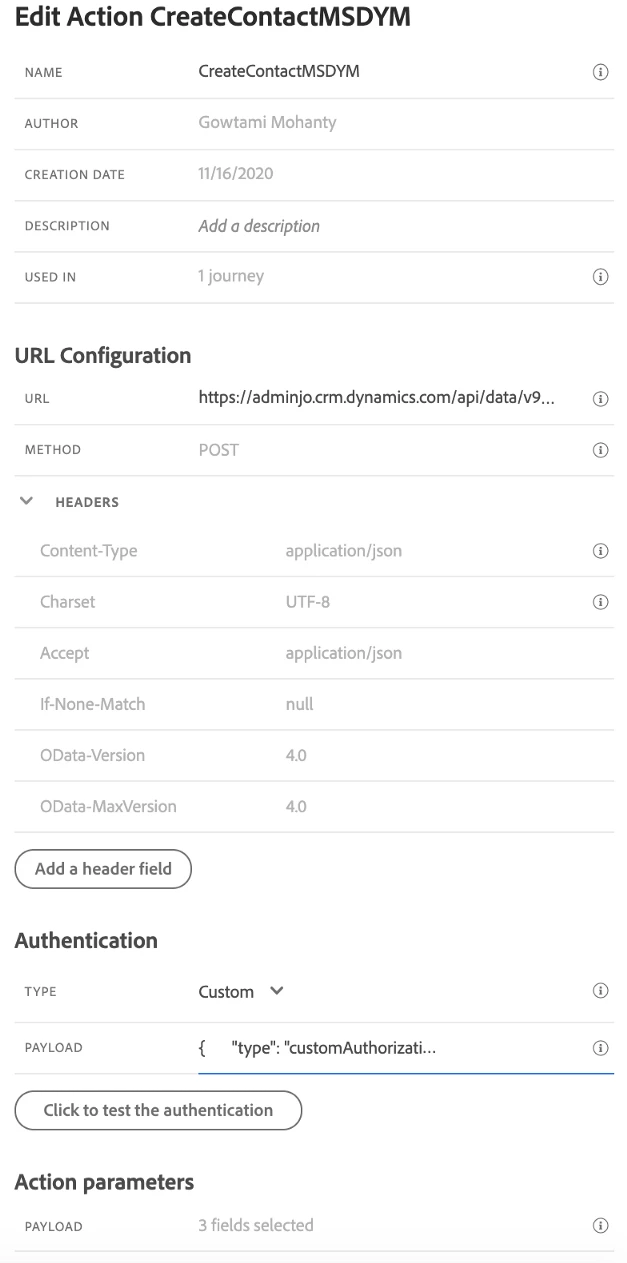
- Create a new Custom Action with the details we generated by configuring MS dynamics trial account and app in azure active directory.
- In this case, we are trying to create/update a contact in MS Dynamics CRM. For more information on MS web APIs, refer to MS web API.
- Add the headers as shown in the image here or as per the need of the external data platform you are going to integrate with.
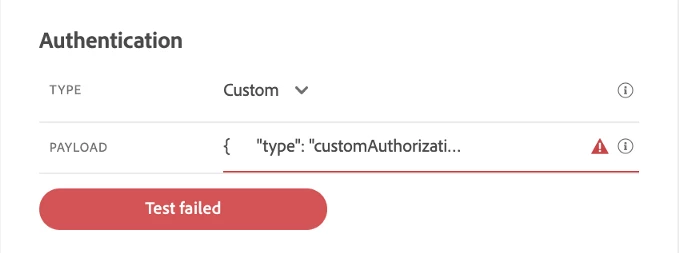
- We will be using a Custom type of Authentication as Microsoft uses OAuth with Dataverse, the details we saved earlier will be useful here like client id, tenant id, username, password, and instance URL.
- The custom authentication is a two-step process, firstly to call the authentication endpoint to fetch the access token, secondly to call the actual REST API with the access token injected.
- Refer to sample authentication payload here.
- For the payload structure, refer here.
-
When you configure the custom authentication, you can click on the ‘Click to test the authentication’ button to check if the custom authentication payload is correctly configured, else your journey will fail.
-
Add the fields which you would like to send as part of the POST request like firstName, lastName, emailaddress1, job title, etc in the Action parameters section. Refer to sample payload here.
Create a journey with a trigger event. Use the custom action activities we created on the journey to contact two different external data platforms.

Trigger the journey to check if Journey Orchestration could connect with external data platforms.
Similarly, check MS Dynamics CRM instance.
Check out a quick video about these steps.
Hence, we have successfully demonstrated how Journey Orchestration can be integrated with external data platforms seamlessly.
Follow the Adobe Experience Platform Community Blog for more developer stories and resources, and check out Adobe Developers on Twitter for the latest news and developer products. Sign up here for future Adobe Experience Platform Meetups.
References
- Adobe Experience Platform
- Azure Multi-Factor Authentication(MFA)
- Documentation-Microsoft Dynamics 365 Web API Reference
- Documentation-Register an app with Azure Active Directory
- Documentation-Adobe Experience Platform-Journey Orchestration-External Data Sources
- Github Repo-Sample JSON Payload in this blog
- Documentation-Adobe Experience Platform-Microsoft Dynamic Connector
- Documentation-Adobe Experience Platform-Create a Contact in Microsoft Dynamics 365 using Journey Orchestration & Import data from Microsoft Dynamics
Originally published: Feb 4, 2021