

Creating Multiple Offers in one go with Adobe Campaign and Adobe Workfront
Adobe Campaign provides an out-of-the-box module to help you create various offers, and the ability to define the rules and content to ensure that you are talking with your customers and sending them the offer that is most relevant to them. However, with Adobe Campaign’s Offers UI, it becomes a time-intensive job if we need to create multiple offers and then run through the necessary content and eligibility approvals for each one. If only there was a way that we could get the content set up for the different offers, have them approved in a single go and then have them created in Adobe Campaign. But is this even possible?
The answer… “Yes!”. With the Adobe Workfront and Adobe Campaign integration (via Workfront Fusion), this process can become a reality. In this post, I will highlight how we can leverage data that we capture in Workfront, run an approval process, and trigger the creation of the offers in Adobe Campaign.
Offer Content to Capture:
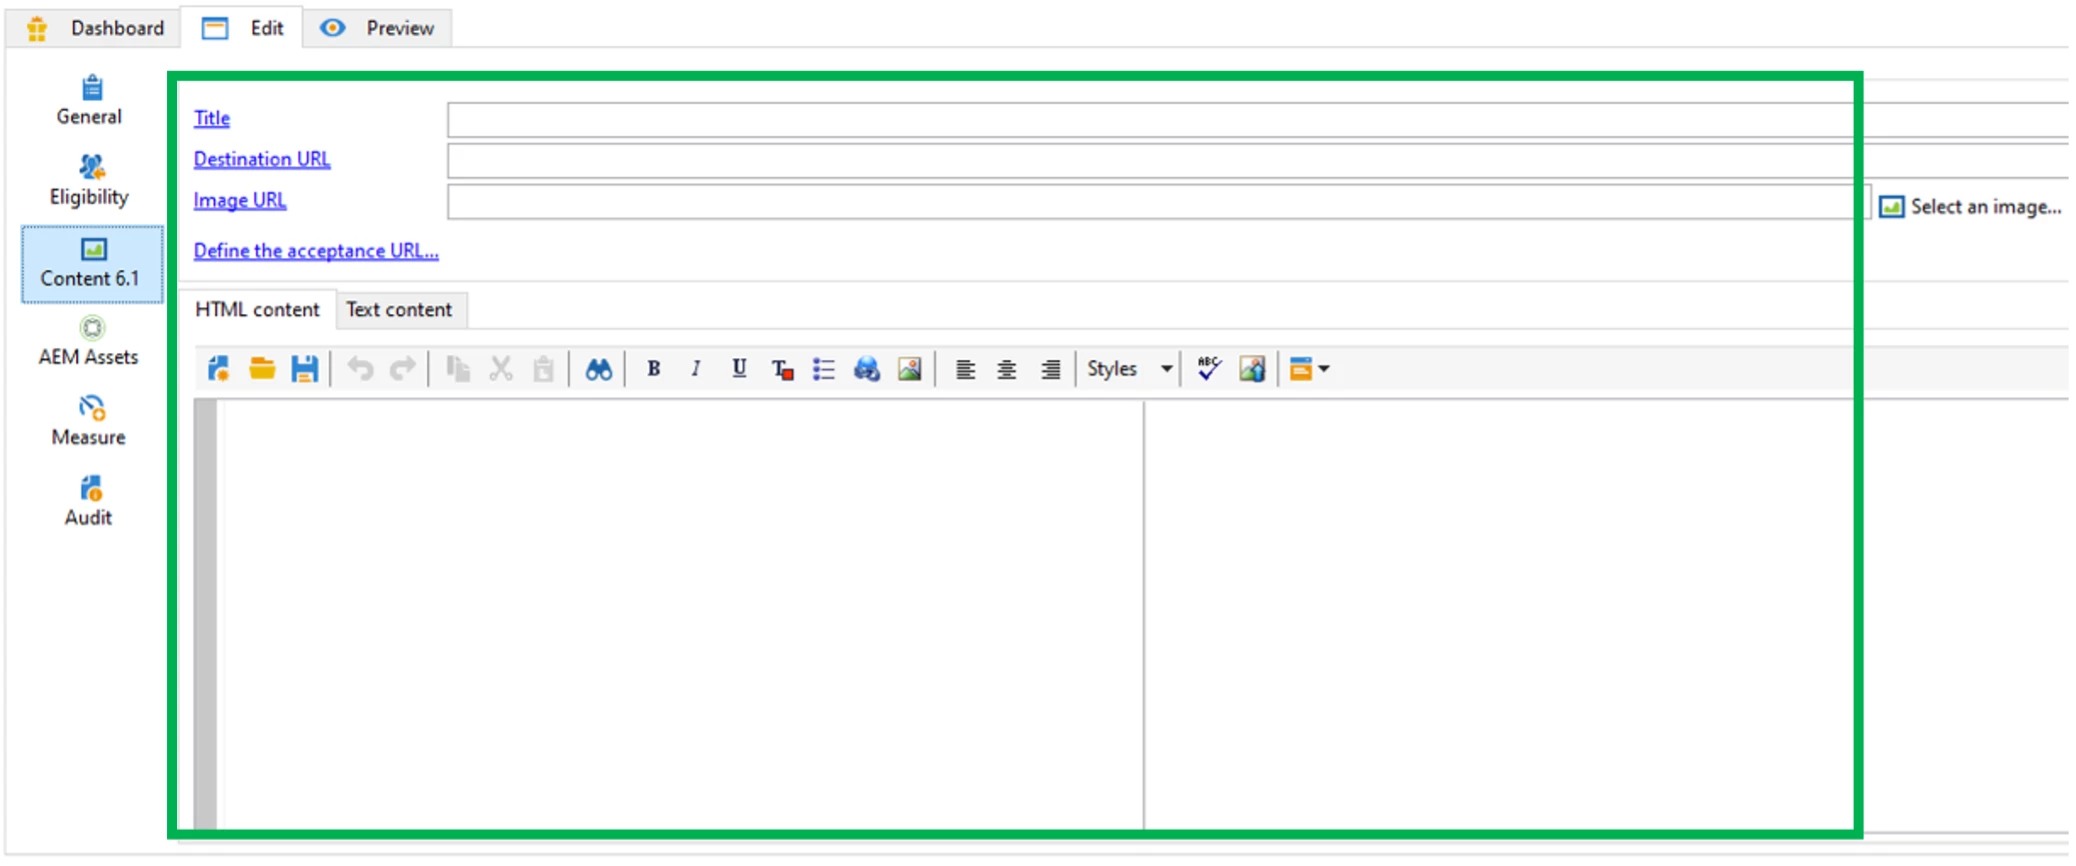
For this post, I am mainly looking at the content aspect of the offer and the content approval. The key content aspects, the content tab, that we need to capture for an offer are the following:
- Title
- Destination URL
- Image URL
- HTML content
There are 4 key steps that we will need to perform:
- Create a Custom Form in Workfront – to capture the content details.
- Create a task in the project and define the offer content.
- Set up the approval process in Workfront.
- Define the workflow in Workfront Fusion.
I have also included the following sections:
- The Output – highlighting the Offer content created in Adobe Campaign
- Speed – The key value is the ability for teams to collaborate on creating offers and getting them set up in Adobe Campaign. Instead of having to create the offer one at a time, which would take minutes, we’ll be able to create the offers in Adobe Campaign in seconds.
Section 1 - Create a Custom Form in Workfront:
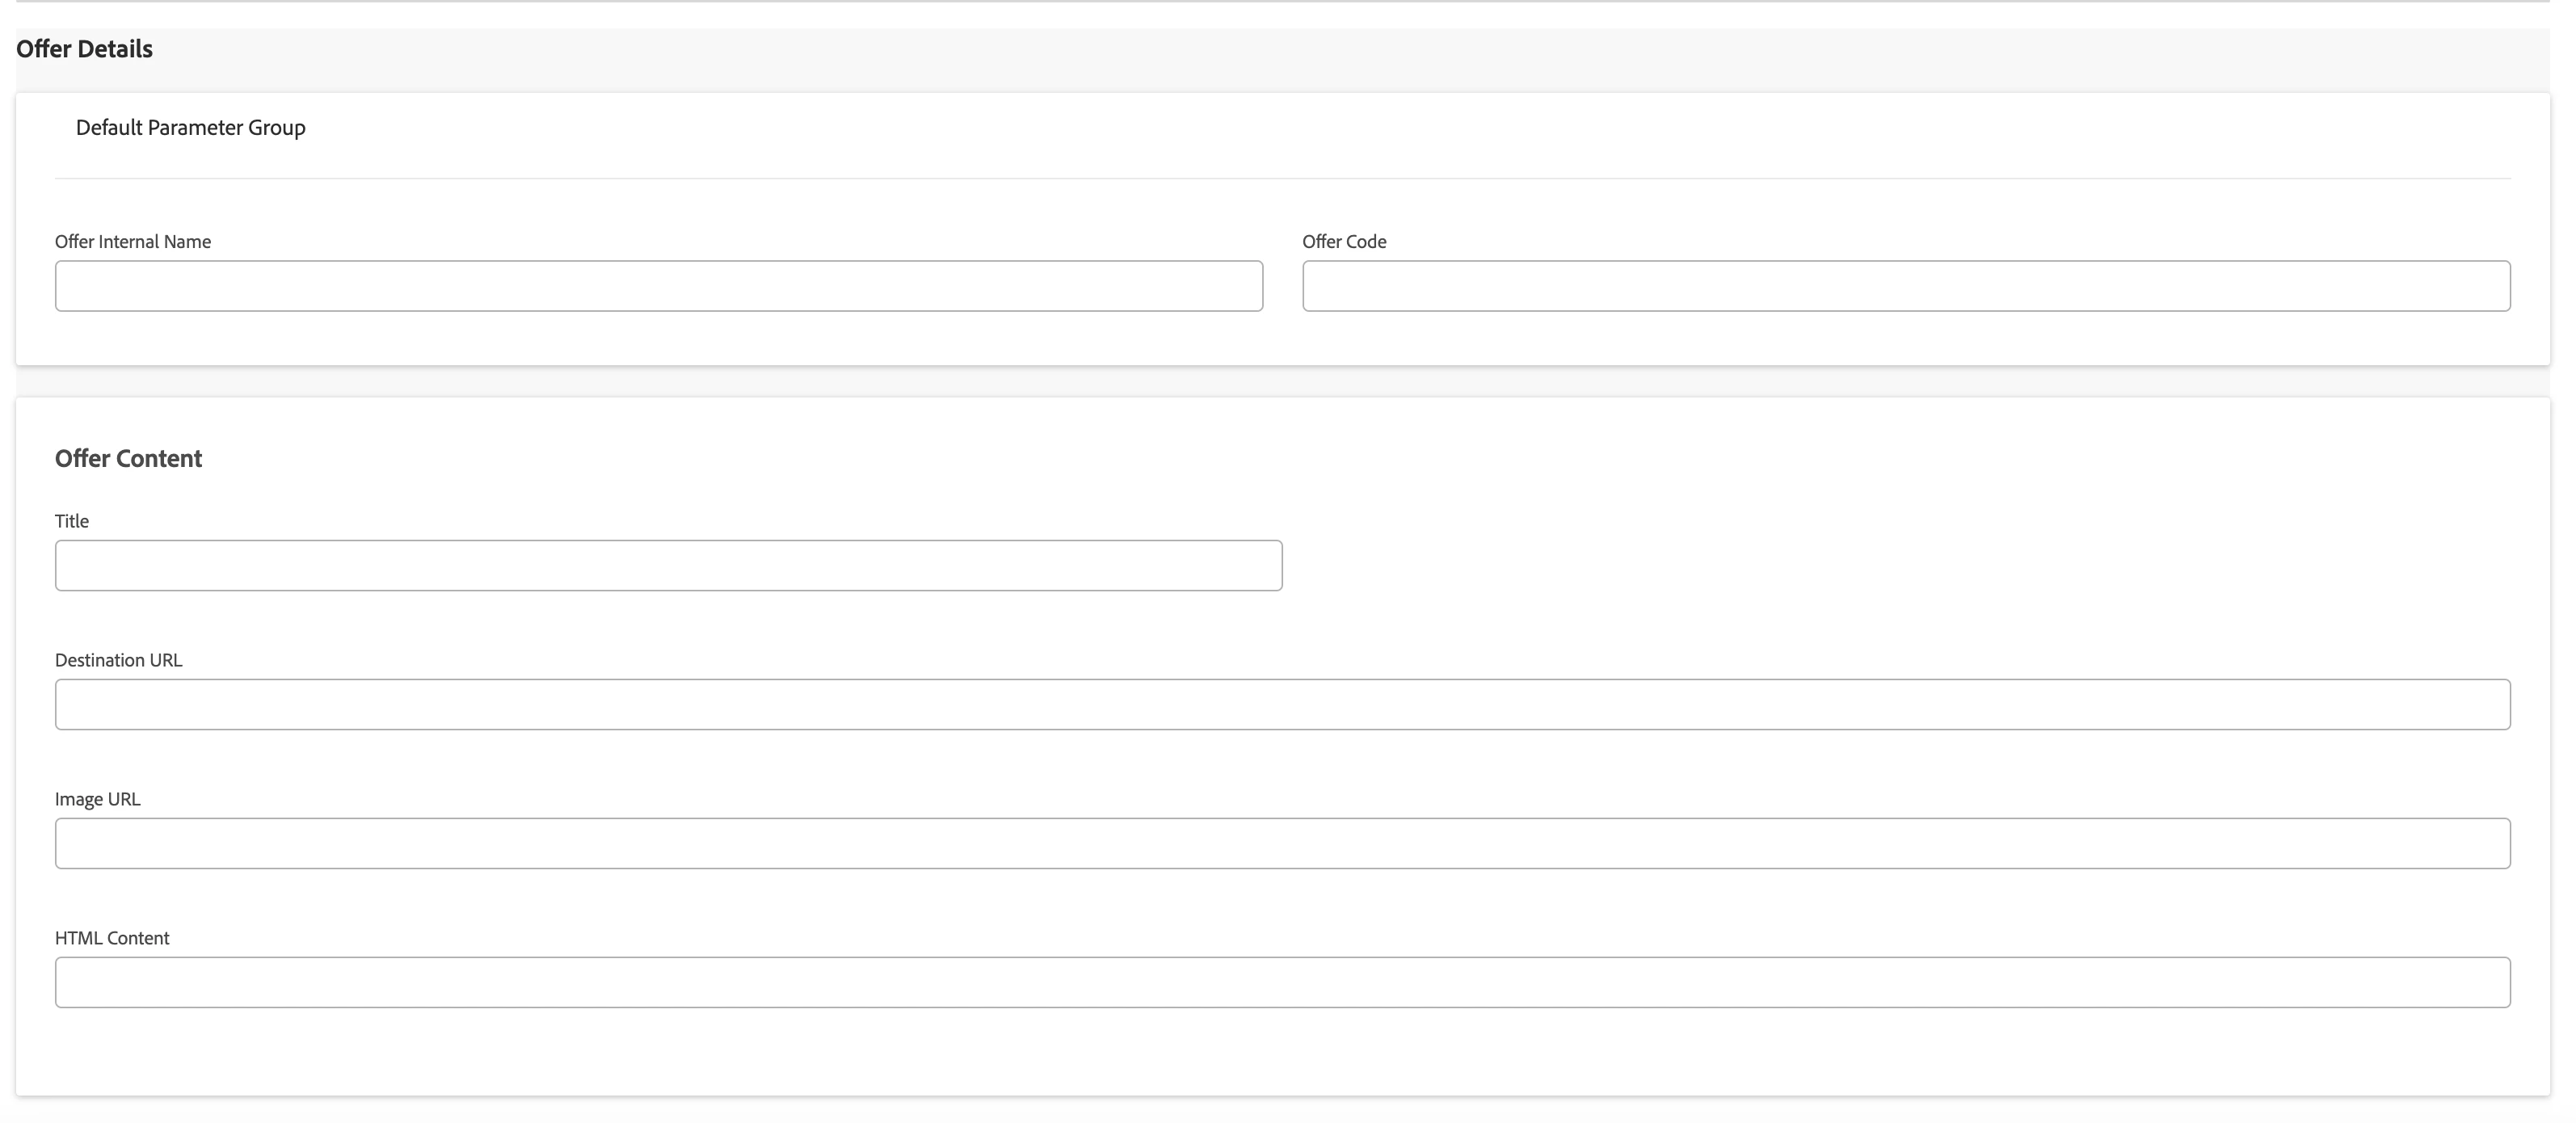
We’ll replicate the information that we need to provide for the content of an offer through a custom form in Workfront.
- For the full steps to create a custom form and link it to an object or objects (Projects, Tasks, Issues, etc.) please take a look at the following page: Create New Custom Form
- Here is the form that I have created and have tagged this to be available for tasks and Issues
Section 2 - Create a Task in the project and define the offer content:
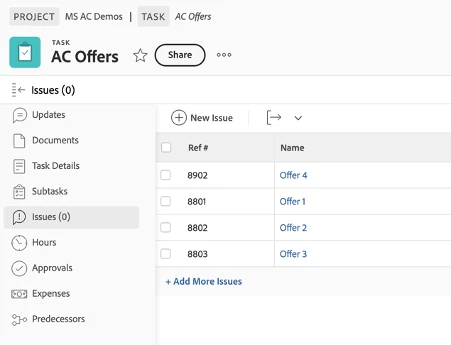
- In the Workfront Projects go ahead and add a new task – “AC Offers”
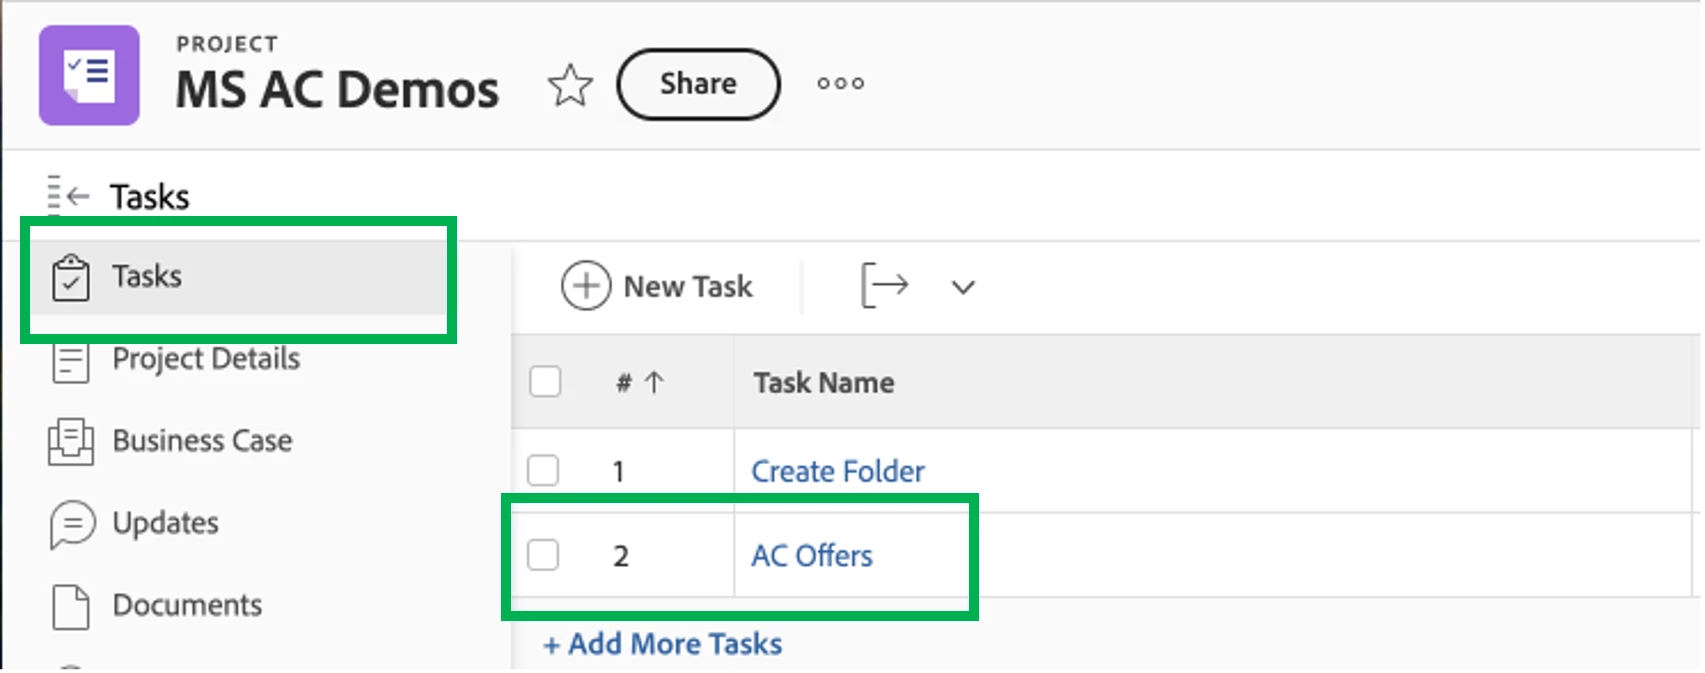
- In the Task, select ‘Issues’ and create a new Issue:
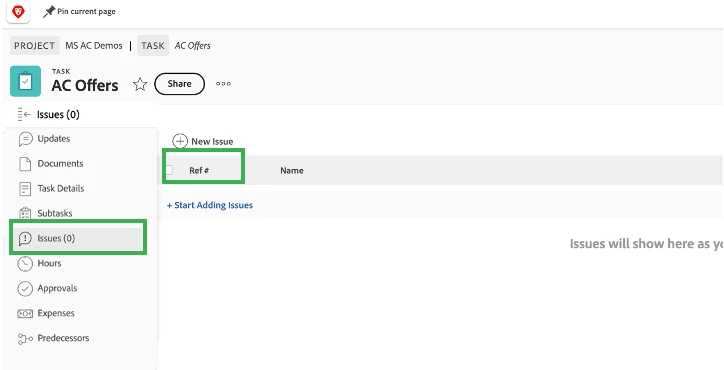
- In the New Issue, select the Custom form to add, and fill in the necessary details:
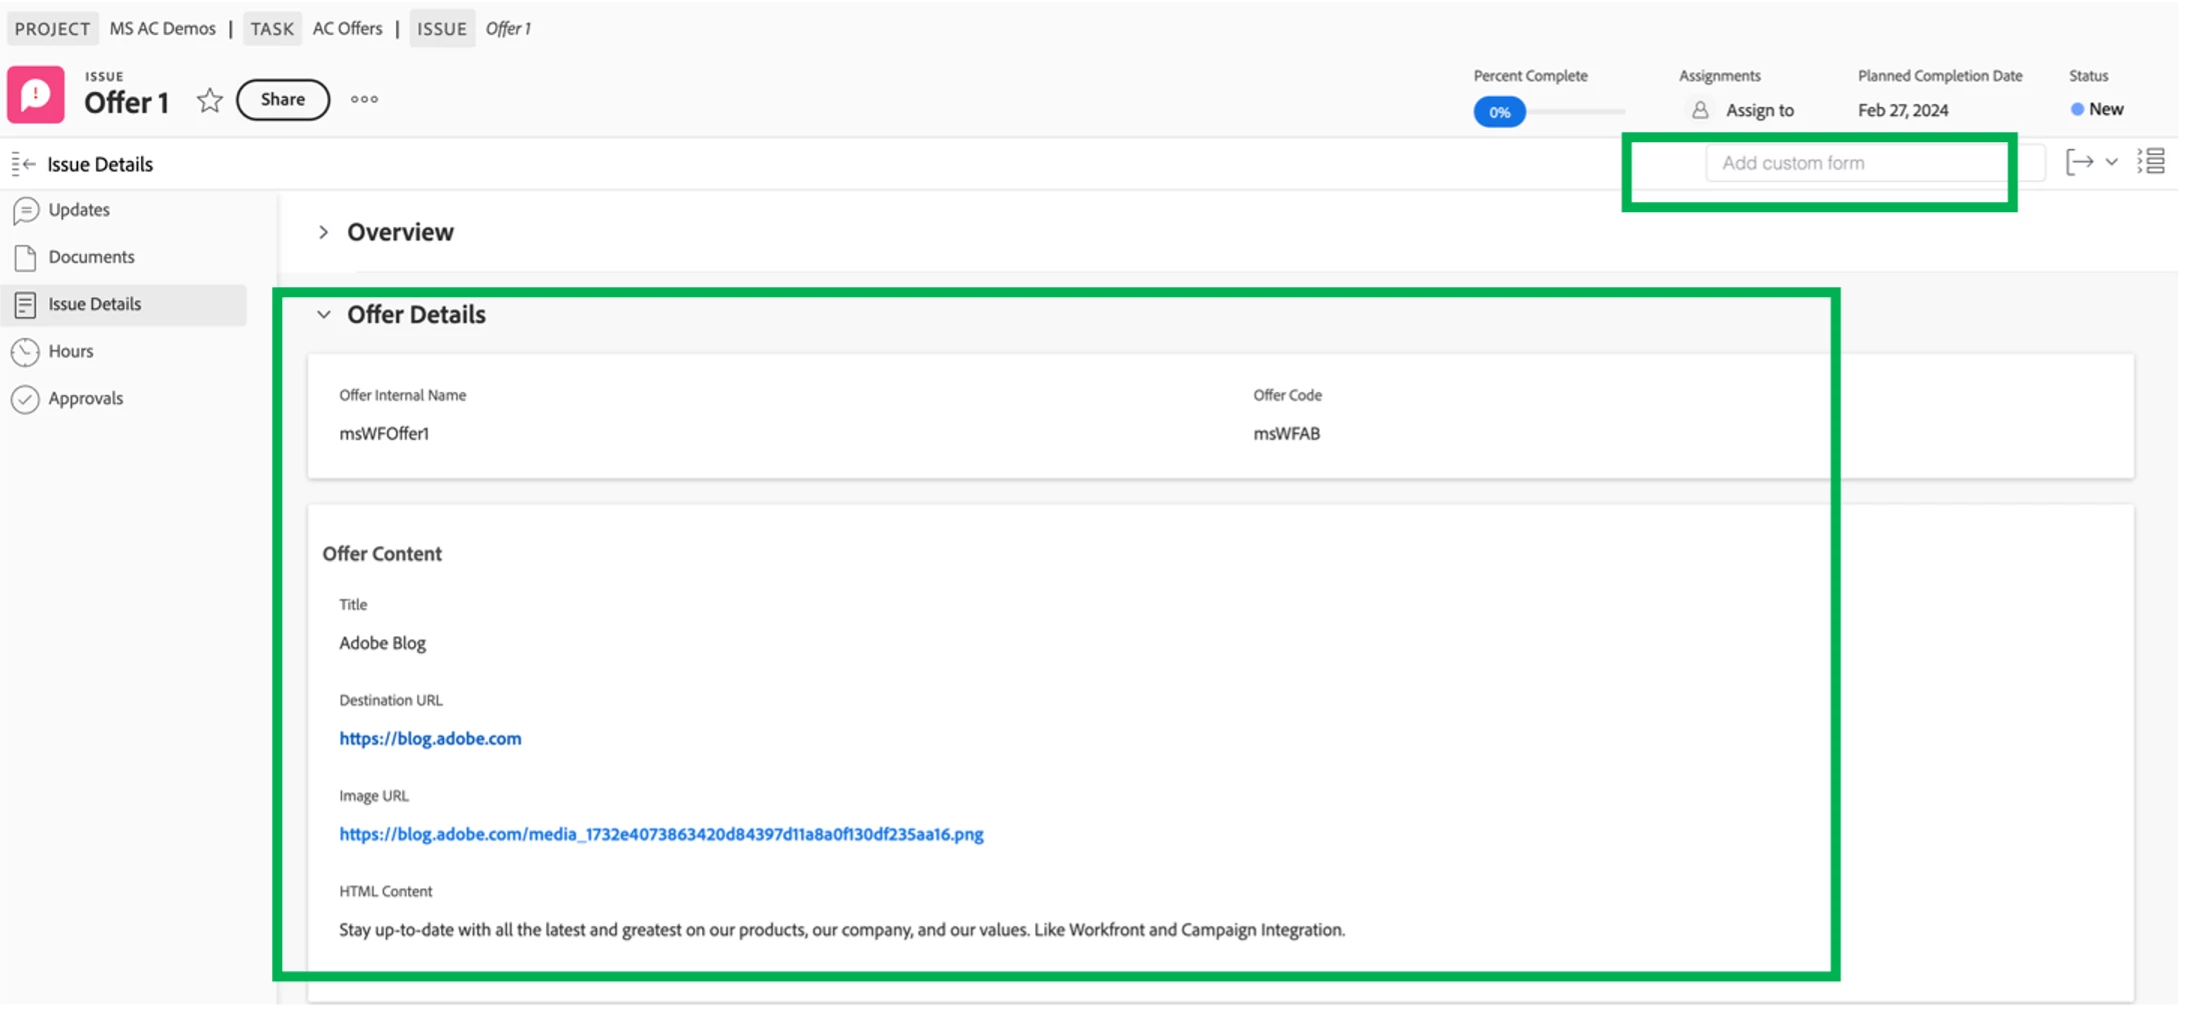
The details I have included are the following:
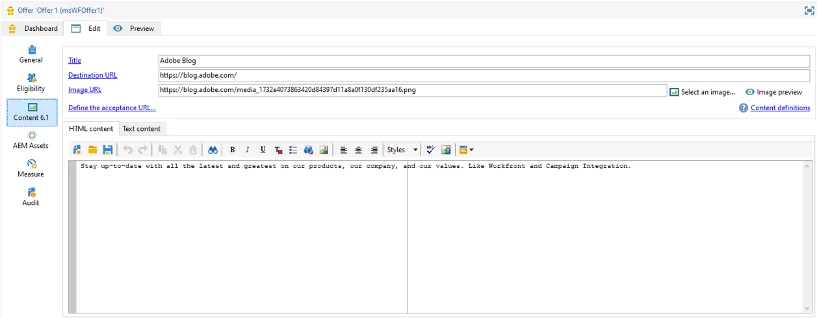
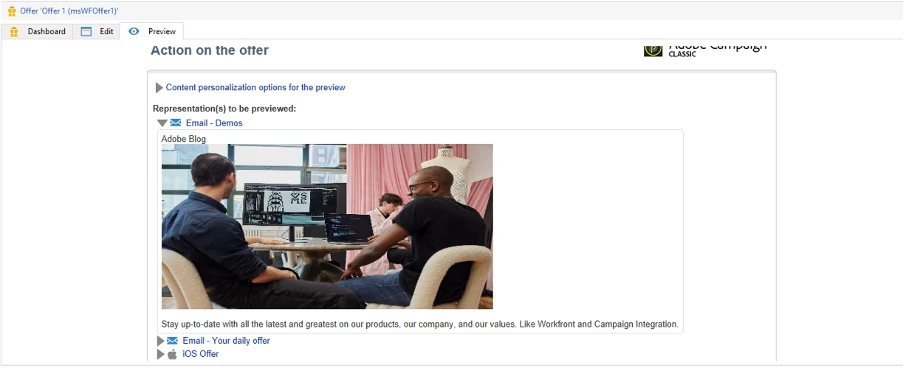
Offer Internal Name: msWFOffer1 Offer Code: msWFAB Title: Adobe Blog Destination URL: https://blog.adobe.com/ Image URL: https://blog.adobe.com/media_1732e4073863420d84397d11a8a0f130df235aa16.png HTML Content: Stay up-to-date with all the latest and greatest on our products, our company, and our values. Like Workfront and Campaign Integration. - Continue to add details for each offer. I have created two more offers:
Section 3 - Setup Approval Process in Workfront:
- To understand how to set an approval process in Workfront please take a look at the following page: Create a single-use approval process
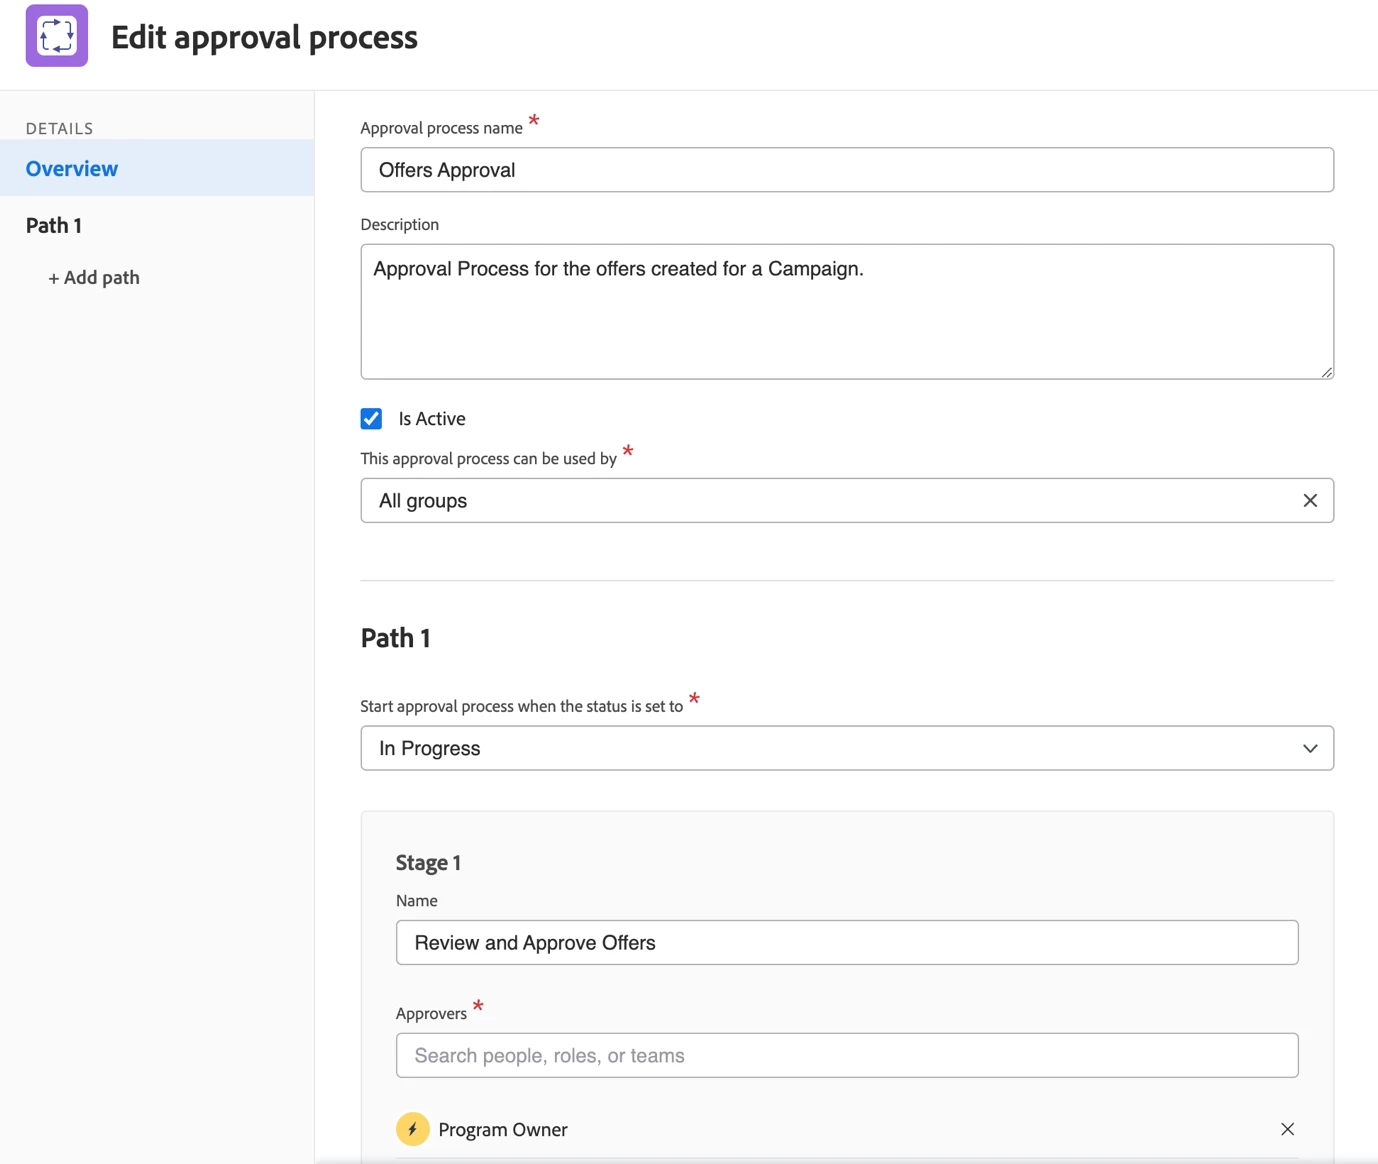
- For this blog post, I have looked at reviewing all offers in one go and so have created an approval process for the Task. If need be, the approval process can be defined at the Issue level so that you can then review each offer separately.
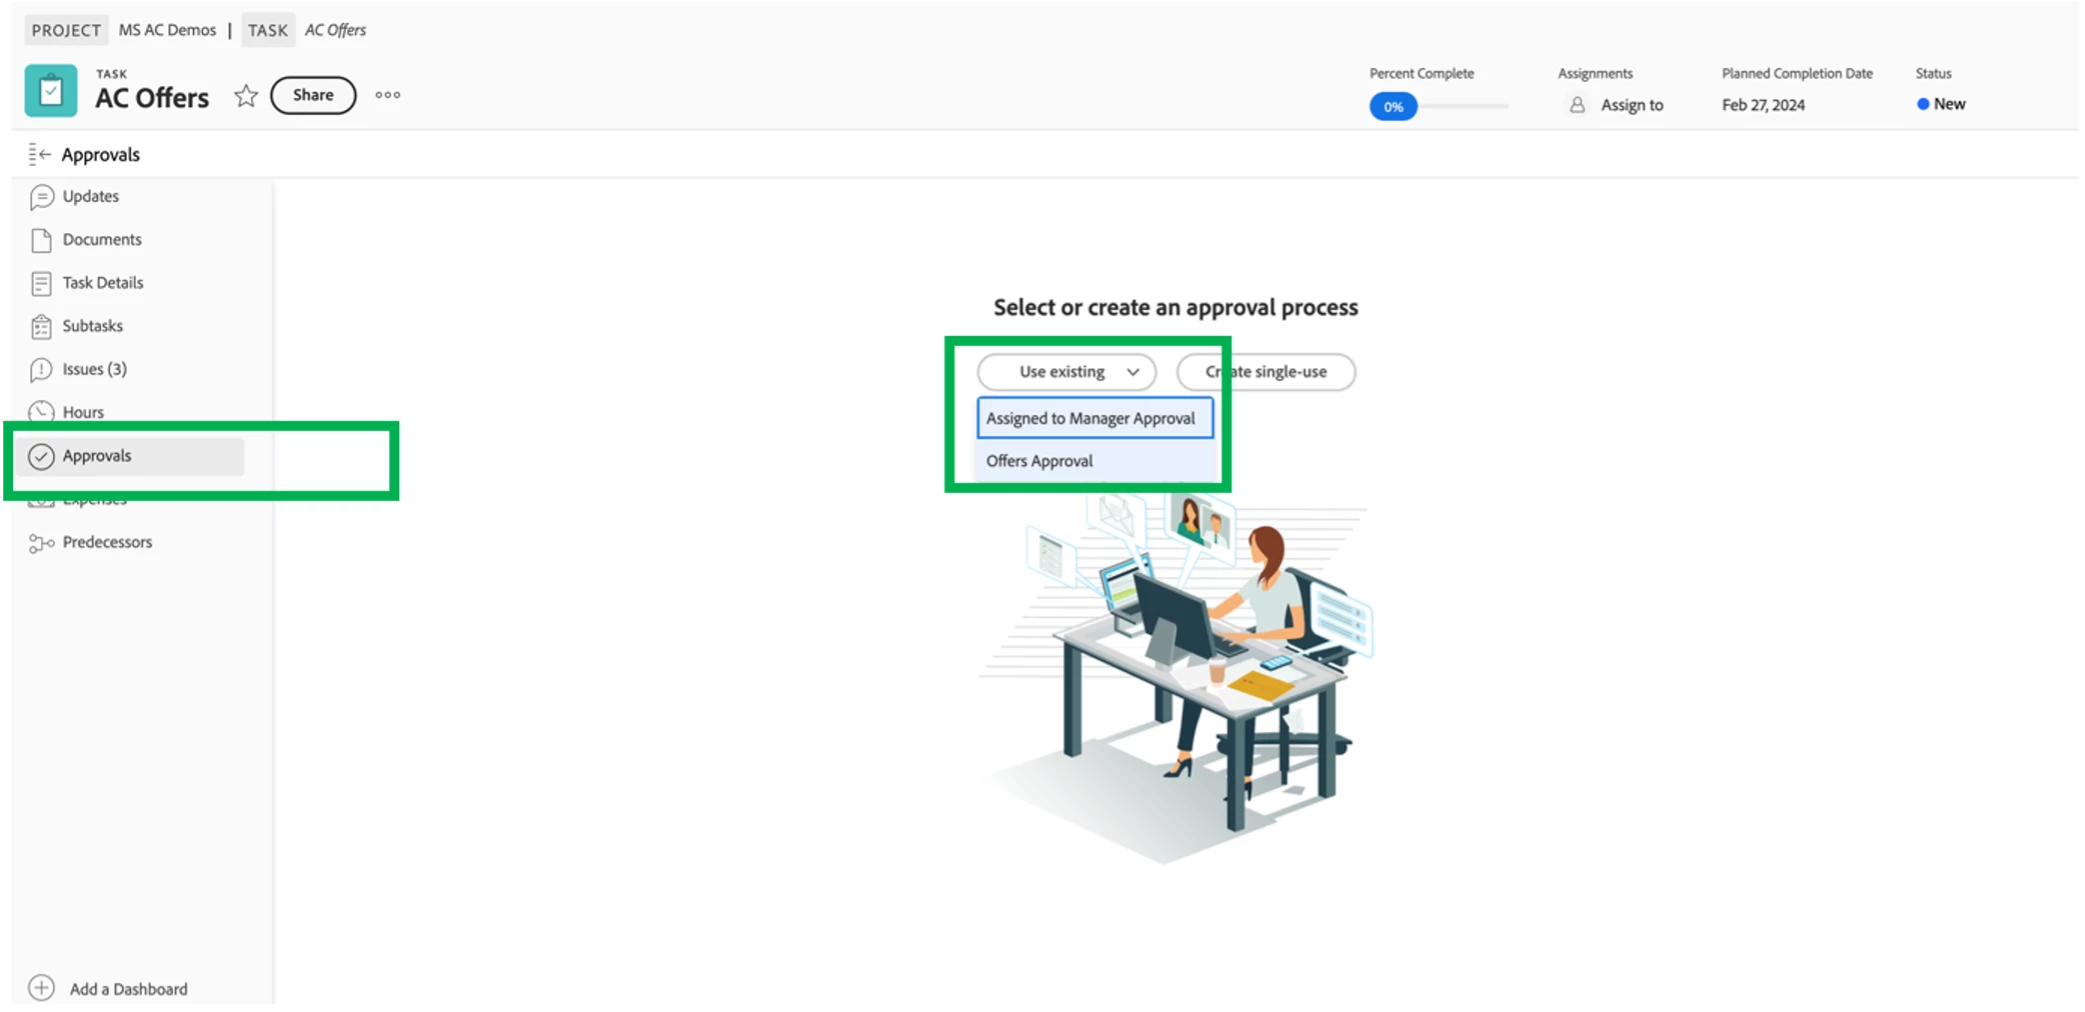
The Offers Approval has been set in the following way:
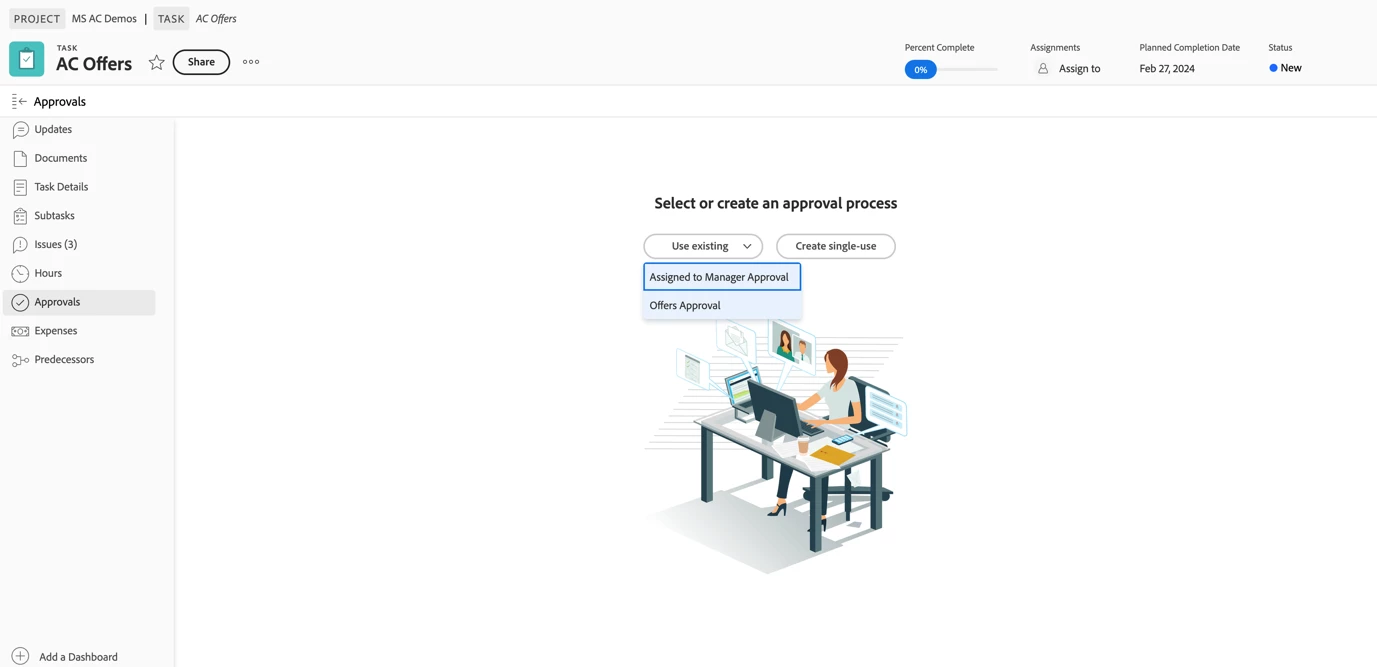
Map the Approval flow to the task, by opening the task and selecting the ‘Approval’ option in the menu. In the Approvals canvas, select ‘Use existing’ and select the approval process created – “Offers Approval”
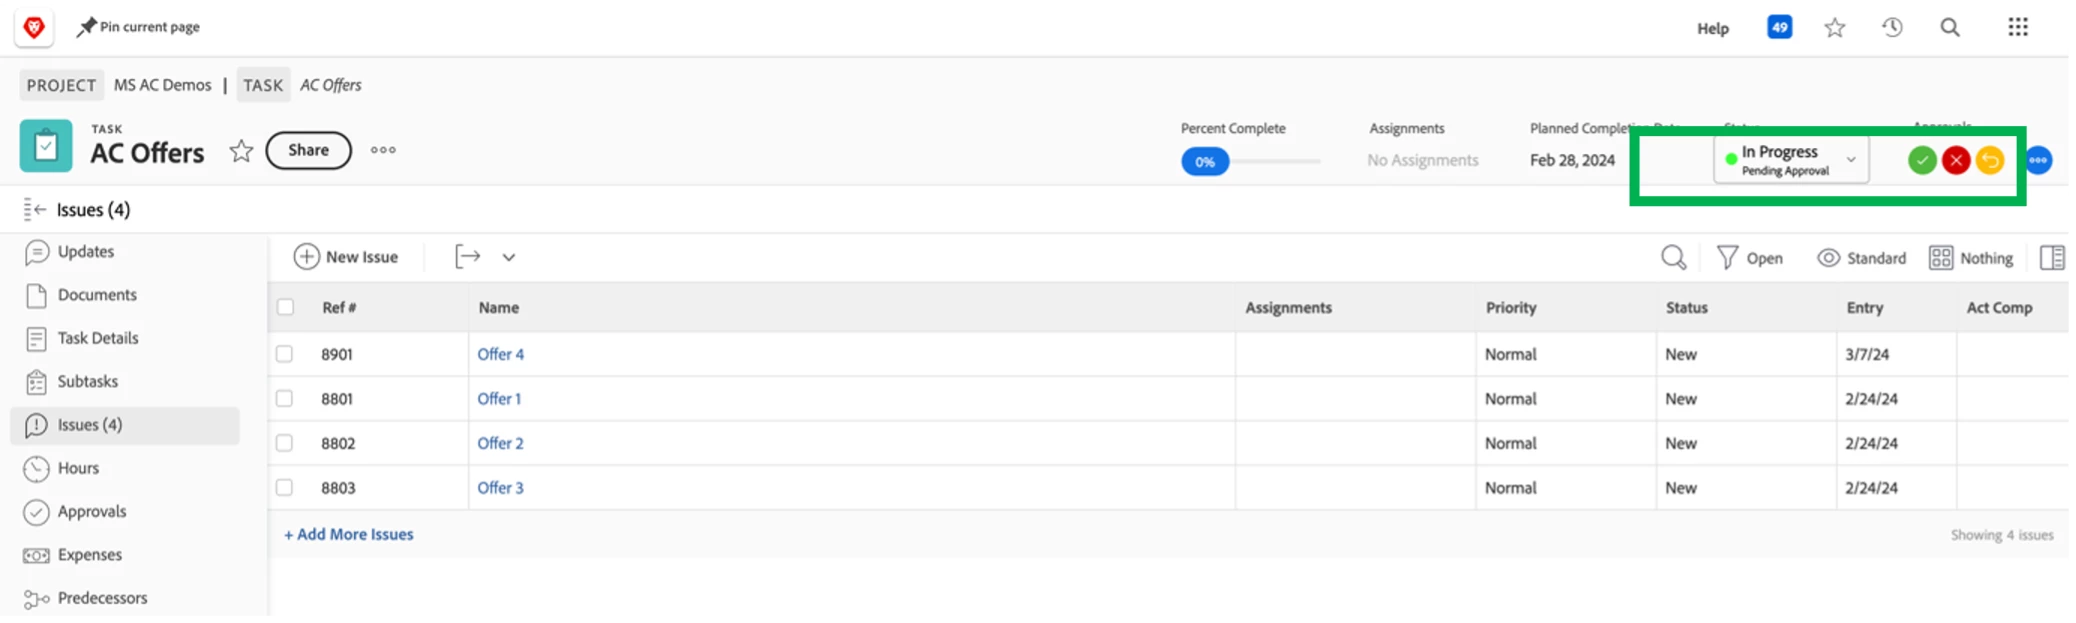
Once you change the Task status to ‘In-Progress’, the approval process will run, and wait for the task approval
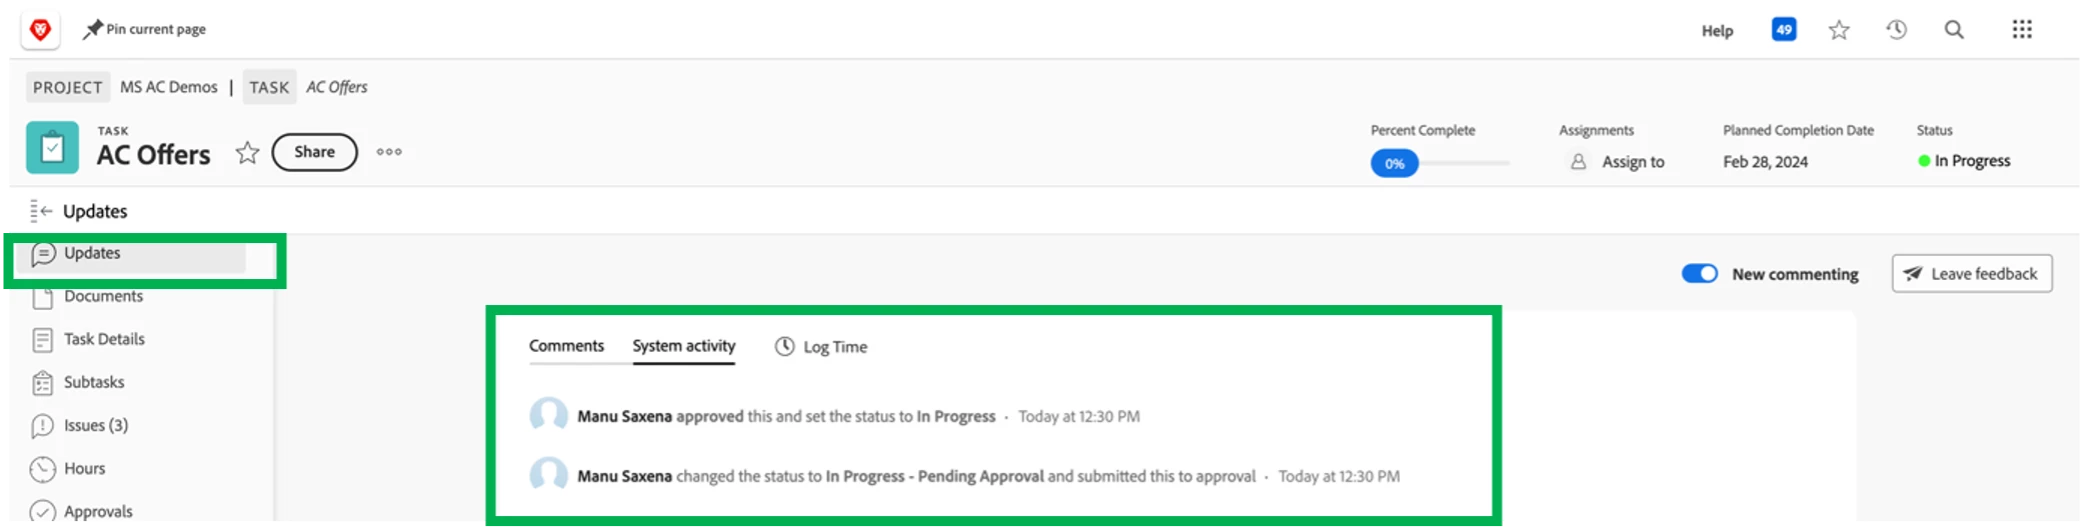
- All the relevant details will be tracked under Tasks -> Updates -> System Activity
- You can now go ahead and mark the task status as “Complete” and this will trigger the workflow to create the Offers in Adobe Campaign.
Section 4 - Define the Workflow in Workfront Fusion:
This is where the magic will take place. Workfront Fusion provides Adobe Campaign modules out of the box that can be used to connect your Workfront and Adobe Campaign instances and seamlessly share data. The flow has the following modules:

Let's see how to setup and configure these activities:
- The first activity is an Instant trigger where we wait for the task status to change to ‘Complete.’
- The necessary webhook was configured here.
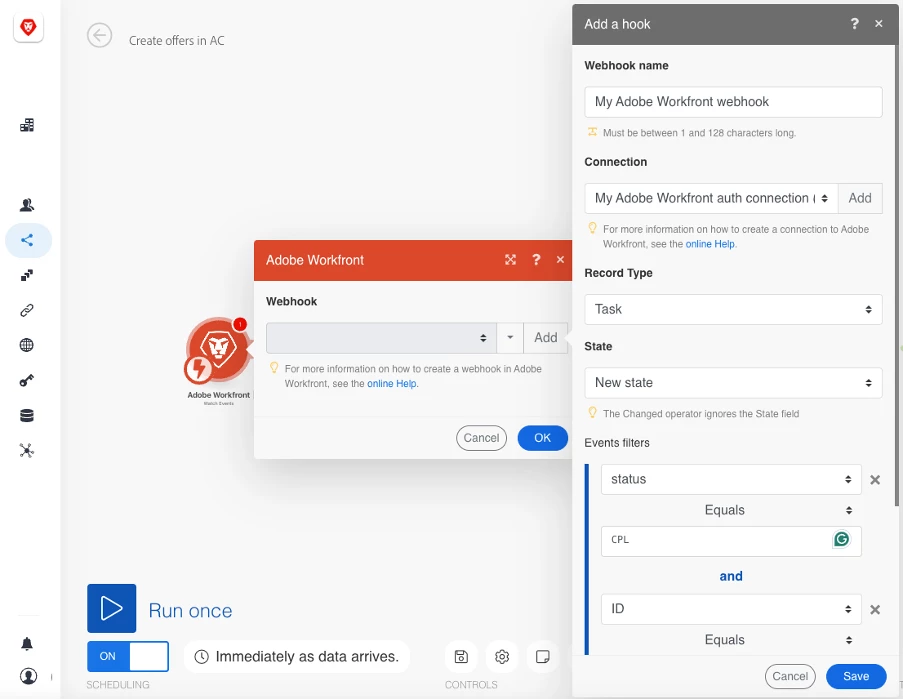
- The necessary webhook was configured here.
- The next two activities are to read the details for each offer created and create an array to store details for each offer.
- First, we will read each offer record and retrieve the offer details. In the 'Outputs' selection, select the 'ID' and the fields that you defined as part of the custom form in section 1 - Creating a Custom Form.
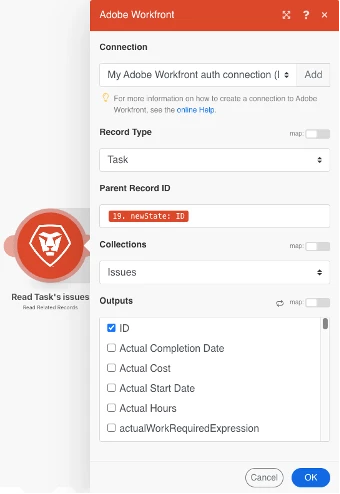
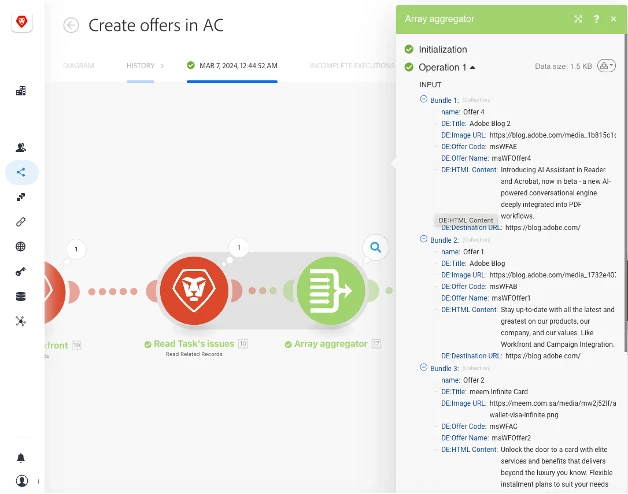
- Then we will use an array aggregator activity to collect all the offer details to be used further downstream in the workflow.
- First, we will read each offer record and retrieve the offer details. In the 'Outputs' selection, select the 'ID' and the fields that you defined as part of the custom form in section 1 - Creating a Custom Form.
- The next three activities allow us to iterate through each of the offers and create them in Adobe Campaign.
- First, we gather all the offer details via the Iterator module
Module Setup Module Output 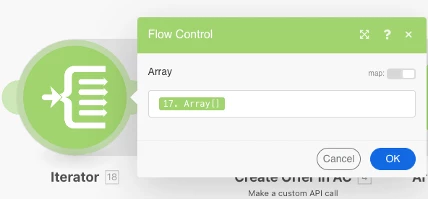

- Next, to create the offers in Adobe Campaign I am using the Make a Custom API call activity of the Adobe Campaign Workfront module. The necessary XML body to generate the offer can be defined here and we can bring in the elements that were tracked in Workfront.
Module Setup Module Output 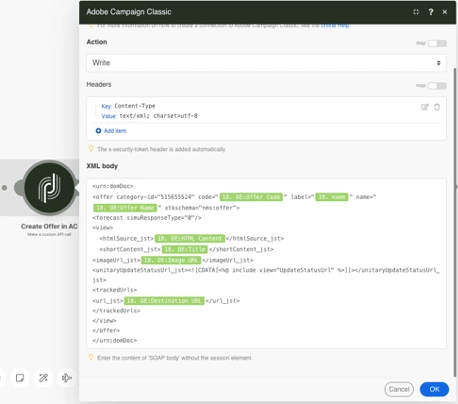
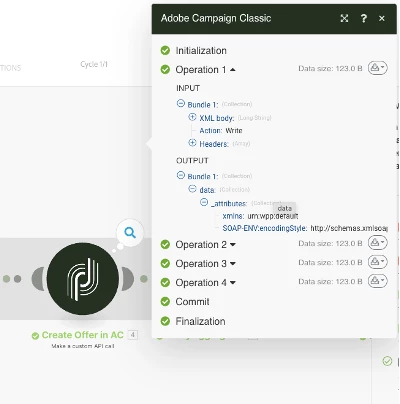
The Script used to create the offer is:<urn:domDoc>
<offer category-id="515655524" code="{{18.`DE:Offer Code`}}" label="{{18.name}}" name="{{18.`DE:Offer Name`}}" xtkschema="nms:offer">
<forecast simuResponseType="0"/>
<view>
<htmlSource_jst>{{18.`DE:HTML Content`}}</htmlSource_jst>
<shortContent_jst>{{18.`DE:Title`}}</shortContent_jst>
<imageUrl_jst>{{18.`DE:Image URL`}}</imageUrl_jst>
<unitaryUpdateStatusUrl_jst><![CDATA[<%@ include view="UpdateStatusUrl" %>]]></unitaryUpdateStatusUrl_jst>
<trackedUrls>
<url_jst>{{18.`DE:Destination URL`}}</url_jst>
</trackedUrls>
</view>
</offer>
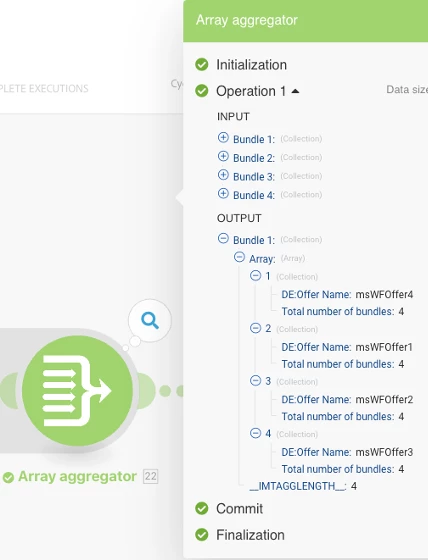
</urn:domDoc> - Lastly, we use the Array aggregator module to close the loop and get the offer internal name for the next part of the process.
Module Setup Module Output 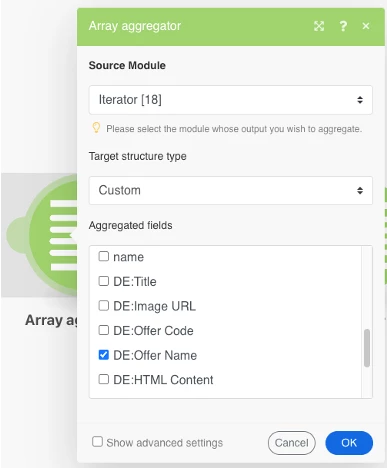
- First, we gather all the offer details via the Iterator module
- Once the offer creation activities are run, we then want to go ahead and update the content status for the offers. We could have set these via the API call as well, however, to give you an idea of the different modules I have used the Search activity of the Adobe Campaign Module, and the Update Record activity of the Adobe Campaign module.
- First, we will have the iterator activity gather all the internal names for the offers that were created.
Module Setup Module Output 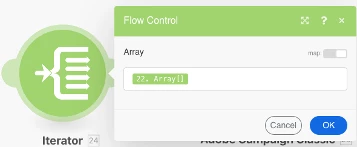

- We will then search for the offers and get the ID (Primary Key) from Adobe Campaign.
Note: You can see from the output that there are 4 operations since there were 4 offers that were created.Module Setup Module Output 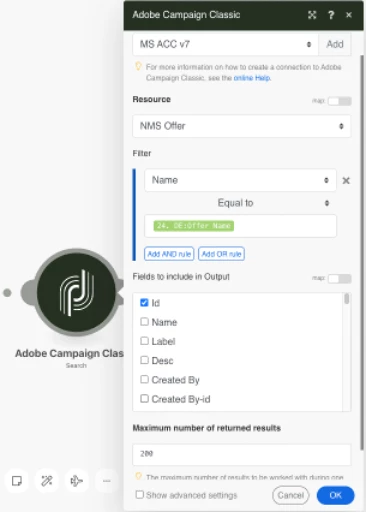

- For each of these offer records, we can now go ahead and update the content status. For this, we will use the Update Record activity of the Adobe Campaign module. From the 'Fields to include in Output' section select the 'Status' and 'Content Status' field and set their value to 'Approved'.
Module Setup Module Output 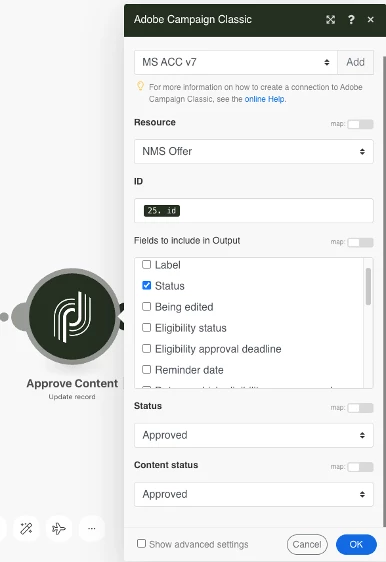

- First, we will have the iterator activity gather all the internal names for the offers that were created.
Section 5 - The Output:
- In Workfront:
When the flow is fully run, all activities will be highlighted in green to show a successful run and you will be able to view the results of the run as well.
Note: Workfront will maintain a history of every run so you can always check for the details that were passed in the flow in the event of a data mismatch. - In Adobe Campaign:
In Adobe Campaign, we can navigate to the offer category that we defined in our workflow and we will see that the four offers are now created there, and for each offer, you will see that only the eligibility approval is required now since the Content has already been approved.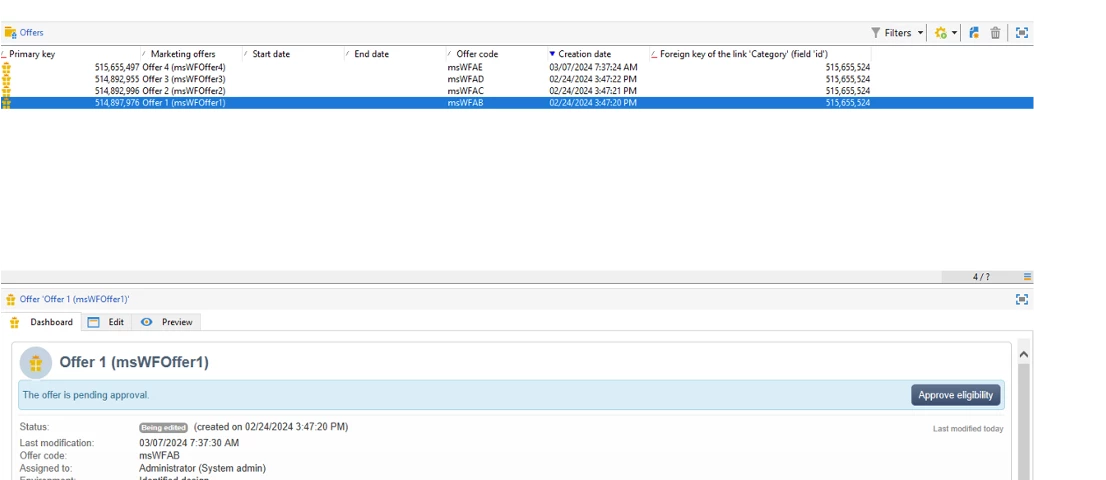
- All the other necessary details are used to create the offer:
- Offer Label, Internal name and Offer code (same as the ones captured in Section 1 point #3)

- Title, Destination URL, Image URL and HTML content are also generated.
- And the preview function will allow you to see how the content renders for the different offer spaces.
- Offer Label, Internal name and Offer code (same as the ones captured in Section 1 point #3)
Section 6 - The Speed:
So, you’ve seen how we can very easily go ahead and get multiple offers created and have an approval process set up as well. The best part is not only the ease now instead of having to create one offer at a time, but even the time and speed. The only time that will go from a process standpoint would be the time it takes to create the offer content and approve it on a customer's end but to create the offers in Adobe Campaign and have the content approval set would take only a matter of seconds*.
The flow to create four offers took 11 seconds to execute.
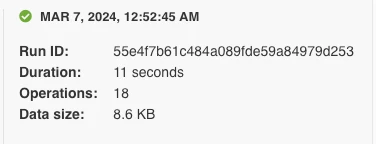
*Note: The speed of the flow would also depend on the number of offers being created and the details provided for each of the offers.