Thank you to everyone who attended the webinar last week! I hope you find some of the concepts helpful as you engage in process design with your teams.
Process Design Embedded Tab
We've received quite a few questions regarding how I set up the Workfront project to track the design process. I wanted to share the steps I took to configure the Process Design tab embedded in the sample project I shared in the webinar. You can follow these steps to set it up in your Workfront instance and customize it to best suit your needs.
Step 1: Create a project in Workfront
The purpose of this project is to track the design phases and store all the relevant information in one location -- your single source of truth
Step 2: Utilize the Issue object to track your goals & objectives
Enter each goal/success critical as a single issue on the project. Rename the Issue Name column to "Goals & Objectives"
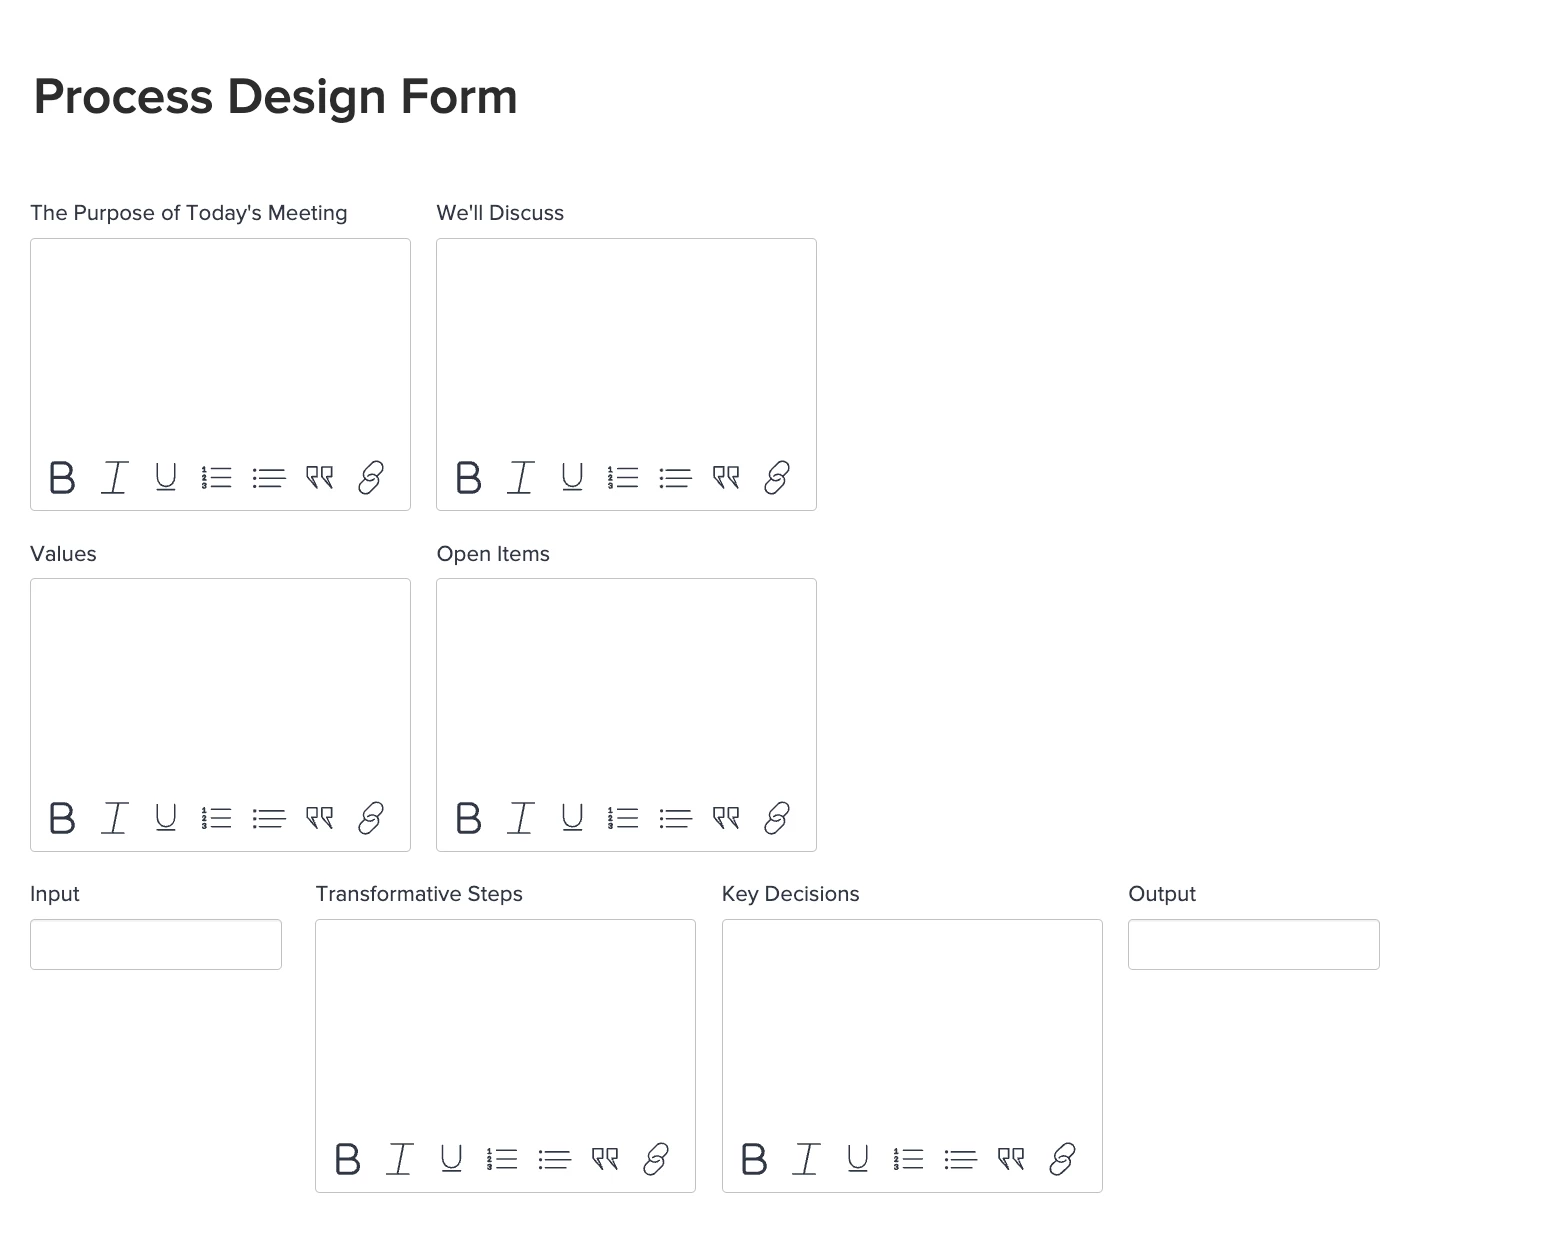
Step 3: Create a task custom form as shown below to help track the values of each phase, meeting agenda, open items, inputs, outputs, etc.
Step 4: Utilize the Tasks tab to enter the main design phases you plan to go through (i.e. Discovery, Define, Develop, Deliver). You can further break these down into sub-phases (i.e. understand, analyze) as needed
Step 5: Create a custom task view to pull in the Meeting Agenda, Values, Open items, etc. Save the view as "Design Phases". This view can help you level-set with your team in each phase, track the important findings, and follow up on any open items
Step 6: As you go through the Discovery and Define phases, enter each of the key steps identified as tasks on the Tasks tab
You can further break down the key tasks into smaller actionable activities by adding subtasks underneath each key task
Step 7: Create a custom task view to pull in the Input, Transformation Steps, Output, Key Decisions, and Assignments (custom field) fields. Save it as the "Process Design" task view
Step 8: Set your task view to the "Process Design" view so you can inline fill in the Input, Transformation Steps, Output, Key Decisions, and Assignments for each step as you're having conversations with your working group
Step 9: Visualize your design
Once you finalize the steps included in your process, you can turn your understanding into a workflow diagram and upload the diagram to the Documents tab on your project
Step 10: Now it is time to build the embedded "Process Design" tab
Goals & Objectives report - Issue Report
- Rename the "Name" column to "Goals & Objectives". Pull in the Priority and the Status columns
- You can further color-code the values by adding conditional formatting rules to the Priority column (i.e. goals with high priority turns red)
Process Design Steps - Task Report
- Rename the "Name" column to "Phase". In the Report Editing page, click on "Apply an Existing View" on the lower right corner and pick the "Design Phases" view you created in Step 5
Process Design Approval Tracking - Document Report (can also be a proof approval report)
- Pull in the Approver, Decision, and Decision Date columns to help you track who has approved your design and which approvers are still pending.
Once you configure the above reports, create a new dashboard to pull in these reports. To display your workflow diagram, click on "Add External Page" at the lower right corner of the Dashboard Editing page and insert the URL of your workflow diagram.
Tips: To ensure you grab the right URL, please follow the steps here:
Go to the Documents tab on your project -> Locate your diagram -> Put your cursor on the document name -> Right click to "Copy Link Address"
Once the dashboard is built, you can embed it as a custom tab to the Working Group Users' layout template so everyone can see it and will be able to interact with it if permission allows.
Please note that once you embed the dashboard as a custom tab, this tab will be listed in the left panel when you click on any project in WF. My advice is to keep the tab there as you're designing and building out your process. You can consider moving this tab lower in the left panel if you wish. Once you complete your process, feel free to remove the tab from the Working Group Users' layout template
I hope this helps you get started with your process design project in Workfront. Please let us know if you have any questions.
Have a great week!