
Tracking Turnaround Time
Historical data — especially tracking how long a work item takes to complete — aids in planning for the future, but most importantly it captures valuable insight and helps establish metrics against which you and your team can continuously improve. While Workfront provides you with the native fields for Actual Start Date and Actual Completion Date, in order to capture the actual duration of work, or average turnaround time of work items, you must use calculated data expressions or text mode.
Since text mode cannot be applied to charts, the instructions below will walk you through how to create three different calculated data expressions in custom forms and then how to apply those values to charts for quick and easy visuals.
CALCULATING TOTAL DAYS
Taking into account the start and the end days of the period selected, this function returns the number of days, both work days and weekends, between the two dates. The start day will not be counted as a full day if the start time is later than the start time of the schedule assigned to the project. For example, if the start time of the object is 3 PM, the schedule start time is 9 AM and the schedule end time is 5 PM, then the duration of the start day will be 2 hours.
To calculate the duration of an object - a project, for example - follow these steps:
- From the Setup area, create a new project custom form.
- Add a new calculated field for Project Turnaround Time - Days and set the format to number. Insert the calculation, ROUND(DATEDIFF(Actual Completion Date,Actual Start Date),2).
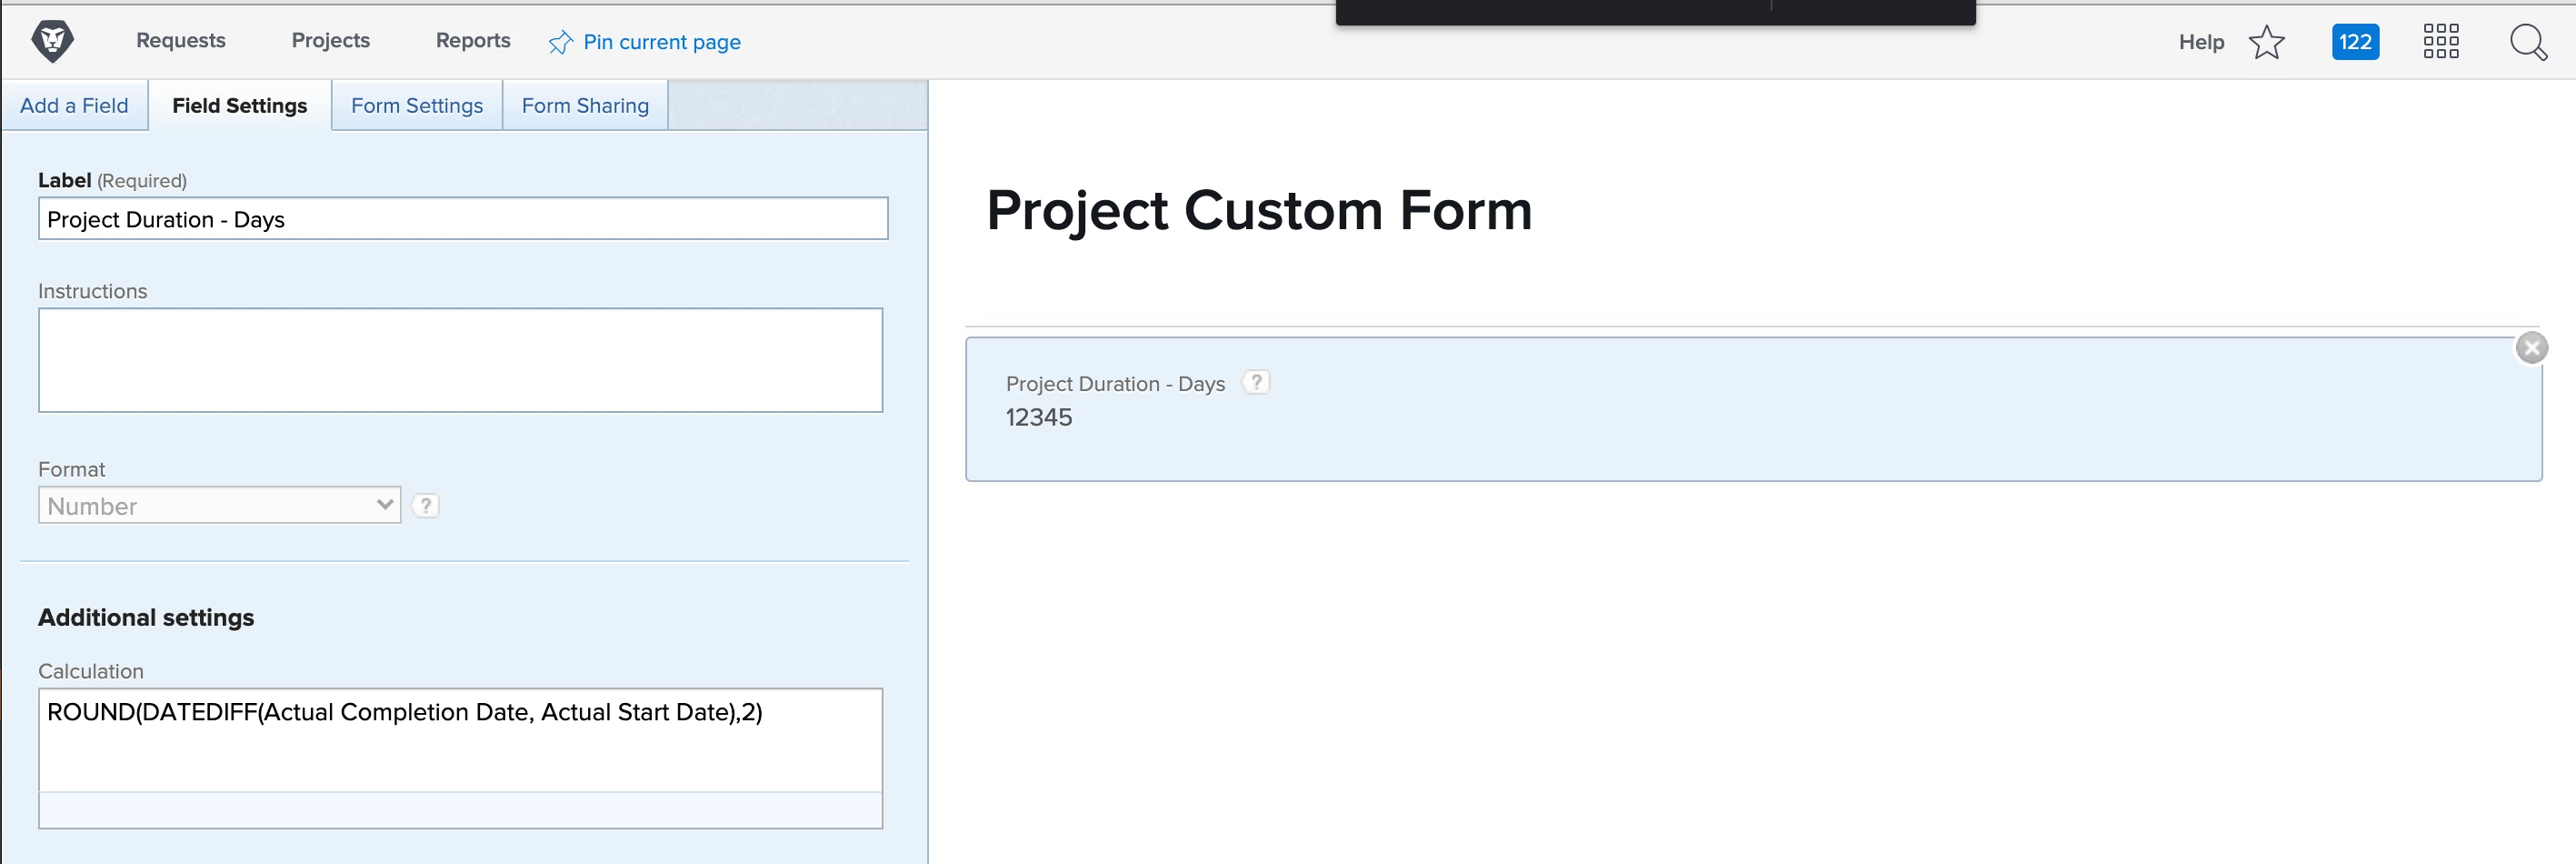
This will generate a number, rounded to two decimal places, for the number of days between the project’s actual start date and actual completion date.
3. Click Apply then Save and Close.
CALCULATING WEEKDAYS
Taking into account the start and the end days of the period selected, this function returns the number of weekdays (Monday-Friday) between the two dates. The start day will not be counted as a full day if the start time is later than the start time of the schedule assigned to the project. For example, if the start time of the object is 3 PM, the schedule start time is 9 AM and the schedule end time is 5 PM, then the duration of the start day will be 2 hours.
To calculate the duration of an object - a project, for example - follow these steps:
- From the Setup area, create a new project custom form.
- Add a new calculated field for Project Turnaround Time - Weekdays and set the format to number. Insert the calculation, ROUND(WEEKDAYDIFF(Actual Start Date,Actual Completion Date),2).
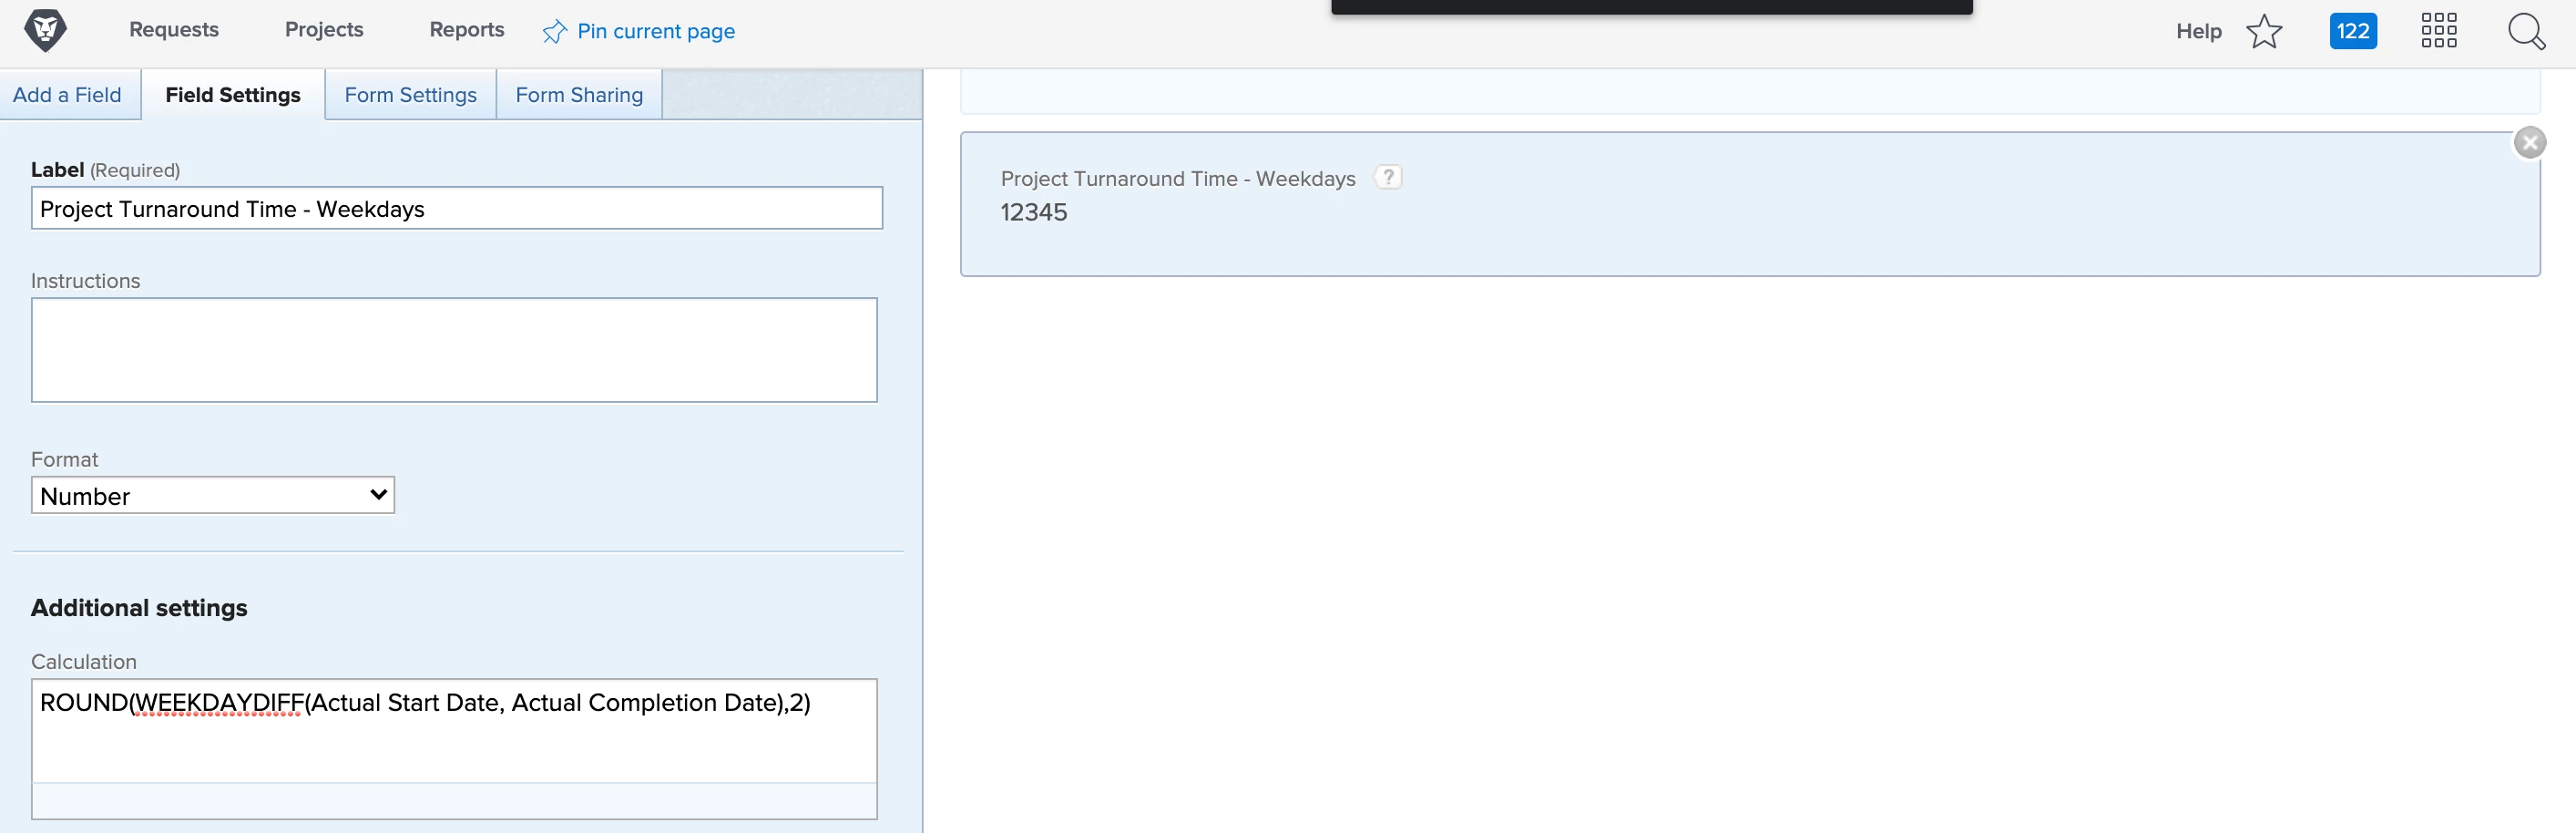
This will generate a number, rounded to two decimal places, for the number of weekdays between the project’s actual start date and actual completion date.
3. Click Apply then Save and Close.
CALCULATING WEEKDAYS BASED ON PROJECT SCHEDULE
This function uses the system's default schedule so when calculating differences, it will skip over both weekends and schedule exceptions, such as company holidays. To calculate the duration of an object - a project, for example - follow these steps:
- From the Setup area, create a new project custom form.
- Add a new calculated field for Project Turnaround Time based on Schedule and set the format to number. Insert the calculation, ROUND(DIV(WORKMINUTESDIFF(Actual Completion Date, Actual Start Date),480),2)
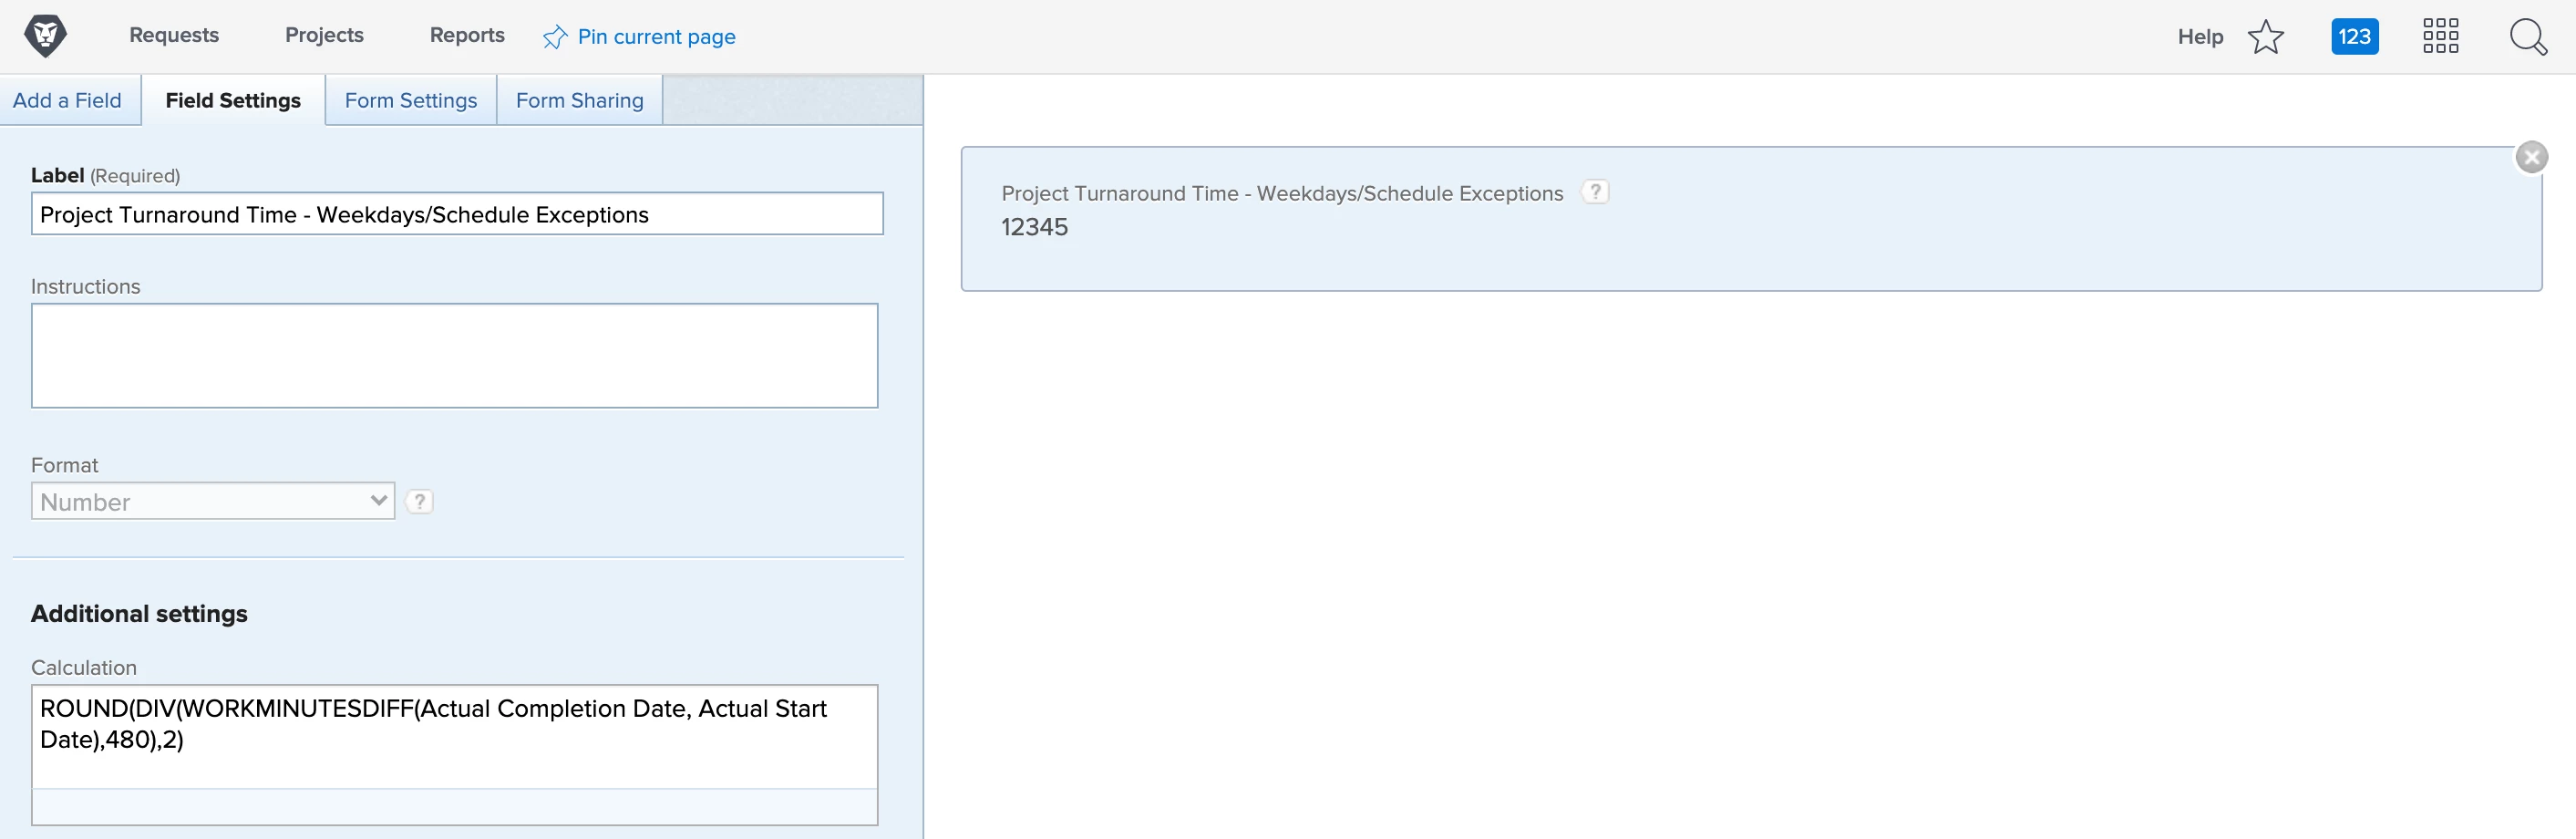
This will generate a number, rounded to two decimal places, for the number of weekdays (Monday-Friday), excluding weekends and schedule exceptions, between the project’s actual start date and actual completion date.
NOTE: The WORKMINUTESDIFF function gives a value in minutes, so that is why the calculation is divided by 480 (number of minutes in an 8-hour day) to convert that value to days.
3. Click Apply then Save and Close.
REPORTING ON TURNAROUND TIME
For users with work items across multiple portfolios, programs or projects, charts provide a visual aid to help understand data quickly. Since charts cannot read text mode, a calculated field must be created first in order to view turnaround time in a chart.
To learn how to calculate the average project turnaround time grouped by portfolio, follow these steps:
- From the Reports area, create a new project report. Leave the filters tab blank so that all projects within your system are captured.
- Save and close to run the report.
- Bulk select all projects and then click the Edit button.
- Scroll down to the Custom Forms area and add the newly created custom form in which the field for turnaround time was added to. Then, save the changes.
PRO TIP: Add this custom form to all templates so that all projects created moving forward will have this custom form associated.
Now that all projects within your system have this custom form attached, you can look to build a customized report with filters, groupings and charts to view turnaround time by portfolio.
- From the Reports area, create a project report.
- Add the filter for Project Status > Equals > Complete.
- Group the results by Portfolio > Name.
- Add your created calculated field for project turnaround time and select Average in the dropdown menu, Summarize this column by.
- From the Chart tab, select a column chart and use project turnaround time as the left (Y) axis (summarized by average) and Portfolio Name as the bottom (x) axis.
- Save and close the report.
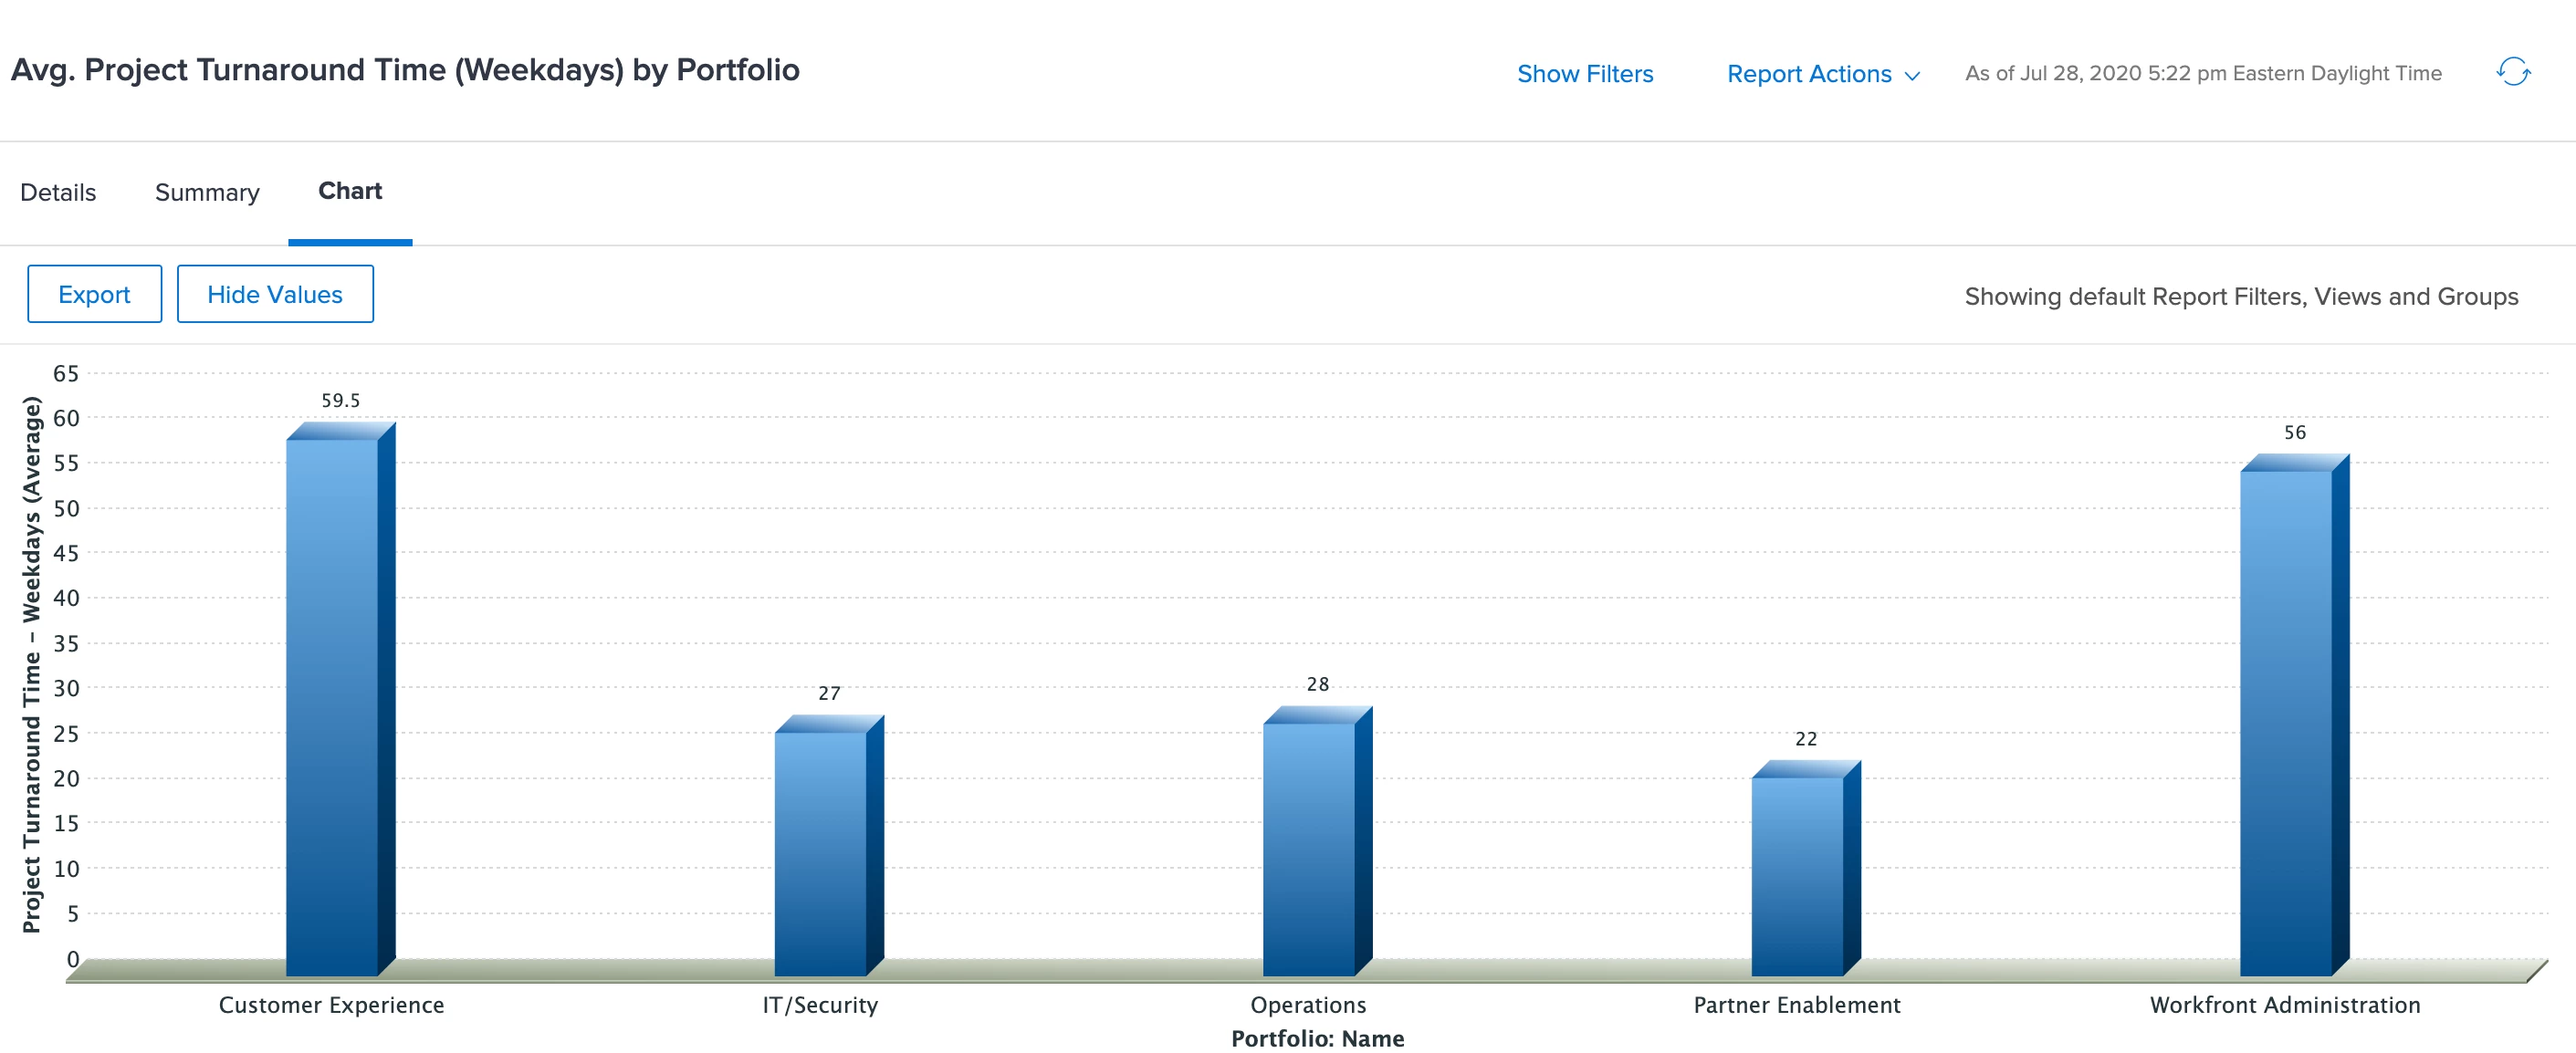
IMPORTANT: If values do not populate in your turnaround time column, go into Setup > Custom Forms and click into your newly created custom form. Select the turnaround time calculated field and scroll down on the left side until you reach the checkbox for “Update previous calculations (in the background).”

Check that box and then click Apply, followed by Save and Close. This will populate the field for all projects in which this custom form is attached.
7. Refresh the report and notice that all values in the turnaround time column have been populated.
To learn how to capture dates of status changes so that you can track how long a work item was in a status, follow step by step instructions in the blog, Save Time Using Calculated Fields to Capture Dates, Details and Data.