

A Practical Guide to Custom Approval Workflows using Adobe Journey Optimizer
The Core Idea: How It Works
The concept is simple: AJO orchestrates the process, but an external system handles the actual human task (like reviewing content and clicking approve or reject). Think of AJO as the conductor and your team as the expert soloists.
The Flow: AJO pauses a journey using Event node with relatively long timeout, sends a request to an external system where a human makes a decision, and then AJO receives that decision to continue the journey down the right path.
This integration relies on a few key AJO components working together:
- Custom Actions: The "messenger" that sends the approval request from AJO to your external review system (like a CRM, a Slack channel, or a custom app).
- External System: The "human's desk" where the decision is made. This is the interface your team uses to approve or reject the request.
- Custom Events: The "messenger" that brings the decision from your external system back into AJO.
- Event Activity: The "gatekeeper" in your journey. It's configured to wait for your specific approval event and has a built-in timeout path if the event doesn't arrive on time.
A Simple Recipe for an Approval Workflow
Here's the process broken down into six simple steps:
- Trigger: The journey begins when a customer does something specific, like placing an order over $1,000.
- Request: A Custom Action immediately sends the order details to your review system's API.
- Pause: An Event activity is configured to wait for the approval response. This node pauses the journey and has a built-in timeout (e.g., 24 hours).
- Review: A team member reviews the details in the external system and clicks "Approve" or "Reject".
- Respond: The external system fires a Custom Event back to AJO containing the decision.
- Resume & Branch: The journey continues from the Event activity. If the event was received, a conditional split checks the approval status. If it timed out, the journey proceeds down the timeout path.
Use Case in Action: High-Value Order Review
Let's look at one example:
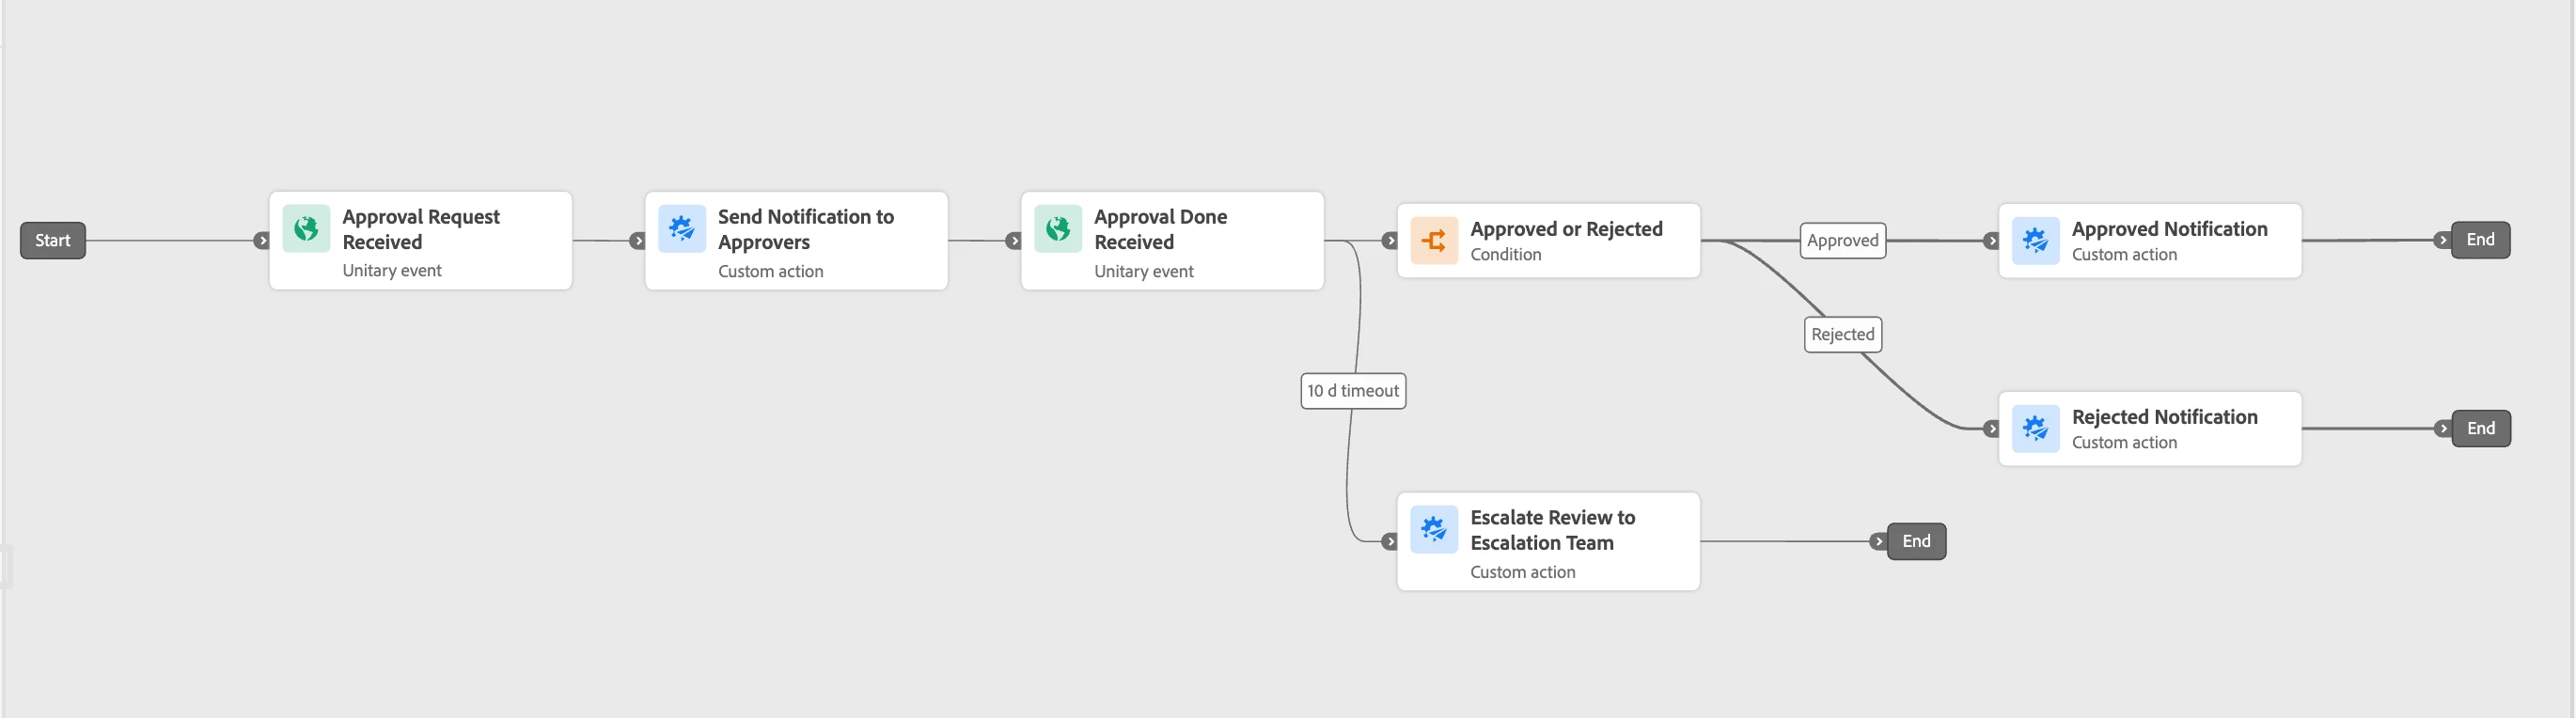
Imagine an e-commerce brand wants to manually review all orders over $5,000 to prevent fraud. Here's how the journey looks on the AJO canvas:
Journey Steps:
- Event: Order Placed → Condition: Order Value > $5000
- Custom Action: Send order details to the Fraud Review Team's dashboard.
- Event Activity (waits for ApprovalResponse): This node pauses the journey. It has two paths:
- Path 1 (Event Received): A conditional split checks the event payload (e.g., status == "Approved"). The journey then sends a confirmation or rejection email.
- Path 2 (Timeout after 10d): The journey proceeds down this path to send an internal escalation alert.
Key Things to Remember Before You Start
Building this workflow is powerful, but requires careful setup.
- Plan Your Data (XDM): Before you build, define what information the approver needs to see and what data you need back. A solid XDM schema for your request and response events is non-negotiable for this to work reliably.
- Build a Solid External Endpoint: Your external system's API must be reliable and able to handle requests from AJO. It's the engine of your approval process.
- Test, Test, Test: Use AJO's built-in testing features for Custom Actions and the journey test mode to simulate the entire flow. This helps you catch issues before a real customer is left waiting.
Unlock a New Level of Control
By integrating human-in-the-loop approvals, you're no longer limited by fully automated decisions. You can now build safer, more compliant, and highly personalized journeys that combine the best of machine-speed orchestration with the nuance of human judgment. Happy building!