Expand my Community achievements bar.

Adobe Campaign User Groups are live now. Join our Adobe Campaign User Groups and connect with your local leaders!
SOLVED

How to display date and time in UTC format i.e, 2018-05-02T13:47:33.743Z?

Avatar

Level 2

Hi,

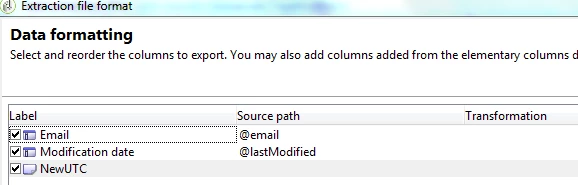
I have an Export workflow, that extracts data from tracking logs and recipient schema and is storing the data in a .csv file. I have a requirement that while extracting date-time data we should be displaying in file (example as 2018-05-02T13:47:33.743Z) this.

My campaign database is configured to store data in UTC format but I want the data while placing in file in the above mentioned format. How to achieve this? Currently I am getting data as: 10/23/2018  8:38:01 AM.

Thanks in Advance.

1 Accepted Solution

Avatar

Correct answer by
Community Advisor

Hi Sonika,

This can be achieved using an "Export File" activity with help of calculated fields.

1605799_pastedImage_2.png

New Calculated Field

1605797_pastedImage_0.png

Code

1605798_pastedImage_1.png

Output file

1605800_pastedImage_3.png

View solution in original post

4 Replies

Avatar

Level 1

Hi there,

I don't think you can do that in the export file activity.

One way to do this would be to convert the date you want in a SQL activity just before the extract file activity.

Do you happen to know which DBMS your Adobe instance is using ?

Mohamed

Avatar

Community Advisor

You are referring to ISO 8601 time, The Z suffix in the ISO 8601 time representation is sometimes referred to as "Zulu time" because the same letter is used to designate the Zulu time zone.

ISO 8601 - Wikipedia

Should get the following.

As for the extract, you need to use an expression with SQL, there are other ways, but this is the quickest I knew

In the column expression use the following, where GetDate() can be replaced with your tsColumnName (name of your field with timestampt) and append the Z manually for (ZULU timezone otherwise known as UTC )

[SQLDATA[CONVERT(VARCHAR(30), tsyourdatehere, 126)+'Z']]

1605732_pastedImage_0.png

Avatar

Correct answer by
Community Advisor

Hi Sonika,

This can be achieved using an "Export File" activity with help of calculated fields.

1605799_pastedImage_2.png

New Calculated Field

1605797_pastedImage_0.png

Code

1605798_pastedImage_1.png

Output file

1605800_pastedImage_3.png