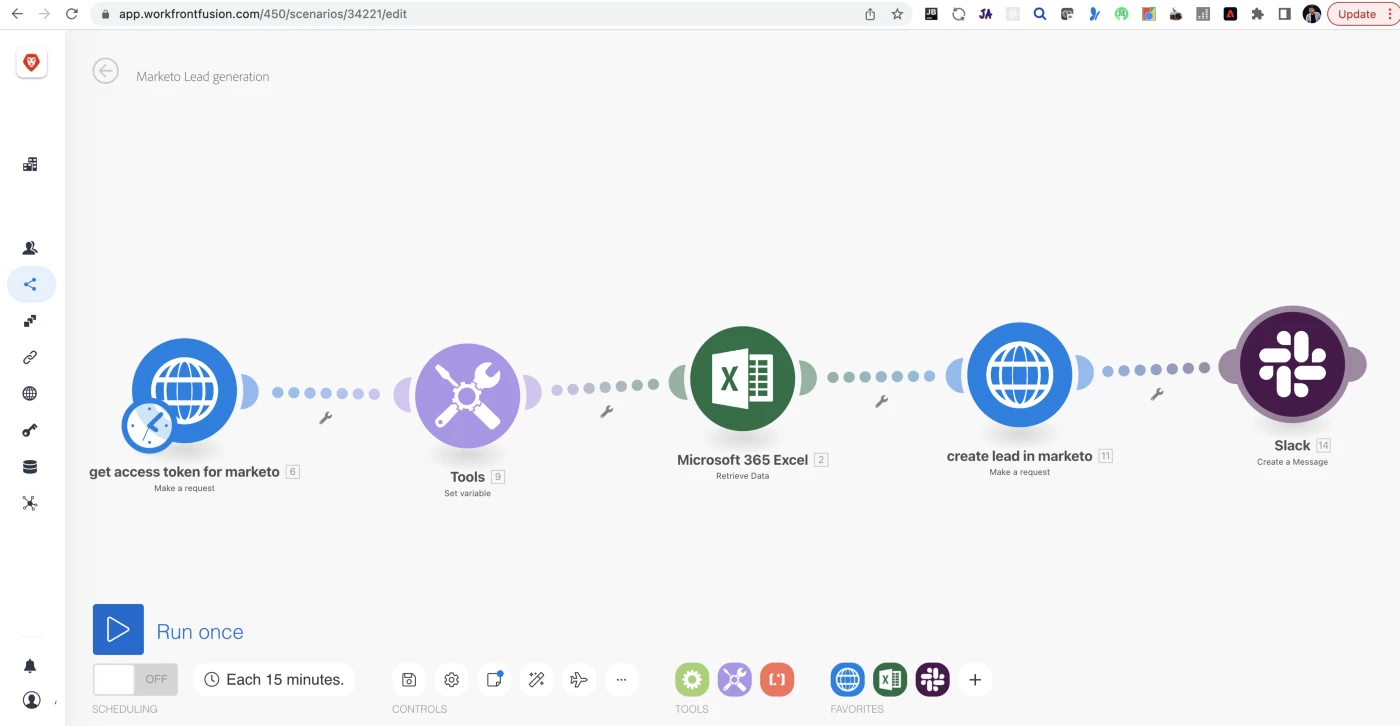
Workfront Fusion: Automation Workflow to create leads in Marketo
Workfront Fusion is the integration platform that allows you to connect Workfront to virtually any business application in your technology stack.
It provides robust capabilities to integrate Workfront into thousands of business applications.
This enables a seamless and connected enterprise knowledge work lifecycle. The power and elegance of Workfront Fusion lie in its simplicity. Workfront Fusion allows business users to create and manage a visual workflow of data processes and rules, transform data from one format to another, and monitor integrations in real-time.
To create workflow automation using work front you need access to https://apps.workfront.com and there should be a certain organization under which your username should exist
Steps to develop a Workfront fusion process to create dynamic users in Marketo from excel.
1 WorkfrontFusion:Create Scenario
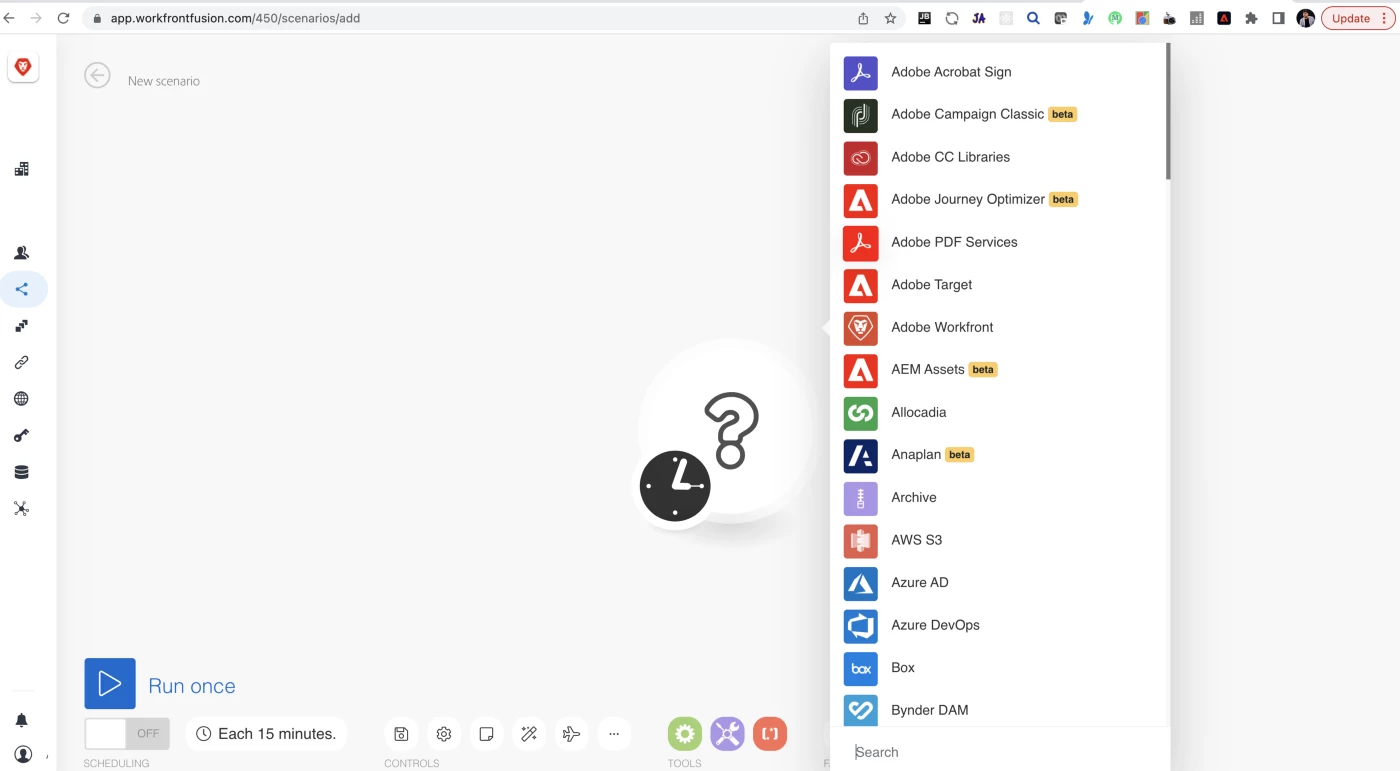
After login to the fusion interface you navigate to the left menu where you get the scenarios option, to create your scenario click on create a new scenario, you can start adding integration as per your business need
2 WorkfrontFusion:HTTPS Module
Add HTTPS module to get access token for your Marketo environment
Fill below value to the HTTPS module
URL : https://yours.mktorest.com/identity/oauth/token
Method: GET
QueryString :
1 name: granttype , value: #####
2 name:clientID, value : ######
3 name:client_secret, value:######
Click OK
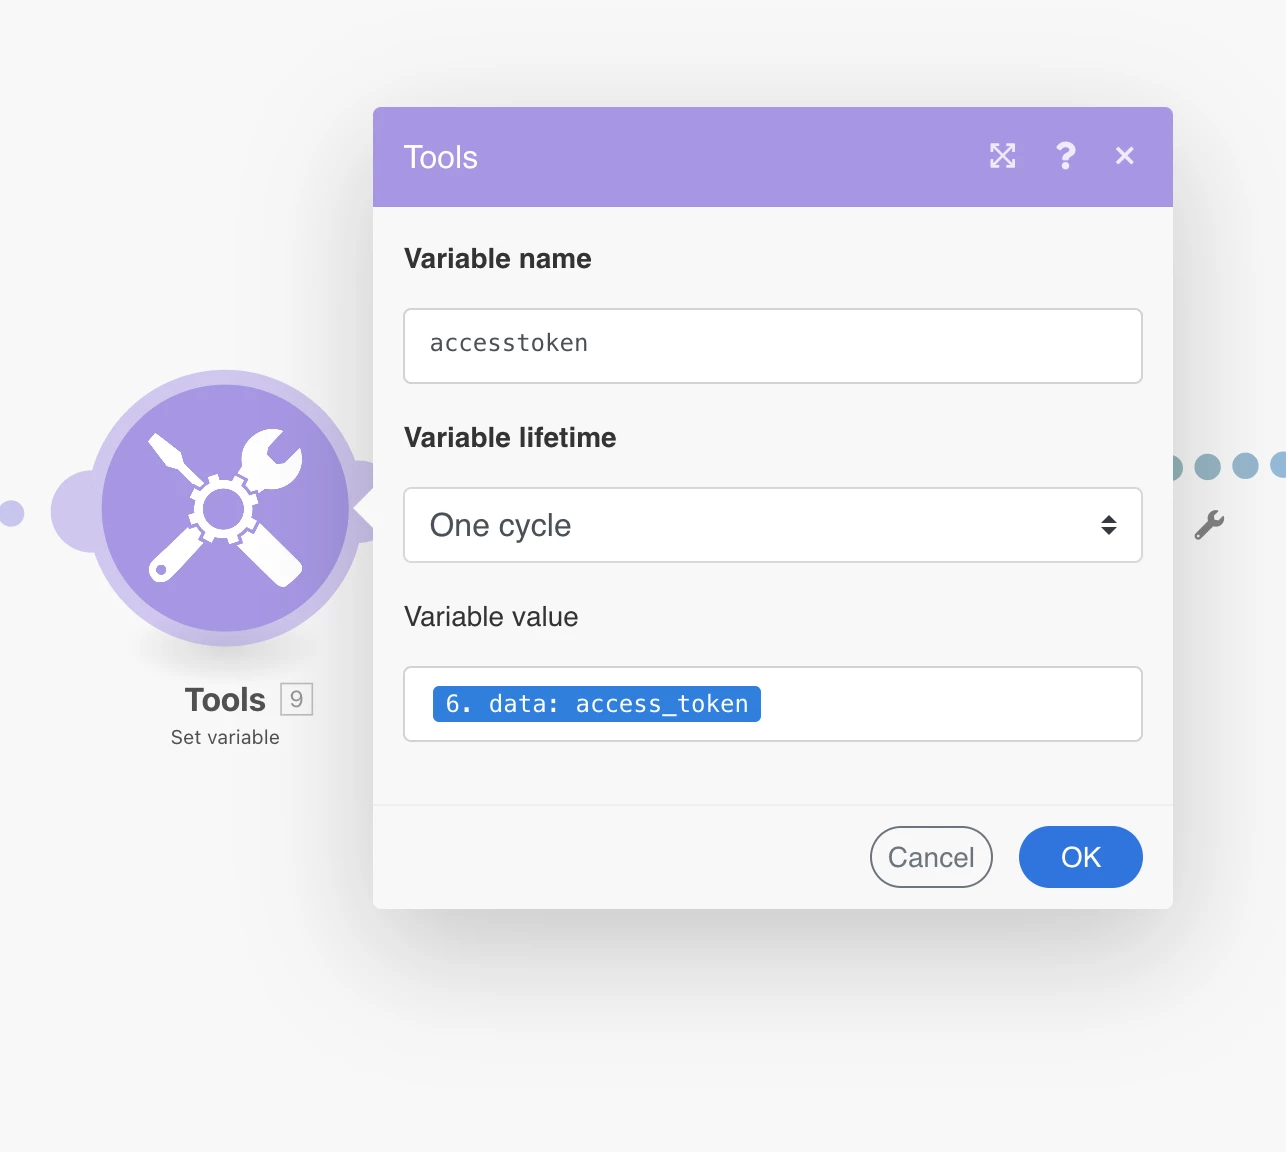
3 WorkfrontFusion:Add Tools element
set response i.e access token to access token variable
4 WorkfrontFusion:Add Microsoft 365 Integration
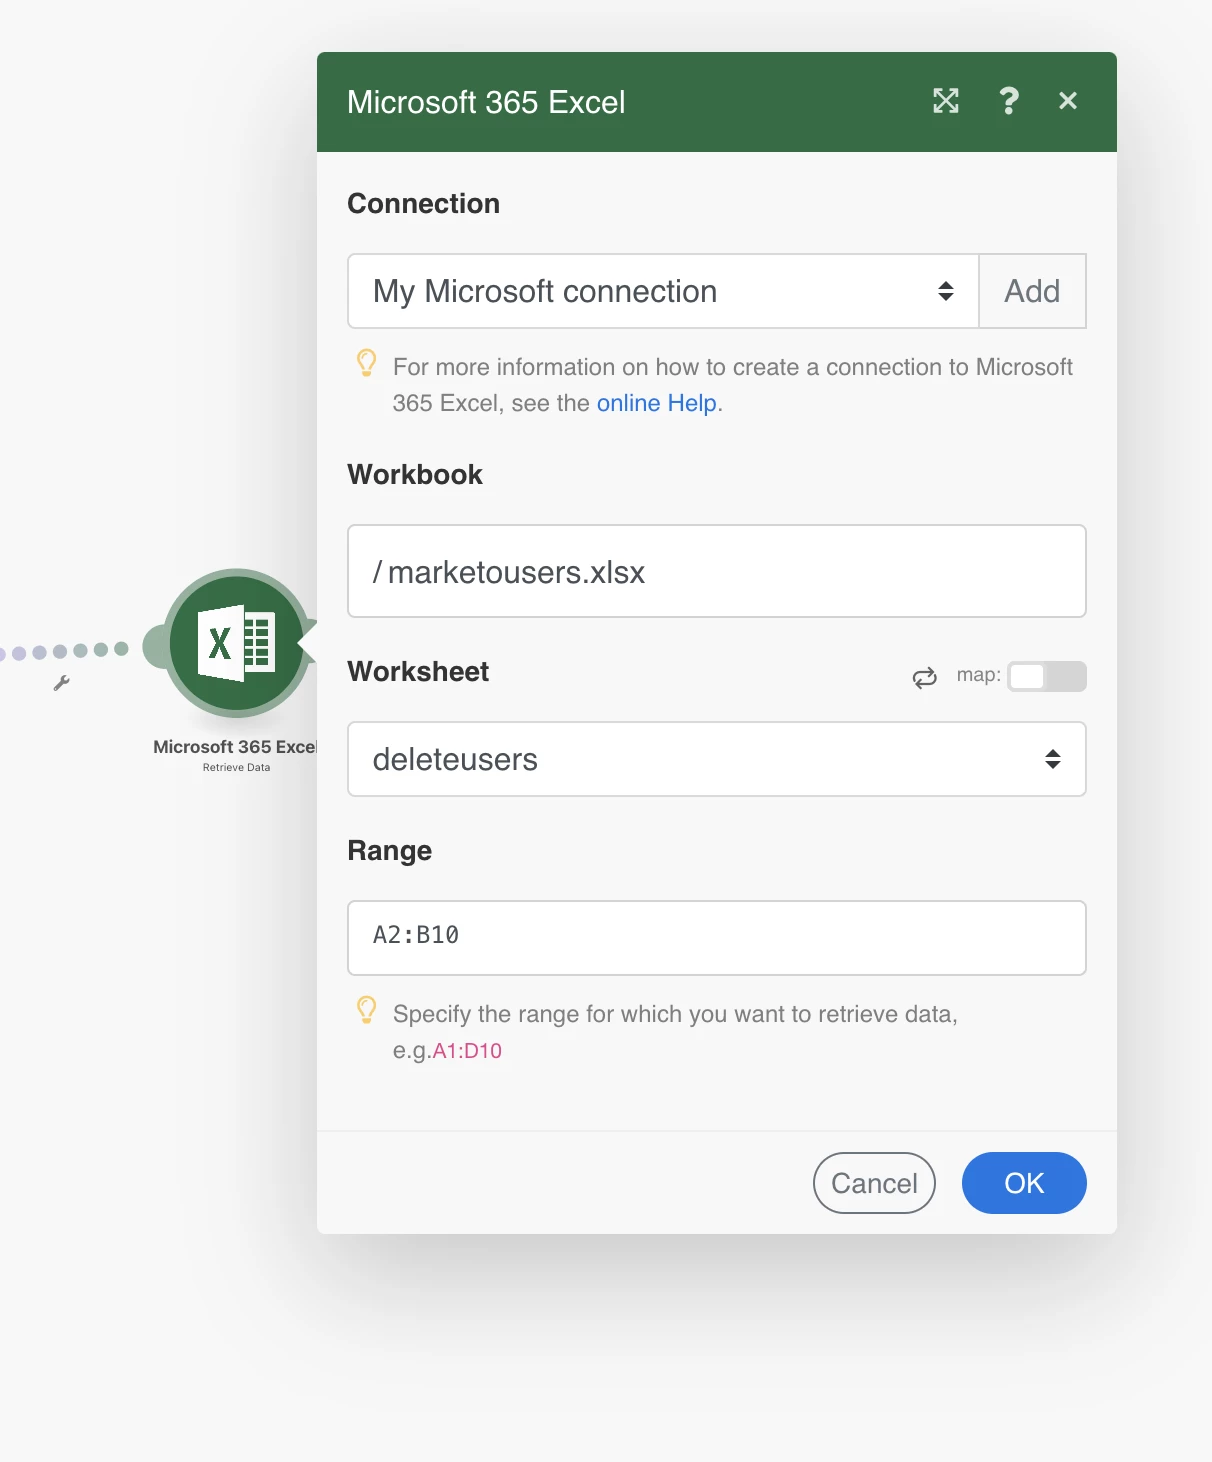
Add another module as Microsoft 365 Excel to import excel which contains usernames for 300 users, Here I added my SharePoint connection and uploaded marketousers.xlsx which contains the username and email
After successful connection, your excel should display under workbook and the corresponding sheet under Worksheet
you can select the data range for example in my case it is from A2:B10
5 WorkfrontFusion: Add Marketo Module
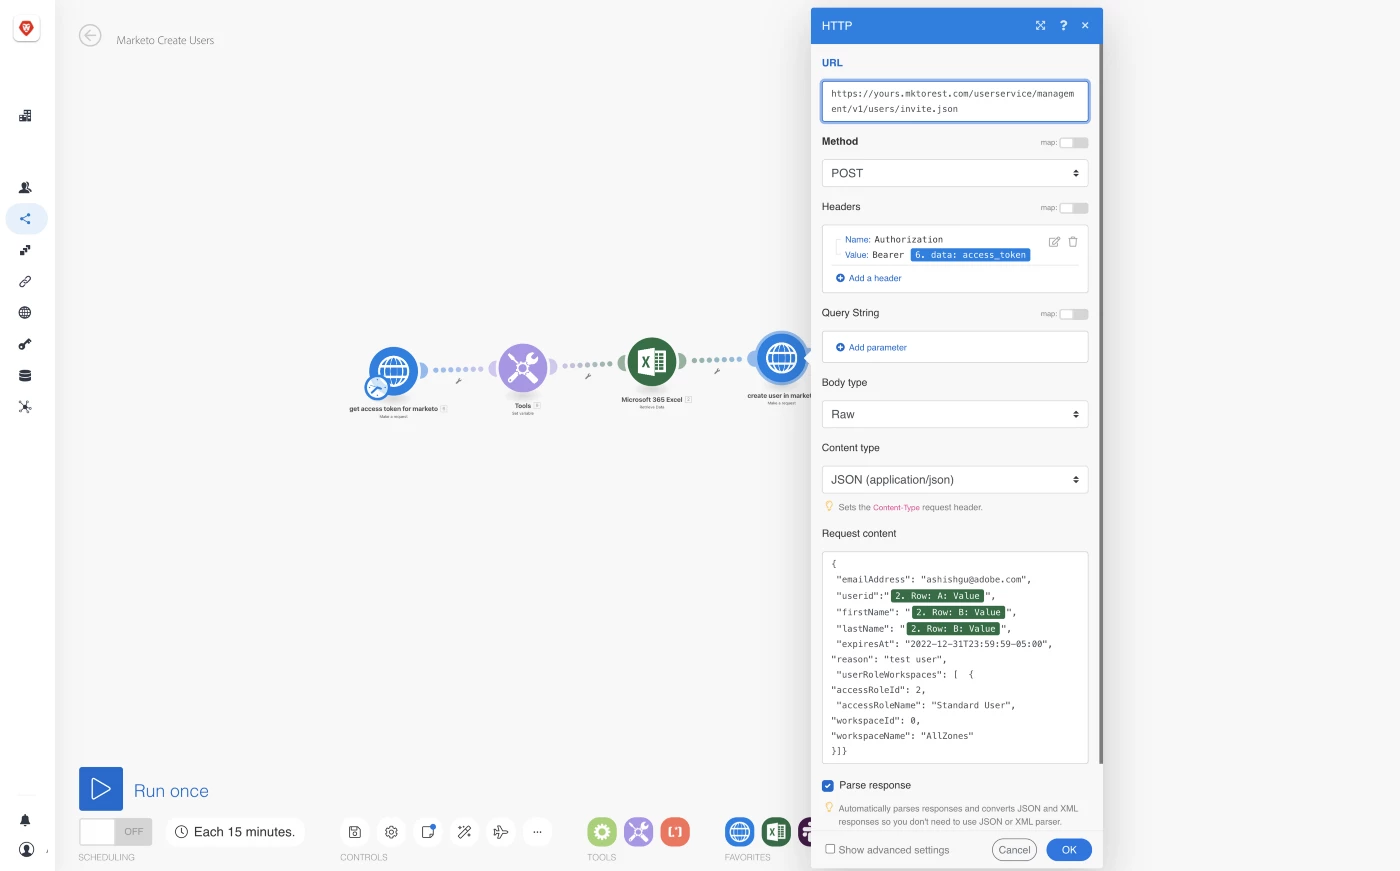
Add another HTTPS module to create leads in Marketo by hitting the user service API of Marketo, please see the below diagram for the settings of values
6 WorkfrontFusion:Add Slack Integration
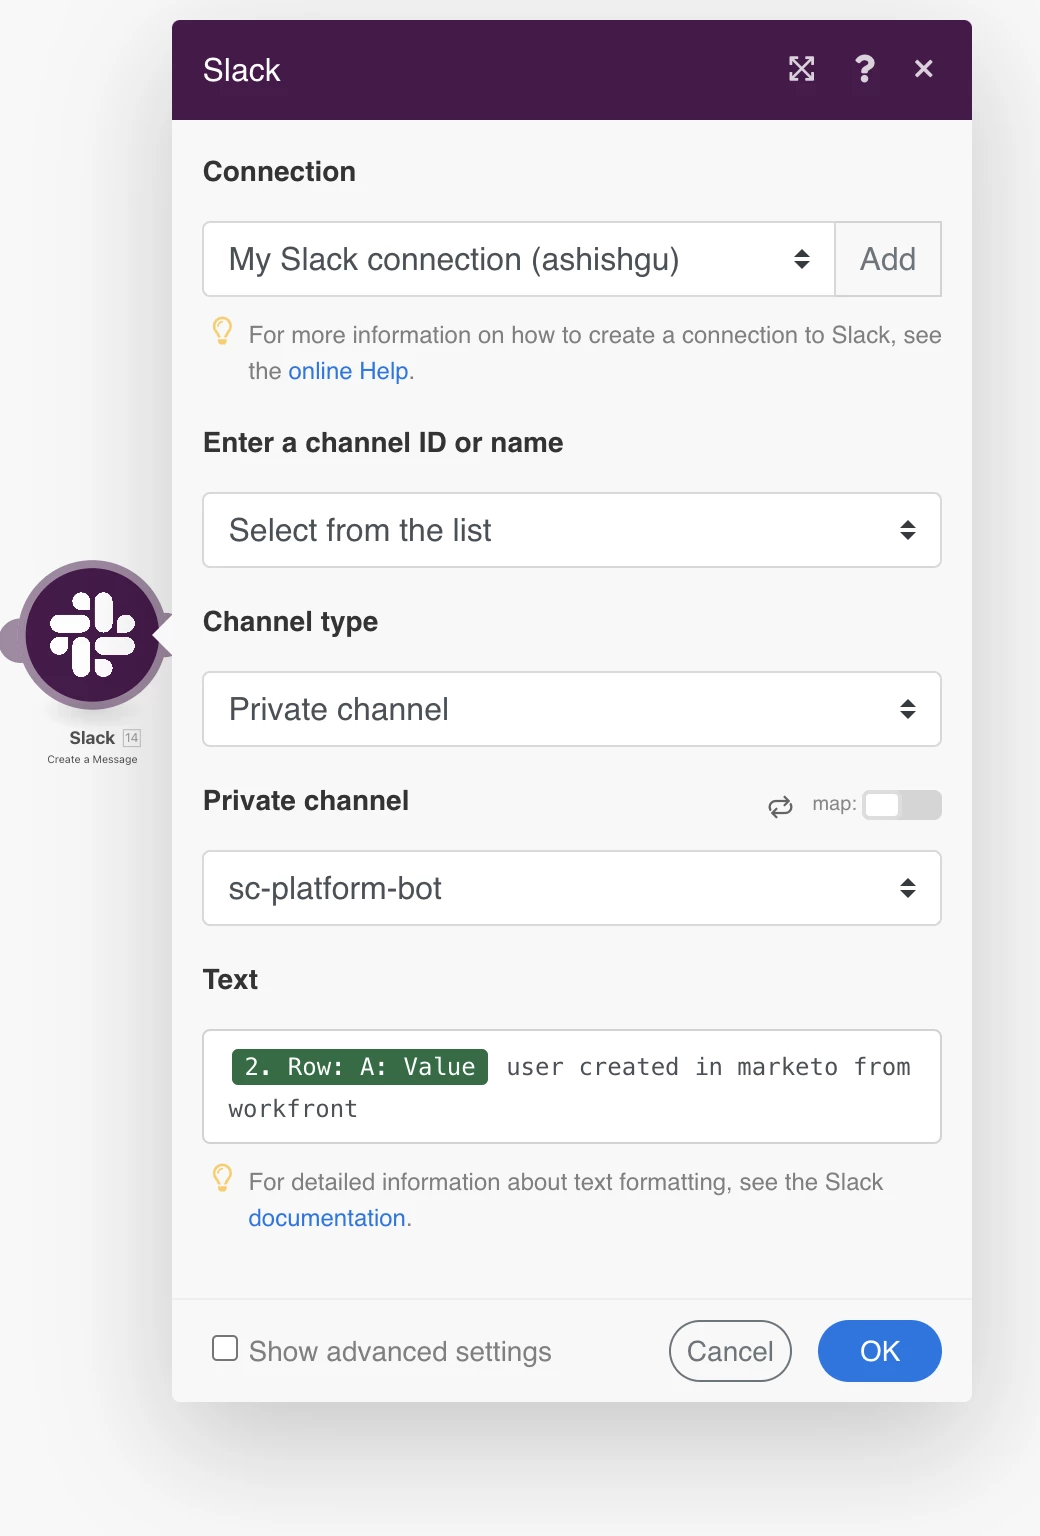
Add Slack module to workflow to push success message with user details as slack notification.
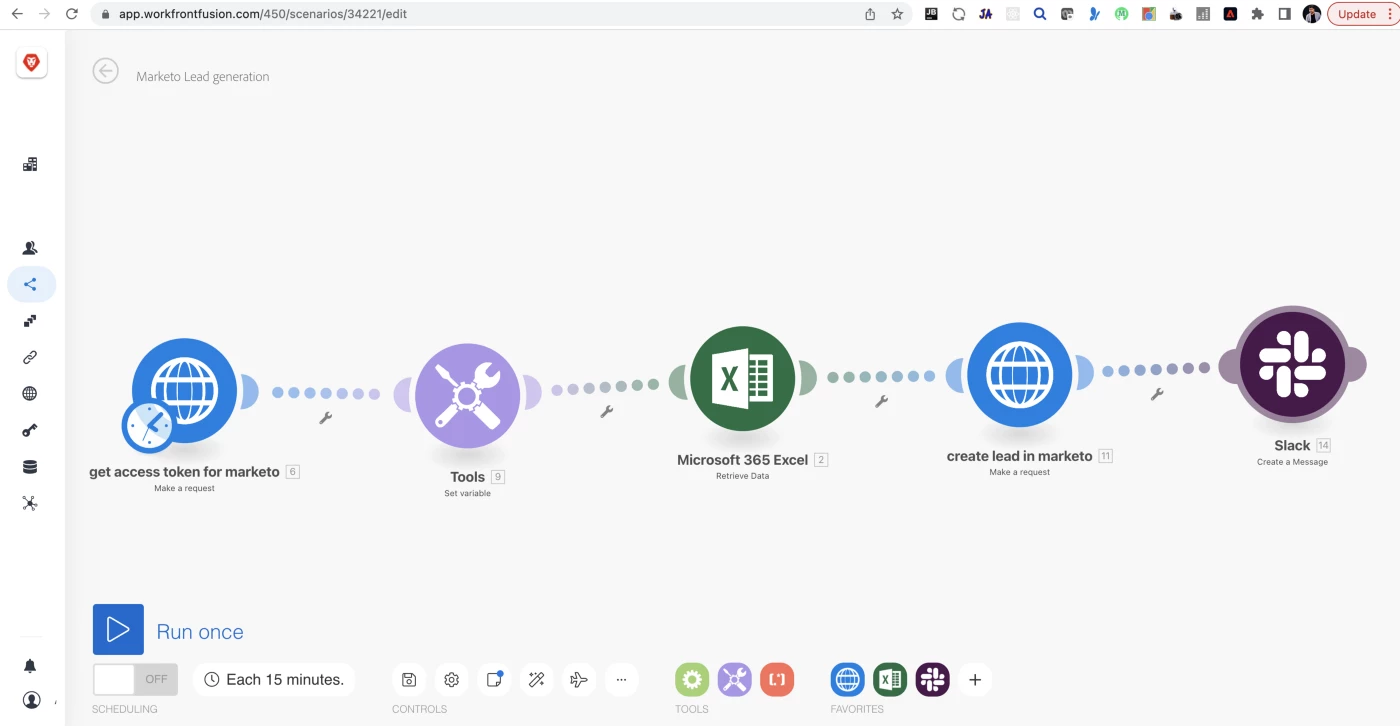
After performing the above steps just click on save to save the scenario, to run this scenario you need to click the run once button which will start the execution process and perform all the steps one by one.
WorkfrontFusion:Advantage
1 Workfrontfusion helps to do automation without writing any code i.e zero coding behind the scene
2 Easy to get and use data using simple REST endpoints of Marketo
3 Easy to integrate across the business integrations
4 Reusable process which can be used by just changing a few values across the process
Conclusion
I have also created update lead and delete lead scenarios on a similar concept and used these workflows to create dynamic leads in the Marketo environment.
After reading this blog, users should be familiar with Workfront fusion which is part of Adobe Workfront.
The user learned about the basic flow of business cases that can be automated using workflow fusion.
This blog will also help user to learn about Marketo Developer API to perform any operation which involves REST calls


