
Workfront Wednesday: Did You Know? Send a proof approval to anyone, using just an email address
Did You Know? Send a proof to anyone, using just an email address.
Reviewing and approving digital content can be a manual, tedious process that delays your projects and pushes back deadlines, especially if a decision needs to happen from a person outside of your organization.
Did you know that Workfront allows you to share proofs with anyone for review and approval, using just an email address? You are not limited to users with an active Workfront account or who belong to your company—you have an unlimited number of guest reviewers and approvers who can request edits or make decisions on a proof.
A proof in Workfront doesn’t necessarily have to be a document, image, or PDF. Unlike other proofing tools, Workfront supports a variety of file types for proofing, all of which are listed in the article, Supported proofing file types. Depending on your Workfront plan or integrated environment, you may be able to generate a proof from a URL as a screen capture or interactive content as a proof. Your reviewers don't even have to have the software used to create the files—such as Photoshop or Illustrator—installed on their computers to review a proof using Workfront.
So how can you send a proof to a non-Workfront user?Follow these steps to learn how to create a new proof in Workfront and add a guest reviewer and approver to the workflow.
- To attach a new proof to a project, task or issue, navigate to that object.
- From the Documents section, select Add New > Proof.
- Drag and drop your file or browse to select your file from your computer.
- Once the proof has been uploaded, in the Workflow section to the right, there is a text box labeled “Type contact name or email address to add a recipient.” Manually type in the guest user’s email address and then click “Add new recipient” to add the guest to the proof workflow.
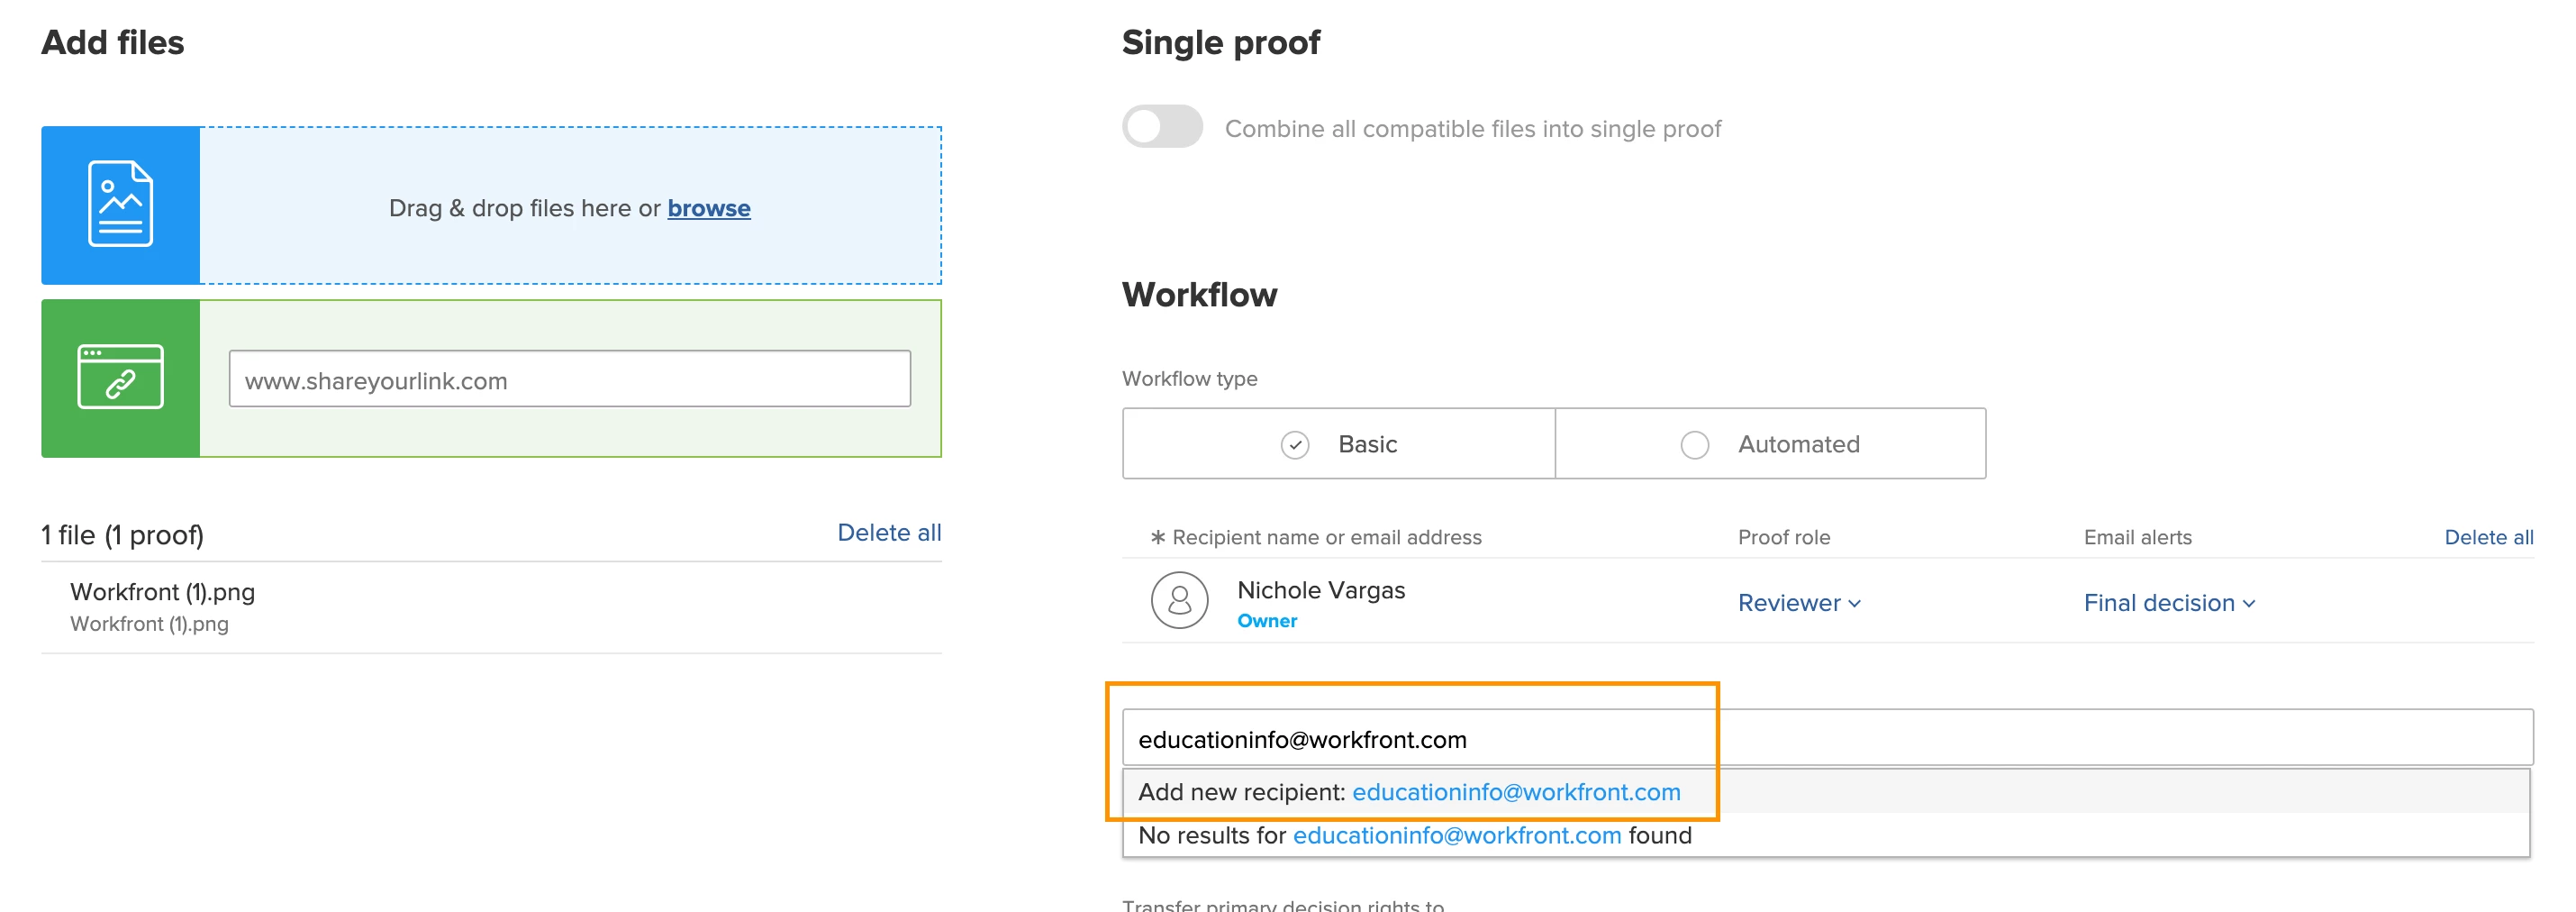
- In the column labeled Proof Role, select which role (reviewer and approver, for example) this guest user should have on the proof. If needed, adjust the guest user’s email alerts.
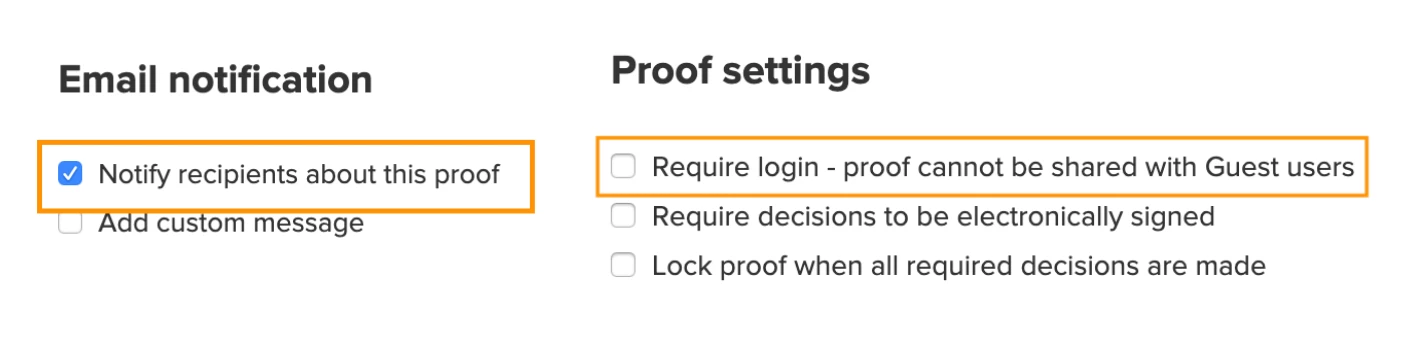
- IMPORTANT: Scroll down to the email notifications setting and make sure “Notify recipients about this proof” is turned on. In the proof settings section, make sure the checkbox for “Require login - proof cannot be shared with guest users” is not selected.
- The remainder of the checkboxes or fields within the workflow, email notification, and proof settings are optional and can be selected based on your organization’s needs.
- Click Create Proof.
- Once the proof has been created, the guest user will receive an email notification stating “You have 1 new proof to review.” If a deadline was added to the workflow, that will be clearly visible in the first line of the email.
IMPORTANT: In the email, the button labeled, Go to Proof, is unique to the user. Anyone who clicks this link accesses the proof as if they were the recipient of the email. Please keep this in mind if you want to forward or reply to the email.
For additional proof tips or best practices, and to hear from John Schuller, one of Workfront’s top proofing experts, register here for our Ask The Expert - Best Practices to Maximize Workfront Proof webinar scheduled for Wednesday, February 26 at 8 AM PT / 4 PM GMT (London).
If you find this post helpful, make sure to “Like” it. To ask questions or to share additional “Did You Know” tips for Workfront proofing users, please post the details in the comments section below and we will reply back!
To share feedback, take the 1-minute survey here.