
Workfront is Simple, Part 1 - Understanding User Management
Workfront offers numerous features and functions to help organizations transition from ad-hoc to strategic work management. It is simple to get started, simple to quickly progress and scale and simple to measure and show value in your work. Knowing where to start, how to identify and streamline current processes, and ensuring all users are on the same page are some of the challenges many system administrators face. The Setup area is where the foundational design of the system is built, but during implementation this part is often handled by a Workfront expert.
To provide you with the building blocks for success, this week will kickoff a Workfront is Simple series starting with the most important aspect — people. Below, user management best practices are broken down by license types, access levels and user organization.
LICENSE TYPES
License types — Plan, Work, Review, Request and External — are the first level of access on a system level. They define what a user can or cannot see or do in Workfront. Every user must have a license type assigned to gain access into the system.
When selecting a license type, take into consideration that user’s role and designated responsibilities. While there are 5 different license types in Workfront, not all are needed. Request and external license types provide limited use, therefore the most commonly used are Plan, Work and Review.
- Plan — Creators, managers and facilitators of work who create and manage the overall project plan, create and manage reports and dashboards, create and manage proof documents and often facilitate the work items at the project level.
- Work — Work fulfillment team members that are updating and facilitating work completion typically at a task level.
- Review — Requesters of new work items, approvers of ongoing work and communicators throughout the work cycle.
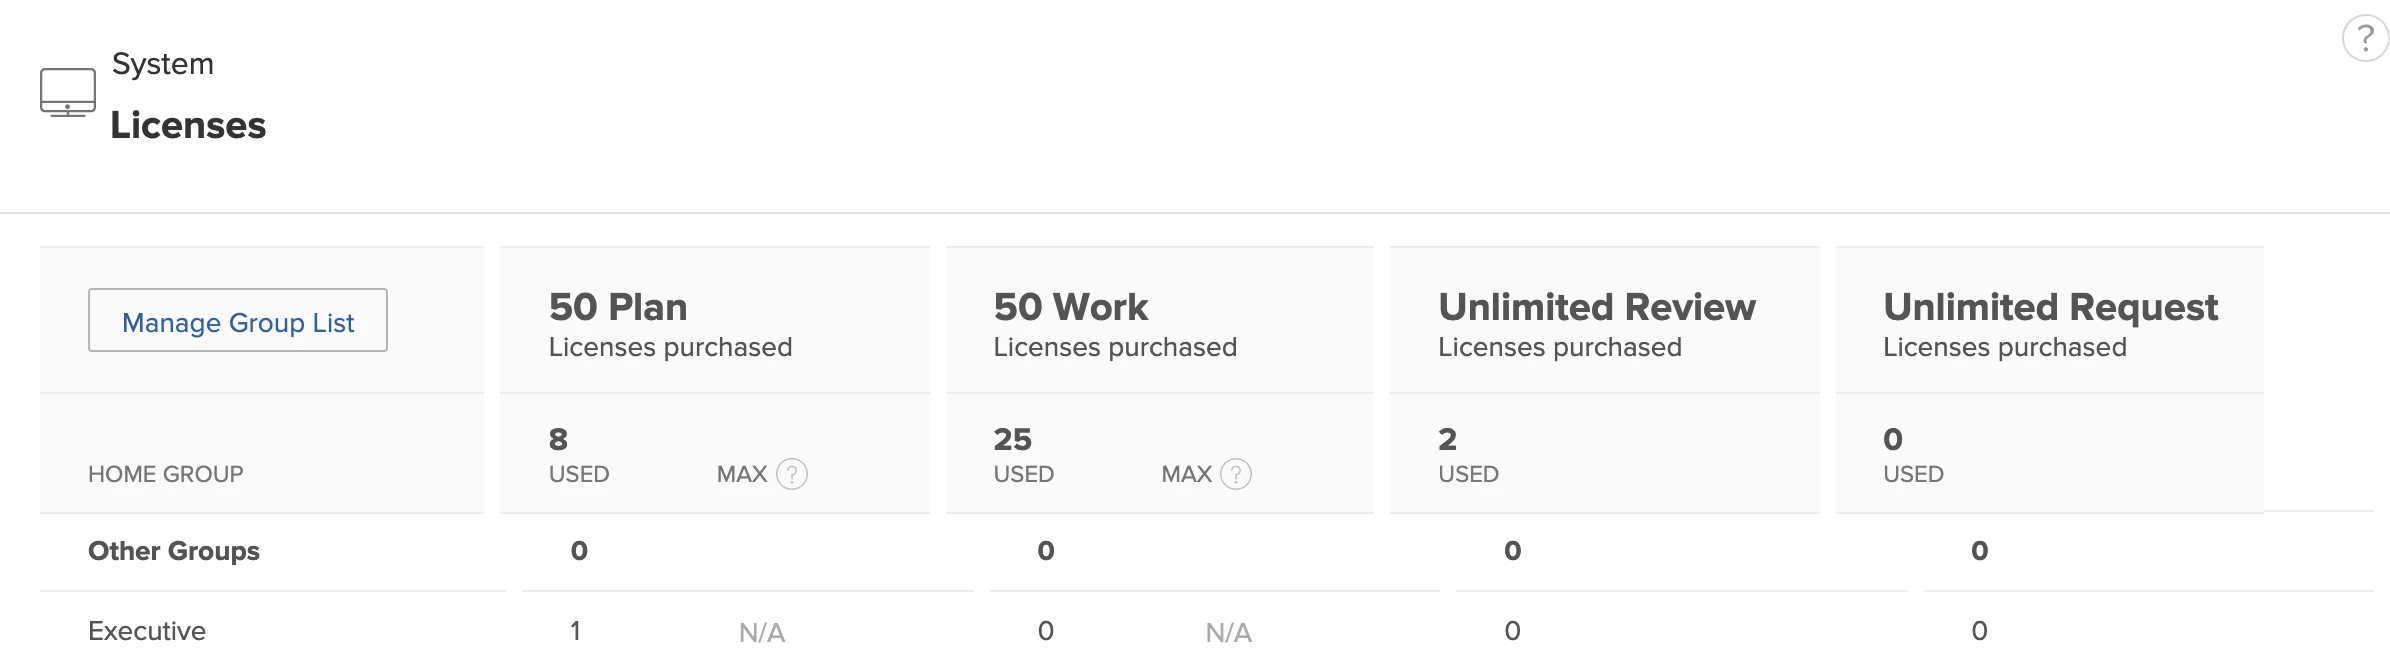
To view your organization’s allocation of license types, click into Setup > System > Licenses or group your user list by license type for a record count or chart view.
Unsure of which license type to assign? The table in the article, Access Levels by License Type, provides an overview of each license and the highest level of access available.
PRO TIP: If potential new users are thinking about getting started in Workfront, immediately grant them a Review license so they can browse and see the overall setup. This license type is limited and no cost, yet offers users the motivation to want to learn more.
ACCESS LEVELS
Access levels and permissions are two separate, but often confused, topics in Workfront.
- Permissions are specific to one item in Workfront and define what actions one can take on that item. You do not have to be a Workfront administrator to grant permissions to items in Workfront. Anyone who can view items in Workfront can grant other users permissions to the items, pending the checkbox for Share is selected under the Additional Settings section.
- User management from the System Administrator’s perspective focuses on access levels. Access levels are the foundation of permissions for users in Workfront, allowing or restricting them to perform certain activities. By default, a user's access level affects which areas are visible to that user in the Global Navigation Bar (Classic) or Main Menu (new Workfront experience).
BEST PRACTICE: Workfront recommends generally that you have 3 System Administrators — and rarely more than that. For larger organizations or those with multiple departments using the application, we encourage the use of Group Administrators.
To get you thinking about how to best assign application access to your users, review the recommended profile access settings in the article, Access Levels by License Type.
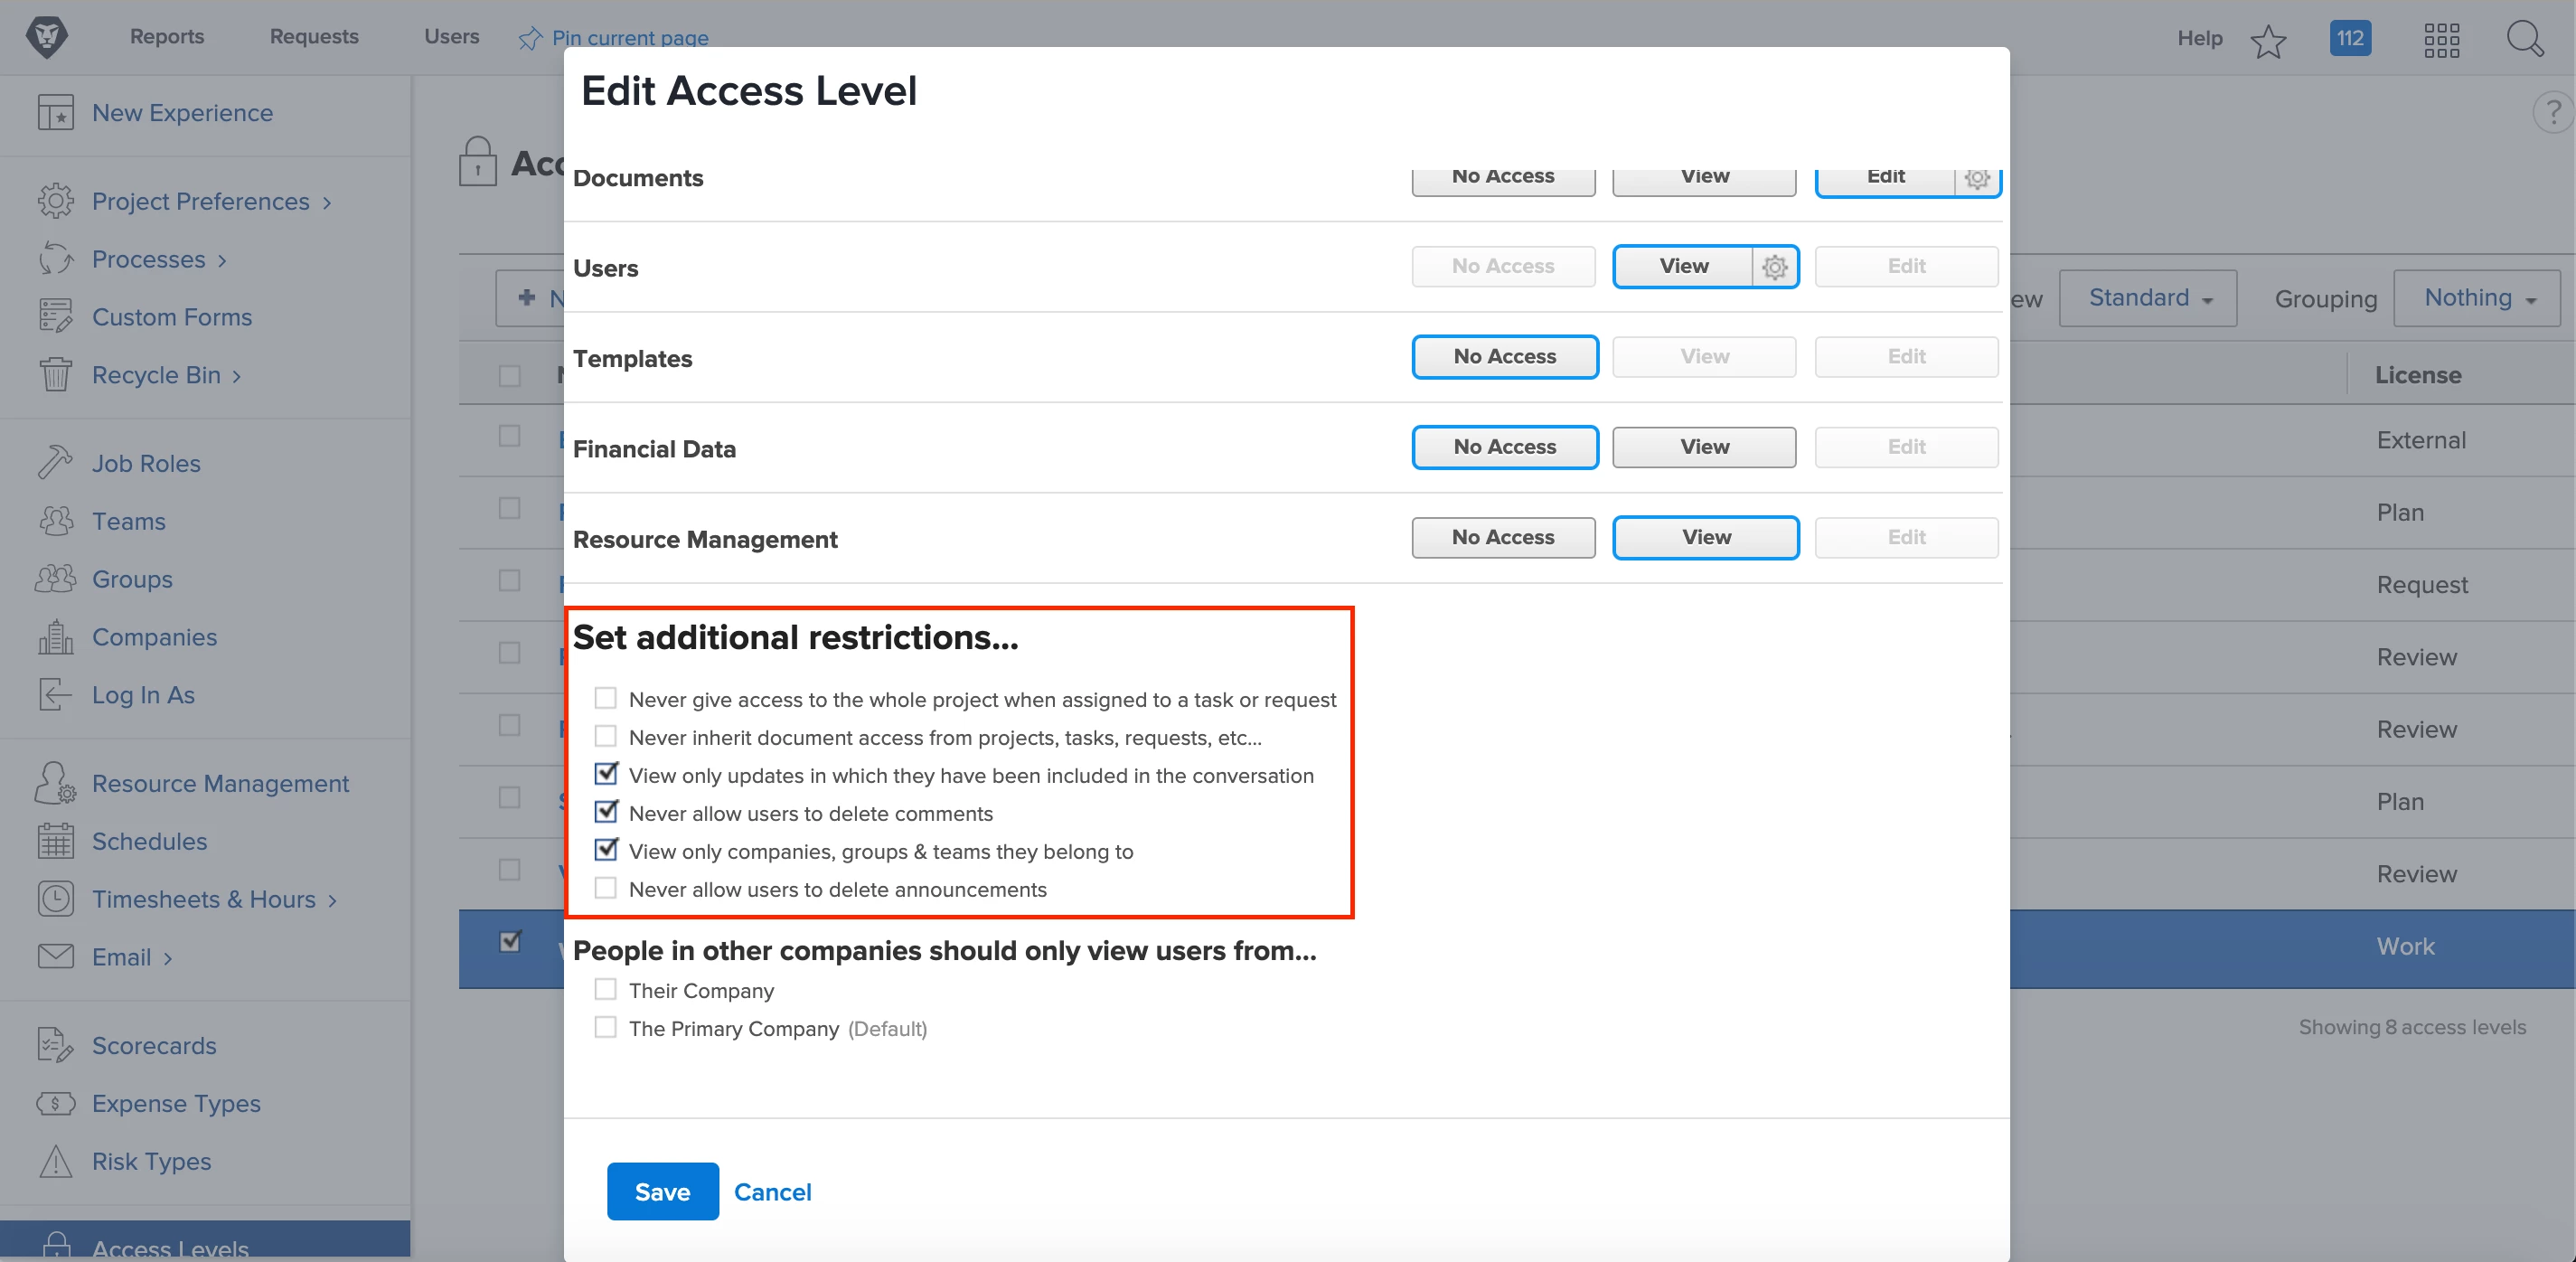
PRO TIP 1: Once you have defined your access levels, make sure you go through the additional restrictions section to ensure that appropriate checkboxes are selected, most notably “Never allow users to delete comments.”
PRO TIP 2: Create user templates to simplify on-boarding. Follow the steps below to learn how.
- From the Users area, create a new user.
- Replace the First Name and Last Name fields with the name of your job role — for example, Copy Editor would be first name Copy, last name Editor.
- Assign a request license to avoid using a paid license.
- Enter a description of the intent of this profile along with the appropriate access level that is needed when the new user is created.
- Leverage these templates when new users are needing to be added by applying custom views in the Users area that include First Name and Last Name or by utilizing the filter icon to quickly search.
USER ORGANIZATION
Using companies, groups, teams and job roles, you can define the overall structure of your company and determine how team members will collaborate. Below are best practices and recommendations for getting started in successfully organizing your user base via Setup.
- Define your company at the highest level to which a user will report.
- Create a single company for all users or set up multiple companies to segment regions, countries or lines of business in which users will not cross-report.
- Users can only be associated with one company, so make sure every person has a company added in their personal profile.
- Use groups to segment departmental divisions, different cost or buying centers or even to align multiple teams with a united function.
- All users should have a Home group and related Other groups associated in their profile.
- Can be used to grant access to projects, reports, dashboards, etc. at the group level and to manage layout templates.
- Create Group Administrators to help share responsibilities and manage license counts — for example, maximum number of licenses per group.
- Use teams to distribute the working structure of your day-to-day departmental users; these may or may not directly align to your organizational hierarchy, based on workflow.
- All users should have a Home team and related Other team associated in their profile.
- Can be assigned work and notified if the email notification for “My team gets a new work request,” found under Action Required, is toggled on.
- Able to be tagged in an update and receive notifications, pending the email notification for “Someone includes my team on a directed update” is toggled on.
- Can be used to grant access to projects, reports, dashboards, etc. at the team level and to manage layout templates.
- Best used in routing rules and approval processes.
- Use job roles to define a functional capacity or skill set a user may fill, for example Product Manager. They are not meant to be job titles, but to describe what work will be done within the role.
- Every user should have a Primary Role associated in their personal profile. If secondary roles are needed, limit to 3 or less.
- Can be used as placeholders for work assignments to help with accurate forecasting and allocation as part of resource planning. These placeholders will not trigger email notifications to users with a matching job role.
PRO TIP: To check and see if any users are missing these critical pieces of information, create a User Report and add the columns for Company Name, Home Group Name, Home Team Name, and Job Role Name. Apply conditional formatting to any cell that is blank so that you can easily see those requiring attention, as seen here.
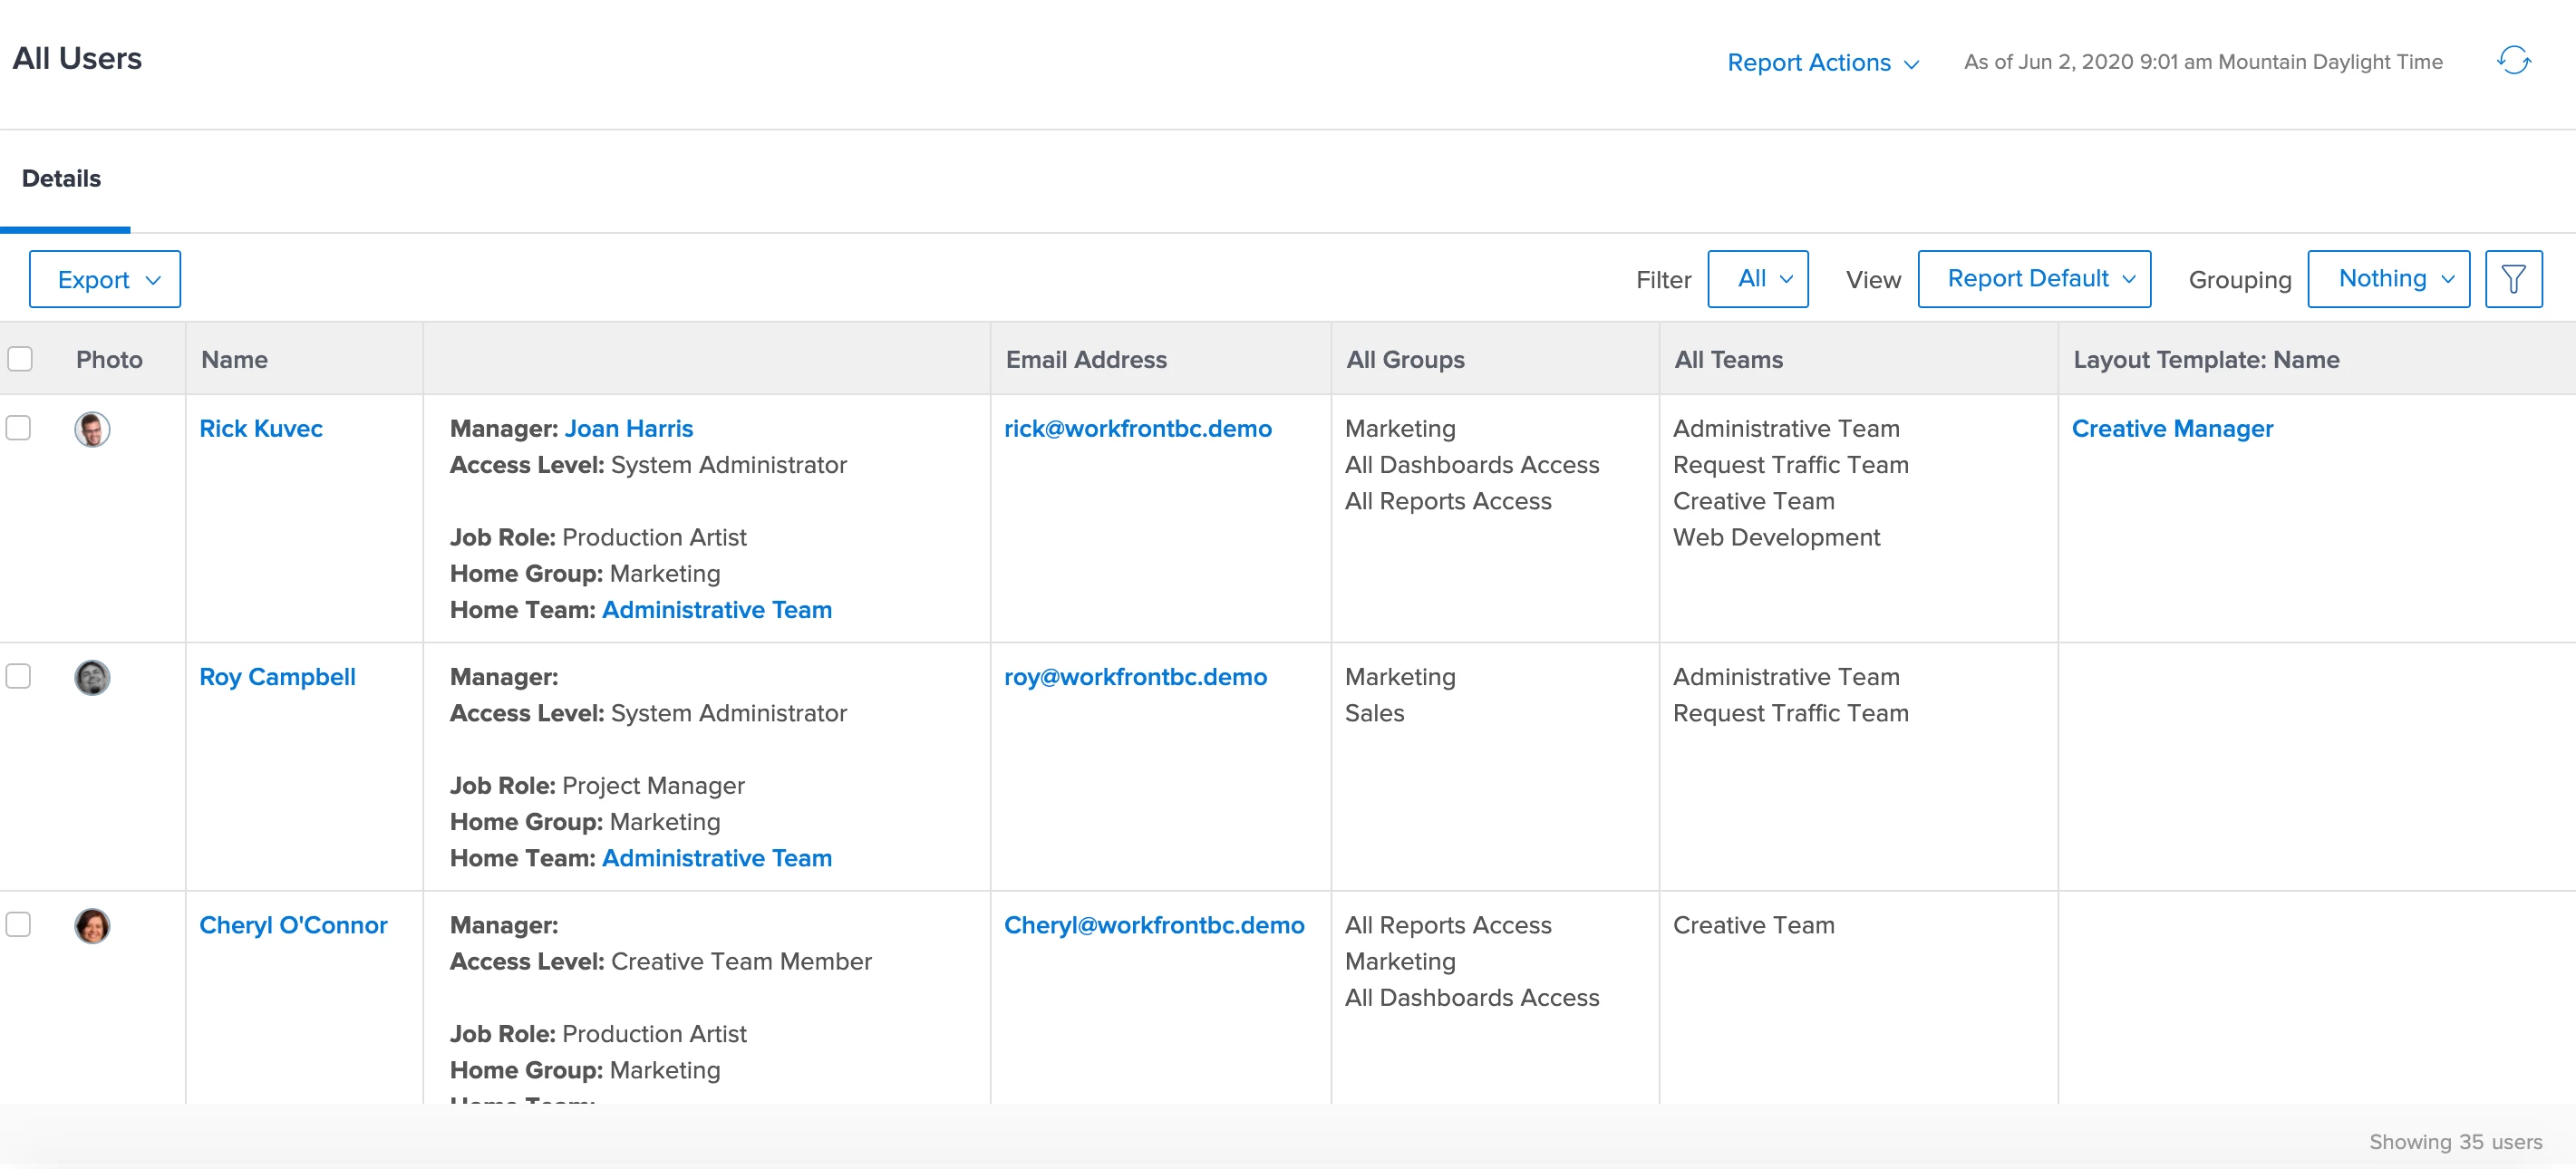
For a more detailed view of each user, create a report like the one below with multiple shared columns. To recreate this in your instance, reach out to the Customer Success at Scale team via email and we will share the text mode.
In order to make all of the above function and flow most effectively, set up a governance process. A governance process creates, manages and maintains your licensing, access, companies, groups, teams and job roles. Stay tuned for upcoming content on this important topic!
To connect with other system administrators on best practices around user management, post a question in the Community forum on Workfront One.