
How to manage metadata before and after migrating to AEM Assets?

After purchasing Adobe’s Digital Asset Management solution, metadata is the most critical aspect while starting your asset management journey. Managing metadata gets completely out of the control of the administrators once the assets are distributed to the users. Effective asset metadata ensures better search, which is the ultimate destination for any DAM tool.
Here are the recommended steps that you must execute before starting to migrate your assets to AEM:
Step 1: How would you filter the assets that exist in the repository? Answer this question and create the list of fields that you need.
Think about your users on how they will search assets that exist in the repository and then work backward to create such properties for your assets.
Step 2: Revisit all existing properties and eliminate redundant ones
Look for properties that seem irrelevant or duplicates of the existing properties and remove them from the list of required properties for Adobe’s DAM.
Step 3: Segregate the properties that are displayed and the ones that are hidden or read-only.
After creating the list of properties and getting rid of the redundant ones, take a decision on the properties that the users would need to modify and mark the rest as read-only or hidden. We will see how you can make these properties read-only or hidden in AEM Assets later in this article.
Step 4: Create mappings between the old and new properties (n:1, 1:n)
Think about whether multiple properties can be combined into one property to reduce the number. Similarly, if you need multiple properties from a single one.
For example, there may be multiple fields with IDs that might not be useful to the users anymore. You can combine the values in these fields into one field, label it as legacy IDs, and then make it a read-only field so that the users can still search assets using these IDs.

Step 5: Create Logical groups of properties
Your final list of asset properties that you need in AEM Assets should be ready now. The next step is to create a list of properties that are generally related and should be there together in AEM Assets as well. For example, you would want to group informational metadata such as title, and description together and technical information, such as file size, format, and resolution together. Similarly, you can group administrative metadata, such as asset ownership, and usage rights together.

Step 6: Use controlled vocabularies — drill down to property level to decide between tags, drop-down list, or rule-based metadata
Always prefer controlled vocabularies ahead of any text property. It ensures that the users select an appropriate value from the list of available values rather than specifying a value that is not as per the metadata strategy defined by the administrator. You can choose between tags, a drop-down list, or use rule-based metadata to enforce controlled vocabularies within an asset property. See Convert the properties into tags or drop-down list for controlled vocabularies section of this article to know more on how to implement controlled vocabularies in AEM Assets.
Step 7: Use metadata standards for common properties
Mapping common metadata fields, such as title, creator, and Document Summary, to standardized properties such as Dublin Core (DC) helps ensure consistency, interoperability, and discoverability of information across different systems, platforms, and industries. Some other benefits include:
- Improved searchability and discoverability
- Metadata reusability and data exchange
- Compliance with industry standards
After executing these steps, you are good to start metadata management within AEM. Here are the most recommended tips and tricks:
Step 1: Start creating a metadata schema and convert those logical groups of properties into tabs
Start adding the logical groups that you created in Step 5 above in AEM. Analyze if you need the Basic and Advanced tabs available in the default schema. If not, delete them and create your tabs, name them appropriately, and add the logical group of fields to each tab. You can also rename the existing tabs, delete the existing fields in those tabs (if you do not need them), and add fields that you need to the tabs.
See all of this in action in this quick video:
Step 2: Make the properties read-only that do not require user inputs
As you have already segregated the fields that require user intervention. You can edit the field properties and make the fields read-only that do not require user intervention but you want to retain them for better search.
See how to do that in AEM Assets in this quick video:
Step 3: Convert the properties into tags or drop-down lists for controlled vocabularies
If the properties need user inputs and cannot be made read-only, try to convert fields so that the user selects one of the available options (controlled vocabularies). You can either use a tags-based approach for the users to select one of the existing tags or use drop-down lists.
Learn how to edit the metadata form to include Tags and drop-down lists.
For more information on how to manage tags, see this article.
Step 4: Use Smart Tags and blocklist capabilities
Smart Tags uses the artificially intelligent framework of Adobe Sensei to train its image recognition algorithm on your tag structure and business taxonomy. This content intelligence is then used to apply relevant tags on a different set of assets. AEM Assets automatically applies smart tags to uploaded assets, by default.
You can drag the Smart Tags component to your metadata form to view the auto-generated tags for the uploaded assets.
For more information on Smart Tags, see this article.
AEM Assets also enables you to configure a blocklist that includes words that should not be added as Smart Tags to assets when they are uploaded to the repository. This capability helps you to maintain brand compliance and reduces the effort to moderate Smart Tags. For more information, see this article.
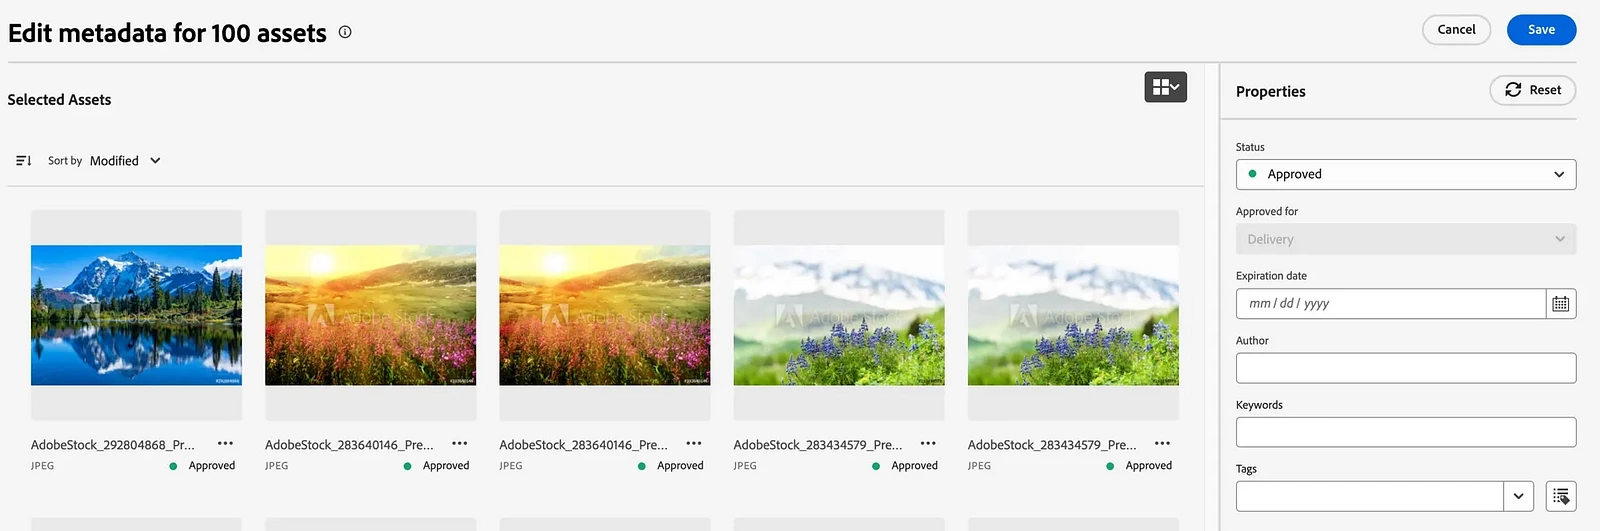
Step 5: Use Bulk metadata edit to save time
The Bulk Metadata Edit feature within the AEM Assets allows users to edit a predefined set of standard metadata fields for multiple asset files simultaneously. Select multiple assets and bulk update their predefined set of standard metadata at once rather than updating that standard metadata for each asset individually. This feature enhances the efficiency, consistency, and accuracy of standard metadata properties across a large set of assets, improving asset searchability and organization.
For more information, see this article.
Step 6: Elevate a keyword for an asset for better search results
You can improve the relevance of keywords for particular assets to help boost searches based on the keywords. In other words, the images for which you promote specific keywords appear at the top of the search results when you search based on these keywords.
Learn more on how to elevate a keyword for an asset for better search results.