Abstract
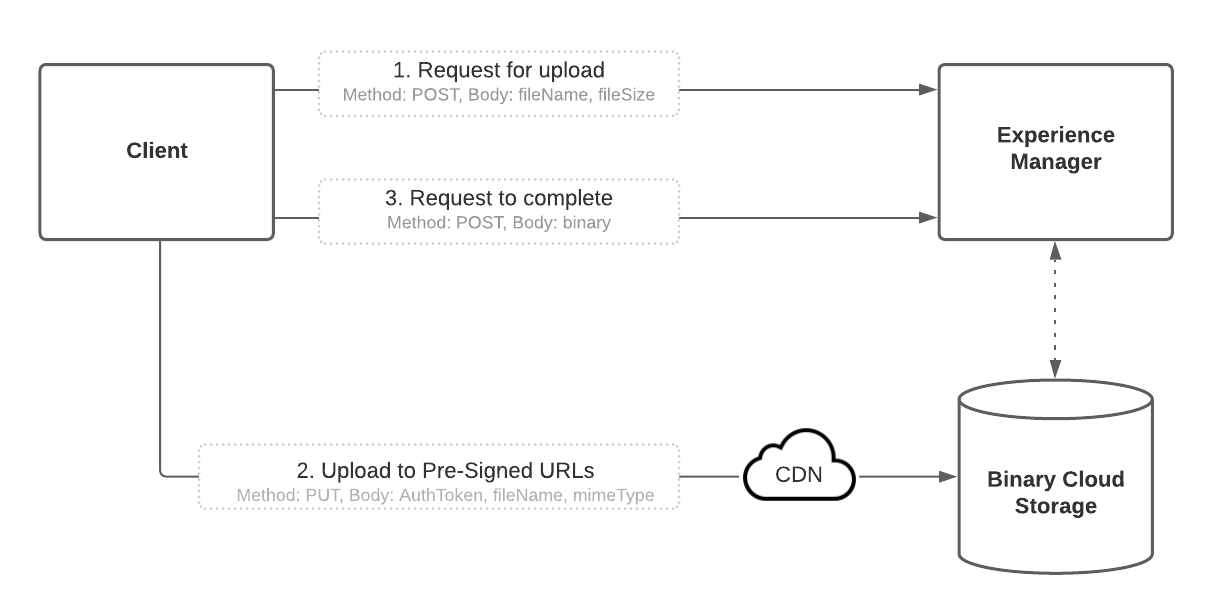
In AEM as a Cloud Service, image processing has been moved to the Asset Compute Microservice. Binary files are uploaded directly to blob storage instead of streaming through the AEM JVM.

In this post, I explain how to get started with the asset upload HTTP API. I review and demonstrate the below-illustrated steps ( 1, 2, and 3) using Postman as a client application.

Note: The Asset Upload HTTP API only works on Cloud Service, not for local SDK
Note: Adobe provides the AEM Upload tool to make uploading easier, and can be used as a command-line executable or required as a Node.js module.

Asset Upload
Note: Before you begin, create a user in AEM with sufficient permission to upload assets and create a folder within the asset dam to upload to. For the sake of demo and simplicity, I am using the basic authentication but Service Token base authentication is the preferred method.

1. Make a request for upload to AEM
The first step in the sequence is to make a request to AEM, relaying the intent to upload files. This requires authenticating with AEM and providing details about the assets you intend to upload (e.g. file name, file size).

The URI format for this POST call is:
https:///content/dam/.initiateUpload.json

Add Basic Auth Credentials
Read Full Blog
Q&A
Please use this thread to ask the related questions.
Kautuk Sahni
