

Workfront Wednesday: Did You Know? 19.4 Release Highlights
Did You Know? 19.4 Release Highlights
Features included in the 2019.4 product release from Workfront make managing custom forms easier, help you find tasks faster, and let you visualize user’s time off on a calendar.
Here are some of the highlights of the release, which will be available to all customers starting Friday, Nov. 15. For information about all of the features included with the 2019.4 release, see the product release overview.
Deployment of the 2019.4 release begins today, Nov. 13. Watch trust.workfront.com for all updates.
Change custom field types
Have you ever created a custom checkbox field only to realize it should have been a drop-down menu? And then had to create a brand new field with the same info? Well, you don’t have to do that anymore.
You can now switch a field’s display type to another, similar display type to prevent duplicate fields and make custom data more manageable.
For more information on changing the display type, see the “Create and add a field” section of the Create a Custom Form article.
Filter lists on the Typeahead field
The Typeahead field in custom forms helps eliminate the need to manually maintain many options in drop-down fields. Sometimes those lists need to be narrowed down to the person filling in the field or to the custom form’s object, like a project or request. To help users provide relevant information faster, a filter, created through text mode, can be added to the Typeahead field.
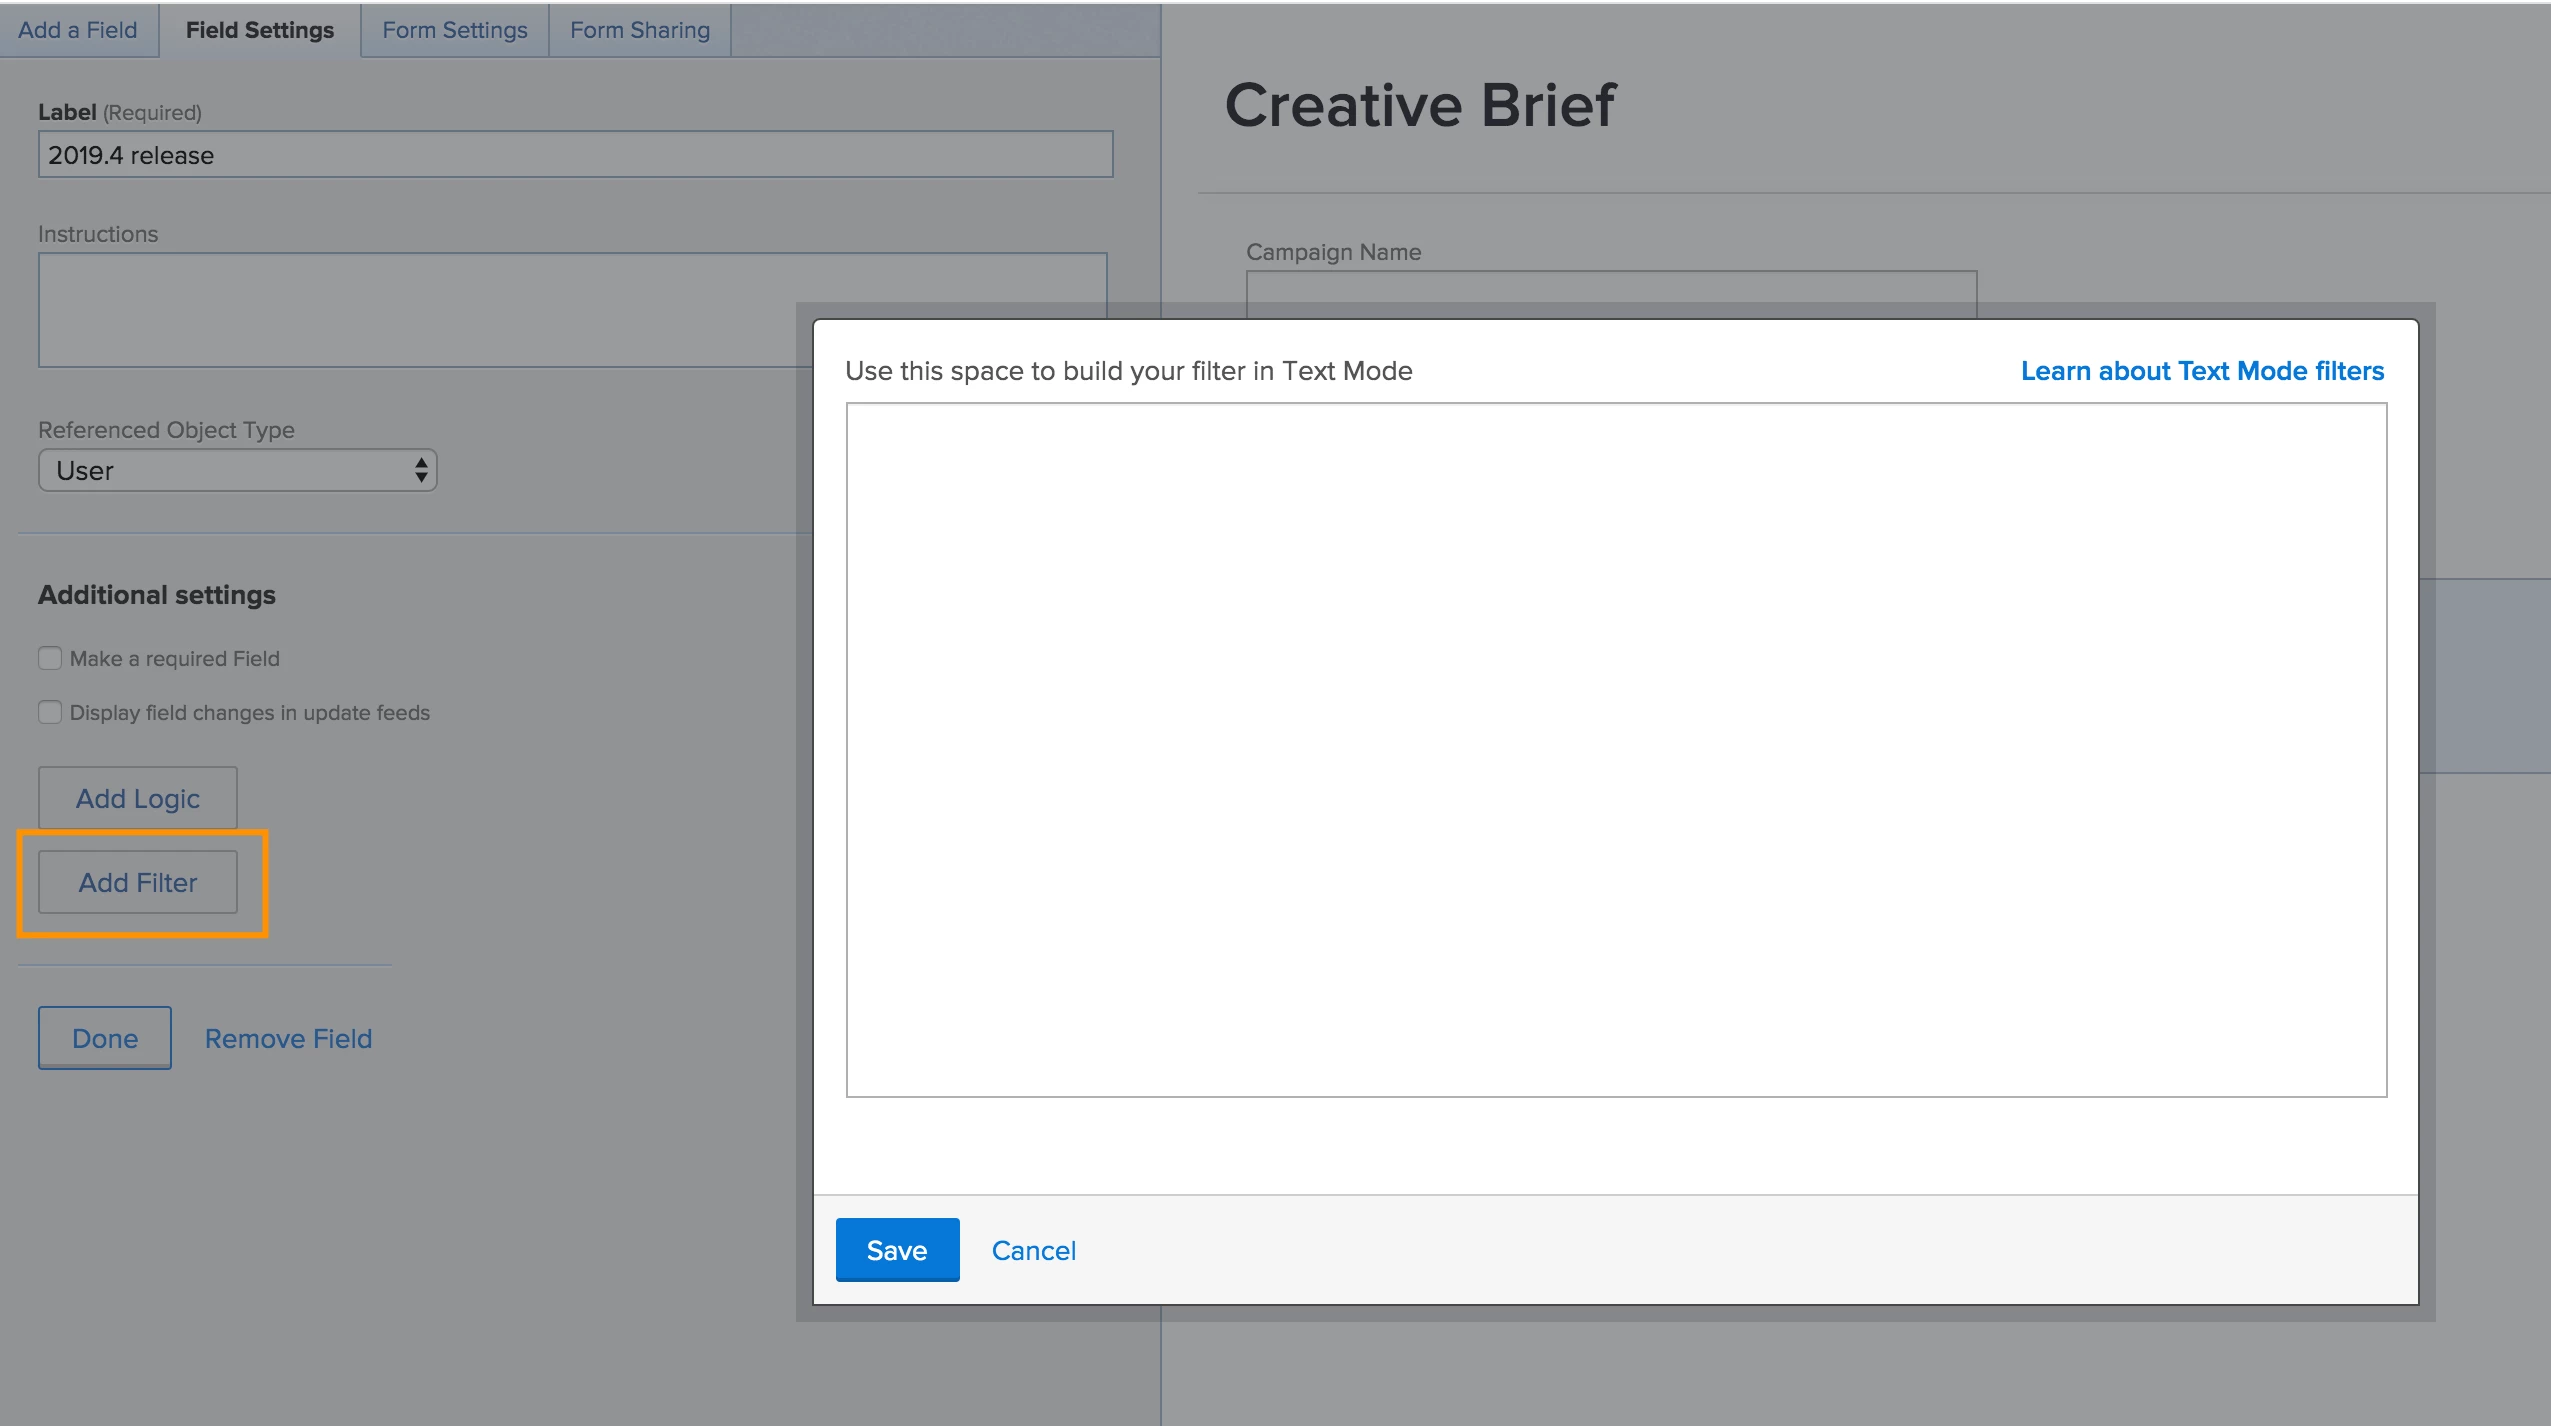
For instance, a Typeahead field titled “Marketing Approvers,” without a filter, will show every user in the system. With a filter, the list of options can be narrowed down to just approvers in the Marketing department.
For more information on adding a filter to a Typeahead field, see the “Create and add a field” section of the Create a Custom Form article.
Shortcuts for quick filter
Quickly filter content within a list using keyboard shortcuts. Alt+F (Windows) or Option+F (Mac) opens and puts the cursor in the quick filter box, allowing you to immediately start typing your search term.
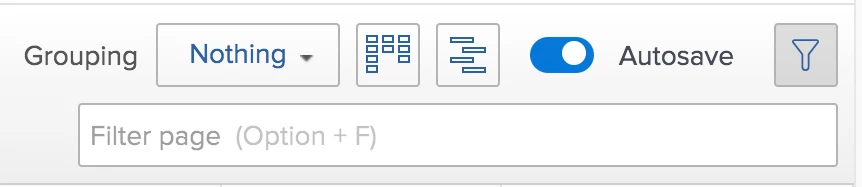
Hit Esc to close the quick filter search box and reset the filter.
Note: If you’re using Internet Explorer on Windows, the keyboard shortcut is Alt+Shift+F. Check the browser requirements to see which version of Internet Explorer, and other browsers, is supported by Workfront.
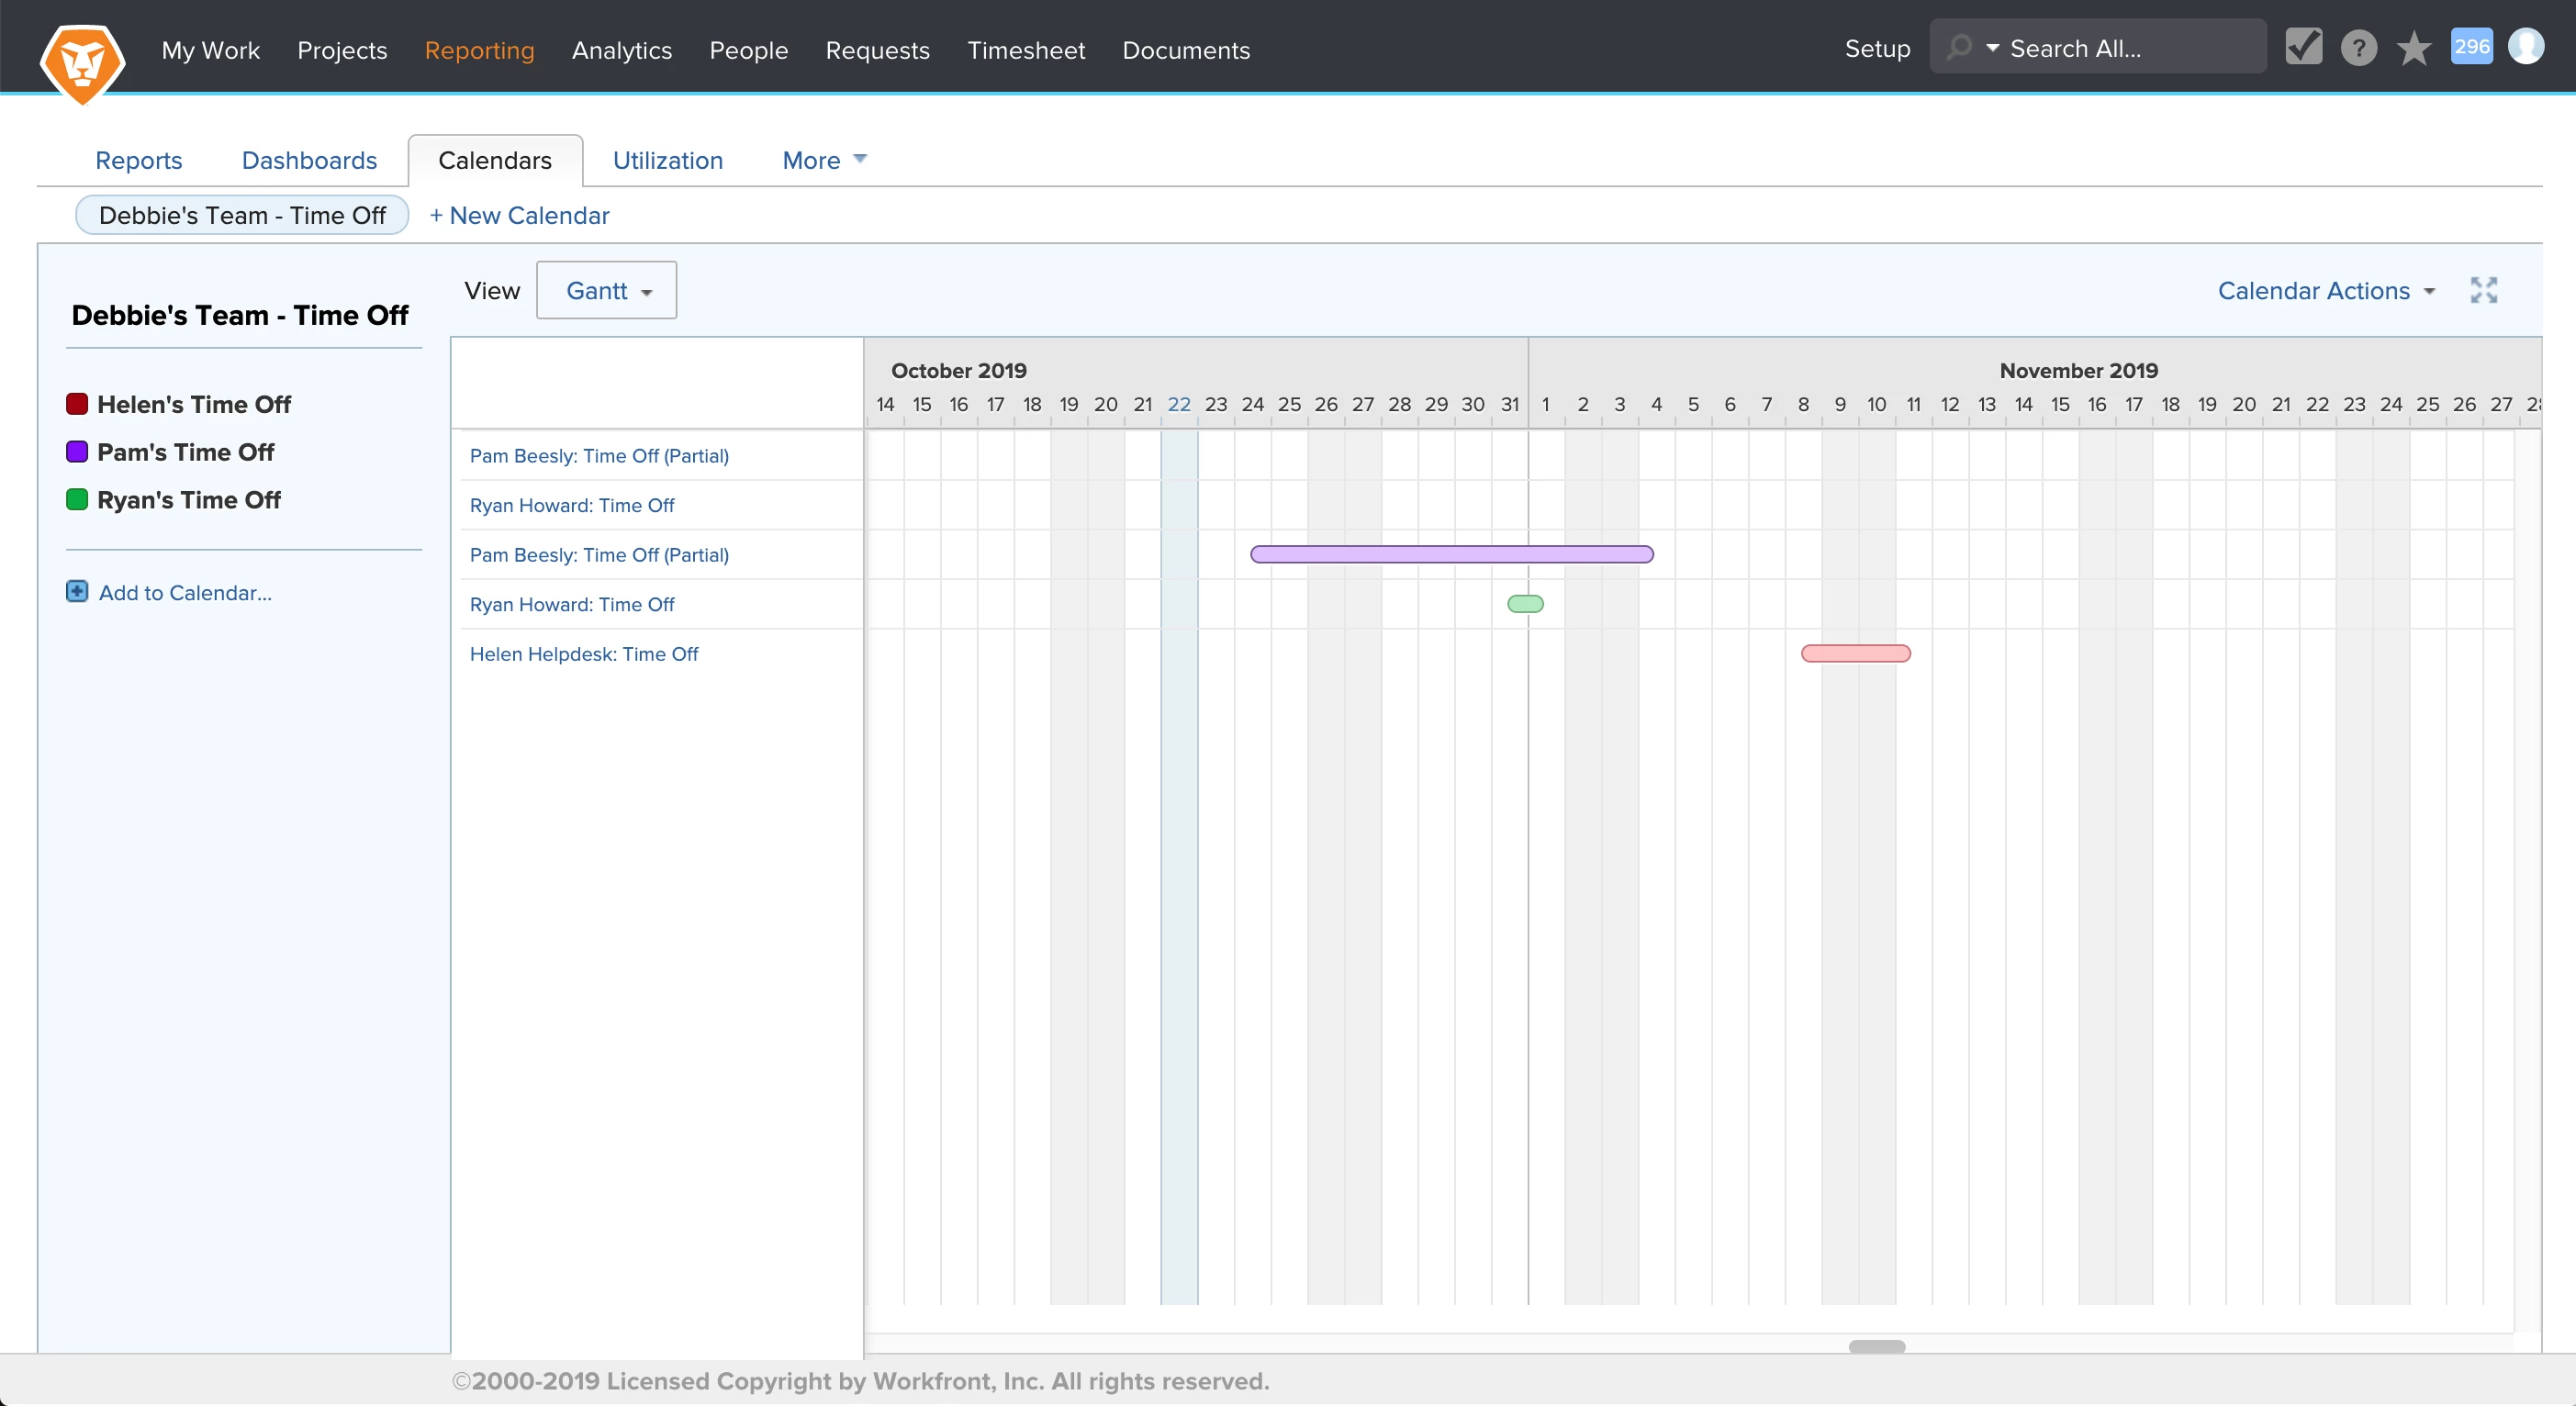
Custom calendar can show time off
Workfront provides a way for you to specify your time off with the Personal Time Off feature in your user profile. This alerts project managers that you’re not available and allows planned completion dates to automatically or manually adjust, as needed. (For information on how to indicate your time off in Workfront, see Understanding Personal Time.)
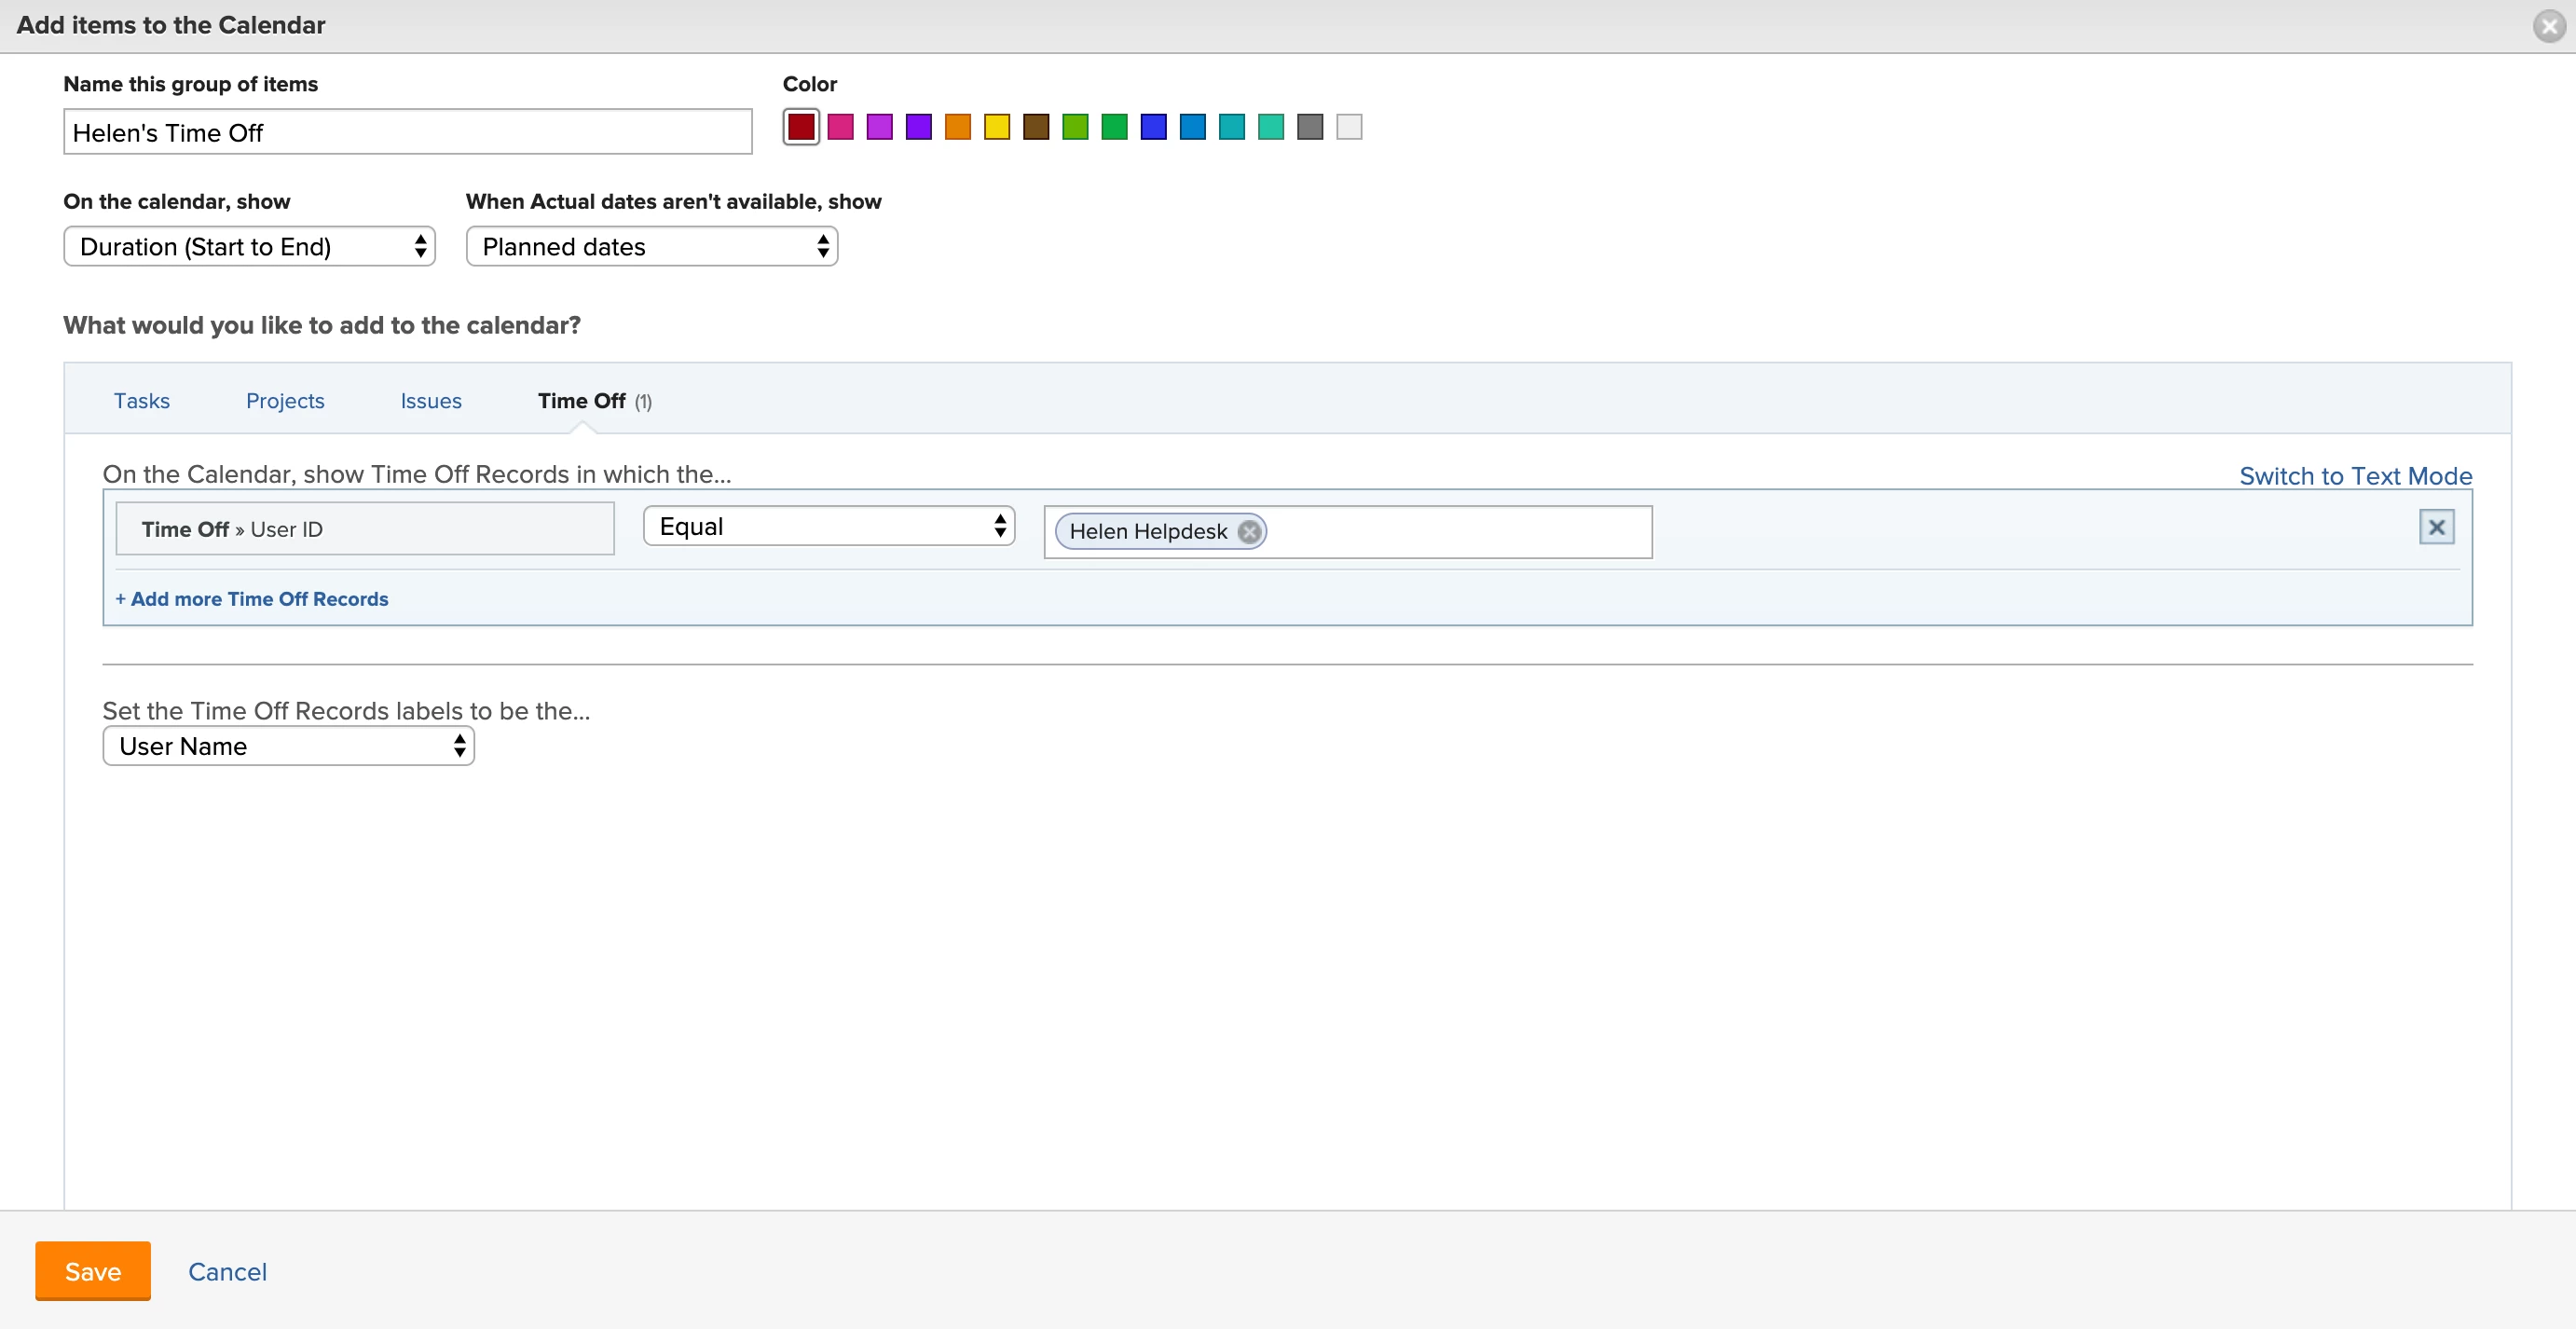
In the Calendar reporting area, you can create a calendar view showing these time off entries. You may already know how to create a calendar showing projects, tasks and issues. If not, you can find out how in this article: Working with Calendar Reports. Creating a time off calendar is very similar.
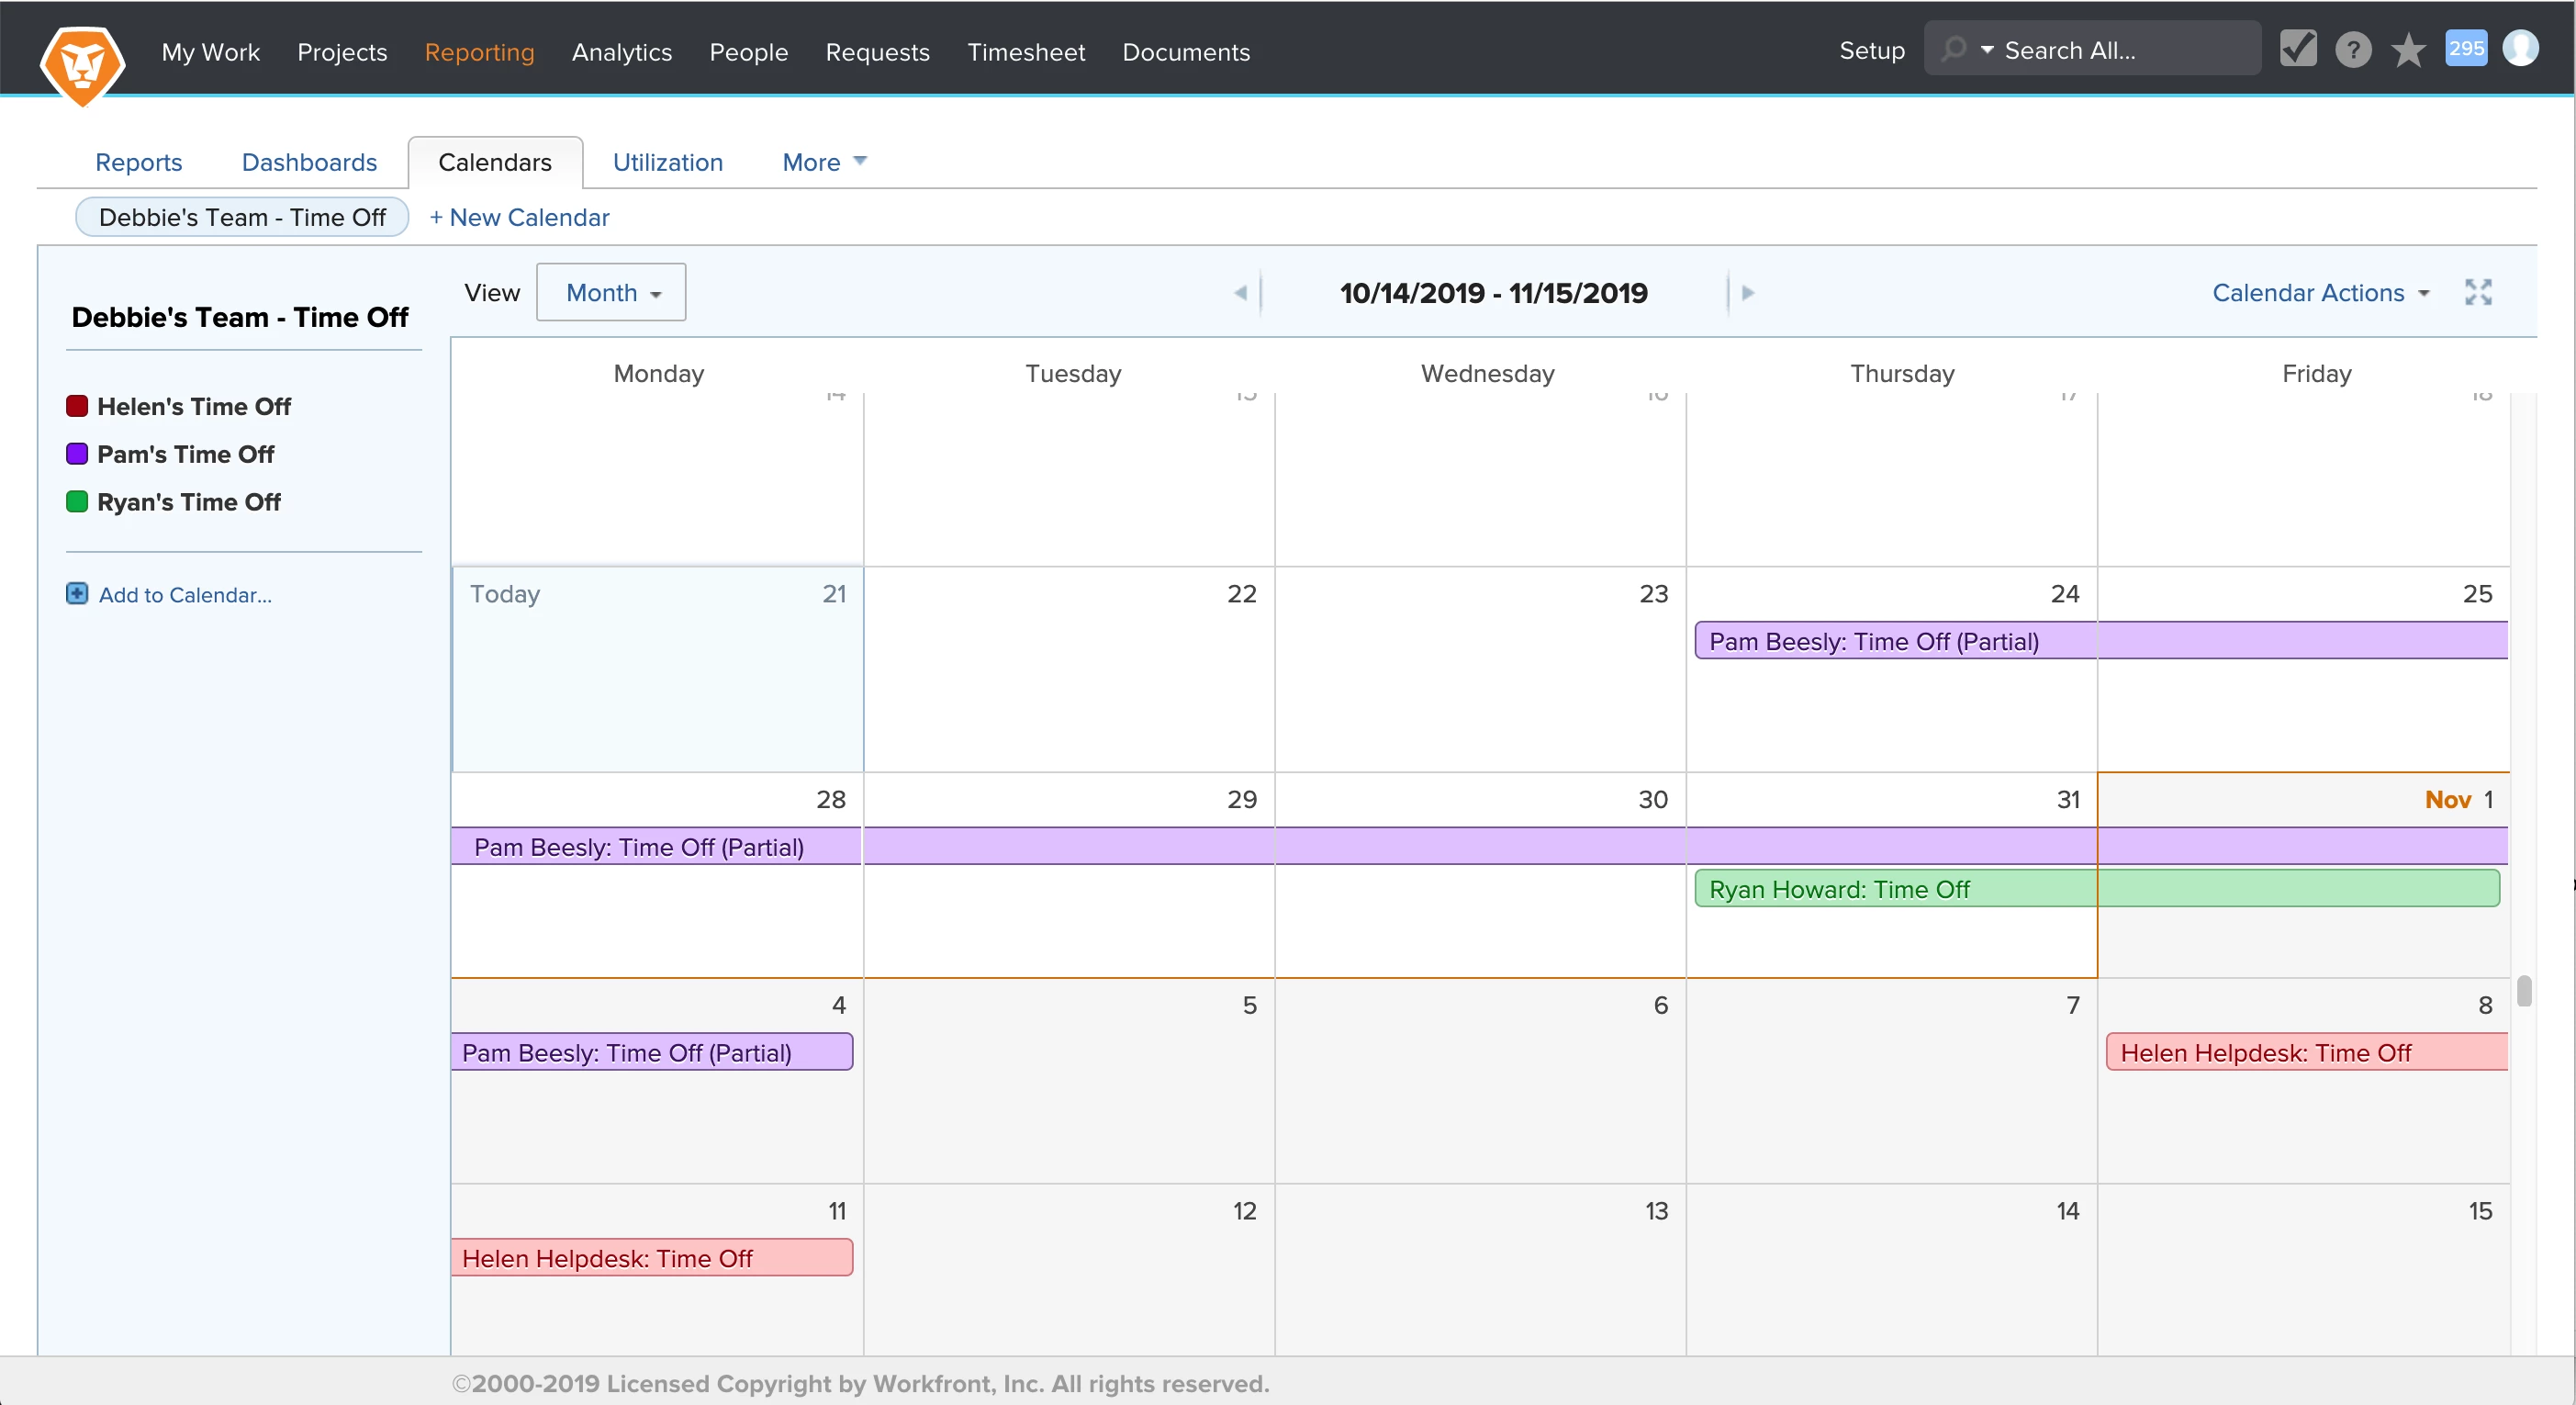
To create a calendar for a particular person, click Add to Calendar in the left panel, then click Add advanced items. Then you can create a calendar like the one below, using the color of your choice. Choose Duration (start to end) for what to show. For the filter, set the User ID to the team member’s name.
After you’ve created your calendar, try changing the View option to Gantt to see which view you like better.
Other features
Other 2019.4 features include improvements to the mobile app; a new app for iPad; and updates to the Workfront for Adobe Creative Cloud extension. See the product release overview for details.
Make sure to “Like” this post if you found it helpful! If you have any questions regarding the release, please post the details in the comments section below and we will reply back.