Hi,
As Arun Patidar suggested you can write a listener and call a servlet using AssetManager API to implement your functionality.
Here's is how we implemented the same and were able to upload the asset to DAM as we uploaded it to the image component.
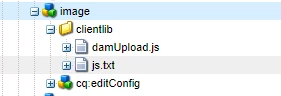
We are using the OOTB Image component and adding a listener file to get the asset and call a servlet. Here is the listener file that we used:
function damUpload() {
var imgPath = $(".cq-FileUpload-thumbnail-img img").attr("src").split('image')[0];
var imgName = $(".cq-FileUpload-thumbnail-img img").attr("title");
var data = 'imgPath=' + imgPath + '&imgName=' + imgName;
$.ajax({
type: 'POST',
url: '/bin/updamfile',
data: data,
success: function(msg) {
}
});
};
$(document).ready(function() {
$(document).on("click", ".cq-dialog-submit", function() {
damUpload();
});
});
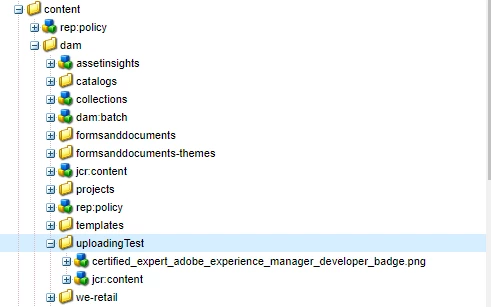
The servlet will create the asset in dam under the path "/content/dam/uploadingTest/" . Here's the servlet:
import java.io.IOException;
import java.io.InputStream;
import java.rmi.ServerException;
import javax.jcr.Node;
import org.apache.felix.scr.annotations.Reference;
import org.apache.felix.scr.annotations.sling.SlingServlet;
import org.apache.sling.api.SlingHttpServletRequest;
import org.apache.sling.api.SlingHttpServletResponse;
import org.apache.sling.api.resource.ResourceResolver;
import org.apache.sling.api.resource.ResourceResolverFactory;
import org.slf4j.Logger;
import org.slf4j.LoggerFactory;
@SlingServlet(paths = "/bin/updamfile", methods = "POST", metatype = true)
public class HandleDamFile extends org.apache.sling.api.servlets.SlingAllMethodsServlet {
private static final long serialVersionUID = 2598426539166789515L;
// Inject a Sling ResourceResolverFactory
@Reference
private ResourceResolverFactory resolverFactory;
@Override
protected void doGet(SlingHttpServletRequest request, SlingHttpServletResponse response)
throws ServerException, IOException {
}
@Override
protected void doPost(SlingHttpServletRequest request, SlingHttpServletResponse response)
throws ServerException, IOException {
try {
String imgPath = request.getParameter("imgPath");
String imgName = request.getParameter("imgName");
imgPath = imgPath.replace("_jcr_content", "jcr:content") + "/image/file";
Node imgNode = request.getResourceResolver().getResource(imgPath).adaptTo(Node.class);
final InputStream stream = imgNode.getNode("jcr:content").getProperty("jcr:data").getStream();
// Save the uploaded file into the Adobe CQ DAM
uploadToDam(stream, imgName, request.getResource().getResourceResolver());
}
catch (Exception e) {
e.printStackTrace();
}
}
// Save the uploaded file into the AEM DAM using AssetManager APIs
private void uploadToDam(InputStream is, String imgName, ResourceResolver resourceResolver) {
try {
// Use AssetManager to place the file into the AEM DAM
com.day.cq.dam.api.AssetManager assetMgr = resourceResolver.adaptTo(com.day.cq.dam.api.AssetManager.class);
String newFile = "/content/dam/uploadingTest/" + imgName;
assetMgr.createAsset(newFile, is, "image/jpeg", true);
LOG.info("asset created");
} catch (Exception e) {
e.printStackTrace();
}
}
}
Here are some screenshots for better understanding:
1. The image component:

2. The asset created under the mentioned path after successful implementation:
Hope this helps!
Regards,
TechAspect Solutions