  • 340 Product updates
New: Workfront Fusion connector — manage Fusion from your scenarios

New: Workfront Fusion connector — manage Fusion from your scenarios

You can now access your Fusion objects from inside a scenario. The new Workfront Fusion connector lets scenarios call Fusion’s own API to create, inspect, modify, and operate Fusion resources.OverviewThis release introduces a first‑party Workfront Fusion connector that exposes Fusion APIs directly inside the scenario canvas. Use it to back up or clone scenarios, inspect dependencies, export activity logs, and gather operational telemetry — all as part of your automation flows.What’s newFull record lifecycle — Create, read, update, delete, list, and clone Fusion records from scenarios. Dependency insights — Retrieve a record’s dependencies so you can understand or safely update resources that are referenced elsewhere. Activity exports — Export activity logs for auditing, troubleshooting, or archival workflows. Queue and hook visibility — List hook queues, read queue items, and get queue statistics to monitor trigger backlogs and failure patterns. Connection & scenario mapping — List scenarios that reference a specific connection to find downstream impact before making changes. Regions & orgs — Enumerate the Fusion regions and organizations available to your authenticated identity.Included API v3 changes (September 2, 2026)This connector includes the latest public API v3 additions and a set of modified responses and request behaviors. Highlights: Why this mattersPlatform and Ops teams can now incorporate Fusion administration directly into automation pipelines. Common use cases include:Automated provisioning of scenarios in CI/CD flows. Org-wide impact analysis by enumerating which scenarios reference a connection before rotating credentials or removing an integration. Operational monitoring by exporting activity logs and queue statistics into observability or ticketing systems for alerting and root cause analysis. Safe cloning and versioning workflows that capture or continue processing state with the new clone options.How to get startedOpen Fusion and create or edit a scenario. Add the new Workfront Fusion connector module to your canvas and create a connection (it authenticates to Fusion using the same pattern as other first‑party connectors). Choose the operation you need (for example, List scenarios, Clone scenario, Get hook queue statistics, Export activity logs). Map inputs and outputs into your scenario flow — for example, list scenarios that reference a connection, iterate, and notify owners or disable impacted scenarios. Test in a non‑production org or team, then publish and schedule or trigger as required.Where to find documentationSee Experience League for full API references, connector documentation, and examples:Workfront Fusion connector documentation Workfront Fusion public API v3 referenceNeed help or want to give feedback?If you have questions, encounter issues, or want to suggest improvements (for example, bulk scenario cloning options, richer dependency graphs, or additional admin endpoints), please:Post a comment on the Experience League article Start a thread in the Experience League Community Contact Adobe Support through the Admin Console Support portalYour feedback helps us prioritize future enhancements. 

View unsuccessful executions across your org with the new Insights page

View unsuccessful executions across your org with the new Insights page

New: A faster way to see what broke — Failed Executions Logs in the Insights dashboardWhen multiple scenarios fail across your org, tracking down how many, which ones, and why used to mean opening scenarios one-by-one. The new Failed Executions Logs widget surfaces every failed execution across every scenario in a single table so you can triage incidents fast, at scale.OverviewThe Failed Executions Logs widget lives on the new Insights page (which now also contains the Performance widget). It aggregates failed executions across your organization into a single, filterable table so you get the full picture quickly — no more stitching together results from individual scenario pages.What’s newCentralized failure list — See every failed execution across every scenario in your organization in one table. Powerful filters — Filter by team, scenario, type, error message, and date range. Each filter supports "only these" or "everything except these" to help narrow or exclude results quickly. Reactivate from the table — Deactivated scenarios appear in the table and can be selected and reactivated directly from the widget to speed recovery. Insights home — The widget is part of a larger Insights page that now houses Performance charts (previously on their own page) and will grow with more widgets for org-wide visibility and monitoring.Why this mattersWhen outages, expired credentials, or upstream failures cause many scenarios to fail, Ops and platform owners need a single, accurate view to triage and prioritize fixes. The Failed Executions Logs widget reduces mean time to detect and mean time to remediate by letting you find the worst offenders, filter by teams or error patterns, and take corrective action without hopping between scenario pages.How to get startedOpen Fusion and click Insights in the left navigation to open the Insights dashboard. Locate the Failed Executions Logs widget on the page (it’s grouped with Performance widgets). Use the Pool selector near the upper-left if you want metrics scoped to a specific worker pool. Apply filters (team, scenario, type, error message, date range). Use "only these" or "except these" options to refine results. Click a row to view the error details; select deactivated scenarios to reactivate them directly from the table when appropriate.Behavior and tipsCombine content filters with date ranges (for example, last 24 hours + specific team) to focus on recent incidents without historical noise. When reactivating a scenario from the table, verify the underlying cause (credentials, connector health, downstream service) before resuming high-volume runs. Pair the Failed Executions Logs with the Performance charts on Insights to correlate failures with execution backlog, pool utilization, or spikes in execution volume.Where to find documentationSee the Experience League article for full details on the Insights dashboard and its widgets: View the Fusion Insights Dashboard.Need help or want to give feedback?If you have questions, encounter issues, or want to suggest enhancements, please post a comment on the Experience League article, start a thread in the Experience League Community, or contact Adobe Support via the Admin Console. Your feedback helps us prioritize future improvements. 

Workfront Fusion now natively supports Adobe Storage (ESM)

Workfront Fusion now natively supports Adobe Storage (ESM)

Workfront Fusion — Native Adobe Storage (ESM) supportWorkfront Fusion now natively supports Adobe Storage (ESM)Workfront Fusion now connects directly to Adobe cloud storage (Enterprise Storage Management, ESM). Browse and upload assets inside Fusion, automate store lifecycle and access, and generate presigned URLs for secure read/write integrations with external systems.OverviewThis release adds native Adobe Storage support in Fusion using the same ESM layer that powers the Workfront/Frame.io unified review and approval experience and is shared across Frame.io, Document Cloud, and Creative Cloud. You’ll see a new Storage navigation menu for browsing and uploads, plus Adobe Storage modules you can use in scenarios to manage stores, collaborators, and presigned URLs.What’s newStorage navigation — A new Storage menu item in Fusion to browse ESM stores and upload files without leaving the app. Store lifecycle — Create, discard, restore, and delete ESM stores from scenarios for automated provisioning and cleanup. Collaboration management — Invite users to collaborate with explicit role, sharing scope, and notification controls. Presigned URL support — Generate Presigned URL and Generate Upload URL modules so external systems can read from or write to ESM stores securely without routing files through Fusion or sharing standing credentials. Custom API calls — Use a generic/custom action to call Adobe Storage API endpoints for operations not yet covered by built‑in modules.Why this mattersBecause Fusion talks directly to Adobe cloud storage (ESM), you can integrate storage operations into existing review, approval, and asset workflows used by Workfront and Frame.io. The presigned URL modules are especially important for content supply chains: they let other systems push or pull large assets securely and efficiently without moving files through Fusion or exposing long‑lived credentials.Before you startThese modules operate on ESM stores. If your organization still uses legacy Workfront storage, enable Adobe cloud storage first — see the links in Documentation below.How to get startedConfirm Adobe cloud storage (ESM) is enabled for your organization. Open Fusion, click the new Storage menu to browse or upload assets, or initialize the connection with Adobe Storage. Start using Adobe Storage modules for collaboration, presigned URLs, or custom API modules.Behavior and tipsStore operations act at the ESM store level — review retention, governance, and access policies before automating deletions or discards. When inviting collaborators, choose roles and notification settings deliberately to avoid unintended access or notification volume. Presigned URLs are time‑limited. Use short lifetimes for public or untrusted clients and rotate keys/credentials regularly. Test custom API calls and presigned URL workflows in non‑production environments to validate scopes, request formats, signed headers, and error handling.DocumentationAdobe Storage modules referenceAdobe cloud storage overview (ESM)Enable Adobe cloud storage for your organizationNeed help or want to give feedback?If you have questions, run into issues setting this up, or want to suggest improvements (for example, bulk presigned URL generation, scoped role templates, or richer Storage UI features), post a comment on the Experience League article, start a thread in the Experience League Community, or contact Adobe Support through the Admin Console Support portal. Your feedback helps us prioritize future enhancements.Questions or want help designing a scenario that uses Adobe Storage modules or presigned URL flows? Drop them below.  

Packages is now generally available in Workfront Fusion

Packages is now generally available in Workfront Fusion

Packages is now generally available in Workfront Fusion — build and run your own custom JavaScript functions, backed by Adobe App Builder, and use them directly in your scenario mappings.OverviewPackages let you build and run your own custom logic inside Fusion, without leaving the Fusion interface. When the standard modules don't do exactly what you need, you can write a function to transform data, do a calculation, call an external service, or wrap a routine you want to reuse — then test it, publish it, and call it from your scenarios. A package can bundle everything a function needs: the function itself, reusable variables (like a base URL or API key), outside library dependencies, and automatic version history.What's newFunctions — Write custom logic in JavaScript, define typed inputs, test drafts safely before publishing, and republish or unpublish live functions as needed. Variables — Store reusable values (URLs, IDs, keys) once and reference them across functions. Mark variables secret to keep sensitive values hidden, or public to use them directly in the scenario designer. Dependencies — Install outside libraries (for example, axios or lodash@4.17.21) that your functions rely on. History — Every draft save is kept automatically, so you can review or restore an earlier version before publishing.How to get startedClick the Packages tab in the left navigation panel and initialize the runtime environment (one-time setup, tied to an Adobe App Builder project). Click Create package, give it a name, and start building functions in the Functions area. Use the Adobe App Builder connector's Use function from package and Use variable from package modules to bring your custom logic and variables into a scenario.Using Packages requires an Adobe App Builder license — see access requirements for details.For full setup instructions, see Use custom function packages. 

Workfront Fusion now supports Azure DevOps using a service principal

Workfront Fusion now supports Azure DevOps using a service principal

Connect Azure DevOps to Workfront Fusion using a service principalYou can create a connection that uses a service principal (an Application API connection) instead of a personal account. Use this when you want the integration to run as an application or service identity rather than a specific person — for example, to avoid breakage when someone leaves the company or changes credentials. This connection type is available for all Azure DevOps modules.OverviewService principal connections let Fusion authenticate to Azure DevOps as an application identity (an app registration in Microsoft Entra ID) using a client secret. After you register the app and add it as a user in your Azure DevOps organization, create a Service Principal connection in the Azure DevOps module and provide the Tenant ID, Client ID, Client Secret, and organization name.NOTE: Service principal authentication does not support every Azure DevOps feature. A small number of admin-level actions — for example, managing user licenses or other tenant-admin-only tasks — still require a personal account connection. Use a service principal when you only need work items, boards, repos, pipelines, and similar non-admin operations.PrerequisitesGlobal Administrator or Application Administrator access in Microsoft Entra ID to create the app registration (or have your identity team perform this step). Project Collection Administrator access in your Azure DevOps organization to add the service principal as a user. The name of your Azure DevOps organization (the segment in dev.azure.com/<your organization name>).Step 1 — Create the app registration in Microsoft Entra IDSign in to the Microsoft Entra admin center. Go to App registrations > New registration. Give the app a clear name (for example, Workfront Fusion Azure DevOps Integration). Leave Redirect URI blank — this connection does not use interactive browser sign-in. Select Register.Step 2 — Create a client secretOpen your new app registration and go to Certificates & secrets. Select New client secret, add a description, choose an expiry, and select Add. Copy the secret Value immediately — it is shown only once. If you navigate away you must create a new secret.Step 3 — Collect the connection detailsFrom the app registration Overview page, note the following values for the connection setup:Tenant ID — Directory (tenant) ID on the Overview page. Client ID — Application (client) ID on the Overview page. Client Secret — The secret Value you copied. Organization — Your Azure DevOps organization name (the folder in dev.azure.com/yourorg).NOTE: You can skip adding API permissions in the app registration. Azure DevOps does not expose application permissions via the Azure portal the same way; access is granted directly inside Azure DevOps (next step).Step 4 — Add the service principal to your Azure DevOps organizationSign in to your Azure DevOps organization at dev.azure.com/<your organization name>. Open Organization settings (lower left) > Users, then select Add users. Search by the app's display name (the name you registered in Entra). Do not search by Client ID. Select an access level: Basic — usually sufficient for reading/writing work items, boards, repos, and pipelines. Project Collection Administrators — required only if your workflow must browse or manage collection-level processes (Agile, Scrum, custom templates) during setup. Grant this only when necessary. Assign the app to the specific project(s) it needs and select Add.Step 5 — Create the connection in Workfront FusionOpen an Azure DevOps module in the Fusion canvas and start creating a new connection. Select the Service Principal (Application API) connection type. Enter Tenant ID, Client ID, Client Secret, and Organization. Save the connection. If the app registration and Azure DevOps user mapping are correct, the connection will validate successfully.Behavior and tipsUse a service principal for non-personal, long-lived integrations so they don’t break when people change accounts. If a workflow requires collection‑level configuration discovery (process templates) you may need to add the app to Project Collection Administrators during setup — otherwise Basic is usually enough. Test the connection with the modules you plan to use (work items, repos, pipelines) to confirm permissions are adequate before switching production scenarios over to the service principal. Rotate client secrets periodically and update the Fusion connection when you create a new secret to avoid unexpected outages. Keep descriptive app names and notes in both Entra and Azure DevOps so admins recognize the purpose and environment (dev/staging/prod).Where to find documentationFor step-by-step guidance and troubleshooting, see the Experience League documentation for Azure DevOps connector setup and Microsoft Entra ID app registration. Need help or want to give feedback?If you have questions, encounter issues, or want to suggest improvements (for example, clearer permission guidance, service principal role templates, or programmatic management of connections), post a comment on the Experience League article, start a thread in the Experience League Community, or contact Adobe Support through the Admin Console Support portal. Your feedback helps us prioritize future enhancements. 

Workfront Fusion Custom UI extensions

Workfront Fusion Custom UI extensions

 Workfront Fusion Custom UI extensions OverviewFusion can display your own web UI inside its interface. Build a small web app (a guest extension), publish it via Adobe App Builder, and Fusion will show a new menu item in its navigation that opens your UI in the main canvas. The guest automatically receives context such as the signed‑in user, organization, team, and other metadata so your extension can adapt to the current environment.The technology underneathYour guest is built with two Adobe technologies:Adobe App Builder — Free hosting and tooling for small web apps and serverless actions. App Builder hosts your static UI on Adobe’s CDN and provides the aio CLI to create, build, and publish the app. Adobe UI Extensibility SDK (UIX) — The libraries that let host and guest talk. Use @adobe/uix-guest in your guest; Fusion uses @adobe/uix-host on its side.Extension pointsAn extension point is a named slot in Fusion where a guest may appear. Extension point names use the format: service/name/version.Fusion currently offers these extension points:Extension point Where it appears When to use it fusion/nav-organization/1 Under the Organization section of the left navigation Your tool is about the whole organization fusion/nav-team/1 Under the Team section of the left navigation (when a team is selected) Your tool is about a specific team An extension can implement one or both points; Fusion adds a navigation menu item with the extension title for the chosen slot(s). Clicking the button opens your UI in the main content area.How to get startedInstall the App Builder CLI (aio) and create a new App Builder app using the UIX guest template. Implement your UI and install @adobe/uix-guest. Initialize the UIX guest client to receive context and messages from Fusion. Test locally with the aio dev workflow and verify the guest receives expected context (user, org, team). Build and publish the app to App Builder (the app is hosted on Adobe’s CDN). Register the extension in Fusion: provide the extension metadata, choose the extension point(s), and supply the hosted URL for your guest. Verify the extension appears in Fusion navigation and validate behavior in target organizations/teams.Behavior and tipsUse the UIX guest API to request context, listen for navigation events, and send messages back to the host as needed. Keep payloads and interactions minimal: rely on the host for authentication and context; perform sensitive server‑side work in actions hosted on App Builder when needed. Test your extension across environments (dev, staging, prod). Use descriptive extension names and notes so admins can identify the intended environment and purpose. Review permissions and security: App Builder hosts your assets on Adobe’s CDN; design auth and server interactions to validate user identity and scope where required.Where to find documentationFor detailed step‑by‑step guidance, code samples, and publishing instructions, see the Experience League documentation:Custom UI extensions: readme on Experience LeagueNeed help or want to give feedback?If you have questions, run into issues, or want to suggest improvements (for example, additional extension points, deeper host APIs, or streamlined publishing), post a comment on the Experience League article, start a thread in the Experience League Community, or contact Adobe Support through the Admin Console Support portal. Your feedback helps us prioritize enhancements.  

Search input and output bundles in scenario executions

Search input and output bundles in scenario executions

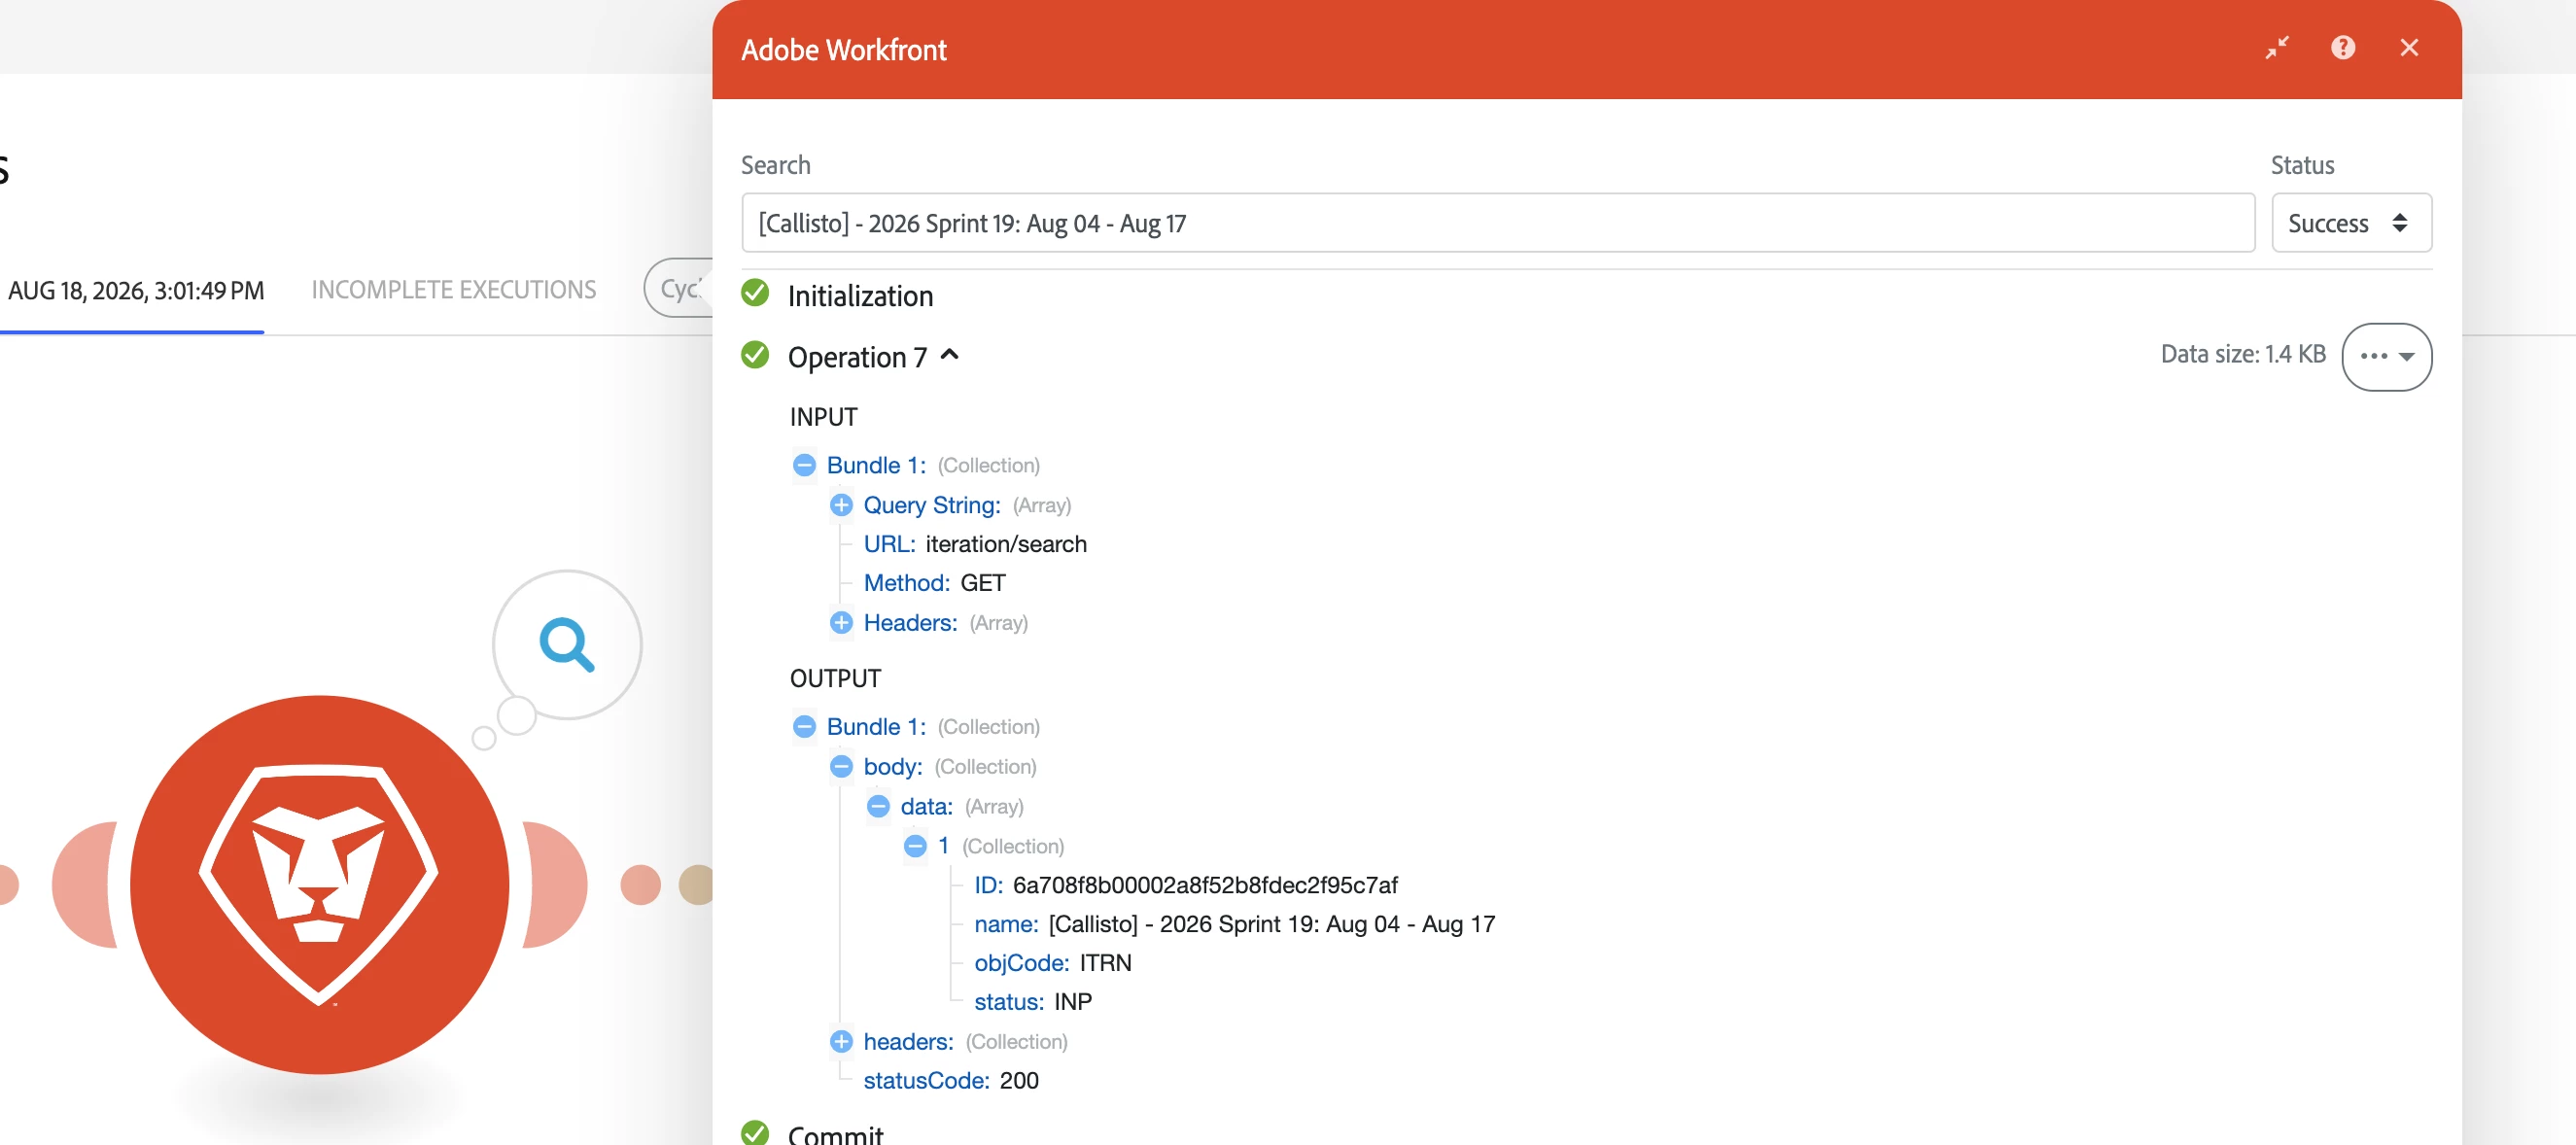
 Search input and output bundles in scenario executionsPreviously you could not search the actual input and output bundles shown in an execution. Now you can search both input and output bundles directly from the execution UI — use the module/filter output search bars or the execution search to find specific bundle content, IDs, or events.OverviewWe’ve added the ability to search the text and metadata inside bundle payloads for both inputs and outputs in an execution. This makes it much faster to locate a particular bundle, debug processing logic, or verify that expected data passed through a specific step. You can search at the module/filter level or across the entire execution timeline.What’s newSearch the contents of input bundles shown for a module or filter. Search the contents of output bundles shown for a module or filter. Combine content searches with status filtering to surface only Success, Warning, Failed, Passed, or Failed bundles as applicable.How to search bundle contentOpen the scenario and select the execution you want to inspect. To view a module’s input/output, click the details bubble next to the module. The number in the bubble is the count of bundles the module produced for that execution. In the module output panel, use the search bar to search the text and metadata inside input and output bundles. Results update immediately to show matching bundles Refine searches by status: use the Status Filter dropdown in the search panel to show only Success, Warning, Failed, Passed, or Failed bundles.Behavior and tipsSearches operate on the entire payload and metadata returned by the module. Combining content search with status filters (for example, search for an order ID and show only Failed bundles) helps isolate problematic records faster.Where to find documentationYou can learn more about viewing execution history on Experience League: see the View a specific scenario execution.Need help or want to give feedback?If you have questions, encounter issues, or want to suggest improvements (for example, saved bundle searches, regex search, or direct links from execution search results to bundle payloads), post a comment below, start a thread in the Experience League Community, or contact Adobe Support through the Admin Console Support portal. Your feedback helps us prioritize future enhancements. 

All Workfront Watch Events webhooks will be secured by default after August 23

 Workfront Watch Event modules secured by default with authTokenEffective August 23, 2026, all Workfront Watch Event module subscriptions — including existing ones — will be protected by authToken-based verification by default. This ensures payloads delivered to your Fusion scenarios can be validated as originating from Workfront.OverviewTo improve webhook security, Fusion will be enabling authToken validation by default for the Watch Event modules. The authToken is a shared secret included with every webhook delivery so your receiving endpoint can verify the request before processing it. This change applies to both new subscriptions and any Watch Event modules you already have in active scenarios.What’s changingAll Workfront Watch Event module subscriptions will include an authToken with delivered payloads by default starting August 23, 2026. Fusion will automatically apply this security setting to existing Watch Event module webhooks — no manual migration or reconfiguration is required.Why it’s changingWithout a shared secret, webhook endpoints cannot distinguish legitimate Workfront events from spoofed requests. A discovered webhook URL is otherwise open to anyone. The authToken provides a simple, effective way for your endpoint to validate that requests truly came from Workfront before taking action.What this means for youOn August 23, your existing Watch Event module scenarios will be secured by default; payloads will include an authToken you can verify at the receiver. No action is required to receive this protection: the setting will be enabled automatically for existing Watch Event subscriptions.If you need to turn it off (compatibility only)If a webhook breaks after this change and you need to disable authToken for compatibility, perform these steps before August 23, 2026:Open the scenario that contains the Watch Event module. Edit the module’s webhook. Disable the Enable secured hooks option. Save the module and re-activate the scenario.We strongly recommend leaving authToken verification enabled unless your receiving endpoint explicitly cannot support it — disabling the setting removes the ability to verify that requests are genuinely from Workfront. Where to find documentationFor technical details about the underlying mechanism and how to validate tokens, see the Event Subscription API docs and the Workfront / Workfront Planning connector documentation on Experience League:Fusion release notes (2026-08-10) Event Subscription API documentationNeed help or want to give feedback?If you have questions or encounter issues, post a comment below, start a thread in the Experience League Community, or contact Adobe Support through the Admin Console Support portal. Your feedback helps prioritize future enhancements.  

Set team or scenario notification options for IMS organizations

Set team or scenario notification options for IMS organizations

 Set team or scenario notification options for IMS organizationsIMS organizations can now enable or disable each notification type independently at the team level — the same fine-grained controls previously available only to non‑IMS organizations. Scenario-level notification settings continue to override team settings when present.OverviewTo give teams finer control over the notifications they receive, administrators and team managers in IMS organizations can now choose which situations trigger Fusion notifications. Instead of a single on/off switch for all notifications, you can toggle each notification type independently:Notify on warning — Send a notification when a scenario execution logs a warning. Notify on error — Send a notification when a scenario execution fails. Notify when scenario is disabled — Send a notification when Fusion auto‑deactivates a scenario (for example, after too many consecutive errors).Scenario-level notification settings still take precedence over team-level settings. If a scenario has its own notification configuration, that configuration is applied regardless of the team setting.How to configure team notification options (IMS organizations)Sign in to Workfront Fusion and open the Admin or Team management area for your IMS organization. Select the team you want to configure. Locate the Notifications section for the team (use Show advanced settings if required). Toggle the individual notification types you want the team to receive: Notify on warning, Notify on error, and Notify when scenario is disabled. Save your changes.How to configure scenario-level notification optionsOpen the scenario in the Fusion canvas. Open the scenario settings or the notification panel. Set the desired notification options for that scenario. These settings will override the team-level values for this specific scenario. Save the scenario settings.Behavior and tipsScenario settings always override team settings. The team notification UI indicates when a scenario has an override for a particular notification type. By default, all notification types are enabled. Review team and scenario settings after migration to ensure teams receive the notifications they expect. If your organization uses the Adobe Unified Shell, notifications are delivered through the Adobe Notifications area — check the shell’s notification center for messages. Use team-level controls to set broad defaults (for example, suppress Notify on warning for very noisy teams) and use scenario-level settings for exceptions (for example, enable Notify on error for a mission‑critical scenario). Audit your notification settings periodically to avoid notification fatigue and ensure important events (errors and disabled scenarios) reach the right people.Where to find documentationStep‑by‑step instructions and reference details are available on Experience League: see Set notification options for usage examples and troubleshooting.Need help or want to give feedback?If you have questions, run into issues, or want to suggest improvements (for example, notification digests, more granular recipient controls, or programmatic management of notification defaults), post a comment below, start a thread in the Experience League Community, or contact Adobe Support through the Admin Console Support portal. Your feedback helps us prioritize future enhancements. 

Restrict webhooks by Adobe IMS authorization and browser origin

Restrict webhooks by Adobe IMS authorization and browser originRestrict webhooks by Adobe IMS authorization and browser originWe’ve added two new security controls for custom webhooks: Allowed Origins (CORS) to restrict browser-based calls to specific domains, and Adobe IMS Bearer token validation so webhooks accept requests only when callers present a valid Adobe IMS access token.OverviewCustom webhooks can now enforce two common security requirements:Allowed Origins (CORS) — Specify which browser origins may invoke the webhook from client-side JavaScript. Requests from other origins are blocked by CORS, preventing untrusted web pages from calling your webhook. Adobe IMS authorization — Require requesters to send an Adobe IMS access token in the Authorization header (Bearer <token>). Fusion validates the token before accepting the webhook payload, enabling secure server-to-server or user-scoped calls using Adobe Identity Management.How to configure Allowed Origins and IMS authorizationOpen the Add a hook dialog for the webhook you want to create or edit and check Show advanced settings. Under Authorization type, select Adobe IMS (Bearer token) if you want Fusion to validate incoming IMS tokens. In the Allowed origins field, enter the list of origins (for example https://www.example.com, https://app.example.com) that should be permitted to call the webhook from a browser. Use exact scheme + host (+ port when needed). Save the webhook. When IMS is enabled, Fusion will validate the Authorization header and when Allowed origins are set, Fusion will include the appropriate CORS response headers for allowed browser requests.Tip: Specify only origins you control (including protocol). If you need server-to-server calls from non-browser clients, IMS authorization is the recommended approach—CORS does not apply to server-side requests.Behavior and tipsAllowed Origins implements CORS policy for browser-initiated requests. Non-browser clients (server-to-server) are not subject to CORS; use IMS validation or other auth to secure those calls. When IMS authorization is enabled, send the Adobe IMS access token in the Authorization header as Bearer <access_token>. Fusion validates the token before accepting payloads. If both controls are used together, browser requests must come from an allowed origin and include a valid IMS token to be accepted. Leaving Allowed origins empty results in no browser-origin restriction (default permissive behavior for CORS). Leaving Authorization type unset means Fusion will accept unauthenticated requests (unless other protections are in place). Use descriptive webhook names or notes to indicate which environment (dev, staging, prod) or client application each webhook and policy is intended for.Where to find documentationStep‑by‑step configuration details and examples are available on Experience League: see Webhooks and HTTP module authentication and CORS settings for usage examples and troubleshooting.https://experienceleague.adobe.com/en/docs/workfront-fusion/.../webhooks-updated#use-a-webhook-with-adobe-identity-management-system-imsNeed help or want to give feedback?If you have questions or run into issues, post a comment below, start a thread in the Experience League Community, or contact Adobe Support through the Admin Console Support portal. Your feedback helps us prioritize future enhancements (for example, allowlist management APIs, automated origin validation, or expanded IMS claim checks). 

Adobe Express connector

Adobe Express connector

 Adobe Express connector now available in Workfront FusionWe’ve added a new Adobe Express connector so you can automate common Express workflows—like listing tagged documents, creating variations, exporting renditions, and checking operation status—directly from Workfront Fusion integrations and automations.OverviewThe Adobe Express connector exposes the primary Express API surface so you can programmatically interact with Express documents and tagged elements from your Fusion scenarios. The connector maps the Express API endpoints into modules that make it easy to include Express operations in integration flows, automation canvases, and scheduled jobs.Connector capabilities (API endpoints)Tagged documents — List all documents that contain tagged elements so you can discover assets to process. Tagged document details — Retrieve metadata and the tagged-element structure for a specific document to inspect editable regions and element IDs. Generate variation — Create new document variations by modifying tagged elements (for example, swap text, replace images, or change colors) and kick off asynchronous generation. Export rendition — Export a document or variation to JPG, PNG, MP4, or PDF renditions for downstream delivery or archival. Status — Check the status of asynchronous operations (such as variation generation or export jobs) so you can poll and take action when processing completes.What you can do with the Adobe Express connectorAutomate batch exports of finalized Express documents to your DAM or cloud storage (PDF, JPG, PNG, MP4). Drive templated content production by generating variations programmatically—populate tagged text, swap tagged images, or apply style changes for personalized outputs. Build end-to-end flows that discover documents, create variations, wait for generation to finish, export renditions, and then notify stakeholders or update records in downstream systems. Integrate Express document workflows with marketing automation, publishing pipelines, or asset management systems using Fusion’s mapping and conditional logic.How to get startedOpen your integration or automation canvas in Workfront Fusion and add the Adobe Express connector. Select the module that corresponds to the Express operation you need (Tagged documents, Tagged document details, Generate variation, Export rendition, or Status). Generate credentials at developer.adobe.com. Configure module inputs—document IDs, tagged element updates (payload), export format and options, and polling intervals for async operations. Map outputs into subsequent steps in your flow (for example, pass exported file URLs to an HTTP module, upload to cloud storage, or notify via email/Slack).Tip: Use the Status module to poll asynchronous jobs (variation generation or exports). Chain the Status check with conditional steps so your flow only proceeds when processing is complete.Behavior and tipsVariation generation and some export operations are asynchronous. Request a job and use the returned job ID with the Status module to determine completion. When updating tagged elements, include the element IDs and the correct edit payload as returned by the Tagged document details call to ensure modifications apply to the intended regions. Exported renditions return downloadable URLs (or files) that you can immediately ingest into other systems or store in Fusion-managed connectors. Saved credentials for Adobe Express are reusable across multiple Adobe connectors and modules—create the credential once and select it wherever Express auth is required.Where to find documentationStep-by-step instructions and reference details are available on Experience League: see the Adobe Express connector docs for module references, payload examples, and troubleshooting tips.Need help or want to give feedback?If you have questions or run into issues, post a comment below, start a thread in the Experience League Community, or contact Adobe Support through the Admin Console Support portal. Your feedback helps us prioritize enhancements (for example, additional export options, more granular variation controls, or deeper integration with Adobe storage and asset services). 

mTLS support for custom webhooks

mTLS support for custom webhooks

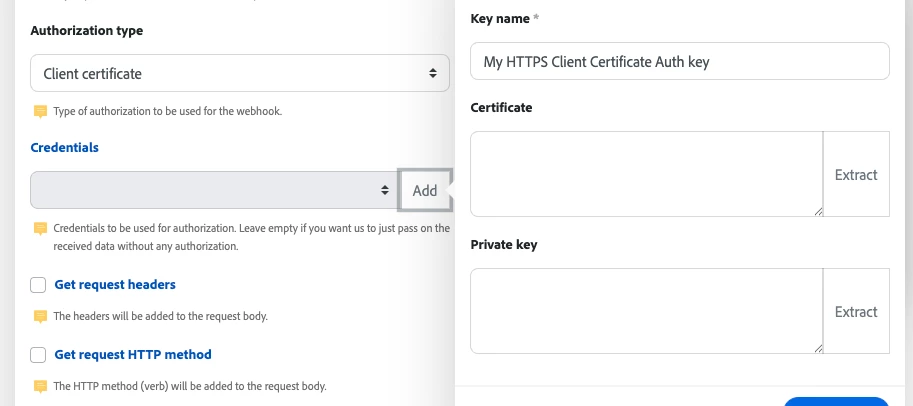
 Product update:mTLS support for custom webhooksTo meet stronger security requirements, you can now use mutual TLS (mTLS) with custom webhooks. Add a client certificate and private key to a webhook so Experience League integrations and automations authenticate to the receiving service using client-side TLS credentials.OverviewCustom webhooks now support Client certificate authorization. When you configure a webhook to use a client certificate, Fusion will present that certificate and private key during the TLS handshake so the remote service can verify the client. This provides an extra layer of security for server-to-server webhook delivery when the endpoint requires mTLS.How to configure mTLS for a webhookOpen the Add a hook dialog for the webhook you want to create or edit and check Show advanced settings. Under Authorization type, select Client certificate. In the Credentials field, click Add. This opens the Create a key dialog. Give the key a descriptive Key name (for example, “My HTTPS Client Certificate Auth key”). Paste the client Certificate (PEM) into the Certificate field. Use Extract if your certificate is bundled with other data. Paste the corresponding Private key (PEM) into the Private key field. Use Extract if the private key is in the same PEM bundle. Click Create a key to save the credential. Back in the Add a hook dialog, select the new key from the Credentials dropdown and click Save.Tip: Use a descriptive key name to make it easy to identify which certificate is used for which environment (dev, staging, prod).Reuse keys in HTTP modules and other placesThe client certificate keys you create for webhooks are not limited to use with webhooks. The same saved credentials (Basic auth and Client certificate keys) are selectable in HTTP modules (for example, HTTP > Make a request), so you can reuse one saved key for outgoing requests to the same mTLS-protected endpoint. Create the credential once and use it anywhere the matching auth type is supported.Notes and behaviorCredentials (both Basic auth and Client certificate keys) are saved once and can be reused across multiple webhooks and HTTP modules — you don’t need to re-enter them each time. Leaving the Credentials field empty means Fusion will send the received webhook data without presenting a client certificate. The Extract buttons in the Create a key dialog can parse a certificate or private key out of a pasted PEM bundle so you don’t have to split combined files manually. Stored keys are used for authentication during the TLS handshake; they are not sent as part of the webhook payload.How to get help or give feedbackIf you have questions or run into issues when configuring mTLS, post a comment below, start a thread in the Experience League Community, or contact Adobe Support through the Admin Console Support portal. Your feedback helps us prioritize enhancements (for example, additional certificate formats, automated rotation, or private key management integrations).Where to find documentationStep‑by‑step instructions and reference details are available on Experience League: see the Webhooks and HTTP module authentication topics for configuration examples and troubleshooting tips. 

Workfront Planning v2 connector now available

Workfront Planning v2 connector now available

Product update: Workfront Planning v2 connectorWorkfront Planning v2 connector now availableWe’ve released a new connector that exposes the expanded capabilities of the Workfront Planning API version 2 so you can automate and integrate Workfront Planning resources directly from Experience League integrations and workflows.OverviewThe new Workfront Planning v2 connector adds modules that map to the Planning API v2 surface so you can programmatically manage Workfront Planning workspaces, record types, records, fields, and access workflows. The connector also includes user and permission queries and a generic custom-call module so you can call any remaining endpoints not covered by the dedicated modules.What you can do with the Workfront Planning v2 modulesCreate, read, update, and delete workspaces, record types, records, and fields. Retrieve user-level info such as authorization ID and permissions. Request access to a resource and view pending access requests. Make custom API calls to any Workfront Planning v2 endpoint via the generic request module.How to get startedOpen your integration or automation canvas and add the Workfront Planning connector. Select the Workfront Planning v2 modules for the operations you need (Workspace, Record Type, Record, Field, User, Access Requests, or Custom Request). Authenticate with your Workfront Planning credentials and grant the connector the required permissions. Configure the module inputs (IDs, payloads, query parameters) and map outputs into subsequent steps in your flow.Tip: Use the Custom Request module to call any v2 endpoints not yet provided as first-class modules, or to experiment with new API capabilities before we add dedicated actions.Where to find documentationFull reference and step-by-step instructions are available on Experience League: Workfront Planning modules.Need help or want to give feedback?If you have questions or run into issues, post a comment below, start a thread in the Experience League Community, or contact Adobe Support through the Admin Console Support portal. Your feedback helps prioritize new modules and improvements. 

Overview

View changes between scenario versions

Product update: View and compare scenario versionsThis post introduces a new Review changes experience that makes it easy to see exactly what changed between two versions of a scenario so you can confidently restore older versions when needed. OverviewYou can now open a side-by-side comparison of any two versions of the same scenario to view detailed differences before you restore a version. The Review changes view highlights additions, removals, and edits (colored green and red) and groups changes by logical sections (Scenario, Scenario settings, Modules, Flows, Router routes, Error handlers, and Orphan groups). Restoring a version creates a new version, so all restores are reversible.How to compare scenario versionsClick Scenarios in the left panel and open the scenario you want to inspect. Click the More icon at the bottom of the screen, then choose Previous Versions. From the list of previous versions, click View changes for the version you want to compare. The Review changes panel opens and shows a side-by-side comparison: the current scenario on the left and the selected version on the right.Tip: Use the Compare from and Compare to dropdowns near the top of the panel to pick any two versions for comparison.Understand the comparison viewThe Review changes panel visually indicates what would happen if you restored the right-hand version:Red (left): Items present in the left (current) version that would be removed if you restored the right-hand version. Green (right): Items present in the right-hand version that would be added if you restored it. If a value changed between versions, you’ll see the old value in red on the left and the new value in green on the right.Change groupsChanges are grouped into these sections to help you quickly locate relevant differences:Scenario: Name, description, and type. Scenario settings: Schedule and processing options. Modules: Modules added, removed, moved, or reconfigured. Flows: Branches added, removed, or reordered. Router routes: Routes and their contents. Error handlers: Error-handling branches. Orphan groups: Disconnected modules on the canvas.Restore behaviorTo revert to the version shown on the right, click Revert to selected version. Restoring saves the restored scenario as a new version so the change itself can be undone later. If you want to restore the version currently shown on the left, click the ⇄ swap button to put it on the right, then click Revert to selected version.When there are no differencesIf the two selected versions are identical, the Review changes view displays No differences found.More information and supportFor step-by-step guidance, see: View and manage scenario versions on Experience League.If you have questions or feedback, post a comment below or contact Adobe Support via the Admin Console Support portal. 

Understanding CNIL’s updated guidance on email open tracking

This post is for informational purposes only. It is not legal advice and does not warrant your compliance. The Adobe Marketo Engage product capabilities described in this help article, configured and operated appropriately, support a compliant implementation. Each user is responsible for determining and complying with its obligations under applicable law.OverviewOn April 14, 2026, France’s data protection authority (CNIL) published a recommendation on the use of open tracking pixels in emails. The guidance clarifies when consent is required and highlights the importance of proper consent practices for email pixel tracking. This policy impacts any entity sending emails to subscribers based in France.CNIL provided a three-month period from the date of the recommendation for companies to inform their email recipients of the presence of the tracking pixels, their purpose, and the recipients’ right to opt-out. During this transition period, Marketo Engage users are expected to notify their recipients about pixel tracking and provide an opt-out if necessary. CNIL is expected to begin enforcement activities after July 14, 2026.As the CNIL and other regulators clarify guidance on tracking pixels and related issues, Adobe will continue to monitor updates and inform you of changing technical capabilities.Marketo Engage offers controls that help you manage open tracking at the email level. Users are responsible for determining their own compliance obligations under applicable CNIL guidance and other laws. What is an email tracking pixelAn email tracking pixel is a small transparent image (just 1x1 pixel in size) embedded in the HTML of an email. When a recipient’s email client loads the email images, the pixel pings a server that records data such as a timestamp, device type, email client, and sometimes an IP address for approximate location. That log is tied to the recipient’s record, allowing marketers to see whether an email is opened.Guidance on consent trackingDetailed steps are outlined for Marketo Engage users in this help article on Experience League.Updates and supportFor the latest updates, bookmark this post. If you have any questions, please post a comment below.

Join the Project Falco Beta Program

The Project Falco beta program grants you exclusive access to an updated version of Adobe Journey Optimizer B2B Edition that is specifically designed to supercharge your Marketo Engage instance (no purchase required).Program highlights• Agentic Program & Journey Creation: Design and optimize omni-channel lead journeys inseconds leveraging your existing programs, campaigns, and channels inside Marketo Engage.• Agentic Audience Segmentation: Prompt the audience agent to automatically discover andcreate audience segments using Marketo Engage data.• AI-powered Decisioning: Achieve next-gen personalization through AI-powered Next-bestJourney and Journey Path decisioning.• Omni-channel Orchestration: Connect and activate inbound and outbound channels togetherfrom a single journey canvas, expanding to web and paid channels.• Agentic BDR Experience: Allow your BDR teams to automate outbound sequences using theAccount Qualification Agent together with integrated marketing data.What you getEarly accessFirst access to new capabilities: AI agents, audience creation, journey orchestration, conversational AI, and more, before general availability.Direct product line1:1 engagement with the Development, Product Management, Design, and Product Marketing teams through a dedicated private Slack space and regular conference calls.Roadmap influenceReal influence over what we build next. Participate in the development process, submit enhancement requests prior to release, and directly shape the final feature set before it ships.Marketo-native setupAlready on Marketo Engage? Adobe Journey Optimizer B2B Edition Prime is built to integrate seamlessly, no heavy lift to get started.What’s included in your beta access• Audience Creation and Management• Journey Creation, Optimization, and Decisioning• Conversational AI Experiences• Lead Journeys• Brand Concierge• Sales Qualifier• Reporting & Analytics Project Falco video demoWhat we ask of youDurationThe beta program begins in late June and runs through approximately the beginning of August.Your investmentAll we need is your time and honest feedback. There is no purchase required.After the 6 weeksThe conversation doesn’t have to end there. Beta partners can extend their involvement as the product moves toward general availability.How it works1. Apply. Submit your interest. We’re selecting a small cohort of Marketo Engage customers to partner with.2. Onboard. We get you set up. Because you’re already on Marketo Engage, the integration isstraightforward.3. Use and explore. Your team runs Adobe Journey Optimizer B2B Edition Prime in yourenvironment across the 6-week window.4. Feedback sessions. Regular touchpoints with the Adobe product team. Your input directlyinfluences roadmap decisions.5. Extend or transition. At the end of the beta, we discuss continued involvement in thelighthouse program if you are open to it.Ideal for• Existing Marketo Engage customers• Marketing operations practitioners• Teams with a mandate to evaluate AI in their stack• Organizations willing to co-create with us• Practitioners who want influence, not just accessCommon questionsDo we need to buy anything to participate?No. There is no purchase required to join the beta. Your only investment is time and feedback.We’re already on Marketo. How much setup is involved?Adobe Journey Optimizer B2B Edition Prime is designed to integrate with Marketo Engage data, so the lift to get started is minimal. We handle all of the onboarding.What does “design partnership” mean in practice?It means your team’s experience in the product shapes what we build next. You’ll have multipletouchpoints with the Adobe product team during the Beta Program.What happens after the 6 weeks?There’s an opportunity to extend your involvement beyond the beta. We’ll discuss options based on your team’s goals and our roadmap timing.How many companies are you selecting?We’re keeping the cohort intentionally small, so every partner gets meaningful access and attention from the product team. Ready to co-design what’s next?The beta launches in late June. Spots are limited. 

Federated Email Service (FES) Migration 

Marketo Engage is in the process of migrating to the Adobe Federated Email Service (FES), a centralized email-sending solution designed to streamline and standardize email delivery across Adobe's various teams and products. Over the next couple of months, all Marketo Engage subscriptions will be on FES, making email delivery more reliable, stable, and easier to support at scale.What do you need to do?If you do not have a Branded Return-Path configured during the initial set up of the purchased Dedicated IP, or a Branded Return-Path SKU, no actions are needed. Users who have a Branded Return-PathFor those who had a Branded Return-Path configured during the initial setup of a purchased Dedicated IP, or a Branded Return-Path SKU, you must update the MX record for that specific Branded Return-Path domain.Note: this is not the Branded Domains for your links.Ask your IT team to update the MX record for your branded return path using the values listed below for your pod. If you're unsure which pod your subscription is on, see: identify your data center.The migration has been separated into two cohorts. The first cohort has been completed. Cohort One POD New MX Record SJ  or.mx.mseme.adobe.net  LON or e  gbr.mx.mseme.adobe.net  NLD  irl.mx.mseme.adobe.net  SN  aus.mx.mseme.adobe.net  mlm100x  or.mx.mseme.adobe.net  mlm300x  aus.mx.mseme.adobe.net  mlm400x  irl.mx.mseme.adobe.net  ajob2b100x  or.mx.mseme.adobe.net   Cohort Two POD New MX Record AB  va.mx.mseme.adobe.net  mlm200x  va.mx.mseme.adobe.net  ajob2b200x  va.mx.mseme.adobe.net   Expected service impactsThe MX record update is required to ensure Adobe continues to receive and process Asynchronous bounce events on your behalf. No additional service impacts are expected. ScheduleTo receive the full benefits of the FES migration, Branded Return-Path users should make this change by the dates below.Cohort One: Make the change by July 17, 2026.Cohort Two: Make the change by August 31, 2026. If you don’t update your records by the date(s) listed:Your subscription won’t be able to process Asynchronous Hard Bounces (which typically amounts to less than 1% of messages sent). Very low chance of Deliverability impacts. When you do update the MX record and we begin to process async bounces again, the applicable recipients will automatically be identified and marked as a Hard Bounce.Updates and supportFor the latest updates, bookmark this post. If you have any questions, contact Adobe Support via the Support portal in the Admin Console or Experience League.

What Adobe Data Engineering Agent Means for Your Workflows

If you've been following Adobe Summit, you'll have seen the announcement of Adobe Data Engineering Agent, a purpose-built Adobe Experience Platform Agent powered by Experience Platform Agent Orchestrator. While the official blog covers the vision well, I want to share more on what it unlocks for your workflows your Adobe stack.  What it's built to doData preparation is high-value but time-intensive, often delaying downstream activation. Adobe's AI & Digital Trends Study found 75% of organizations cite data integration and quality as their top AI implementation challenge. Data Engineering Agent addresses this with an AI-guided, human-in-the-loop approach that automates operational steps across the data lifecycle, so you can focus on higher-value decisions. How it plays out across your stackAdobe Experience Platform: Faster, more confident data onboardingData Engineering Agent extends Experience Platform’s data ingestion strength by making the onboarding process more guided and automated. Instead of manually configuring mappings, schemas, and dataflows, you work conversationally with the agent. It analyzes source data, recommends schema structures aligned to Experience Data Model standards, flags issues early, and builds dataflows after your approval.Notable use cases:Teams managing multi-brand or multi-region implementations that deal with inconsistent naming conventions across business units will find the schema recommendation and validation workflow particularly valuable for maintaining consistency at scale.Adobe Real-Time CDP and Adobe Journey Optimizer: Upstream quality that flows downstreamReal-Time CDP turns unified data into real-time audience activation. Journey Optimizer journeys depend on fresh, accurate profile and event data. By improving data quality upstream through validation, enrichment, and early issue detection, Data Engineering Agent ensures cleaner profiles and faster activation to shorten time-to-live for audiences and journeys.Notable use cases: For organizations using Real-Time CDP with warehouse-native architectures, the agent automates schema creation and dataflow configuration—reducing back-and-forth between data engineering and analytics without compromising governance. For teams building trigger-based journeys from real-time signals, faster validation of streaming datasets accelerates journey activation.Adobe Customer Journey Analytics: Broader access to SQL-powered data prepCustomer Journey Analytics gives analysts the ability to ask cross-channel questions without reprocessing pipelines but SQL-based data preparation has traditionally required platform expertise. Data Engineering Agent brings natural language prompting to that. It can generate optimized, schema-aware SQL with a preview before execution, monitor and troubleshoot SQL jobs, validate dataset readiness before running analysis, and proactively surfaces issues and troubleshoots.Notable use cases: Campaign performance analysts who regularly validate datasets before refreshing Customer Journey Analytics views get a more automated quality check built into their existing workflow.Adobe Experience Platform: Faster implementation and root cause analysis for better data collection Implementation engineers often juggle documentation, forums, internal wikis, and cross-functional meetings to configure complex data collection use cases. Troubleshooting is equally fragmented, requiring manual lineage tracing across components.Data Engineering Agent brings in-context product knowledge directly into the workflow, leveraging Experience League, community forums, and GitHub to explain how components fit together. When issues arise, it surfaces lineage views and dependency maps to quickly identify misconfigurations and root causes.Notable use cases: For teams managing complex, multi-touchpoint data collection setups, the combination of contextual guidance during configuration and semantic lineage visibility during troubleshooting can compress what used to be a multi-day, multi-meeting process into a single working session. What to know before it arrivesData Engineering Agent is coming soon to Experience Platform. A few operational notes:Human-in-the-loop by design. You review and approve recommendations before the agent executes. Built into the existing governance layer. Actions are auditable and operate within Experience Platform's data governance framework. Accessed through AI Assistant. The agent surfaces through the conversational AI Assistant interface already available across Experience Platform applications.----------------------------------------------------------------------------------------------------------------------I’d love to hear from you! Which part of your data engineering workflow, schema mapping, SQL data prep, data collection troubleshooting, or something else, consumes the most time today that Data Engineering Agent can help with? Let me know your thoughts below!

Now Available: Unified Review and Approval with Adobe Workfront and Frame.io

We're excited to announce Unified Review and Approval, a new capability that brings together Adobe Workfront and Adobe Frame.io into a single, deeply connected review experience. This integration is available now for all Workfront customers upon a contract update. What's included Unified Review and Approval natively integrates Frame.io's professional-grade review surface directly into your Workfront workflows. Here's what your teams get:One review surface for every content type — Whether your team is reviewing a 30-second social clip, a 200-page PDF, or a Photoshop comp, the experience is the same. Frame.io supports over 40 file formats with native video playback for formats like ProRes, H.265, and DNxHD — plus visual markup tools for annotating directly on the asset. Frame-accurate commenting for video — Frame.io was purpose-built for creative review, with frame-accurate commenting, advanced watermarking, and support for files up to 500 GB. That capability now lives natively with Workfront. Multi-stage approval workflows — Define clear roles: reviewers provide feedback, approvers make binding decisions (Approve or Needs Work). Approvals reach a conclusion, and everyone has visibility into exactly where things stand. No more download-upload-reupload — Unified Review and Approval is built on Adobe enterprise storage, a common layer connecting Workfront, Frame.io, and Creative Cloud. Assets live in one place and are accessible across tools without manual file transfers. Creatives work in place, and reviewers always see the latest version. Creative work-in-progress workspaces — Teams get their own visual-first workspace for managing rich media with custom metadata, collections, and semantic search that automatically indexes every asset and makes it searchable via natural language. Why it matters Marketing teams are producing more content for more channels than ever, and video has become the dominant format across social, web, retail media, and internal communications. Research shows creatives spend roughly 70% of their time managing files, tracking feedback, and following up rather than doing meaningful creative work. When your review tools aren't connected to your marketing management platform, teams adopt manual workarounds — downloading files, forwarding emails, tracking approvals in spreadsheets. The result is slower time to market, lost feedback, and version confusion. Unified Review and Approval addresses this by closing the gaps between marketing management, creative review, and content delivery. When your marketing management, creative collaboration, and asset delivery systems share a common foundation, every handoff gets faster and every workflow gets simpler. How to get started Unified Review and Approval is available now for Workfront customers upon a contract update. To get started:Work with your Adobe account manager to get on the updated integration Check out the Get Started articleWhether your team is managing a handful of campaigns or operating a global content supply chain, the path forward is the same — one review surface, one approval process, one source of truth. Learn moreRelease Notes Blog announcement Getting startedQuestions or feedback?We'd love to hear from you. How does your team currently manage review and approval across content types? What challenges are you hoping this solves? Drop your questions or thoughts below — our product team is monitoring this thread. 

Scheduled Maintenance for San Jose Data Center on May 16

Japanese version of this announcement at the bottom of the page | このお知らせの日本語版は、このページの下部に掲載されています。To enhance performance, reliability, and scalability, Adobe is performing required network maintenance for Marketo Engage on May 16, 2026, from 16:00 UTC to 18:00 UTC. This will only affect subscriptions hosted in the San Jose data center. (Learn how to locate your data center)During this two-hour maintenance window, all Marketo Engage services will be unavailable. We recommend taking the following steps to mitigate any impact on your business.Avoid creating or updating leads/people or running processes that modify Person records.Do not trigger follow-on processes, as scheduled campaigns will be paused.Temporarily disable any integrations that send/receive data to/from Marketo Engage.Avoid running data imports/exports or major lead/person-generation campaigns.For externally hosted forms, Adobe can support submission caching. To request this, contact Adobe Support with your Munchkin ID and relevant form IDs before May 11.Additional impacts include:CRM integrations and LaunchPoint services will be disabled but should resume automatically afterward. Landing pages, forms, and data collection will be unavailable, and a maintenance message will be displayed instead. If you rely on externally hosted forms, be sure to request caching in advance.For updates, visit the Adobe Status page and consider subscribing to notifications. If you have any questions, contact Adobe Support via the Support portal in Admin Console or via Experience League.  5 月 16 日に予定されているサンノゼデータセンターの計画メンテナンスについて パフォーマンス、信頼性、拡張性の向上のため、2026 年 5 月 16 日の 16:00 から 18:00(協定世界時)までの間、Marketo Engage のネットワークメンテナンスを実施します。このメンテナンスは、サンノゼデータセンターでホストされているサブスクリプションにのみ影響します。(データセンターの確認方法については、次のリンクを参照してください - リンク) この 2 時間のメンテナンス中は、すべての Marketo Engage サービスにアクセスできなくなります。ビジネスへの影響を最小限に抑えるため、以下の事項に従うことをお勧めします。 リード/ユーザーの作成や更新、個人レコードを変更するプロセスの実行は避けてください。スケジュールされているキャンペーンは一時停止されるため、後続のプロセスをトリガーしないでください。Marketo Engage との間でデータの送受信を行う統合処理を一時的に無効*にしてください。データのインポート/エクスポートや、大規模なリード/ユーザー獲得キャンペーンの実行は避けてください。外部でホストされているフォームの場合、送信のキャッシュがサポートされています。このキャッシュを希望する場合は、5 月 11 日までにアドビサポートまでご連絡ください。その際、Munchkin ID と関連フォーム ID を伝えてください。 その他の影響メンテナンス中は CRM 統合と LaunchPoint サービスにアクセスできなくなりますが、メンテナンスが終了すると自動的に再開されます。また、ランディングページ、フォーム、データ収集が停止し、メンテナンスに関するメッセージが表示されます。外部でホストされているフォームを使用する場合は、必ず事前にキャッシュを依頼してください。 最新情報については、Adobe Status ページ を参照してください。通知に登録 することをお勧めします。不明な点については、Admin Console のサポートポータルまたは Experience League からアドビサポートまでお問い合わせください。

Adobe Campaign updates: What's new and what to explore

We’ve rolled out new Adobe Campaign updates and shared resources to help teams move faster, experiment more easily, and scale customer engagement with confidence. Here’s a quick look at what’s new: Adobe Campaign v8 updatesRecent v8 releases extend key use cases in the web UI while continuing to strengthen flexibility, security, and governance in the client console. Highlights include:Firefly + third-party image generation model integration Campaign inventory timeline view Multilingual deliveries Transactional message profile enrichment Adobe Experience Manager live copies + language copies Content experiments (A/B testing) Continuous delivery enhancements Campaign approval management SMS connector Security improvements 🔗 View full release notes:Adobe Campaign v8 Web UI release notes Adobe Campaign v8 client console release notes Support note: Adobe Campaign Standard and Campaign Classic remain supported. Roadmap investments are focused on Adobe Campaign v8, prioritizing long-term stability, security, and modern campaign orchestration capabilities. Adobe Campaign v8 product description updateWe’ve updated the Adobe Campaign Managed Cloud Services (v8) product description by removing the license metric for generative actions related to AI Assistant content generation in Adobe Campaign Managed Cloud Services v8.While responsible use guardrails remain in place, we will not meter usage of these generative actions - making it easier to experiment with and scale AI-assisted content workflows. Join us at Adobe SummitAdobe Summit (20-22 April in Las Vegas) is a great opportunity to connect with Adobe experts and peers, see what’s coming next across Customer Engagement applications, and get practical guidance you can bring back to your team.Register for Tips & Tricks to Accelerate Adobe Campaign v8 Adoption (Session S525) Campaign VIP Customer Breakfast at Adobe Summit where you can meet other customers and and members of the Adobe Campaign product team. Reach out to your account team for more information on how to register. Resources to help you adopt fasterAdobe Campaign v8 self-guided product tour AI Assistant preview for content generation (Adobe Experience League login required) Webinar: How Southwest unlocked speed and stability with with Adobe Campaign v8 Ultimate Success Webinar: How customers are modernizing campaign execution with Adobe Campaign and Adobe Journey Optimizer Customer success story: General Motors: Pioneering new approaches to zero-friction customer experiences 

AEM as a Cloud Service 2026.02.0 – Release Update

What’s New in 2026.02.0The 2026.02.0 AEM release brings important enhancements across Generation, Activation, and Agentic AI capabilities. Below is a quick summary to help you understand what’s included and where to focus.AEM GenerationContent Fragment Management and Launches, OpenAPI side-port to 6.5 LTS SP2: Improved compatibility and extensibility with OpenAPI side-port support, helping teams working across Cloud Service and 6.5 LTS SP2 environments streamline integrations and content workflows.AEM ActivationQuiet Hours & Update-Free Periods – Now GA: Greater operational control with generally available support for defining quiet hours and update-free windows. This helps teams manage deployments and content activation with reduced disruption. AEM Content Advisor in Adobe Express: Content guidance capabilities are now integrated into Adobe Express, enabling smarter content refinement and optimization directly within creative workflows.AEM Agentic AIPipeline Troubleshooting | Code Quality Step: Enhanced troubleshooting within the pipeline experience, specifically targeting the code quality step to help teams identify and resolve issues faster.🎥 Release Overview Video (6 minutes)Watch here: https://video.tv.adobe.com/v/3480399/Seed Q&APlease use this thread to ask questions related to this release.See all the Previous Releases here and the Current Release Notes here.