
Adobe Journey Optimizer: Using Simulation Mode and Simulated Users to Test Two Journeys Together — A Credit Decisioning Walkthrough
Simulation Mode lets you test draft journeys using Simulated Users — AJO-native temporary profiles that are fast to create, reusable across journeys, and completely separate from AEP test profiles. If you have read the getting-started guide, you have seen how Simulation Mode works for a single journey with a branching condition. This post goes one level deeper: two journeys running in sequence, sharing a single simulated user, where Journey 2 writes profile attributes that Journey 1's condition reads.
The use case is credit decisioning. Journey 2 fires on a credit decision event and writes the outcome and the decline reason to the simulated user's profile using an Update Profile node. Journey 1 fires on a product campaign trigger, waits 2 hours, then reads those profile attributes to route the customer to an approved onboarding email or a personalised declined email that renders the specific reason inline.
The goal is to prove — with green lines in the Results tab — that the correct email goes to the correct customer profile, and that the decline reason renders correctly in the email body, before either journey goes live.
WHAT SIMULATED USERS BRING TO CROSS-JOURNEY TESTING
Before walking through the setup, it is worth understanding what makes Simulated Users the right tool for this specific problem.
In a single-journey simulation, a Simulated User enters the journey, traverses the nodes, and you read the Results tab. The user's profile attributes are either pre-set when you create them, or written during the run by an Update Profile node.
That second behaviour is what enables cross-journey testing. When Journey 2's Update Profile node executes during a simulation run, it writes to the Simulated User's profile — the same profile that Journey 1 will read when you run Journey 1's simulation for the same user. The two journeys share profile state through the Simulated User, exactly as they would share profile state through a real AEP profile in production.
This means you can test the full chain:
- Create one Simulated User with blank credit decision attributes.
- Run Journey 2's simulation for that user — the Update Profile node writes
creditDecisionanddeclineReasonto their profile. - Run Journey 1's simulation for the same user — the condition node reads those attributes and routes to the correct email branch.
- Read the Results tab in Journey 1 and confirm the path and the personalised content.
You are not mocking or pre-seating the result. You are running the actual write-then-read chain that production will execute, using the same journey canvas, the same Update Profile node, and the same condition expression — with a Simulated User standing in for the real customer.
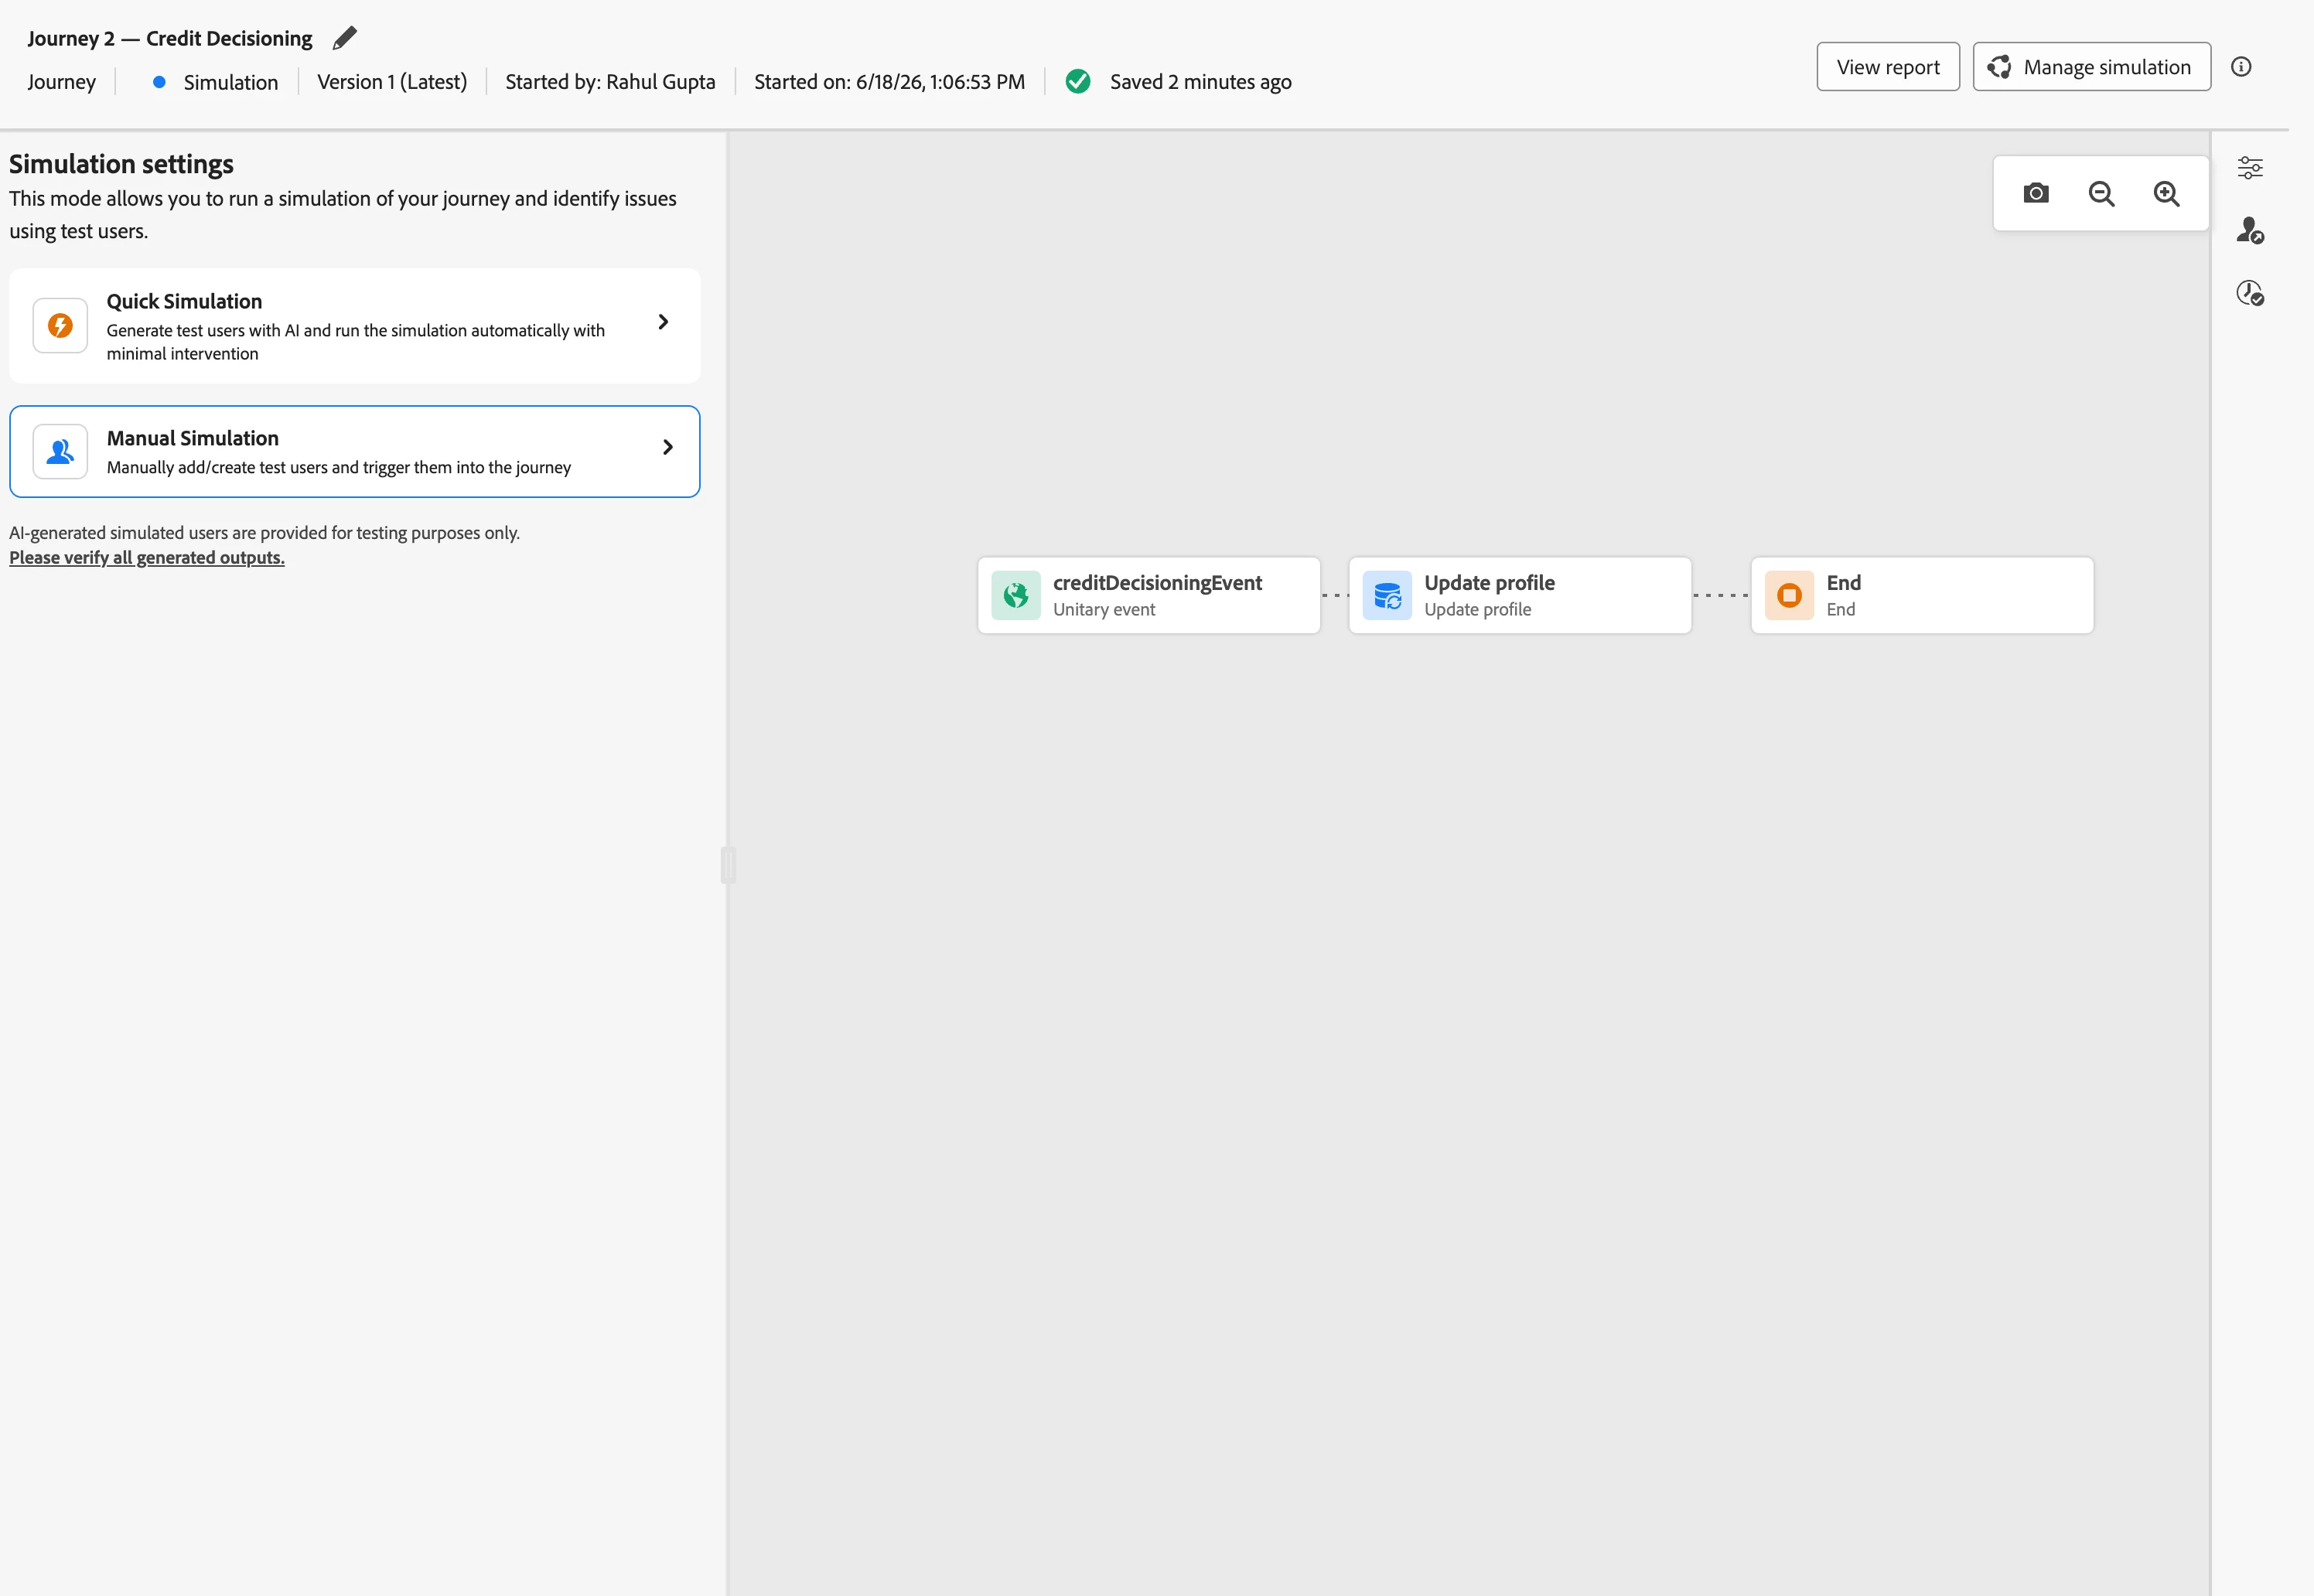
THE JOURNEY ARCHITECTURE
Journey 2 — Credit Decisioning
Trigger: Credit decisioning event (fired by your underwriting system or decisioning API when an application is reviewed).
Nodes: Update Profile — writes three fields in a single activity.
| Profile field | Value source | Field type |
|---|---|---|
creditDecision | @event{creditDecisioningEvent.decision} | String |
declineReason | @event{creditDecisioningEvent.declineReason} | String |
decisionTimestamp | @event{creditDecisioningEvent.timestamp} | String |
End.
creditDecision carries "approved" or "declined". declineReason carries a human-readable explanation — "debt-to-income ratio", "insufficient credit history", "identity verification required" — populated when declined, null when approved. All three are simple string fields, fully supported by the Update Profile node without any workarounds.
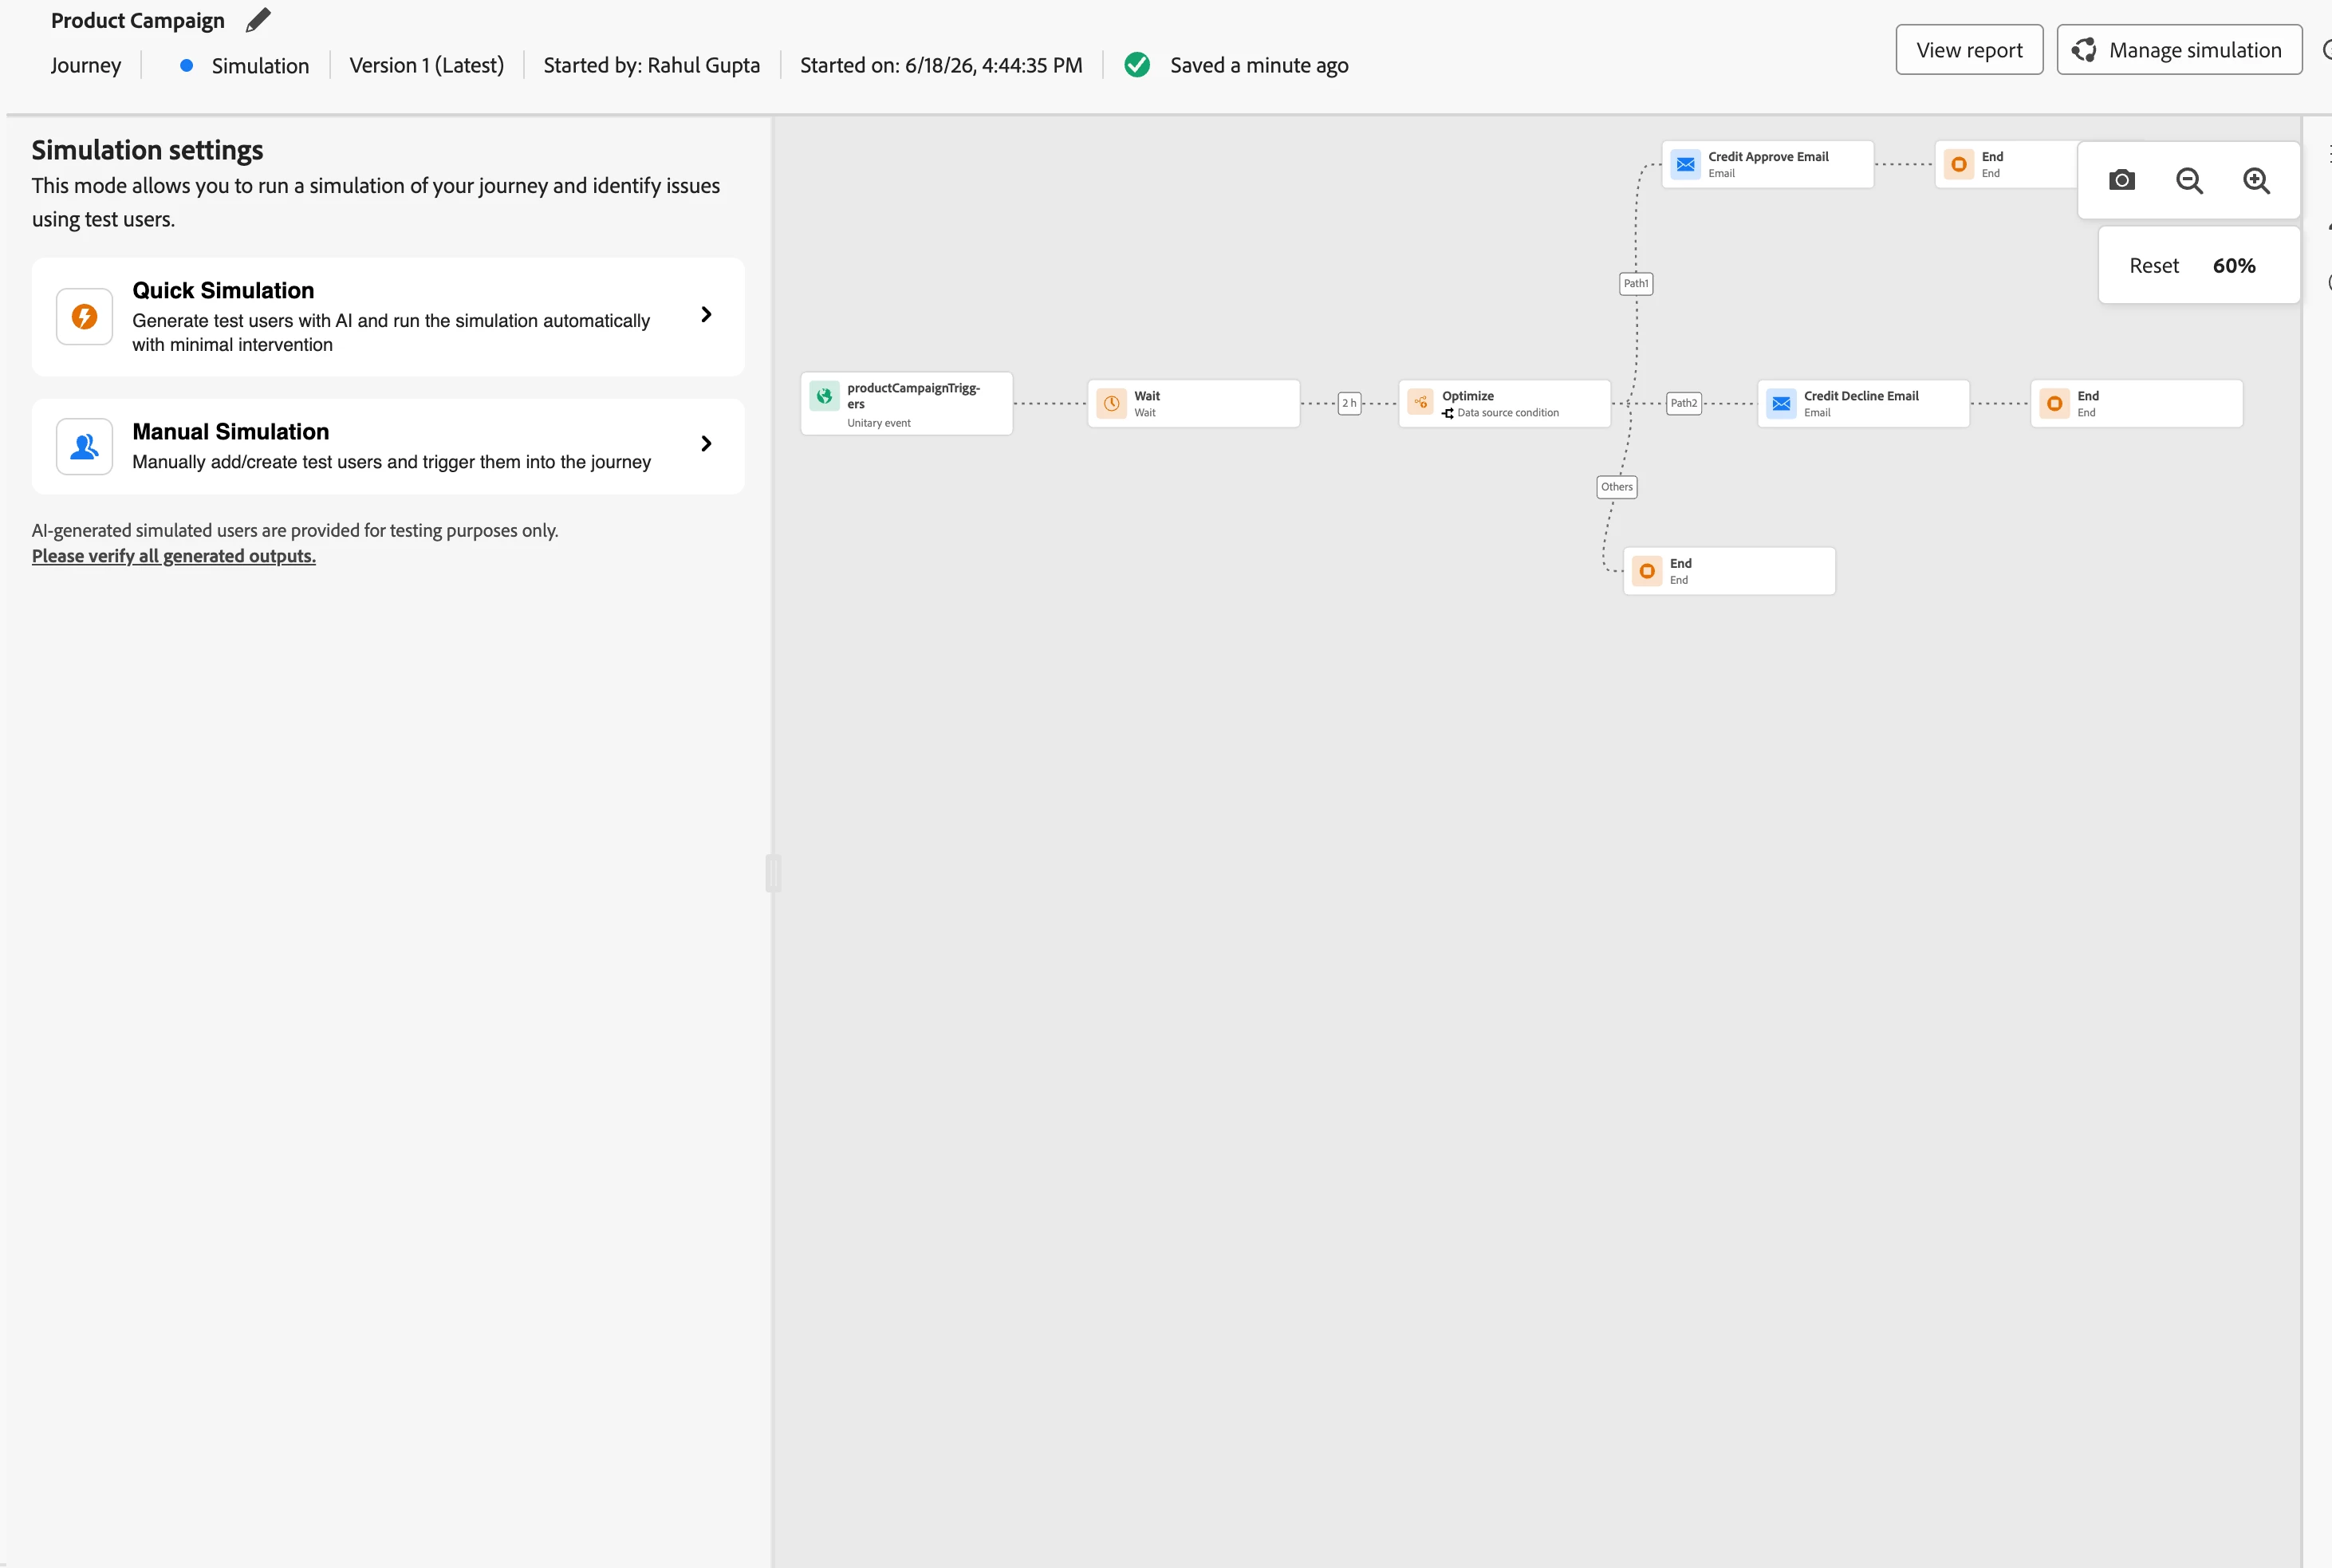
Journey 1 — Product Campaign
Trigger: Product campaign trigger event (a campaign broadcast, a segment qualification, or a product page visit — separate from the decisioning event).
Nodes: Wait (2 hours) → Condition → Email action (approved path) / Email action (declined path).
Condition expression (simple expression editor):
profile.creditDecision == "approved"Approved path: onboarding email with credit limit and next steps. Declined path: alternative product email with {{profile.declineReason}} rendered inline. Fallback path (other cases): holds profiles where creditDecision is null — not yet decided, or Journey 2 has not yet run. Neither email fires.
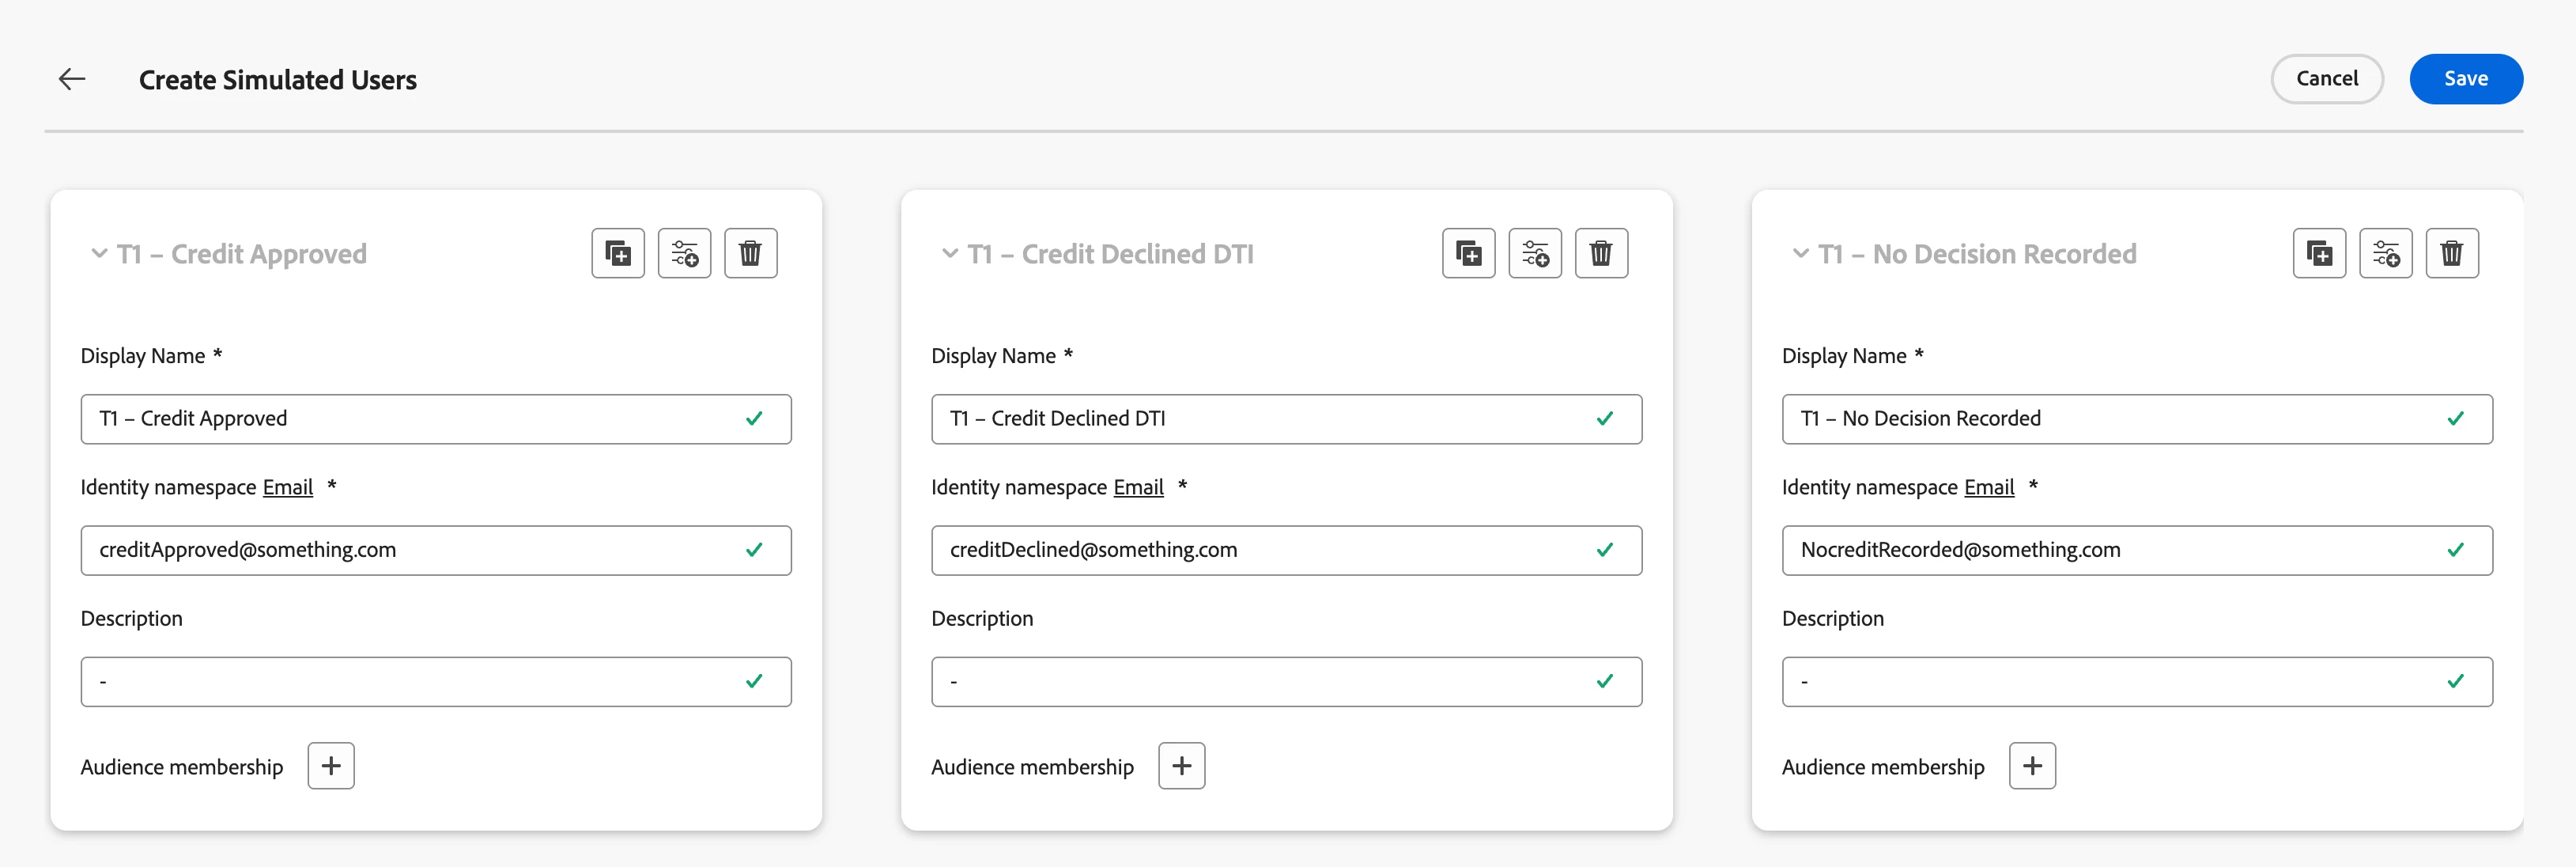
STEP 1: CREATE THE SIMULATED USERS
You need three Simulated Users — one for each meaningful state the system needs to handle.
Open any journey (Journey 1 or Journey 2), click Simulate, and choose Simulation. Click Create Simulated Users.
User A — Approved applicant
| Field | Value |
|---|---|
| Display name | T1 – Credit Approved |
| A real inbox you have access to | |
creditDecision | Leave blank |
declineReason | Leave blank |
User B — Declined applicant (debt-to-income reason)
| Field | Value |
|---|---|
| Display name | T1 – Credit Declined DTI |
| A real inbox you have access to | |
creditDecision | Leave blank |
declineReason | Leave blank |
User C — No decision recorded
| Field | Value |
|---|---|
| Display name | T1 – No Decision Recorded |
| A real inbox you have access to | |
creditDecision | Leave blank |
declineReason | Leave blank |
Leave creditDecision and declineReason blank on all three. Journey 2 will write these for Users A and B. User C never enters Journey 2 — their attributes stay blank throughout, which is exactly the null-state scenario you need to verify.
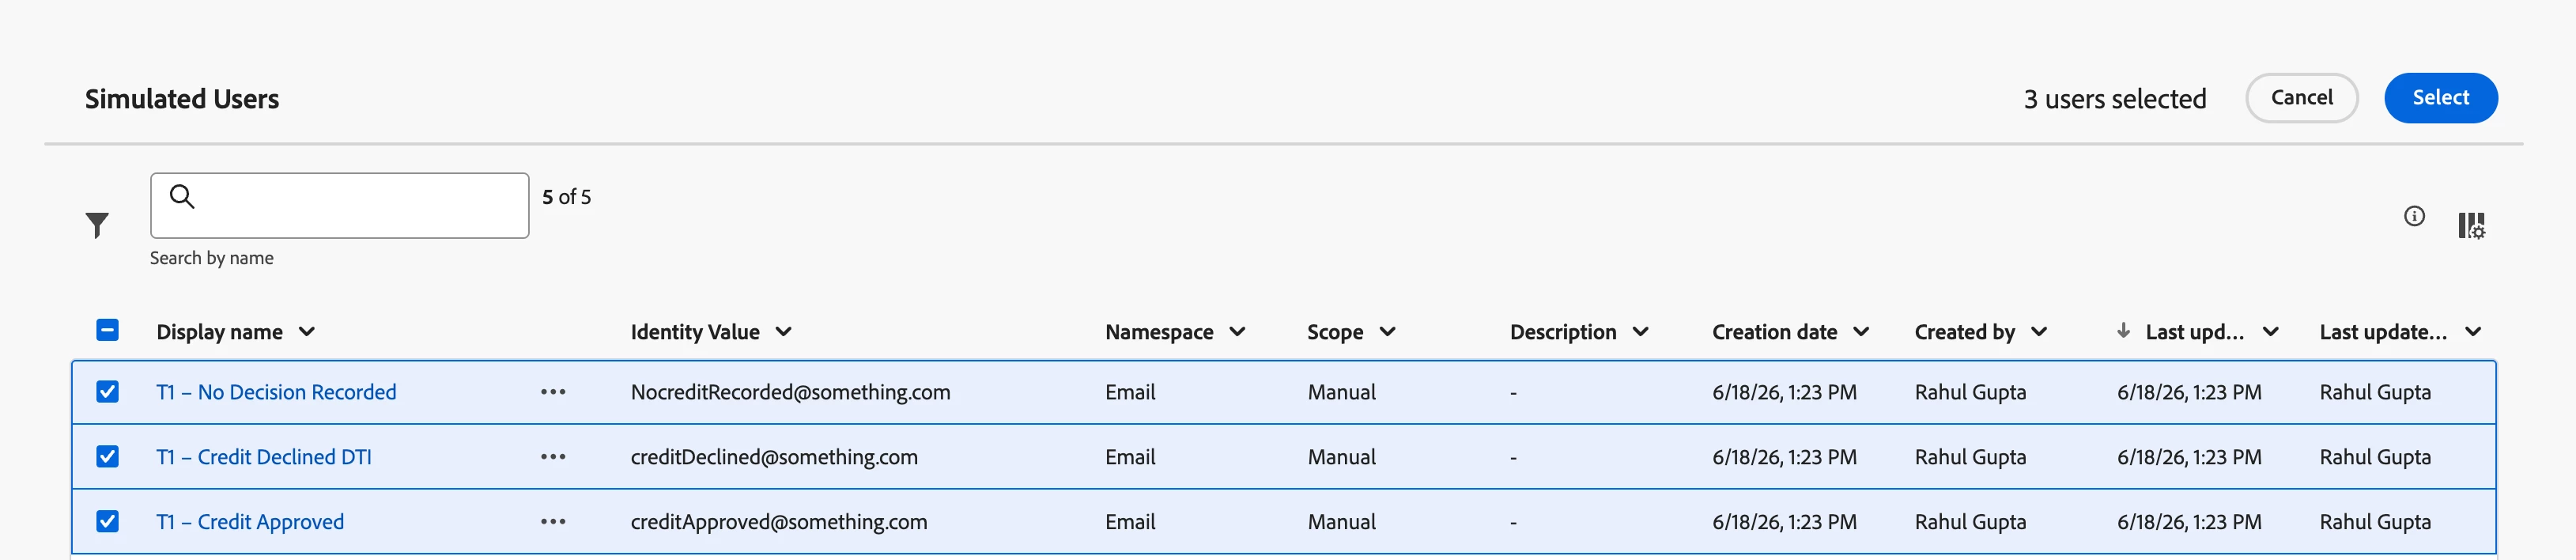
Click Save after creating each user. Saved Simulated Users are available across both journeys via Select Simulated Users — you create them once and reuse them for the entire test sequence.
STEP 2: RUN JOURNEY 2 FOR USER A (APPROVED)
Open Journey 2. Click Simulate → Simulation. Click Select Simulated Users and pick User A.
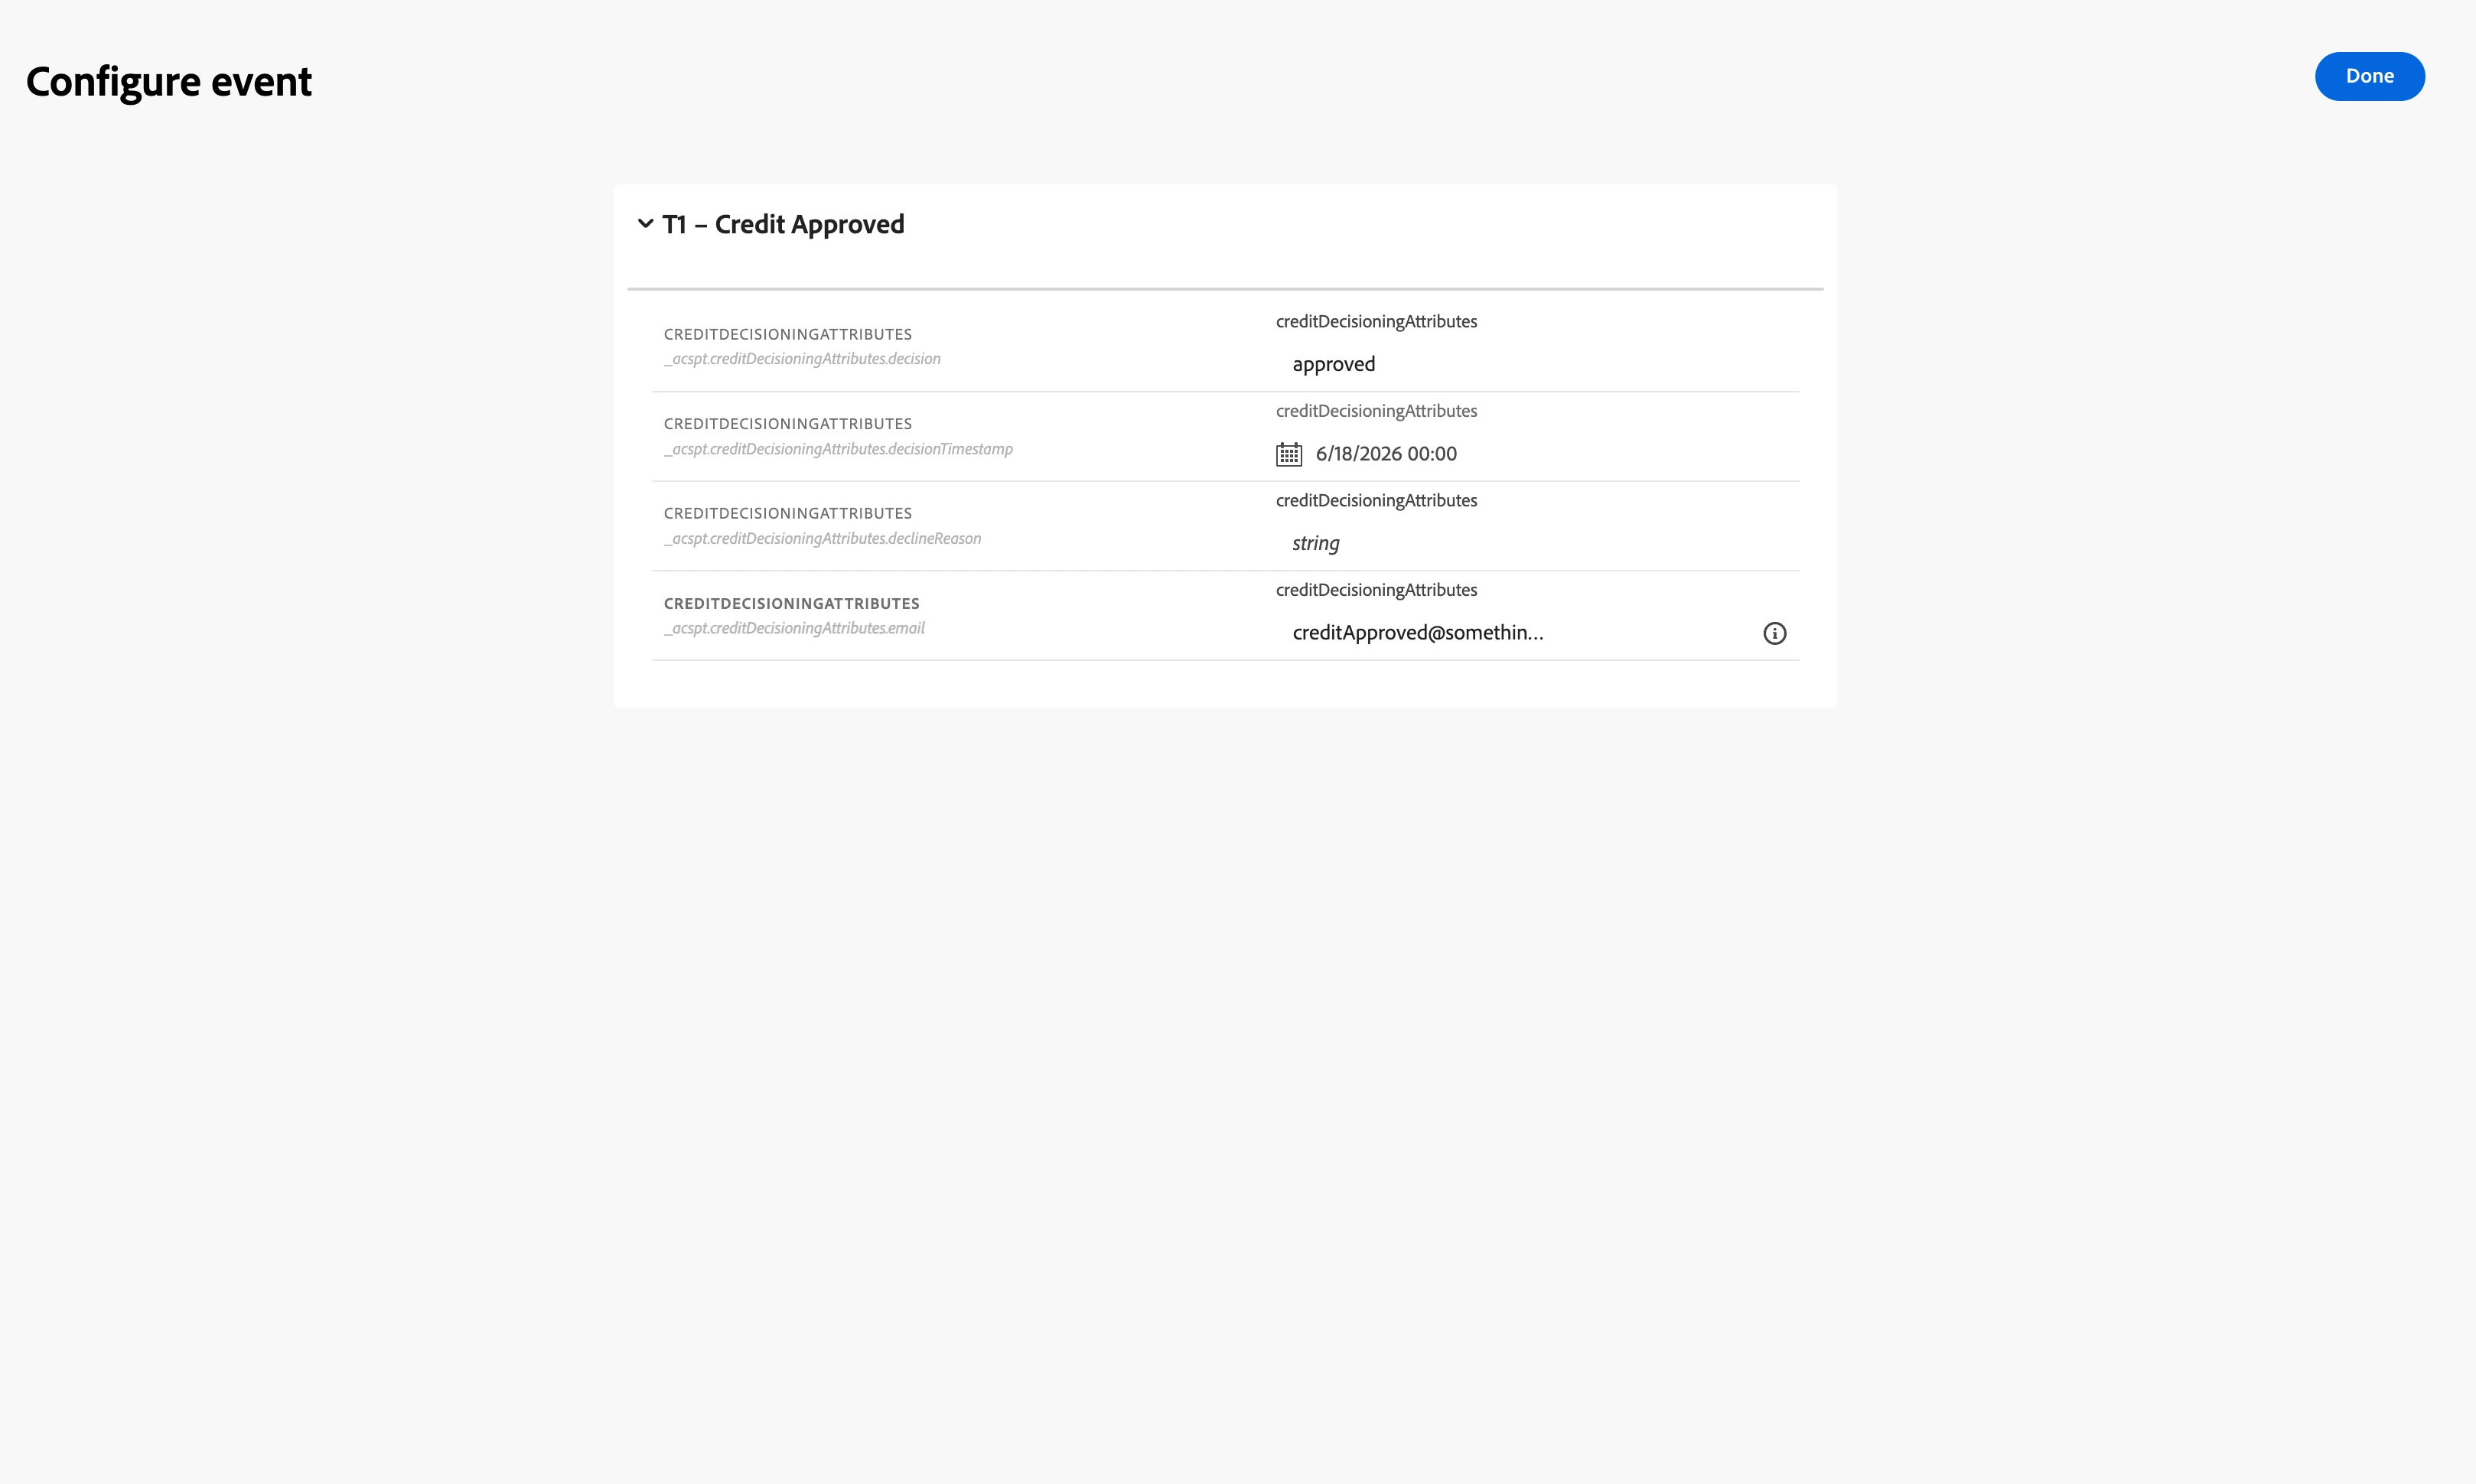
Click Configure events to set the credit decisioning event payload for User A:
{
"decision": "approved",
"declineReason": "Not Applicable",
"timestamp": "2026-06-18T09:00:00Z"
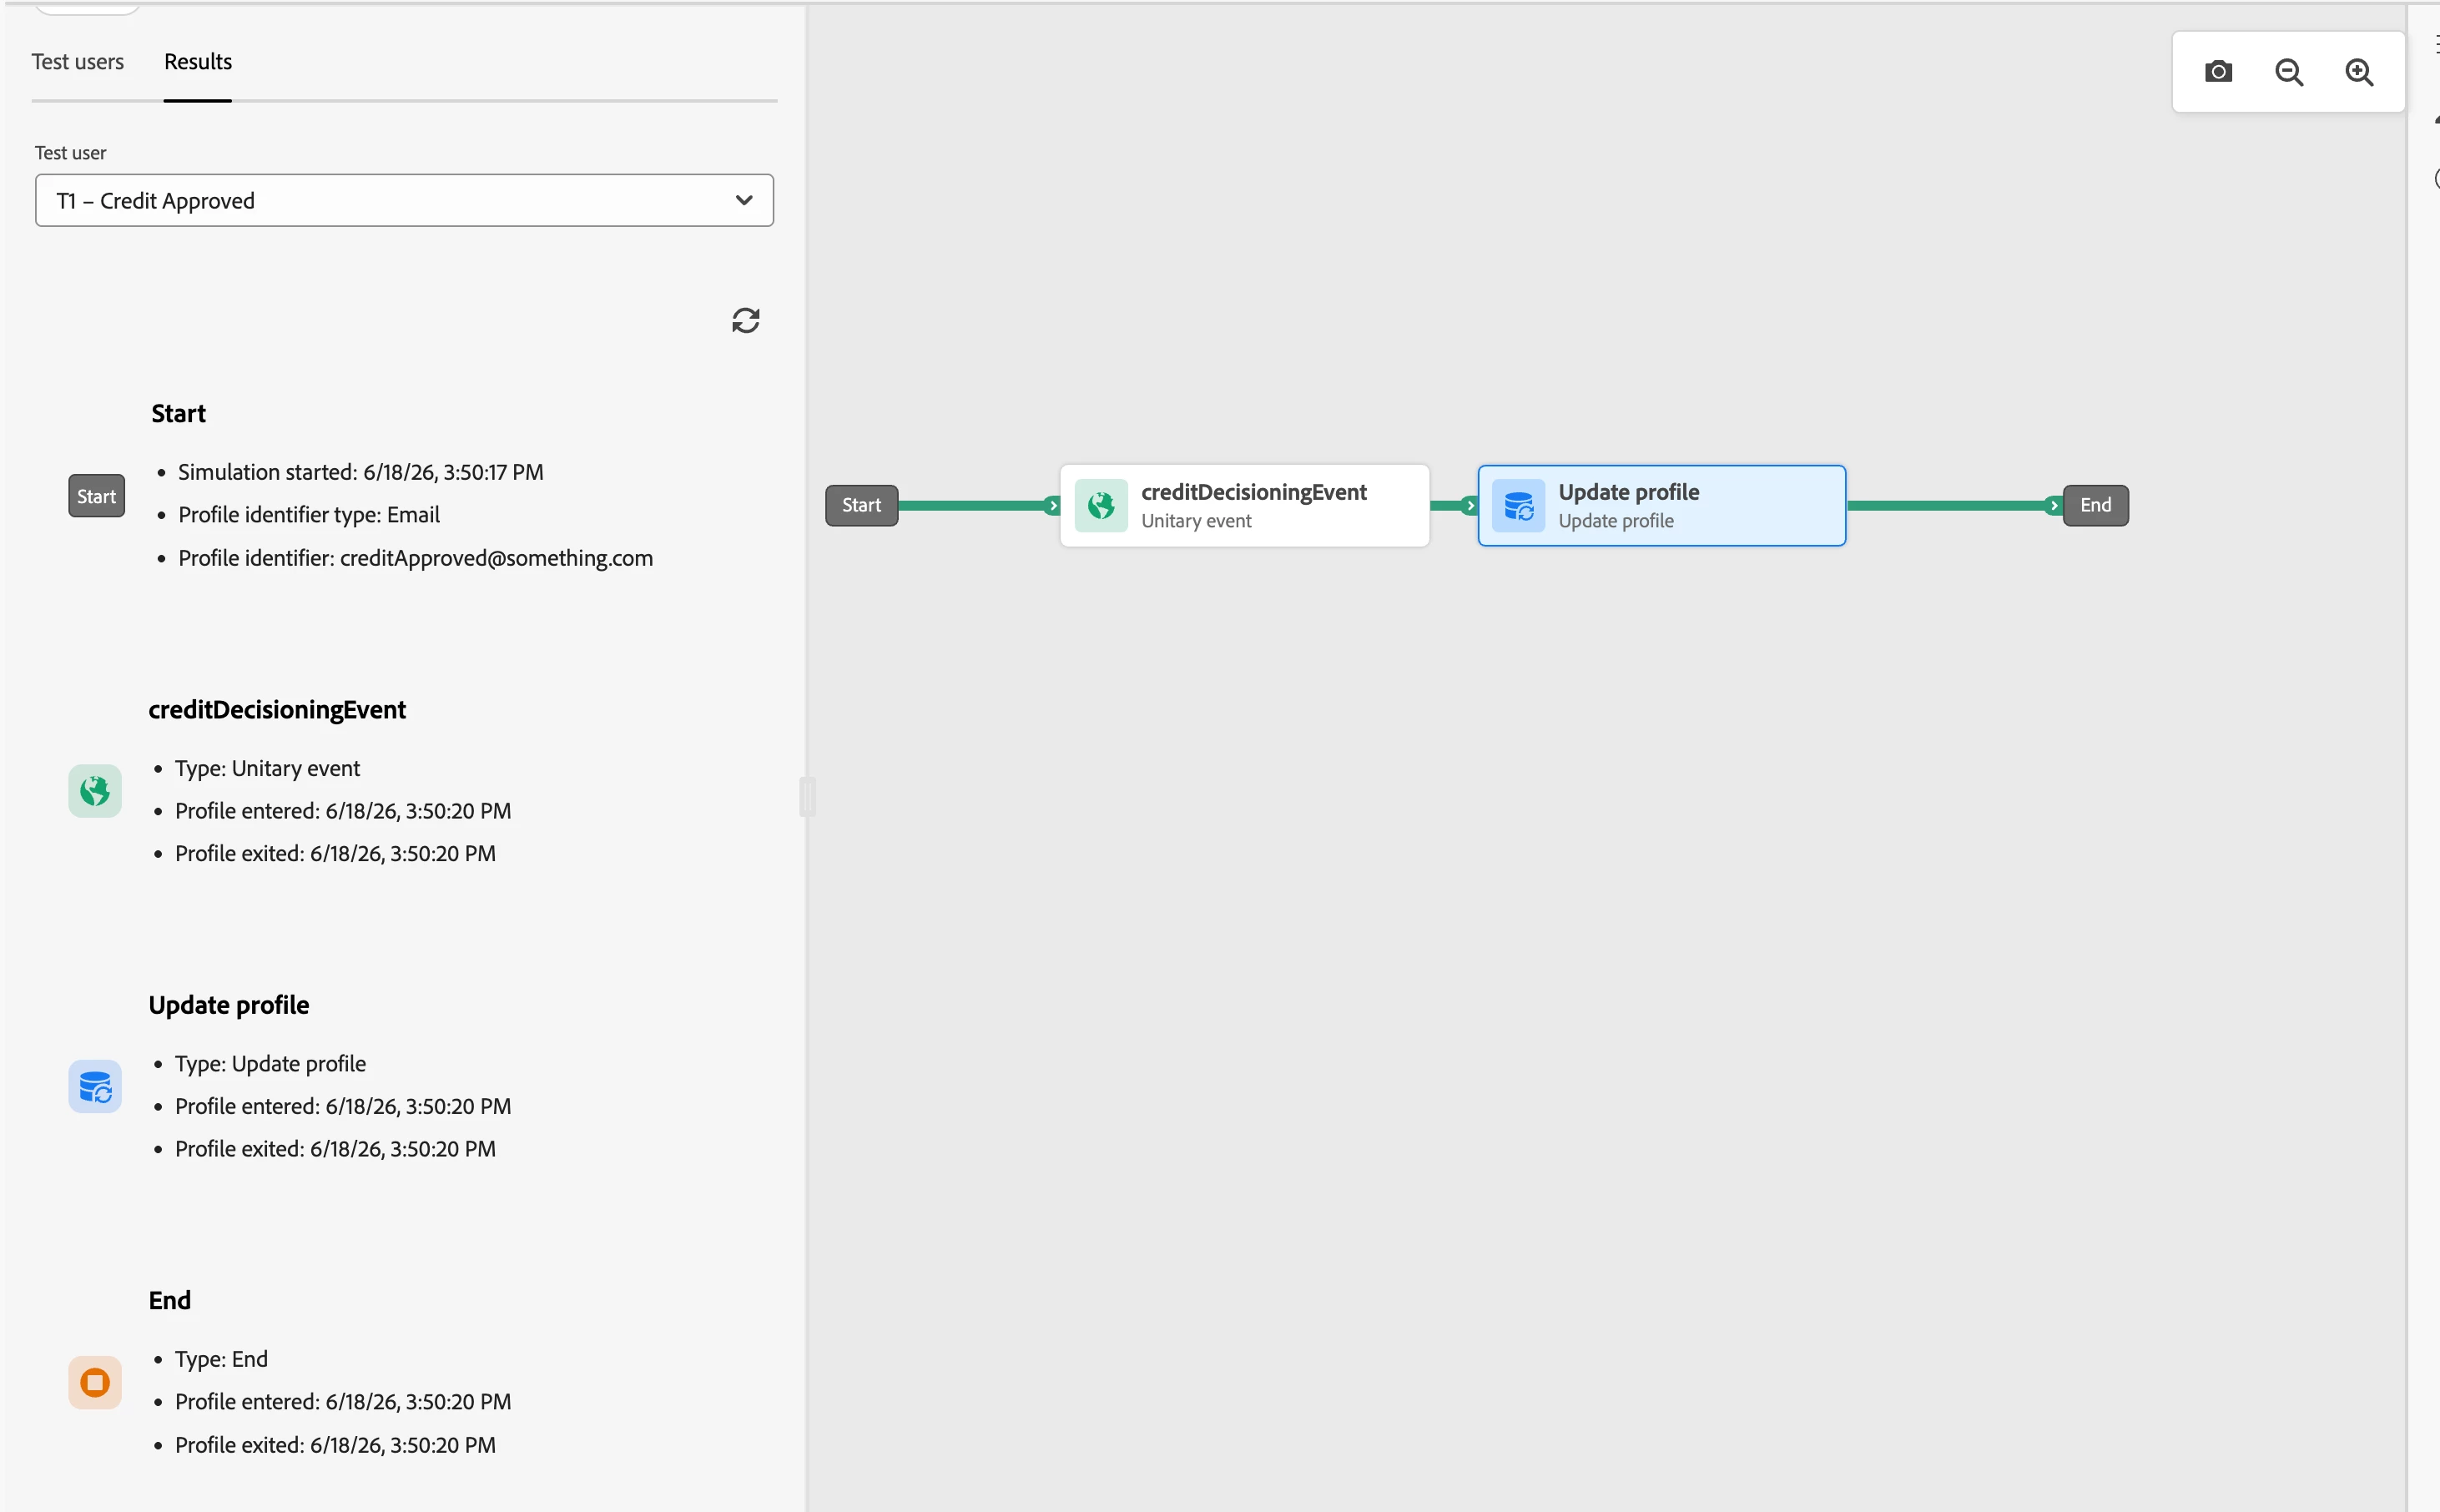
}Click Send. The journey canvas activates. Watch the path trace on the canvas — the green line should move through the Update Profile node and reach End.
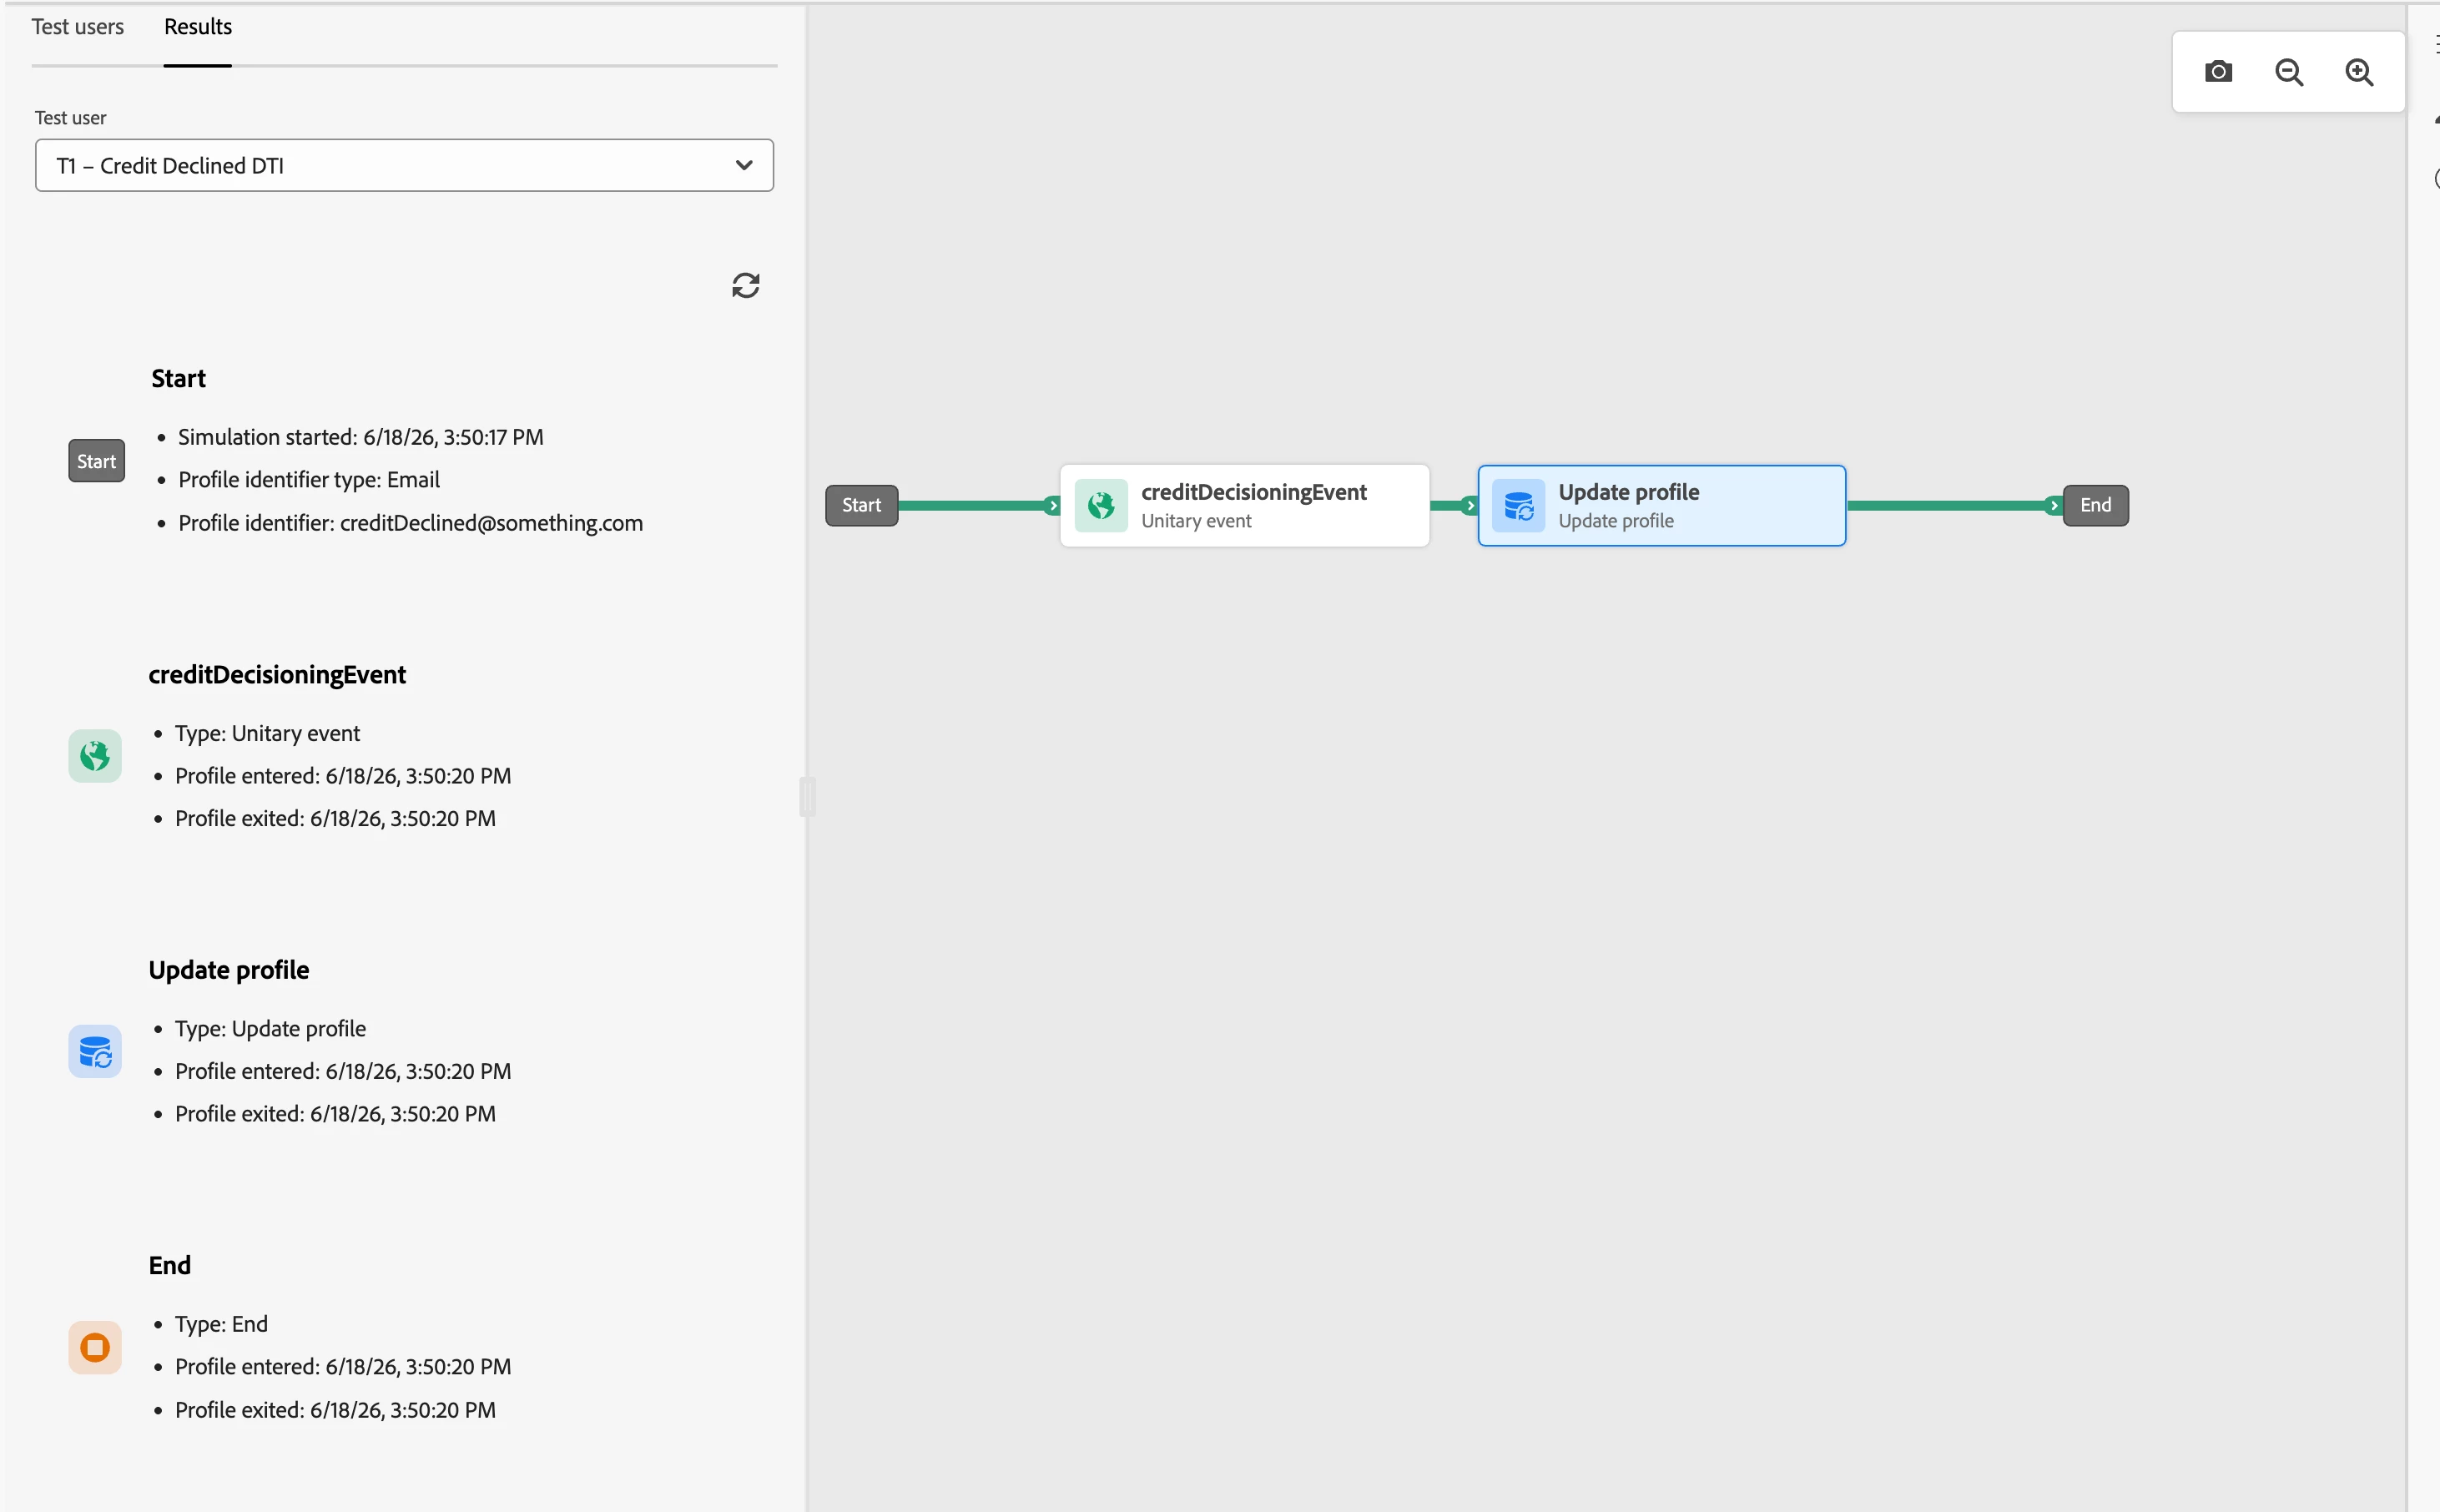
Open the Results tab. Select User A from the dropdown. Open the Update Profile node detail and confirm both writes executed:
creditDecisionwritten as"approved"declineReasonwritten as"Not Applicable"
This is the state Journey 1 will read when User A reaches the condition node.
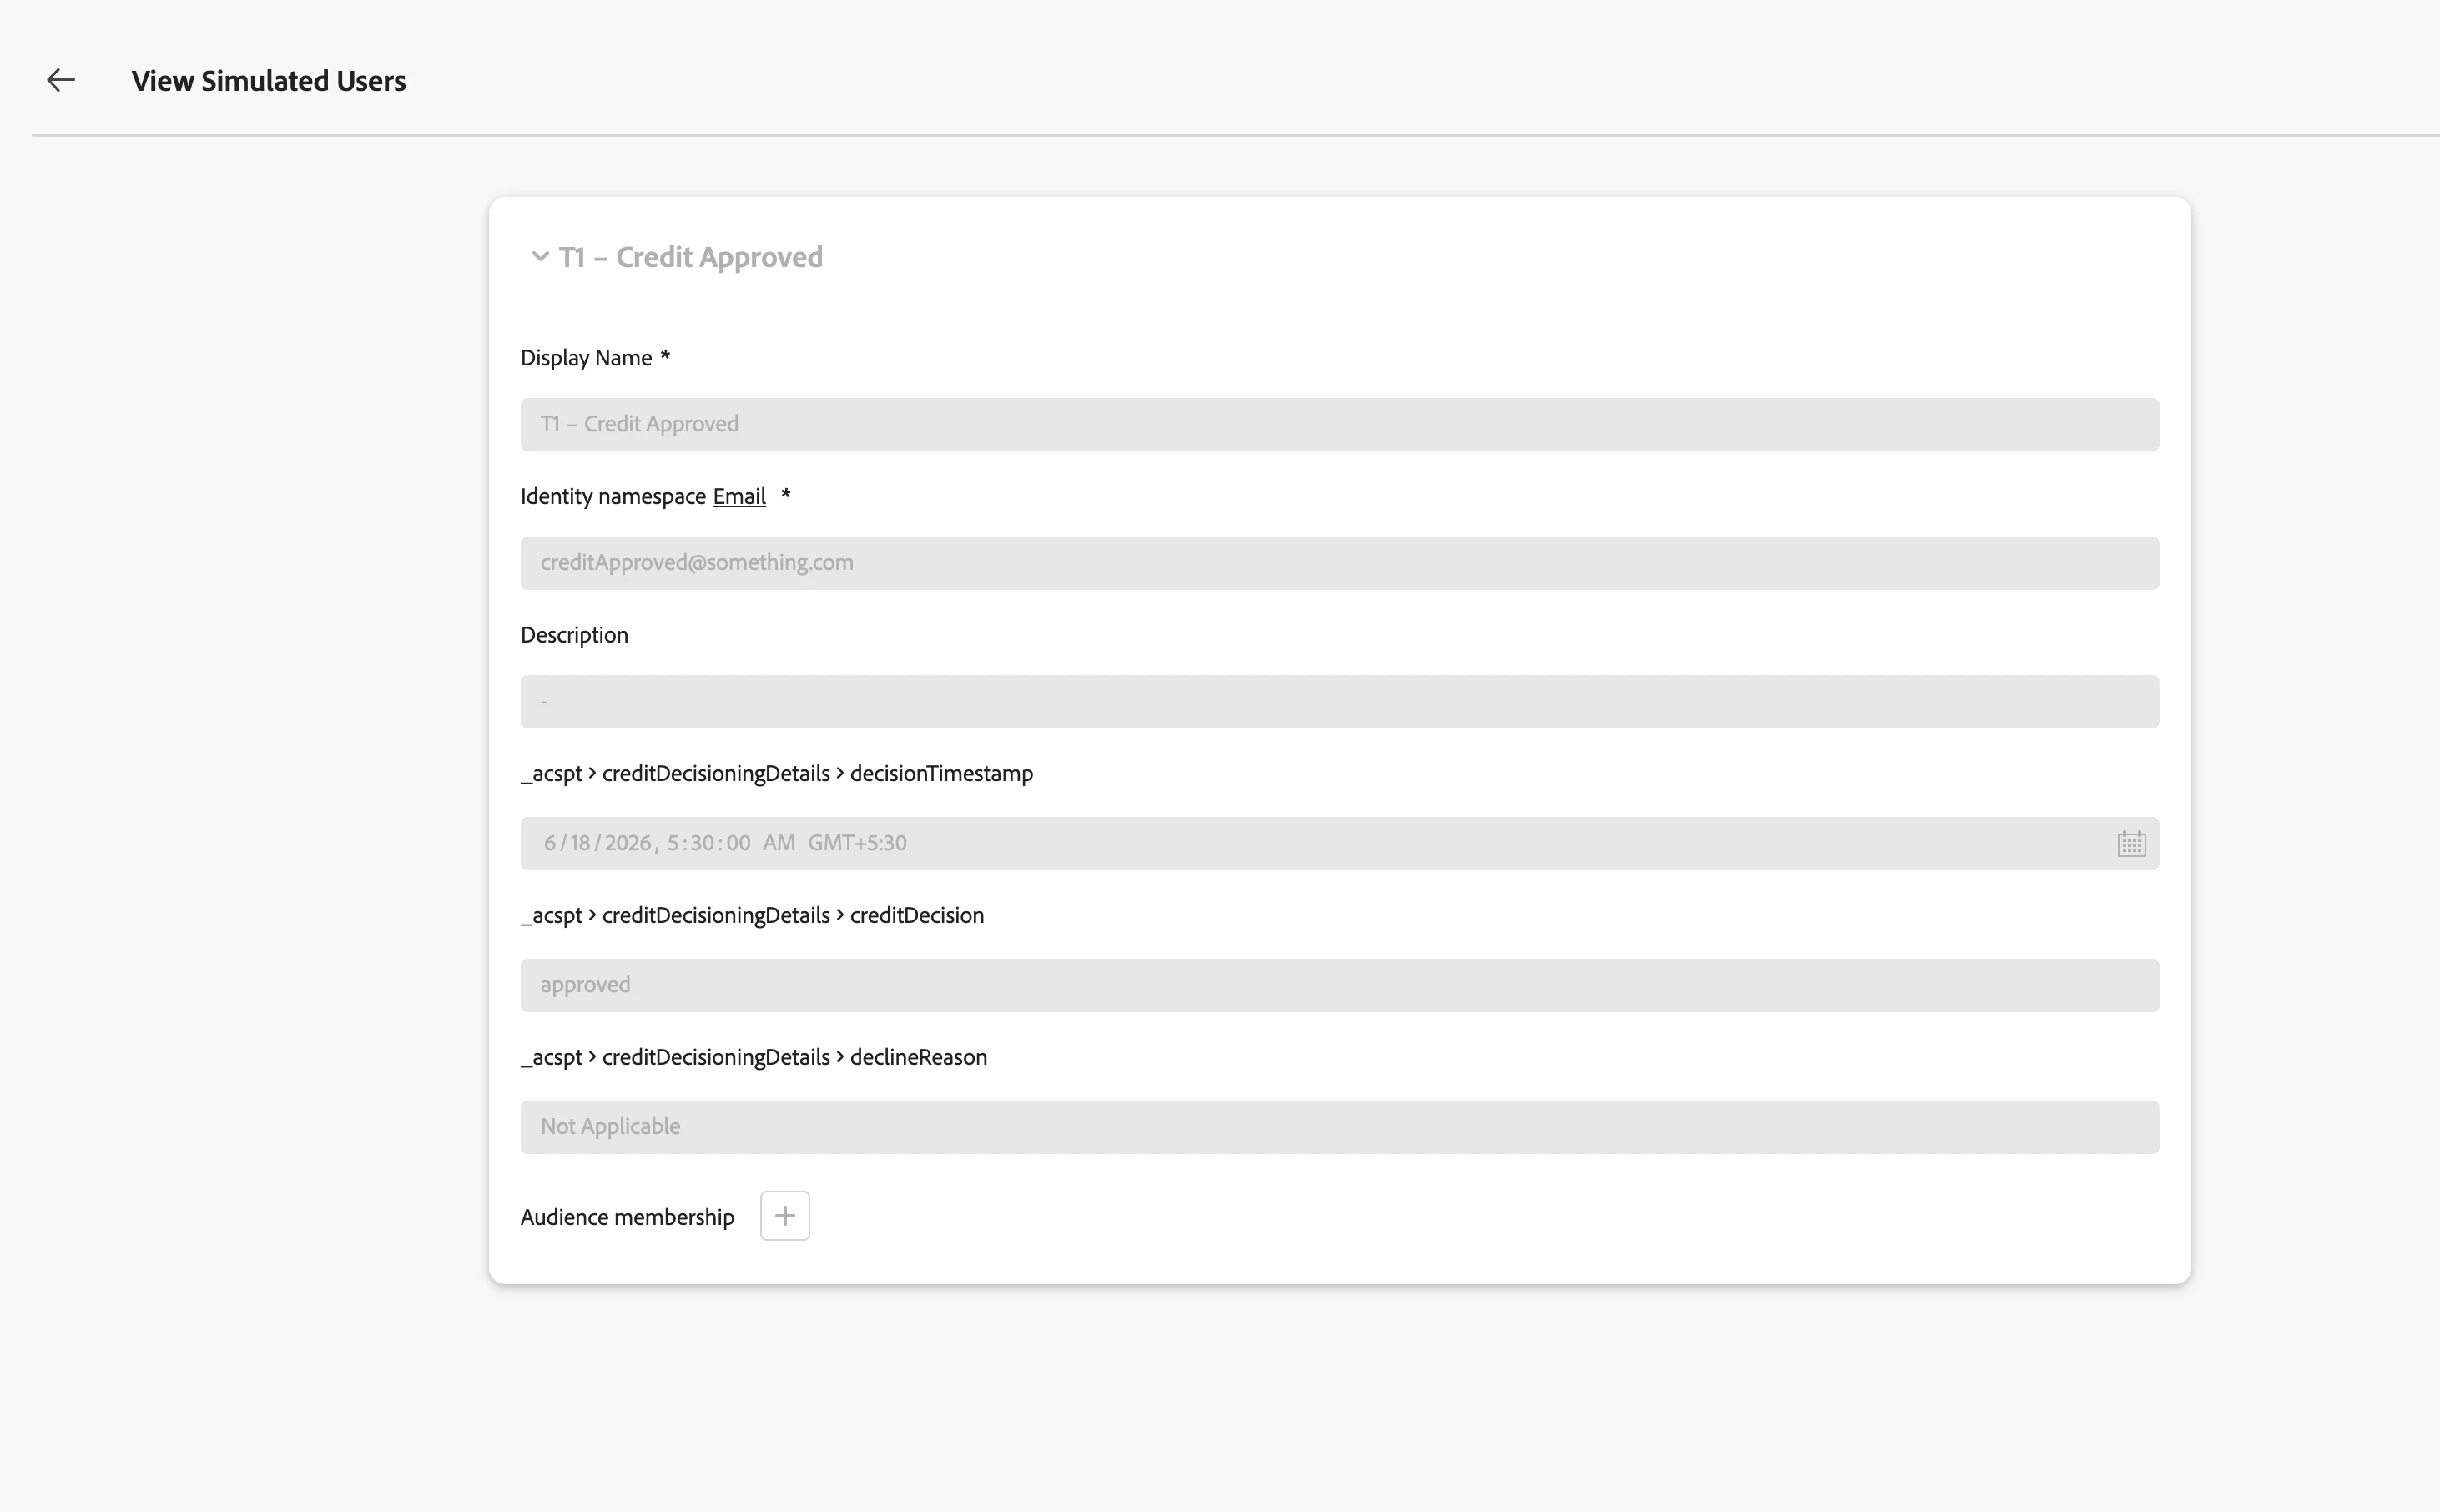
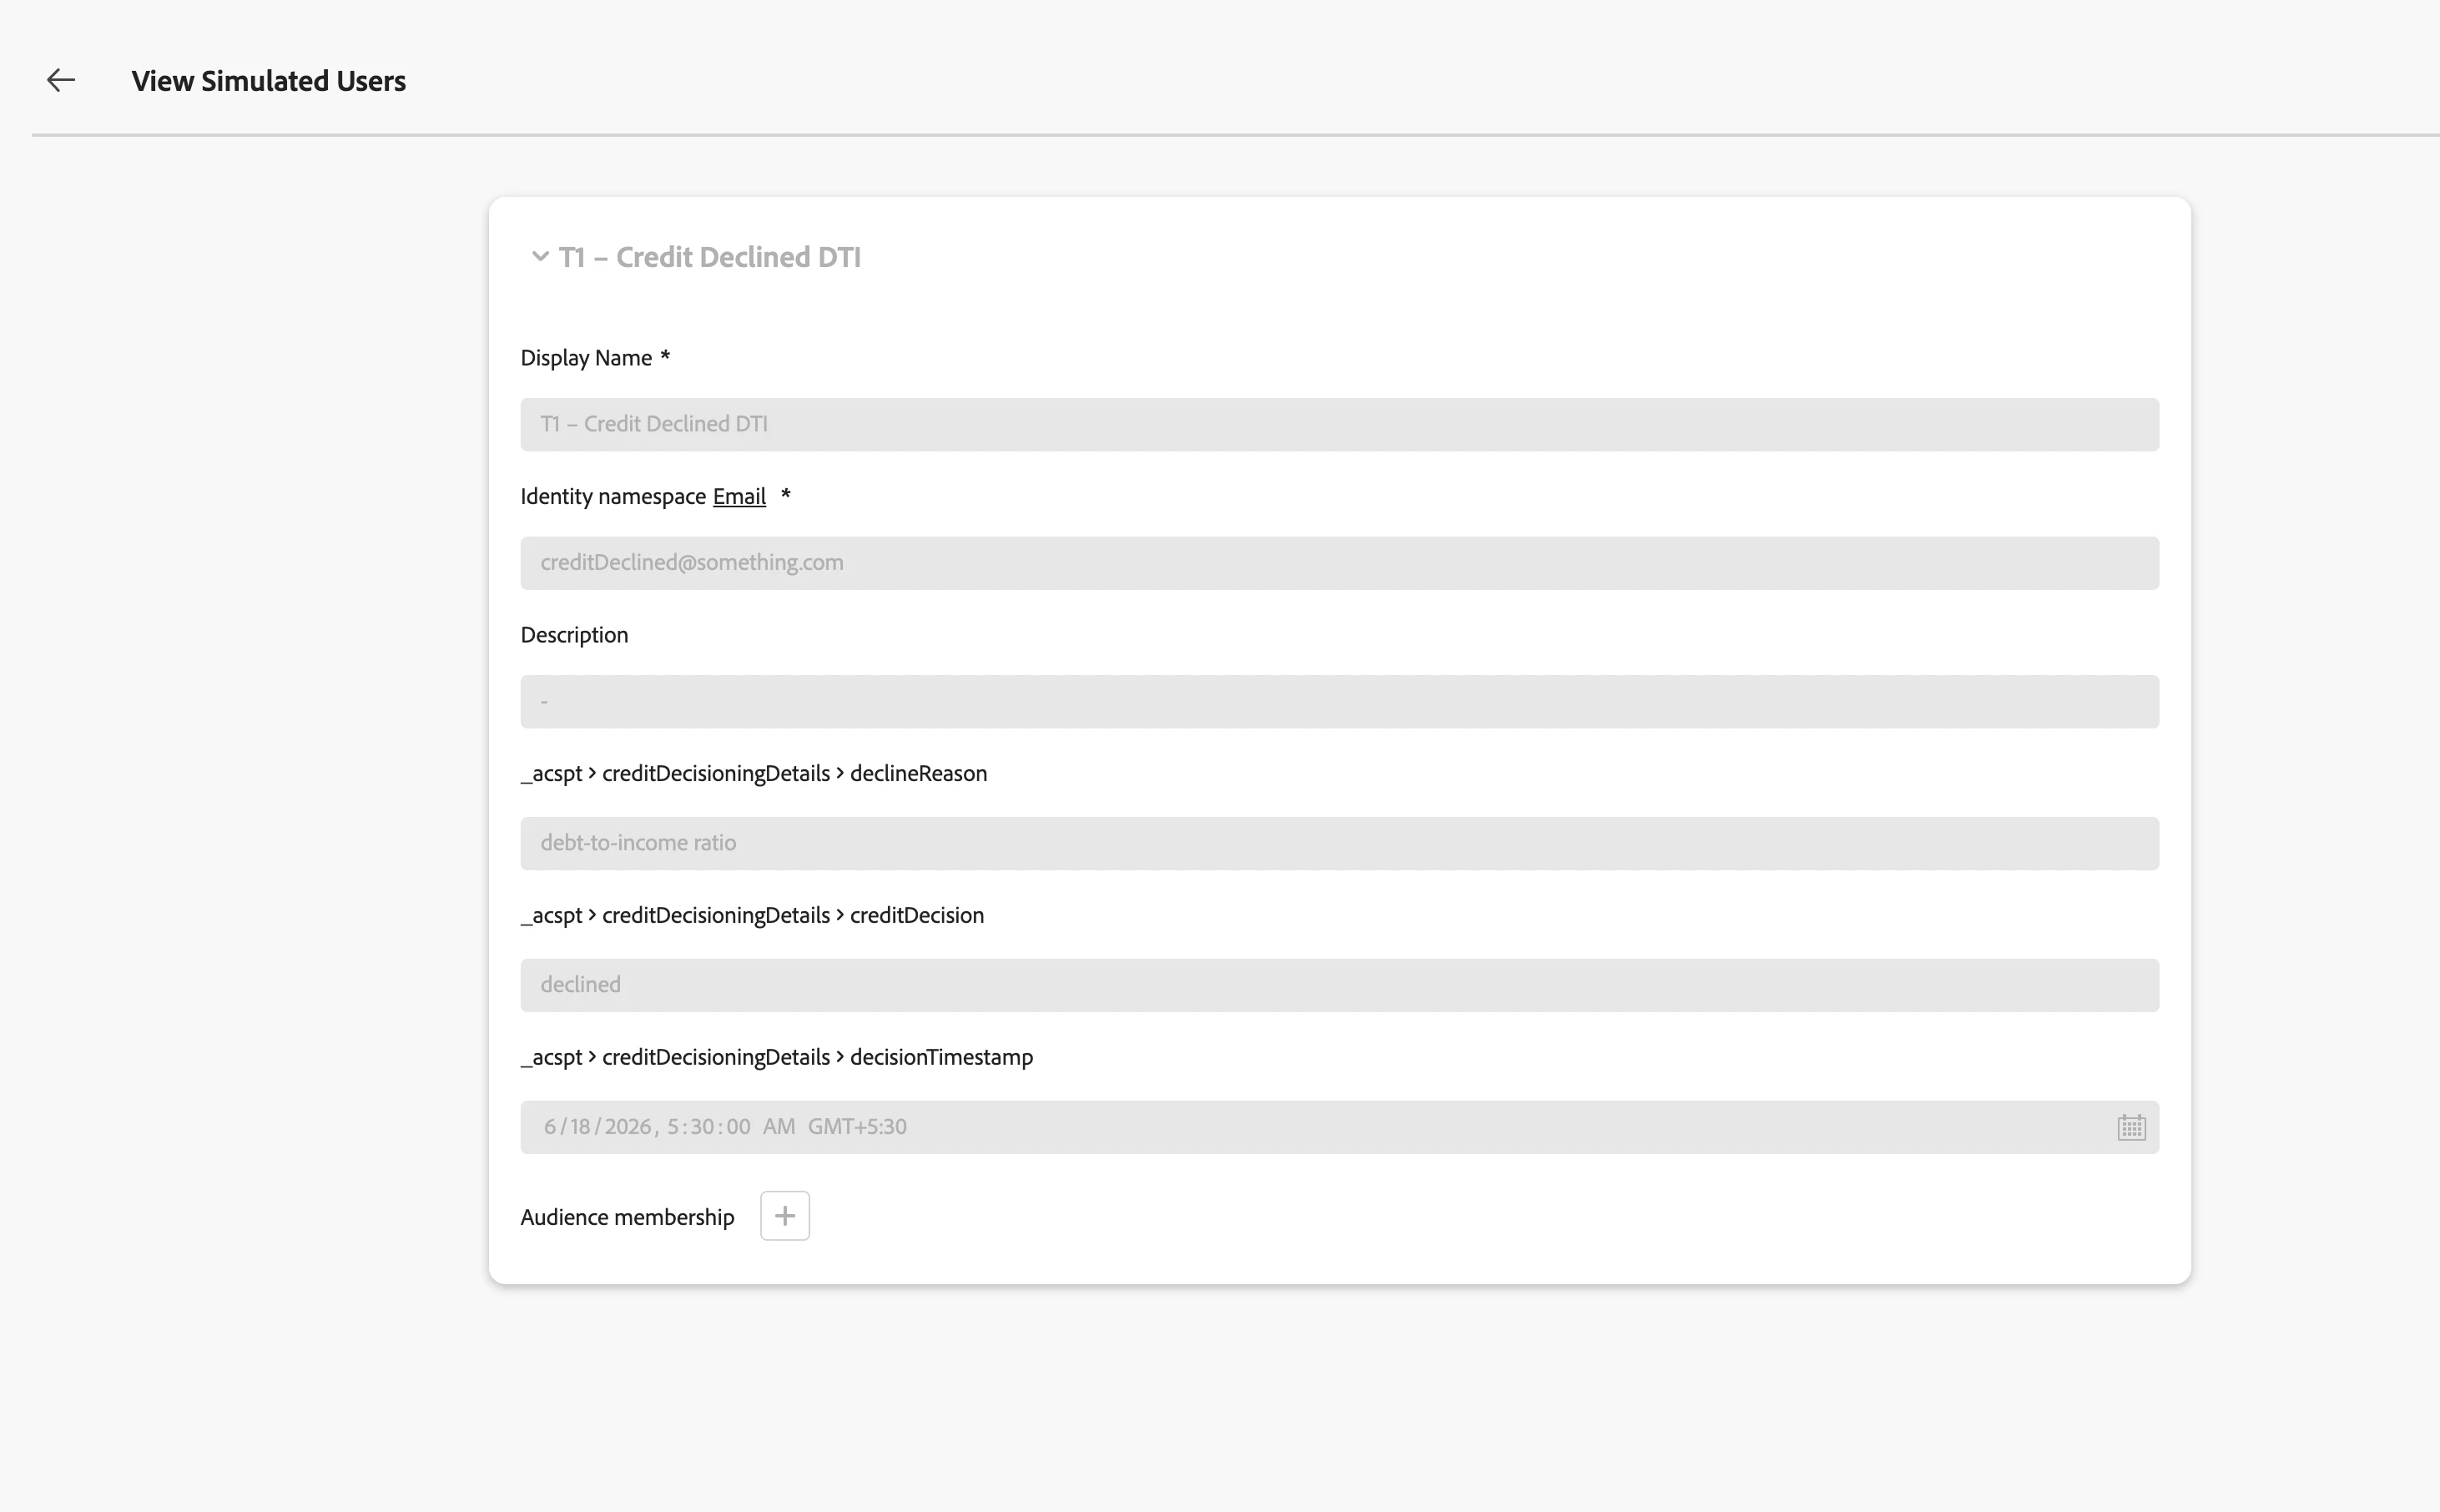
You can also check if the data is updated in the simulated user profile by viewing the simulated user.
STEP 3: RUN JOURNEY 2 FOR USER B (DECLINED)
Still in Journey 2 Simulation Mode, click Select Simulated Users and switch to User B. Configure the event payload:
{
"decision": "declined",
"declineReason": "debt-to-income ratio",
"timestamp": "2026-06-18T09:05:00Z"
}
Click Send. Confirm in the Results tab that the Update Profile node executed for User B and both fields are written:
creditDecisionwritten as"declined"declineReasonwritten as"debt-to-income ratio"
Do not run Journey 2 for User C. Leave their profile attributes blank. The null state is part of what Journey 1 needs to handle correctly.
Close Simulation Mode on Journey 2. Journey 2 returns to Draft status. The writes to User A and User B's profiles persist — those attributes are now readable by Journey 1.
You can also check if the data is updated in the simulated user profile by viewing the simulated user.
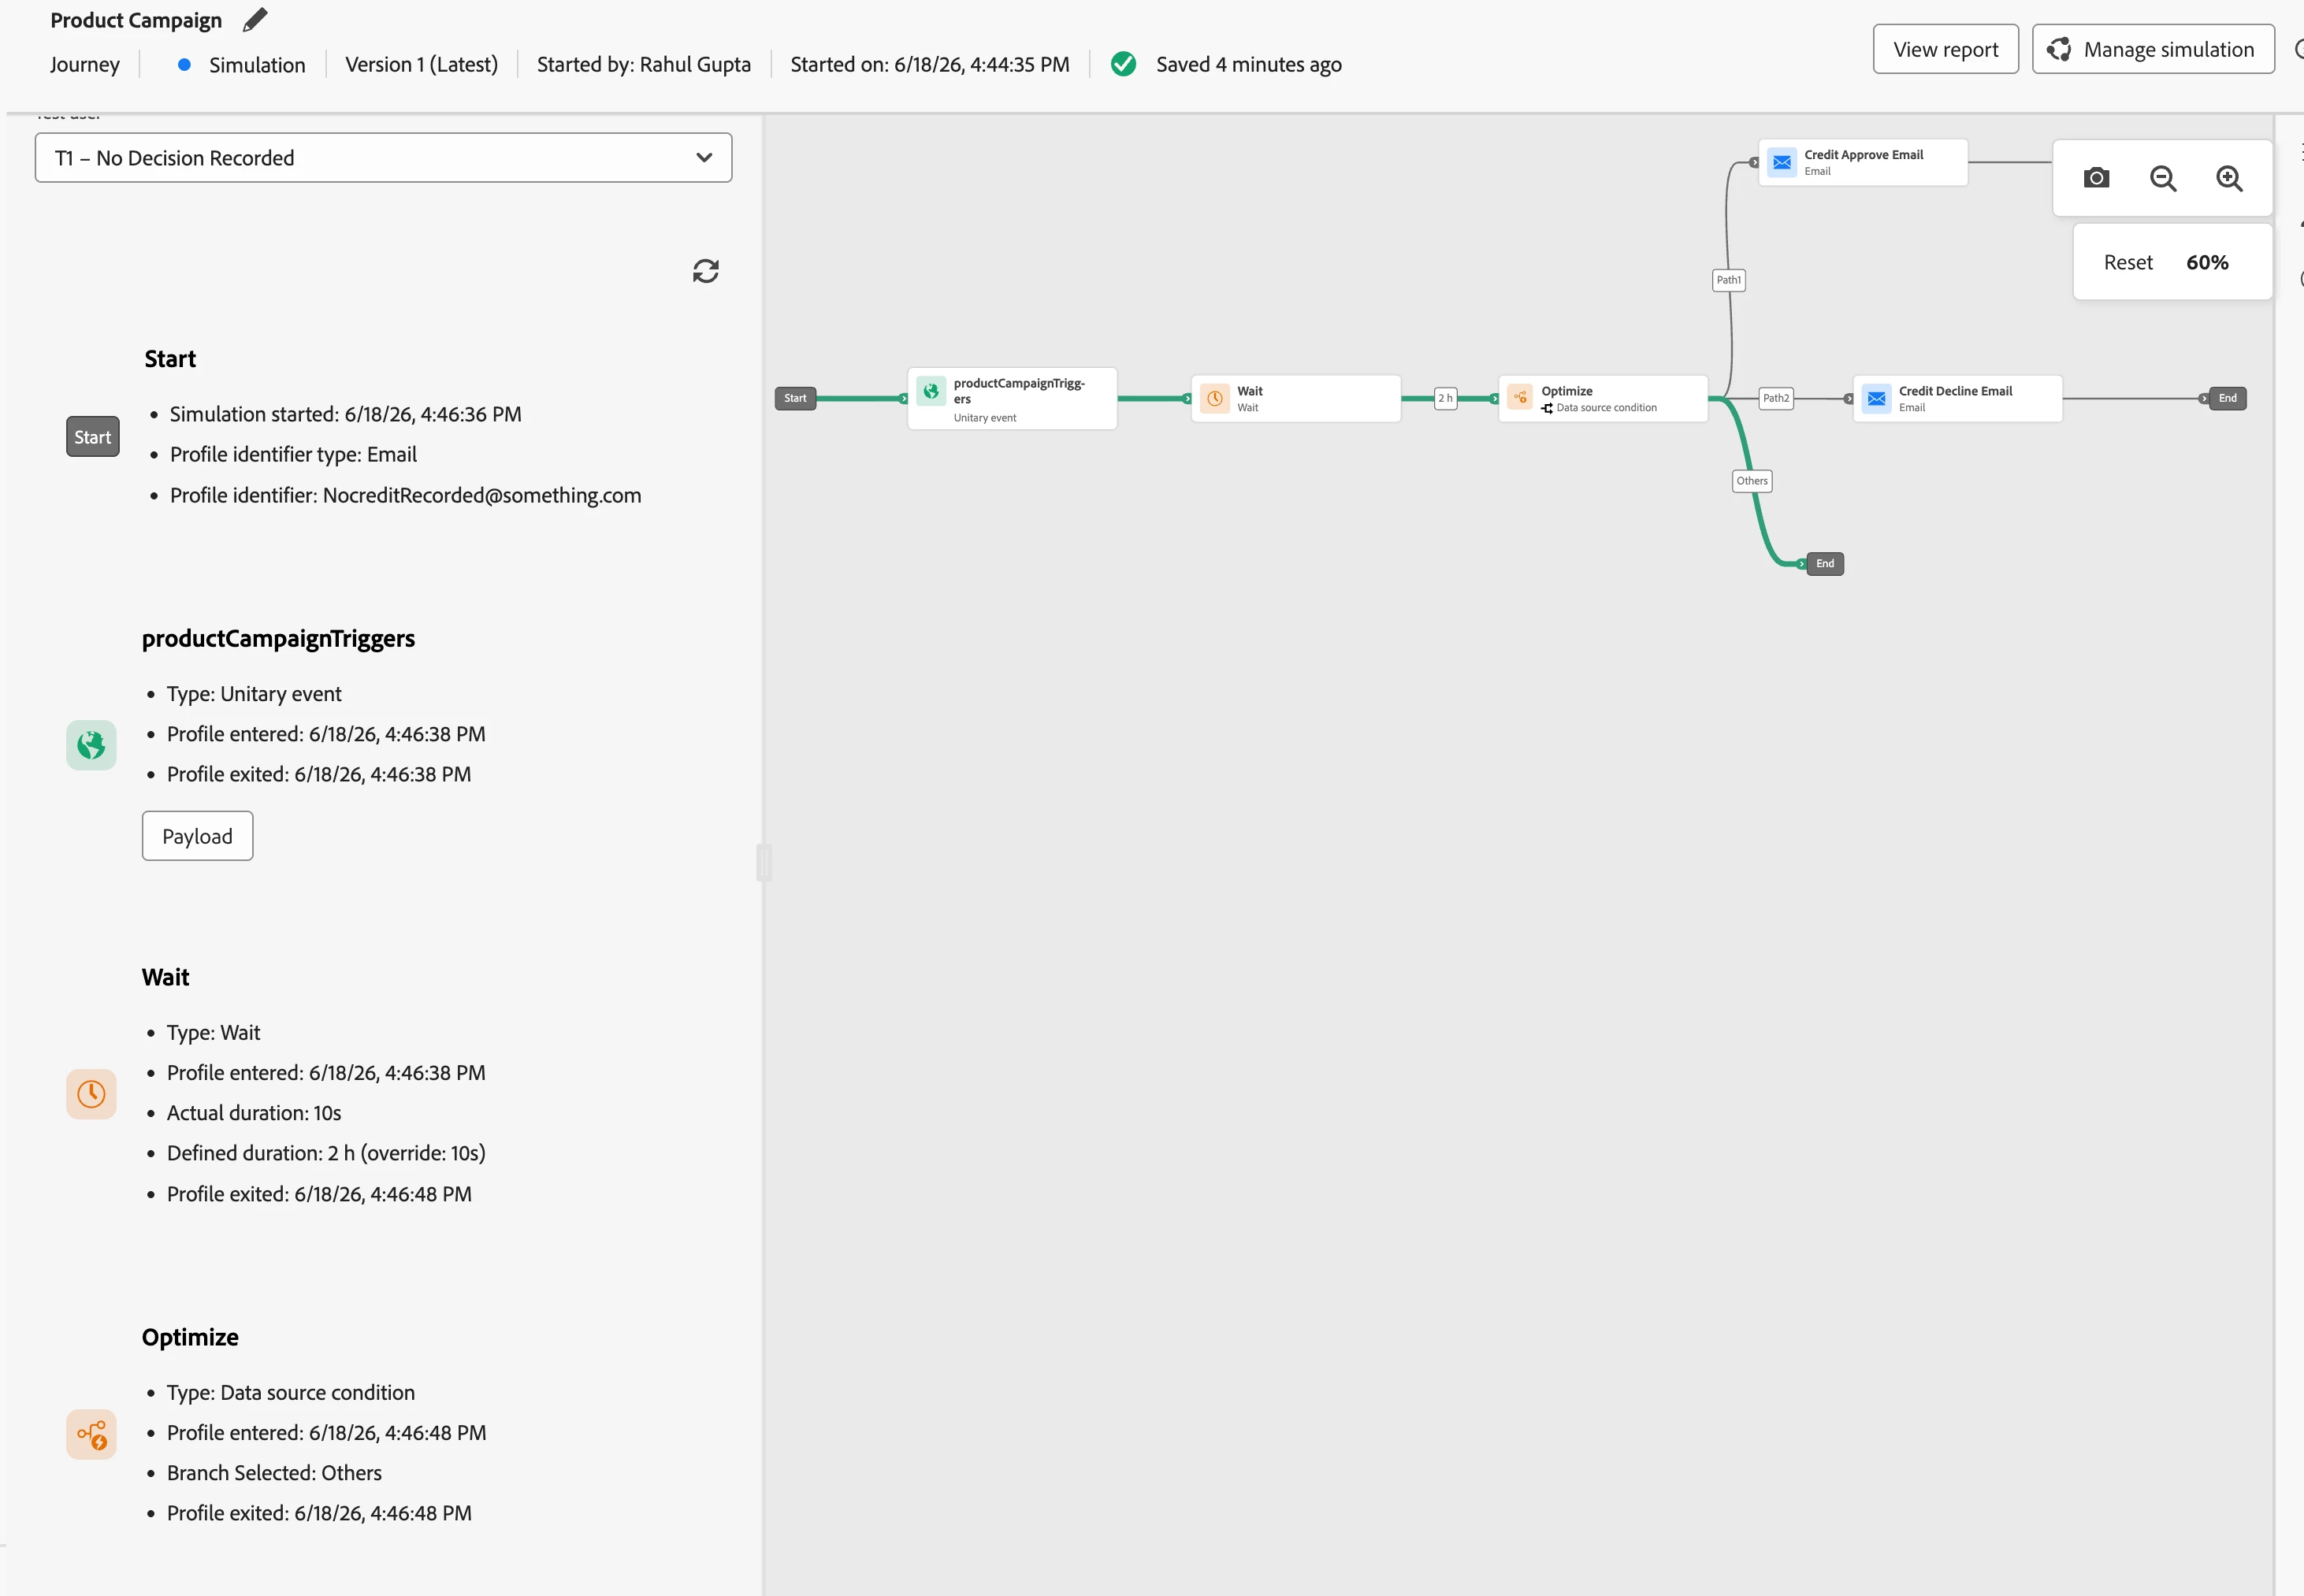
STEP 4: RUN JOURNEY 1 FOR ALL THREE USERS
Open Journey 1. Click Simulate → Simulation. Open Test Settings and compress the Wait node duration to a value that lets you complete the simulation quickly — 30 seconds is enough. The 2-hour wait is the production window for profile propagation; in simulation, the attributes are already written so you just need the wait node to clear.
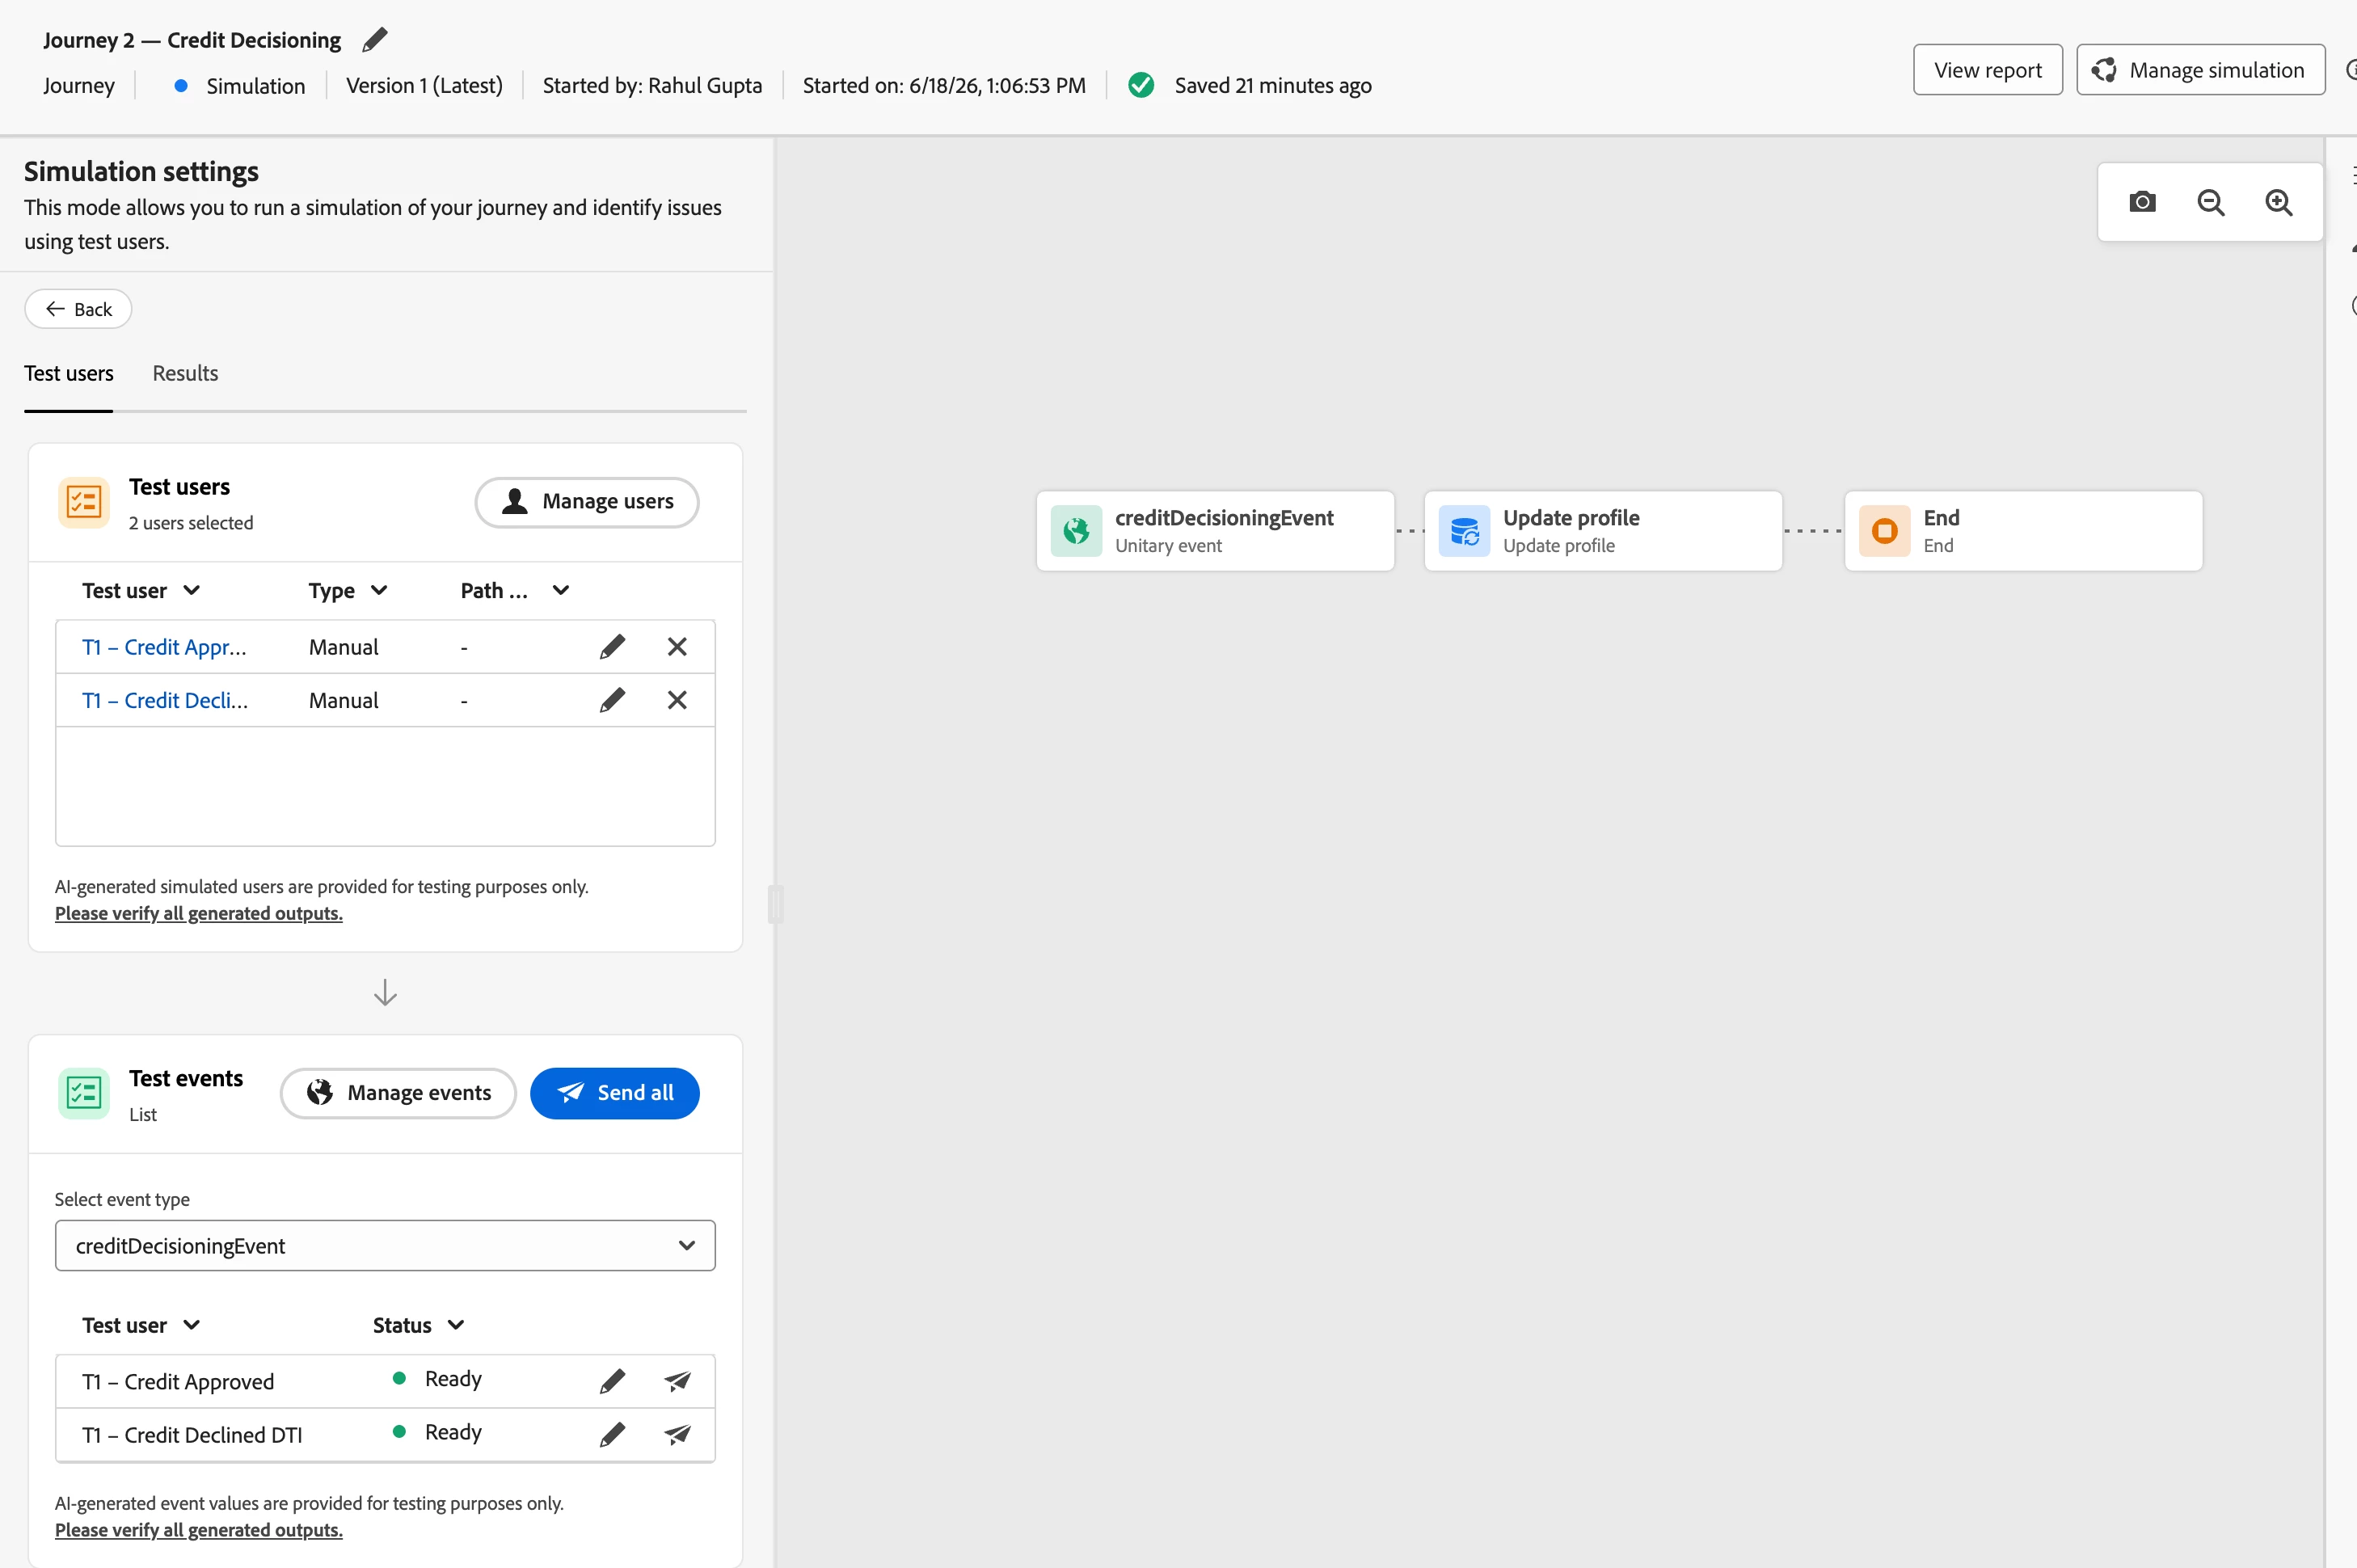
Click Select Simulated Users and pick all three: User A, User B, and User C.
Click Configure events and set the product campaign trigger event. This event is the same for all three users — it is the entry event into Journey 1, not related to the credit decision. Send for all three simultaneously using Send all.

All three users are now parked at the Wait node. After the compressed wait elapses, the condition node evaluates for each user.
STEP 5: READ THE RESULTS TAB
Open the Results tab. Use the dropdown to switch between users.
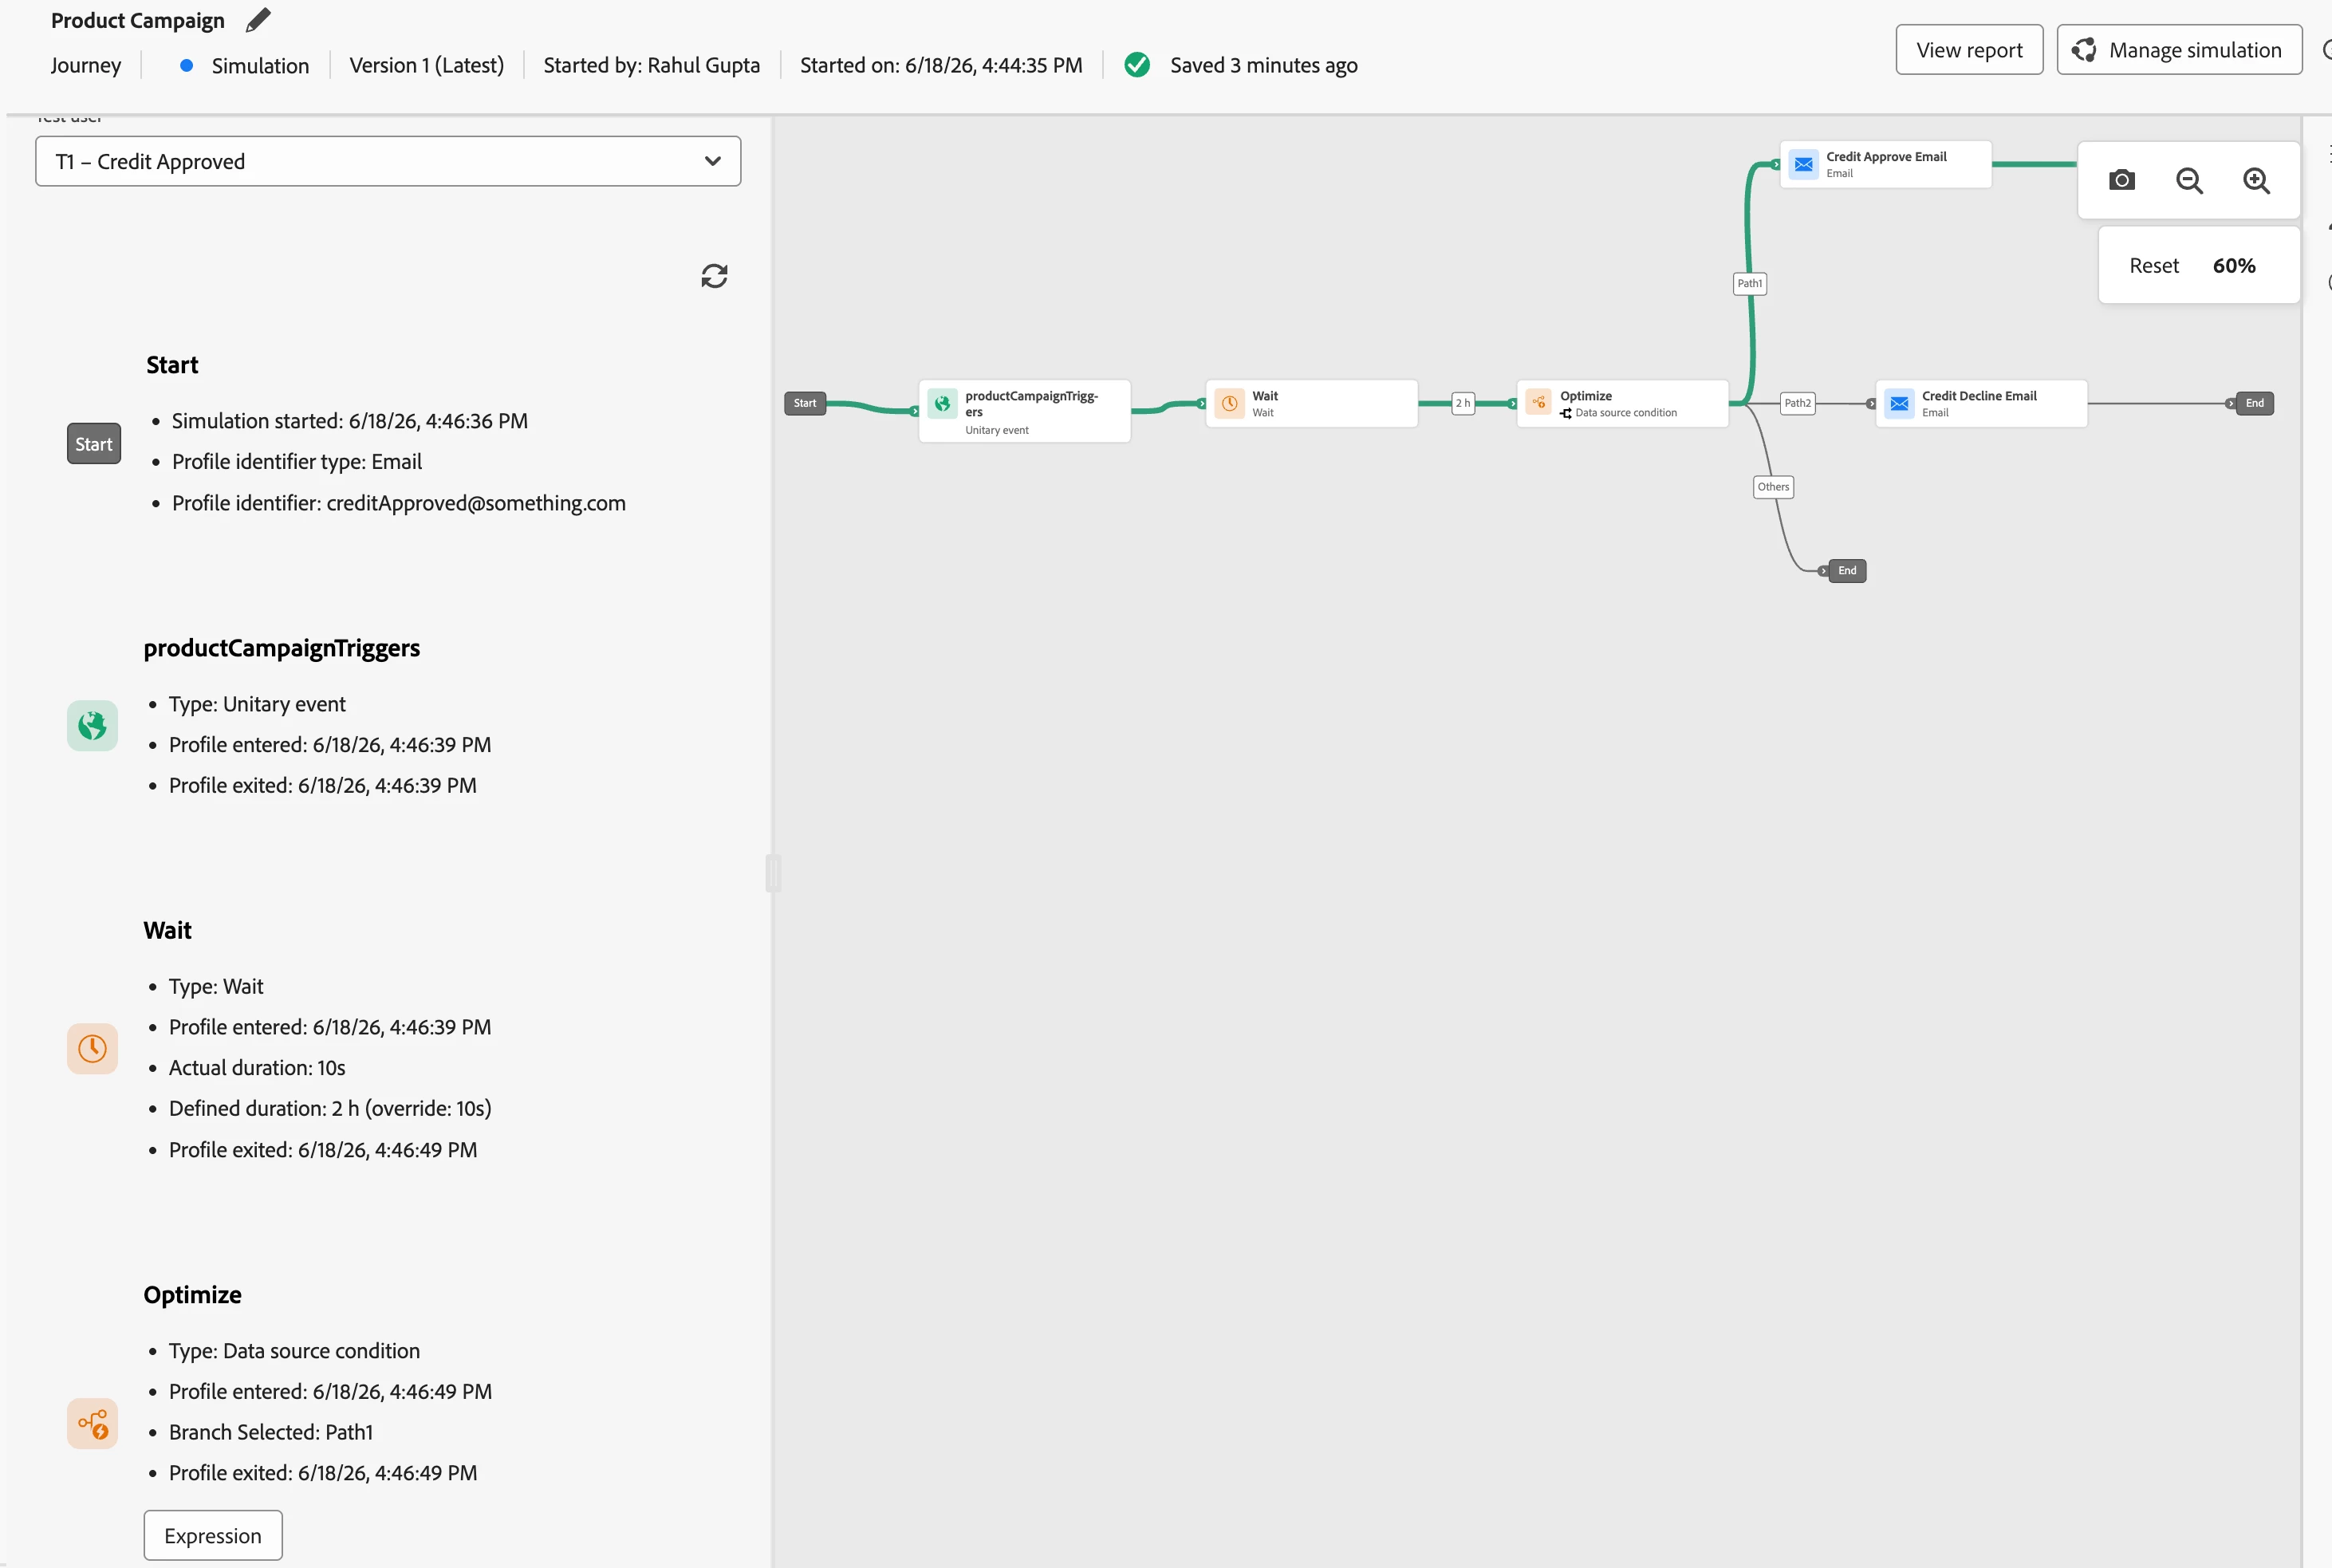
User A — expected: approved path
Select User A. The green line should branch to the approved email node. Open the condition node detail and verify:
profile.creditDecisionread as"approved"- Condition evaluated true on the approved path
Open the approved email action node detail and confirm the approved email template was selected. Verify declineReason does not appear anywhere in the approved email's rendered output — it should not be present because the approved email template does not reference that attribute.
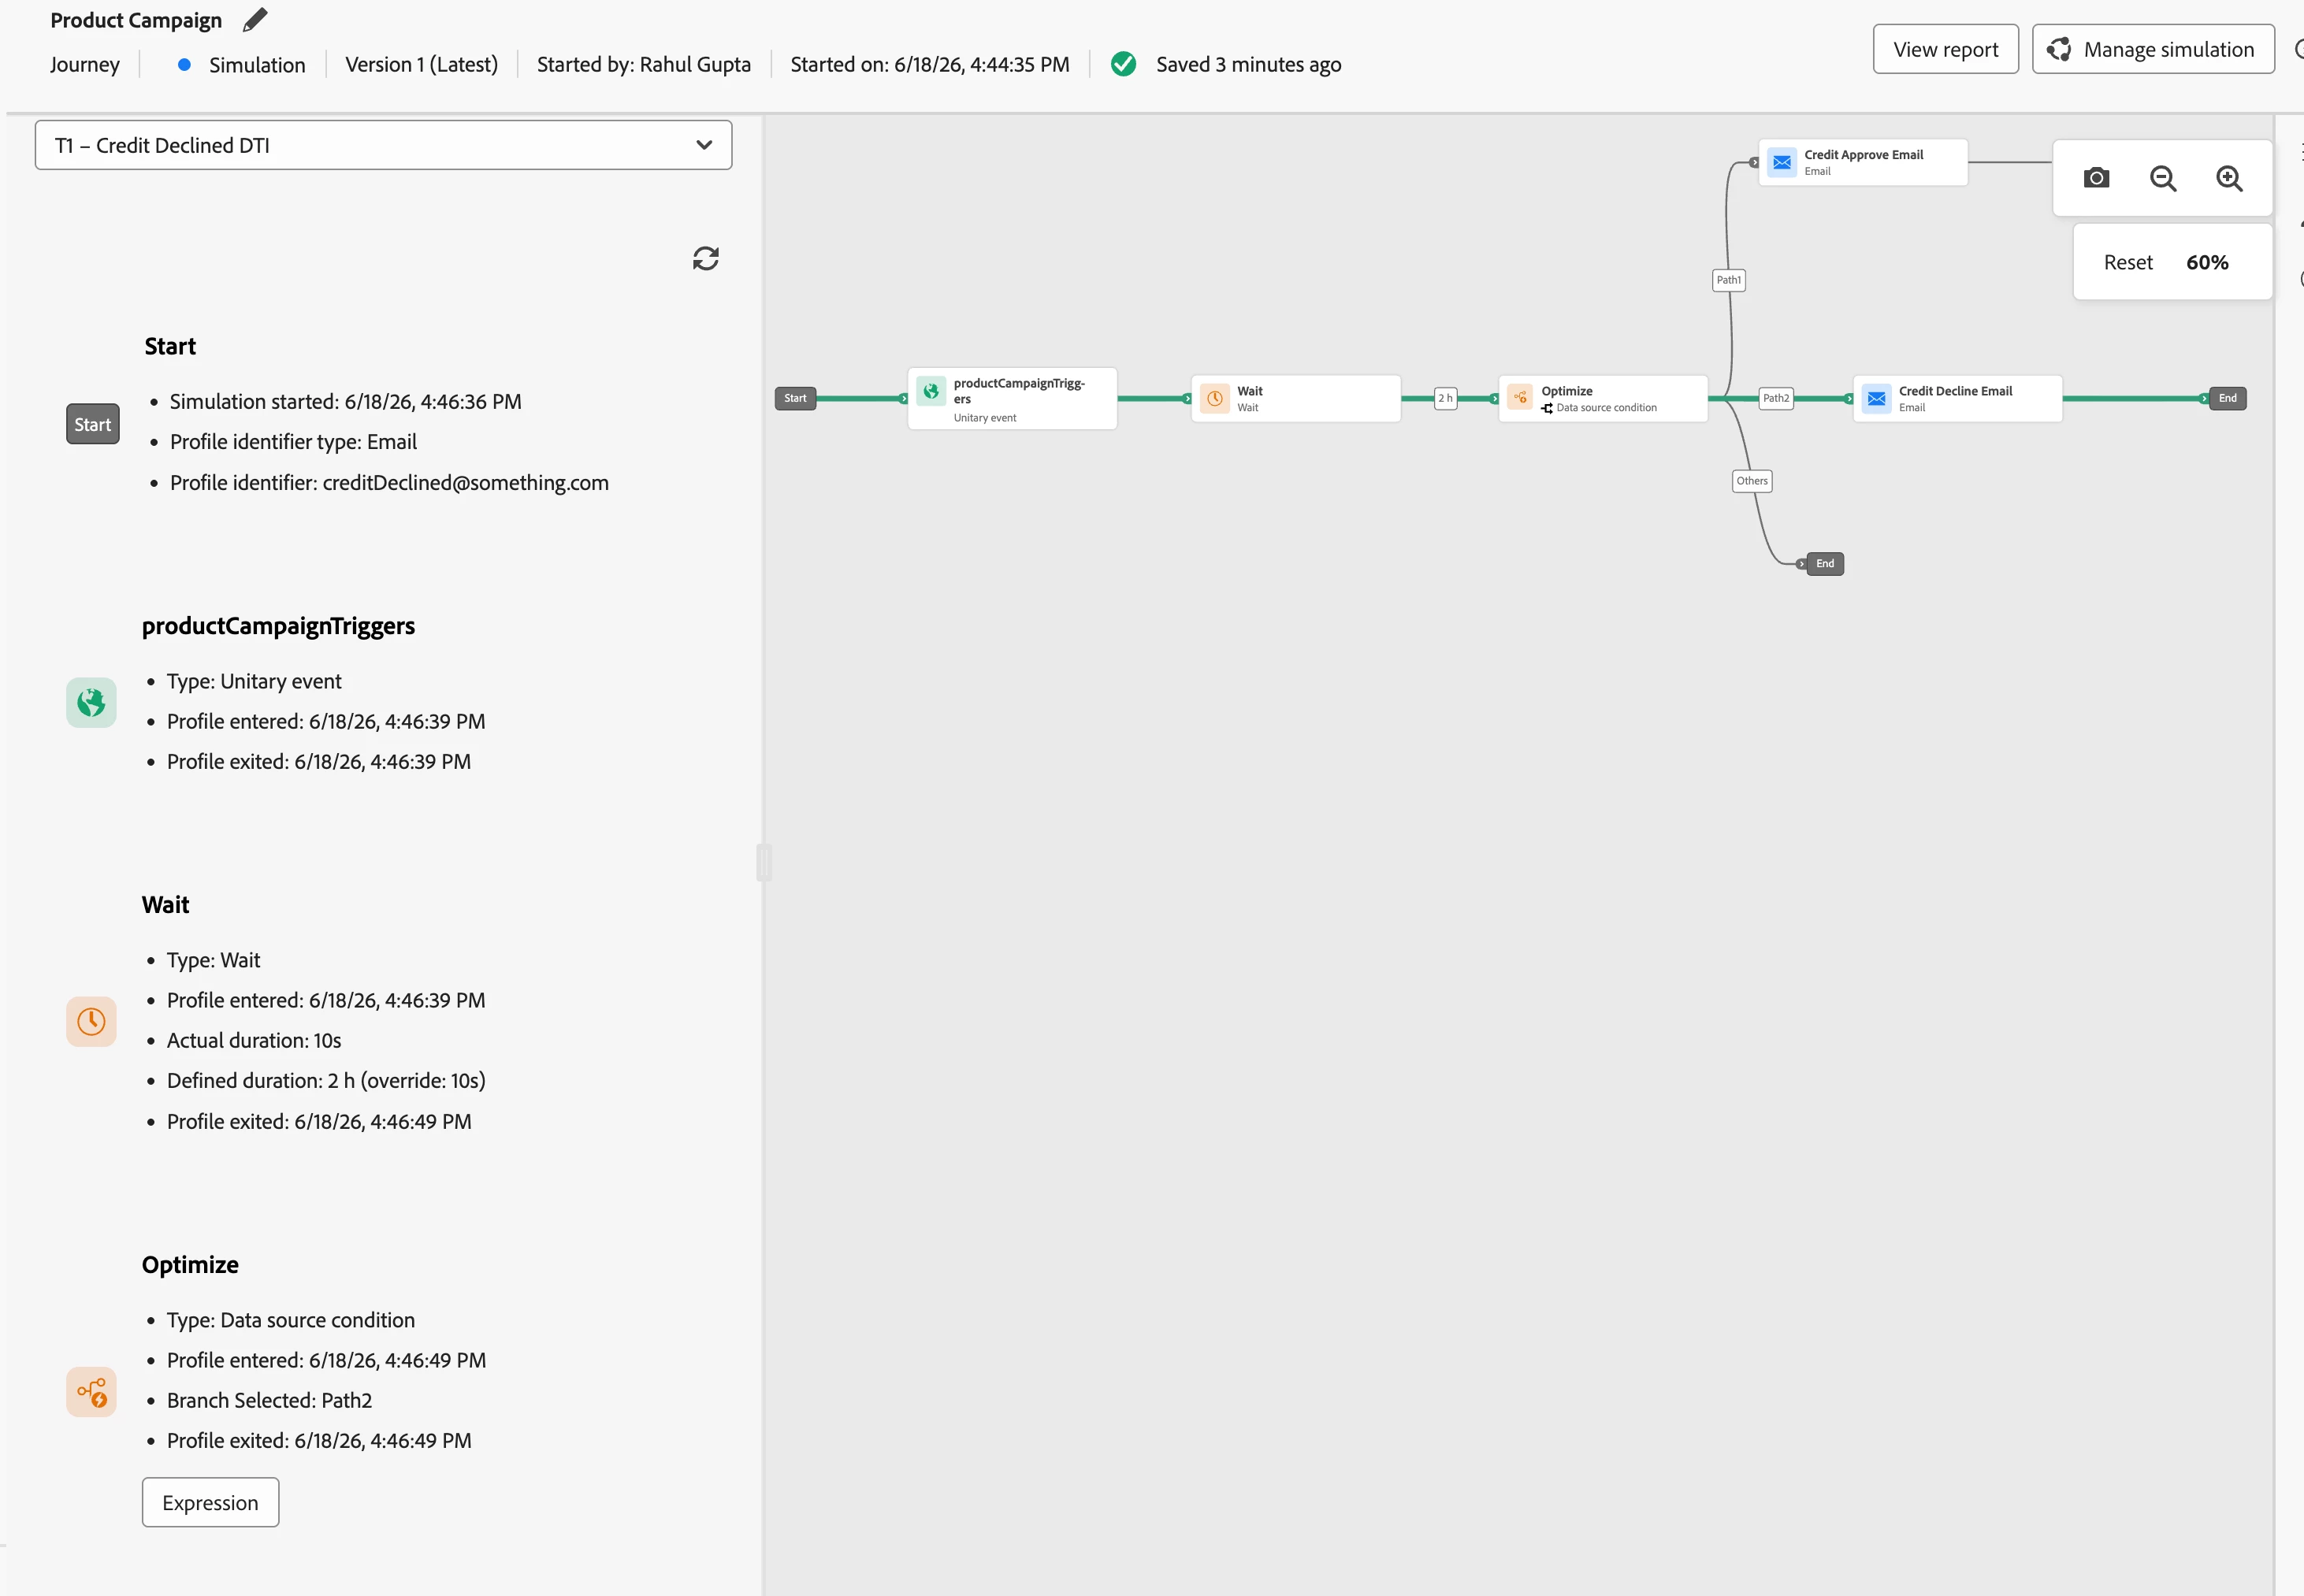
User B — expected: declined path with reason rendered
Select User B. The green line should branch to the declined email node. Open the condition node detail and verify:
profile.creditDecisionread as"declined"- Condition evaluated false on the approved path, true on the declined path
Open the declined email action node detail and confirm:
- The declined email template was selected
{{profile.declineReason}}rendered as"debt-to-income ratio"in the email body- The conditional content block specific to DTI decline (
{%#if profile.declineReason = "debt-to-income ratio"%}) selected the DTI-specific alternative product section
User C — expected: fallback path, no email
Select User C. The green line should route to the fallback path — neither the approved nor the declined email. Open the condition node detail and verify:
profile.creditDecisionread as null- Both conditions evaluated false
- Fallback path triggered
If User C routes to either email instead of the fallback, the "other cases" path is not configured on the condition node. Add it before publishing — this path handles profiles where no decision has been recorded, and sending either email to those profiles is incorrect.
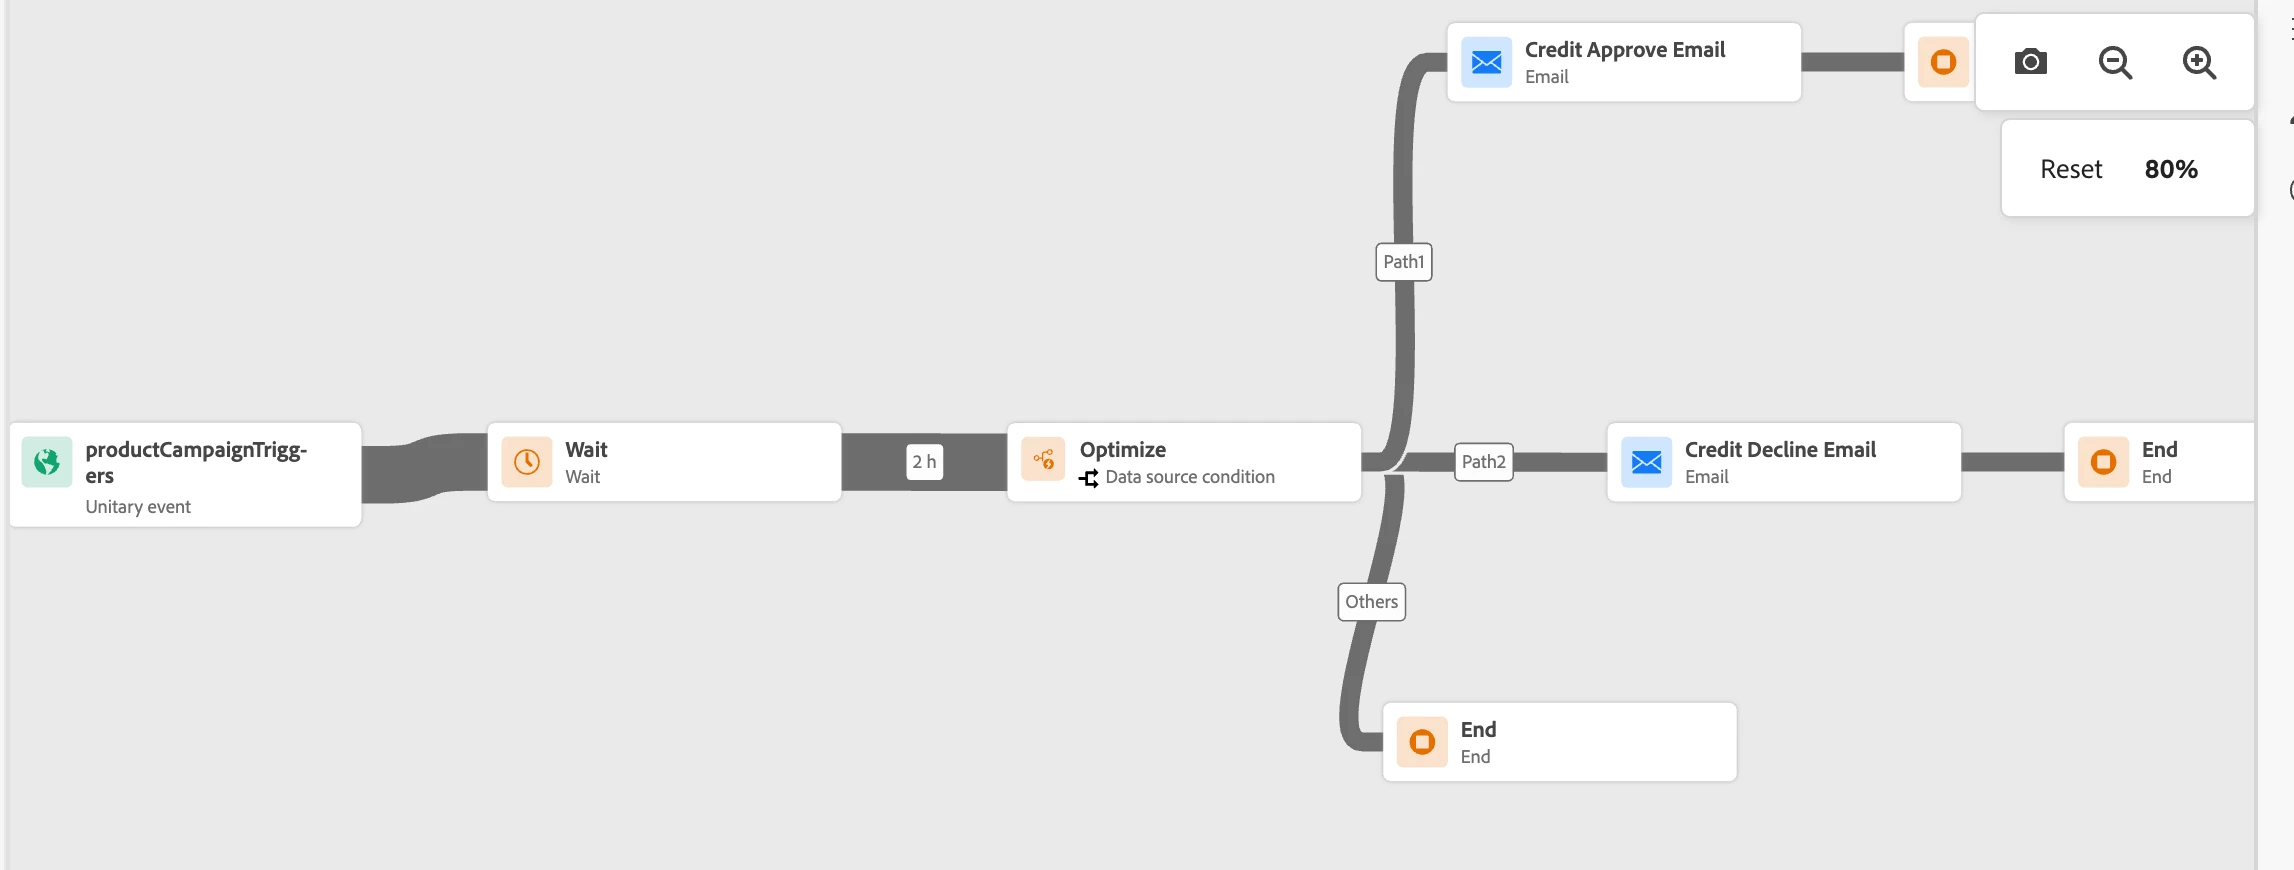
Select All
Switch the dropdown to All Users. Dark grey lines on the canvas show the collective path coverage. You should see two lines diverging at the condition node — one to each email branch — and one line reaching the fallback. This single view confirms all three paths were exercised in this simulation run.
STEP 6: CLOSE SIMULATION MODE
On Journey 1, close Simulation Mode from the same Simulate menu where you opened it. The journey returns to Draft status.
User A, User B, and User C remain saved in your Simulated Users library. The next time you update either journey — a new reason code in the event schema, a change to the condition expression, a revised email template — you reopen Simulation Mode on each journey, select the same three users, and rerun the same sequence. The full test takes under ten minutes once the users are built.
WHAT THIS SIMULATION RUN PROVES
Running all three users through both journeys in Simulation Mode gives you confirmed evidence of five specific behaviours before either journey goes live:
- The Update Profile node in Journey 2 correctly writes both
creditDecisionanddeclineReasonfrom the incoming event payload to the Simulated User's profile. - The condition node in Journey 1 correctly reads
creditDecisionand routes approved profiles to the approved email and declined profiles to the declined email. {{profile.declineReason}}renders the correct reason string in the declined email body.- Conditional content blocks in the declined email select the correct alternative product section by reason code.
- Profiles with no credit decision recorded (
creditDecision= null) route to the fallback path and receive no email.
Each of these is shown as a green line on the canvas and confirmed in the node-level detail view. That is the audit trail — screenshot it and keep it with your launch documentation.