This is fairly straightforward to set up in Analysis Workspace.
Step 1
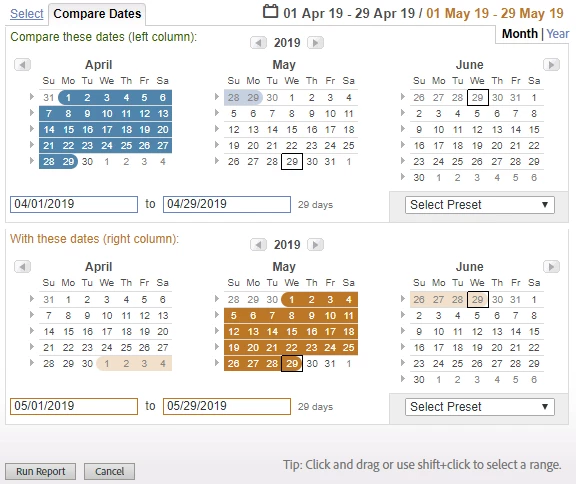
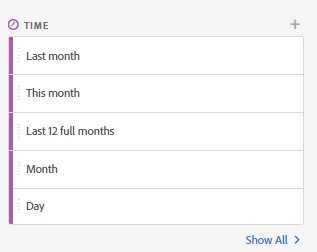
Go to the time section in the component menu and click on the plus sign. This will open up the Date Range Builder.
Step 2
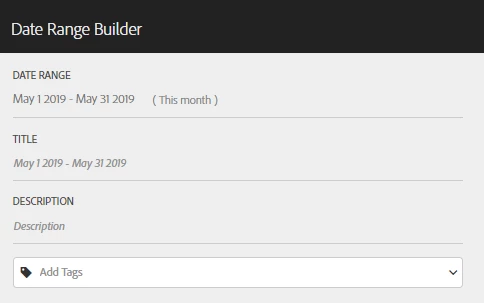
By default it shows you the current month as the date range. Click the grayed-out dates in the date range, next to where it currently shows "(This month)". This will open up the date range menu.
Step 3
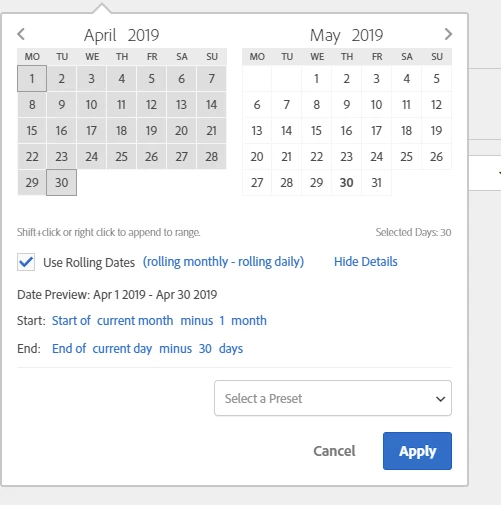
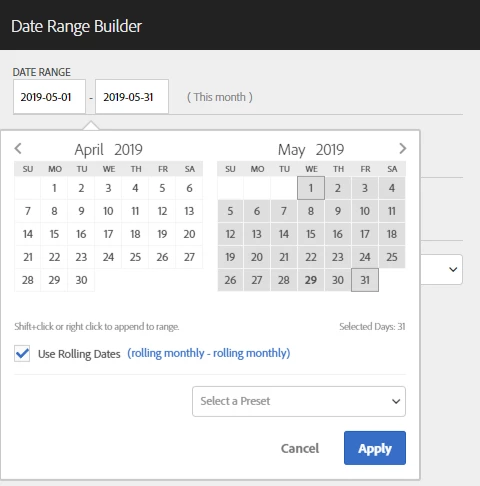
From this screen, click on the (rolling monthly - rolling monthly) text. This will open up some additional options. Don't uncheck the box to the left of "Use Rolling Dates".
Step 4
You're going to edit the Start and End items that now appear on the screen.
Step 5
In the Start section, click on "(none)". This opens up a small menu, where you will select "minus". After you select this a default value of "1 day" is shown. Click on "day" and change it to "month". The sentence should now read "Start of current month minus 1 month"
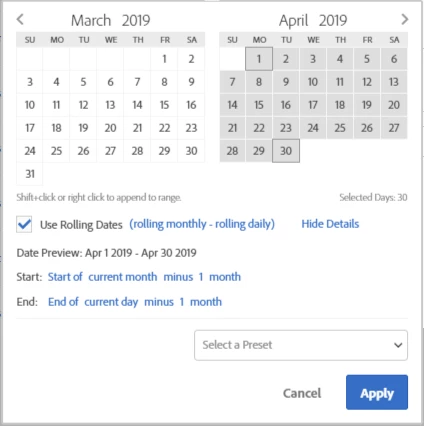
End: Click on "current month" and select "current day" in the menu that appears. Click on "(none)" and select "minus", then click on "1" and change it to "30". Make sure "days" is selected rather than "month".
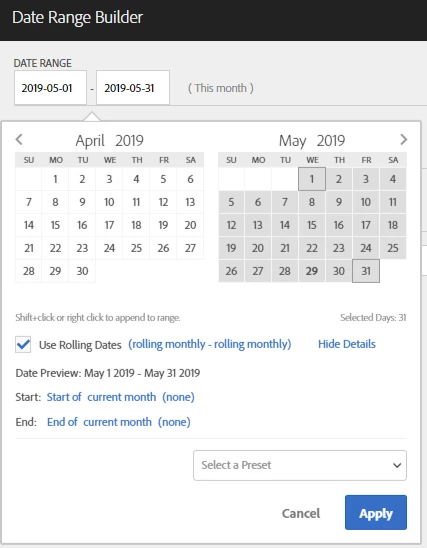
In the end, your screen should look like this:
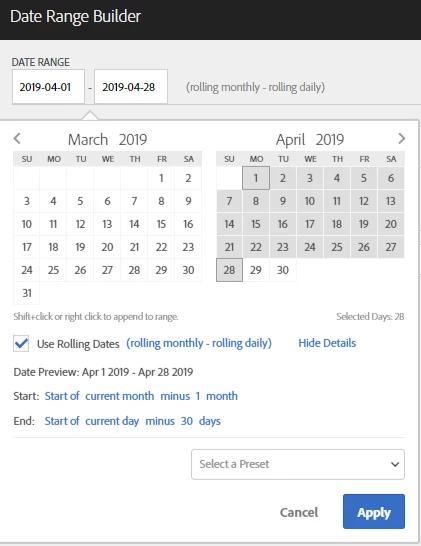
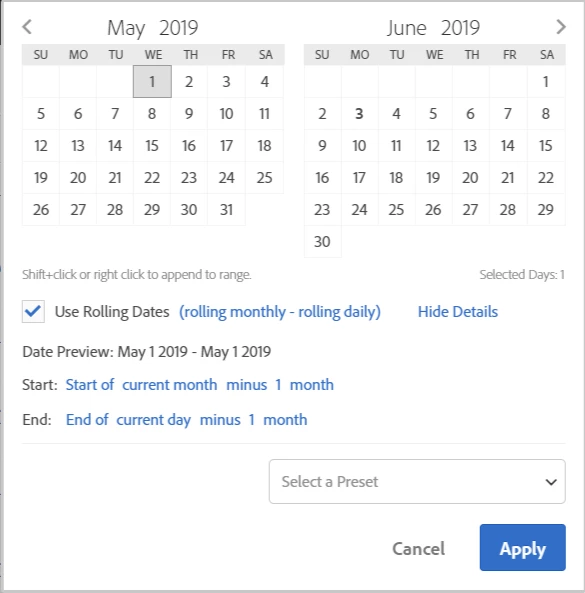
Pay attention to the Date Preview to make sure that it's showing the dates you'd expect. I typically don't include today's date in my reports, so I want the Date Preview to not show today's date (5/29/2019). If you wanted to include today's date in your reports, switch "Start of" to "End of".
Once you are satisfied with what you've built, click the "Apply" button. You'll want to change the title from the default date range to something that makes a bit more sense, such as "Month to date (last month)".