
Organize Your Journeys at Scale with Journey Folders in Adobe Journey Optimizer
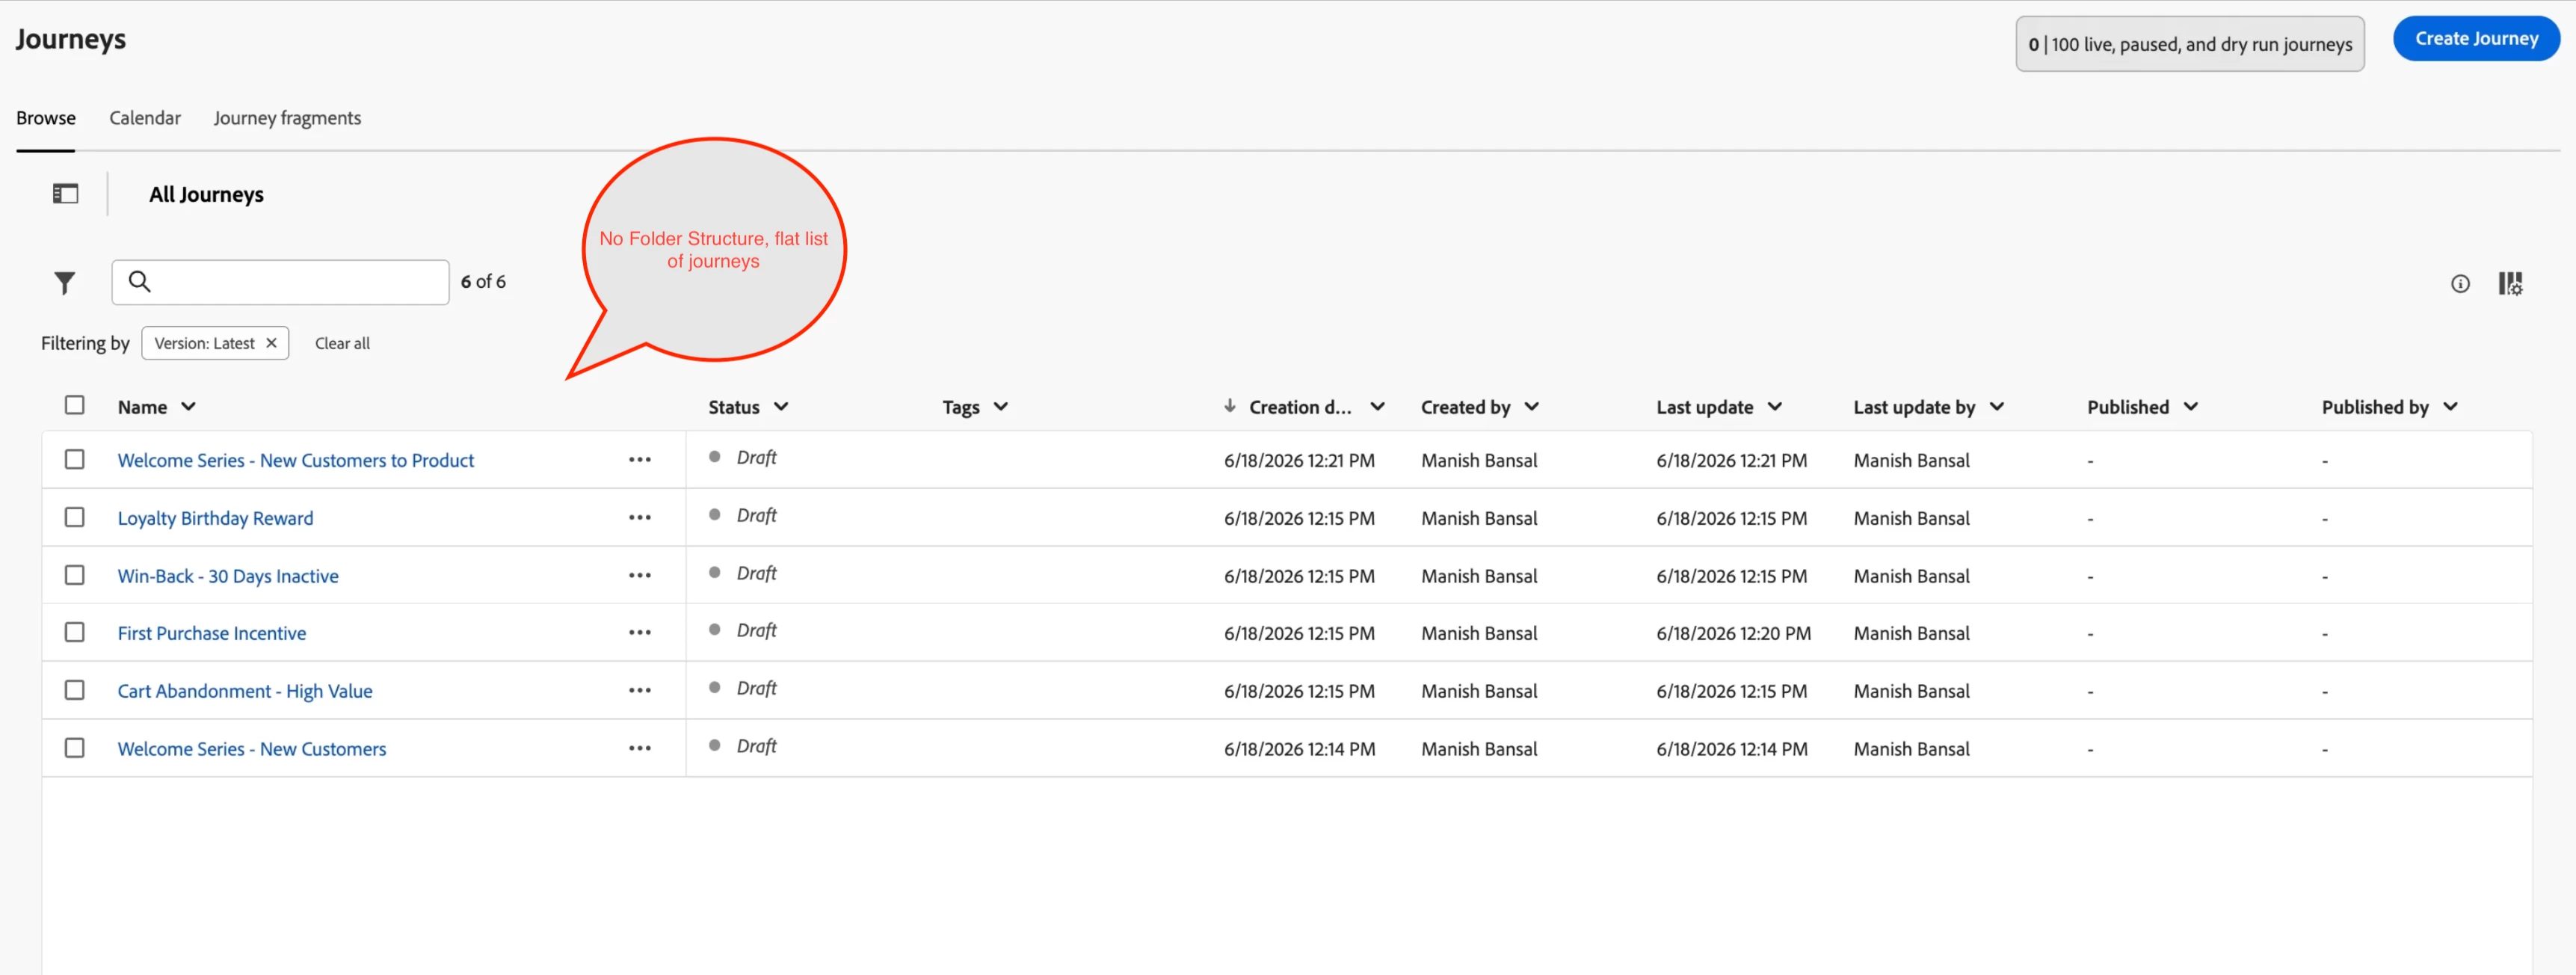
You open your journey inventory and see six, twelve, maybe hundreds of journeys sitting in one flat list — no grouping, no hierarchy, just an ever-growing scroll. Finding the right journey means scanning by name and hoping you remembered what you called it six months ago.
That is the problem Journey Folders solves.
What Are Journey Folders?
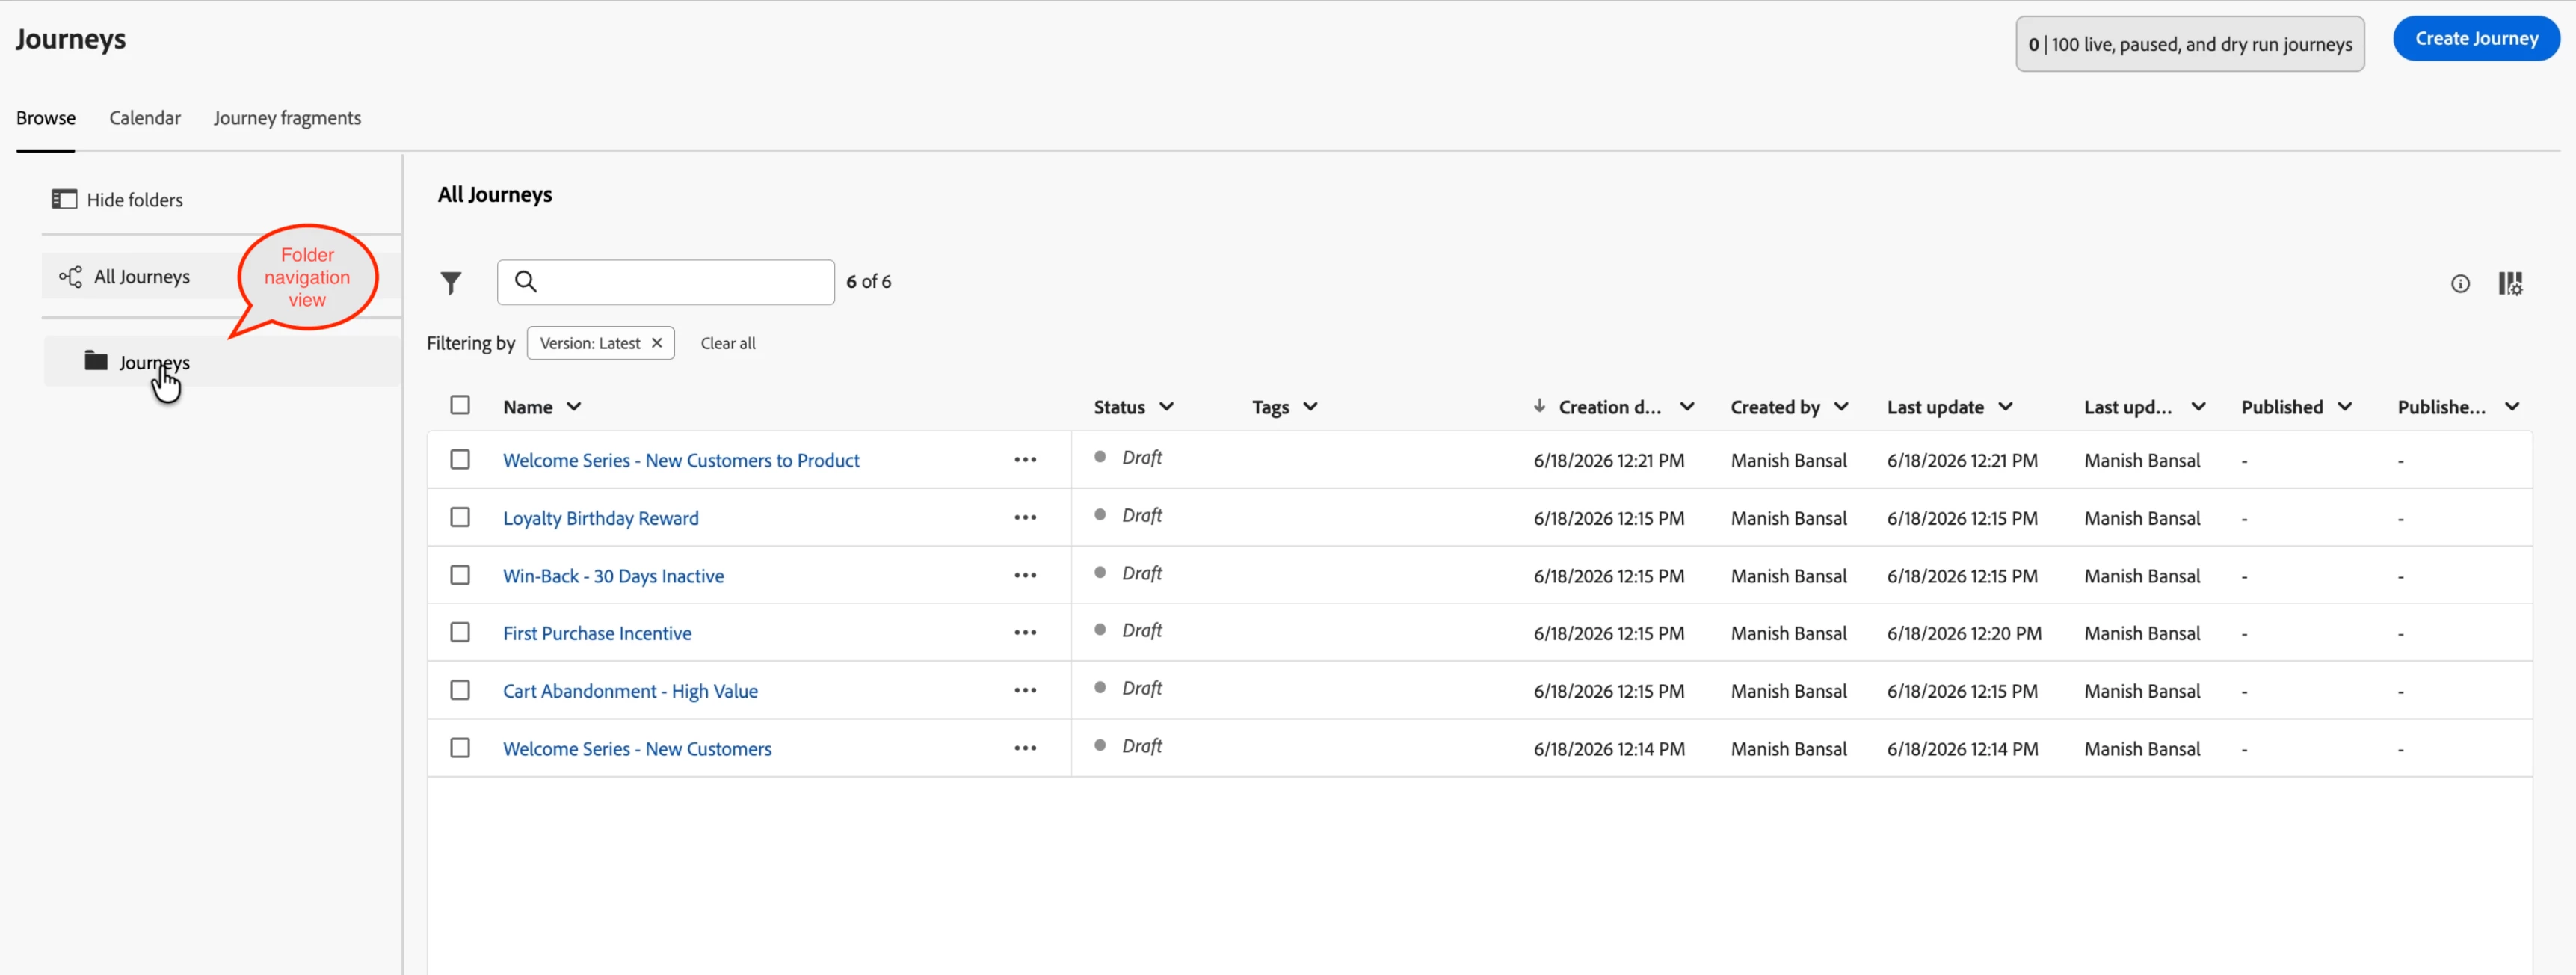
Journey Folders is a native organisational layer built directly into Adobe Journey Optimizer. It lets you create named folders, move existing journeys into them, and nest folders up to four levels deep — giving teams a scalable hierarchy that maps to how they actually think about their programmes: by region, business unit, campaign type, or lifecycle stage.
Unlike tags or filters, folders are structural. A journey lives in exactly one folder. The folder appears in the breadcrumb, in the sidebar tree, and in every "move to" dialog — so the location is always unambiguous.
Step 1: Create Your First Folder
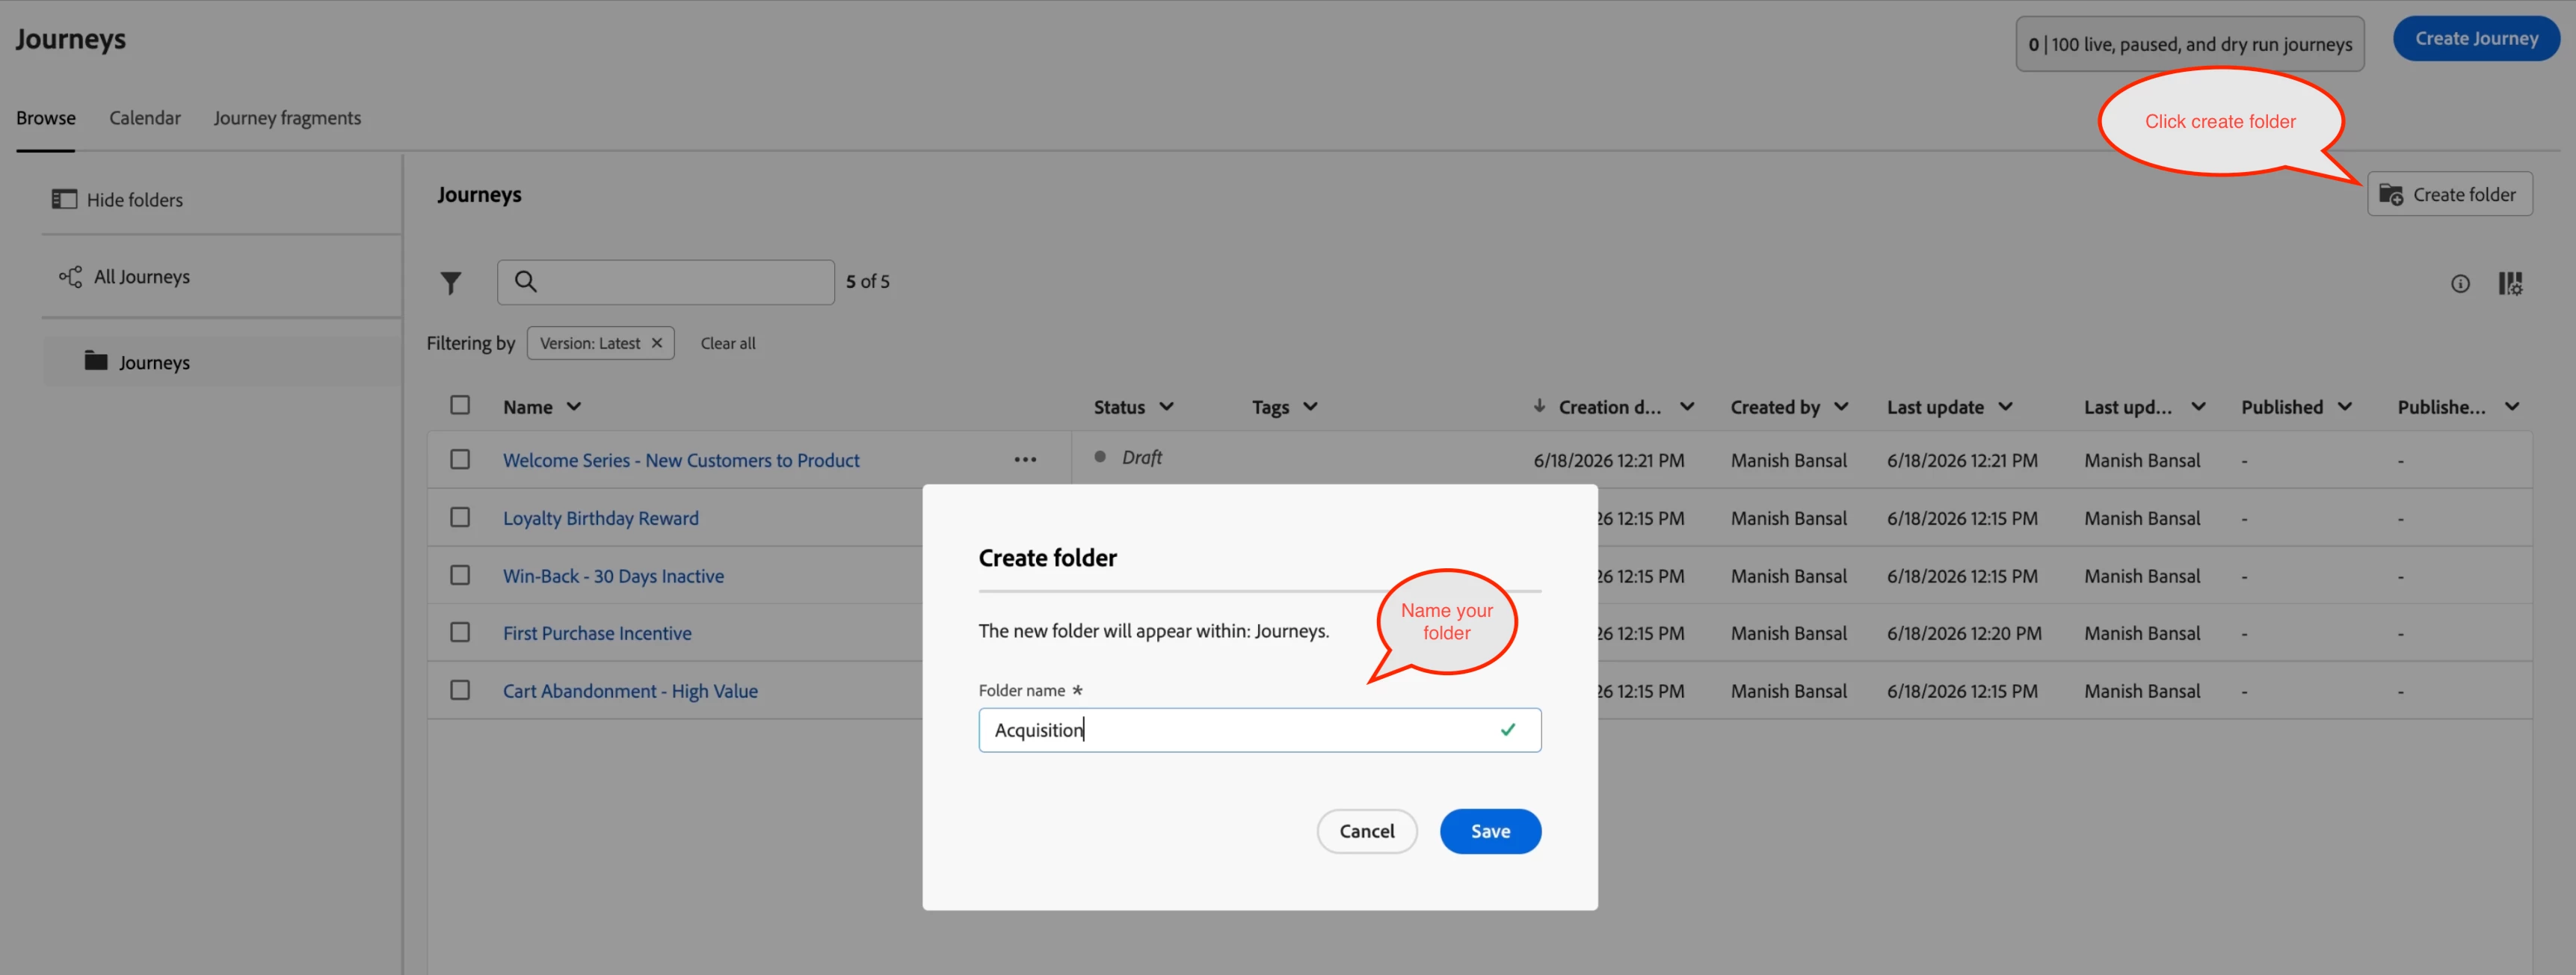
In the Journeys inventory, click the Create folder button in the top-right toolbar. A dialog appears — type a name (for example, Acquisition) and confirm. The folder is created immediately and appears in the sidebar tree on the left.
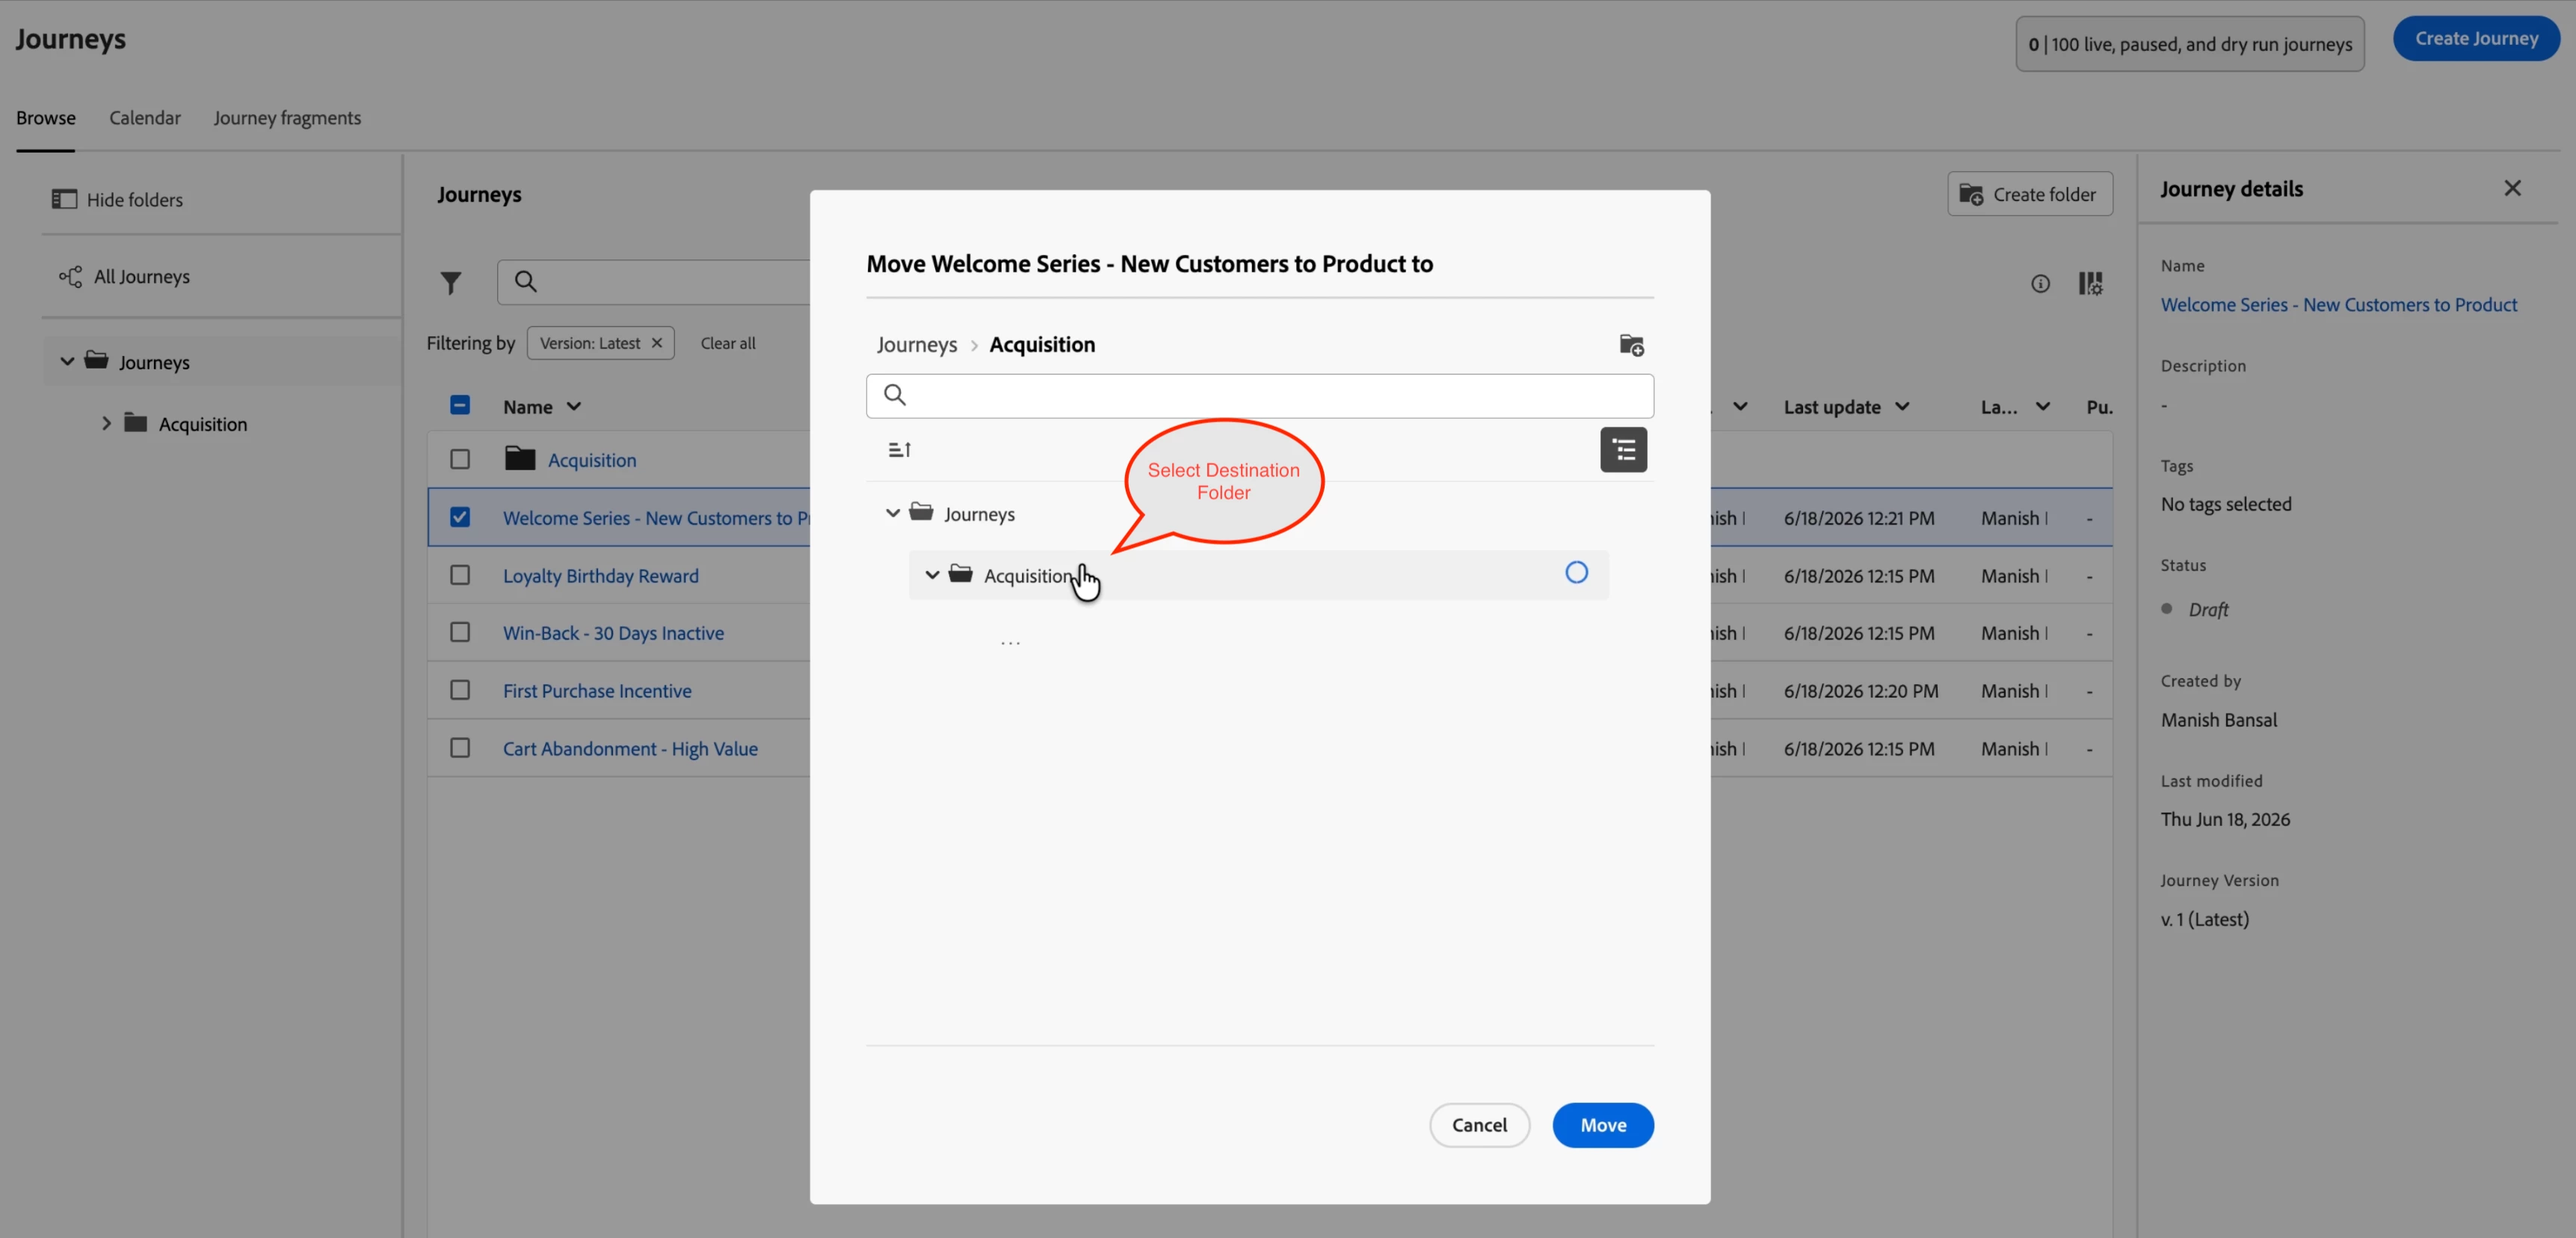
Step 2: Move Your Journeys In
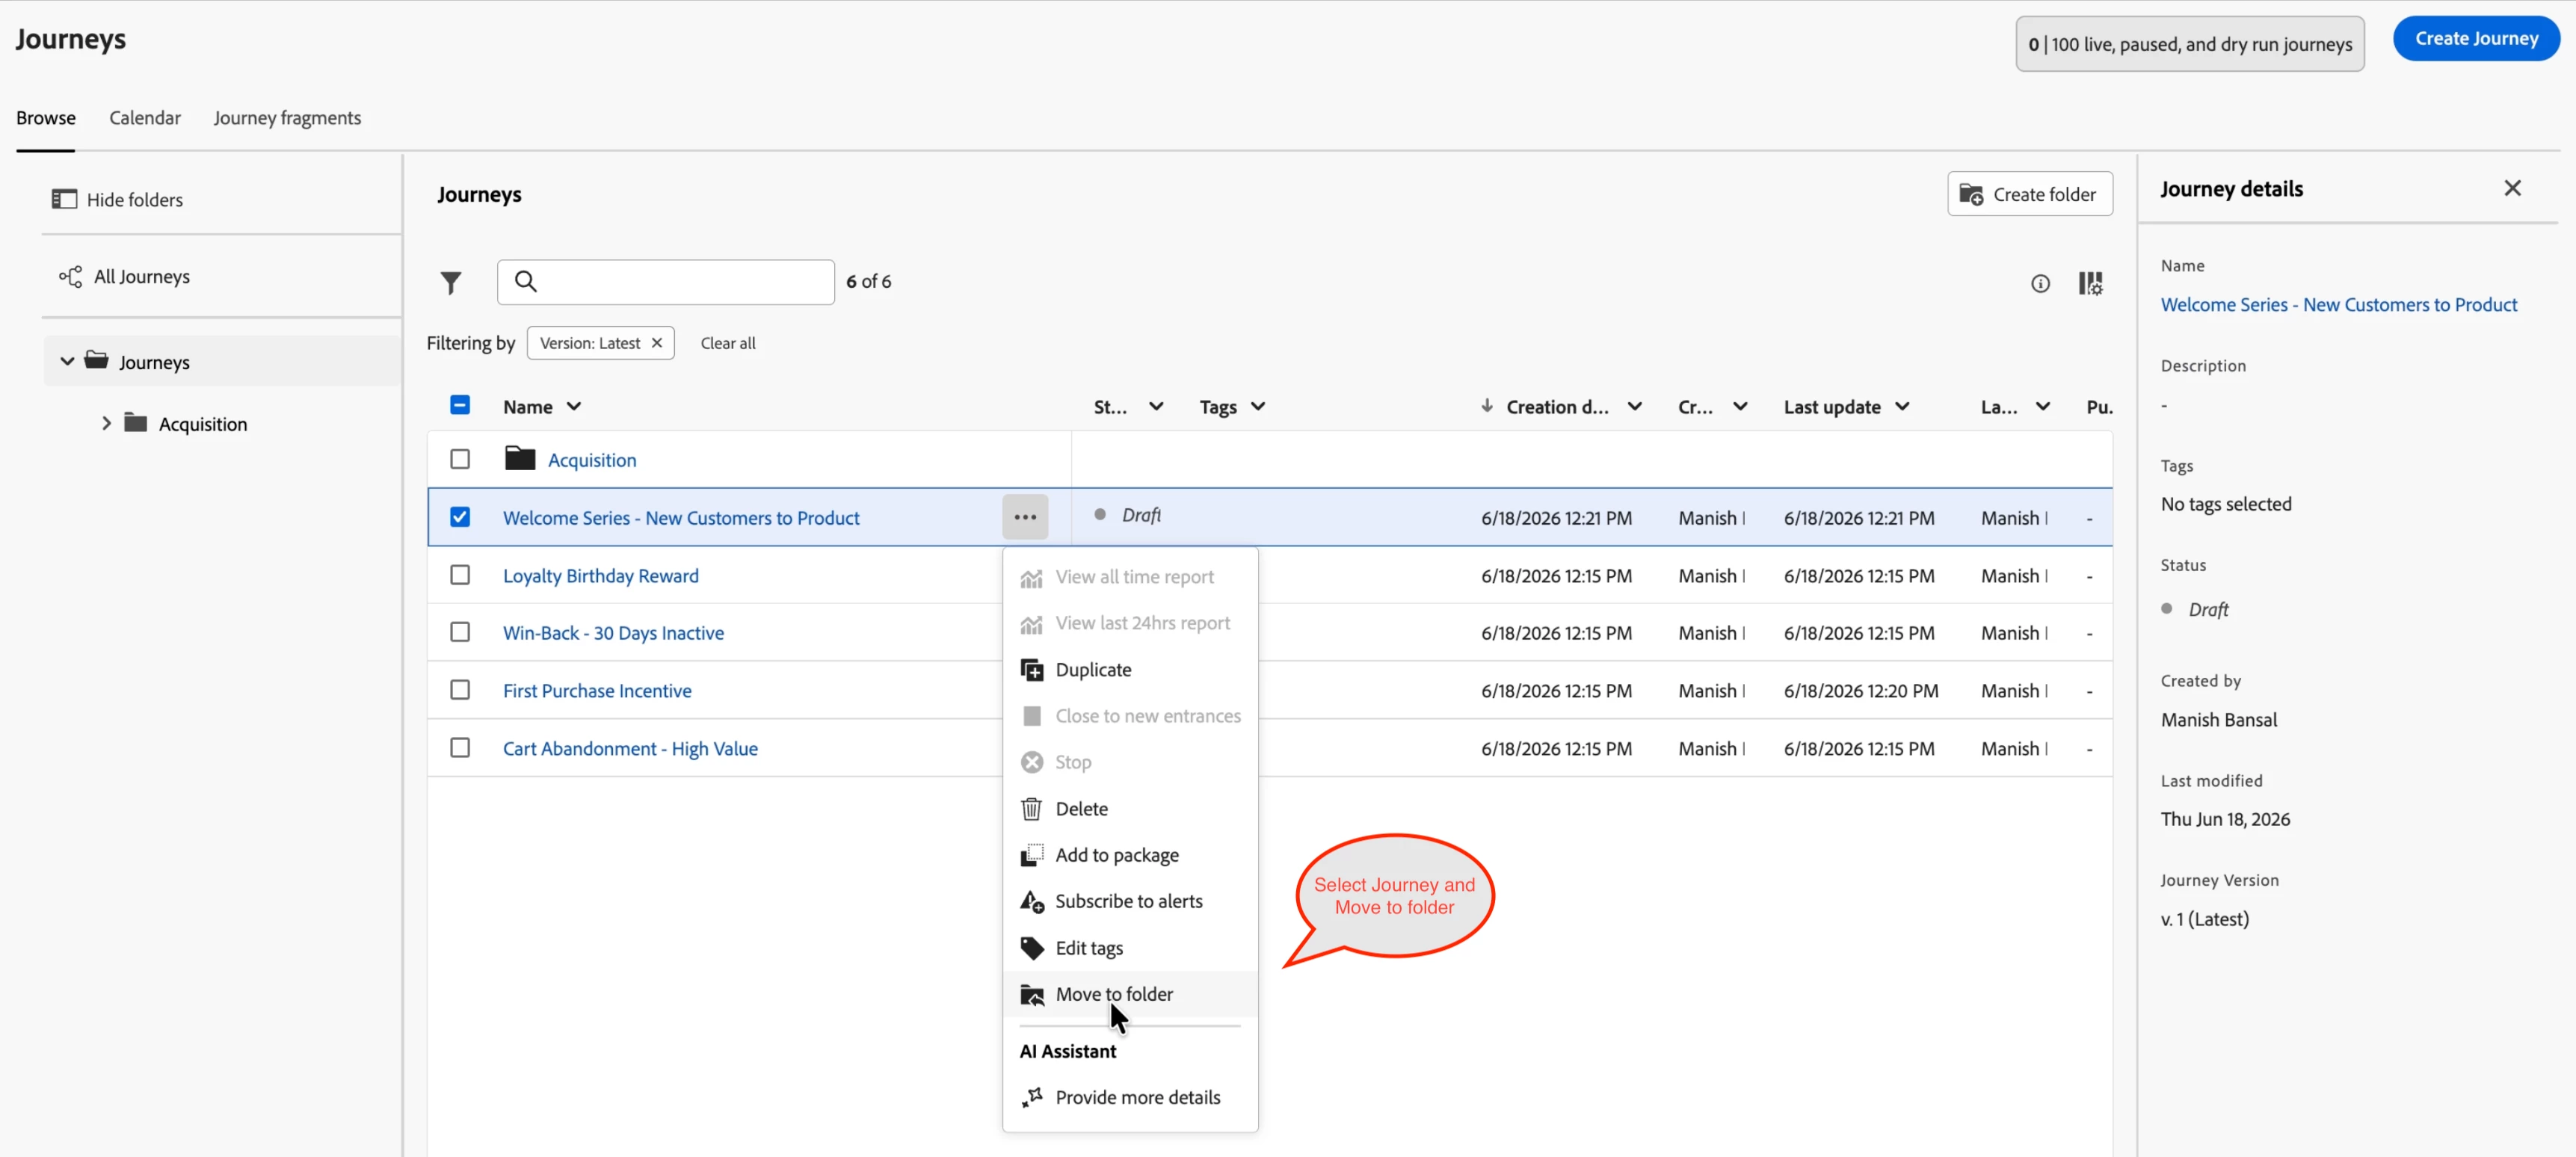
Select any journey from the list and choose Move to folder from its action menu. A picker shows your full folder tree — select the destination and confirm. The journey disappears from the flat list and appears inside the chosen folder.
The Result: A Scoped, Organised View
Once journeys are moved in, clicking the folder in the sidebar shows only those journeys — nothing else. The breadcrumb at the top confirms your location (Journeys > Acquisition), and the folder tree on the left gives you one-click navigation to any other folder.

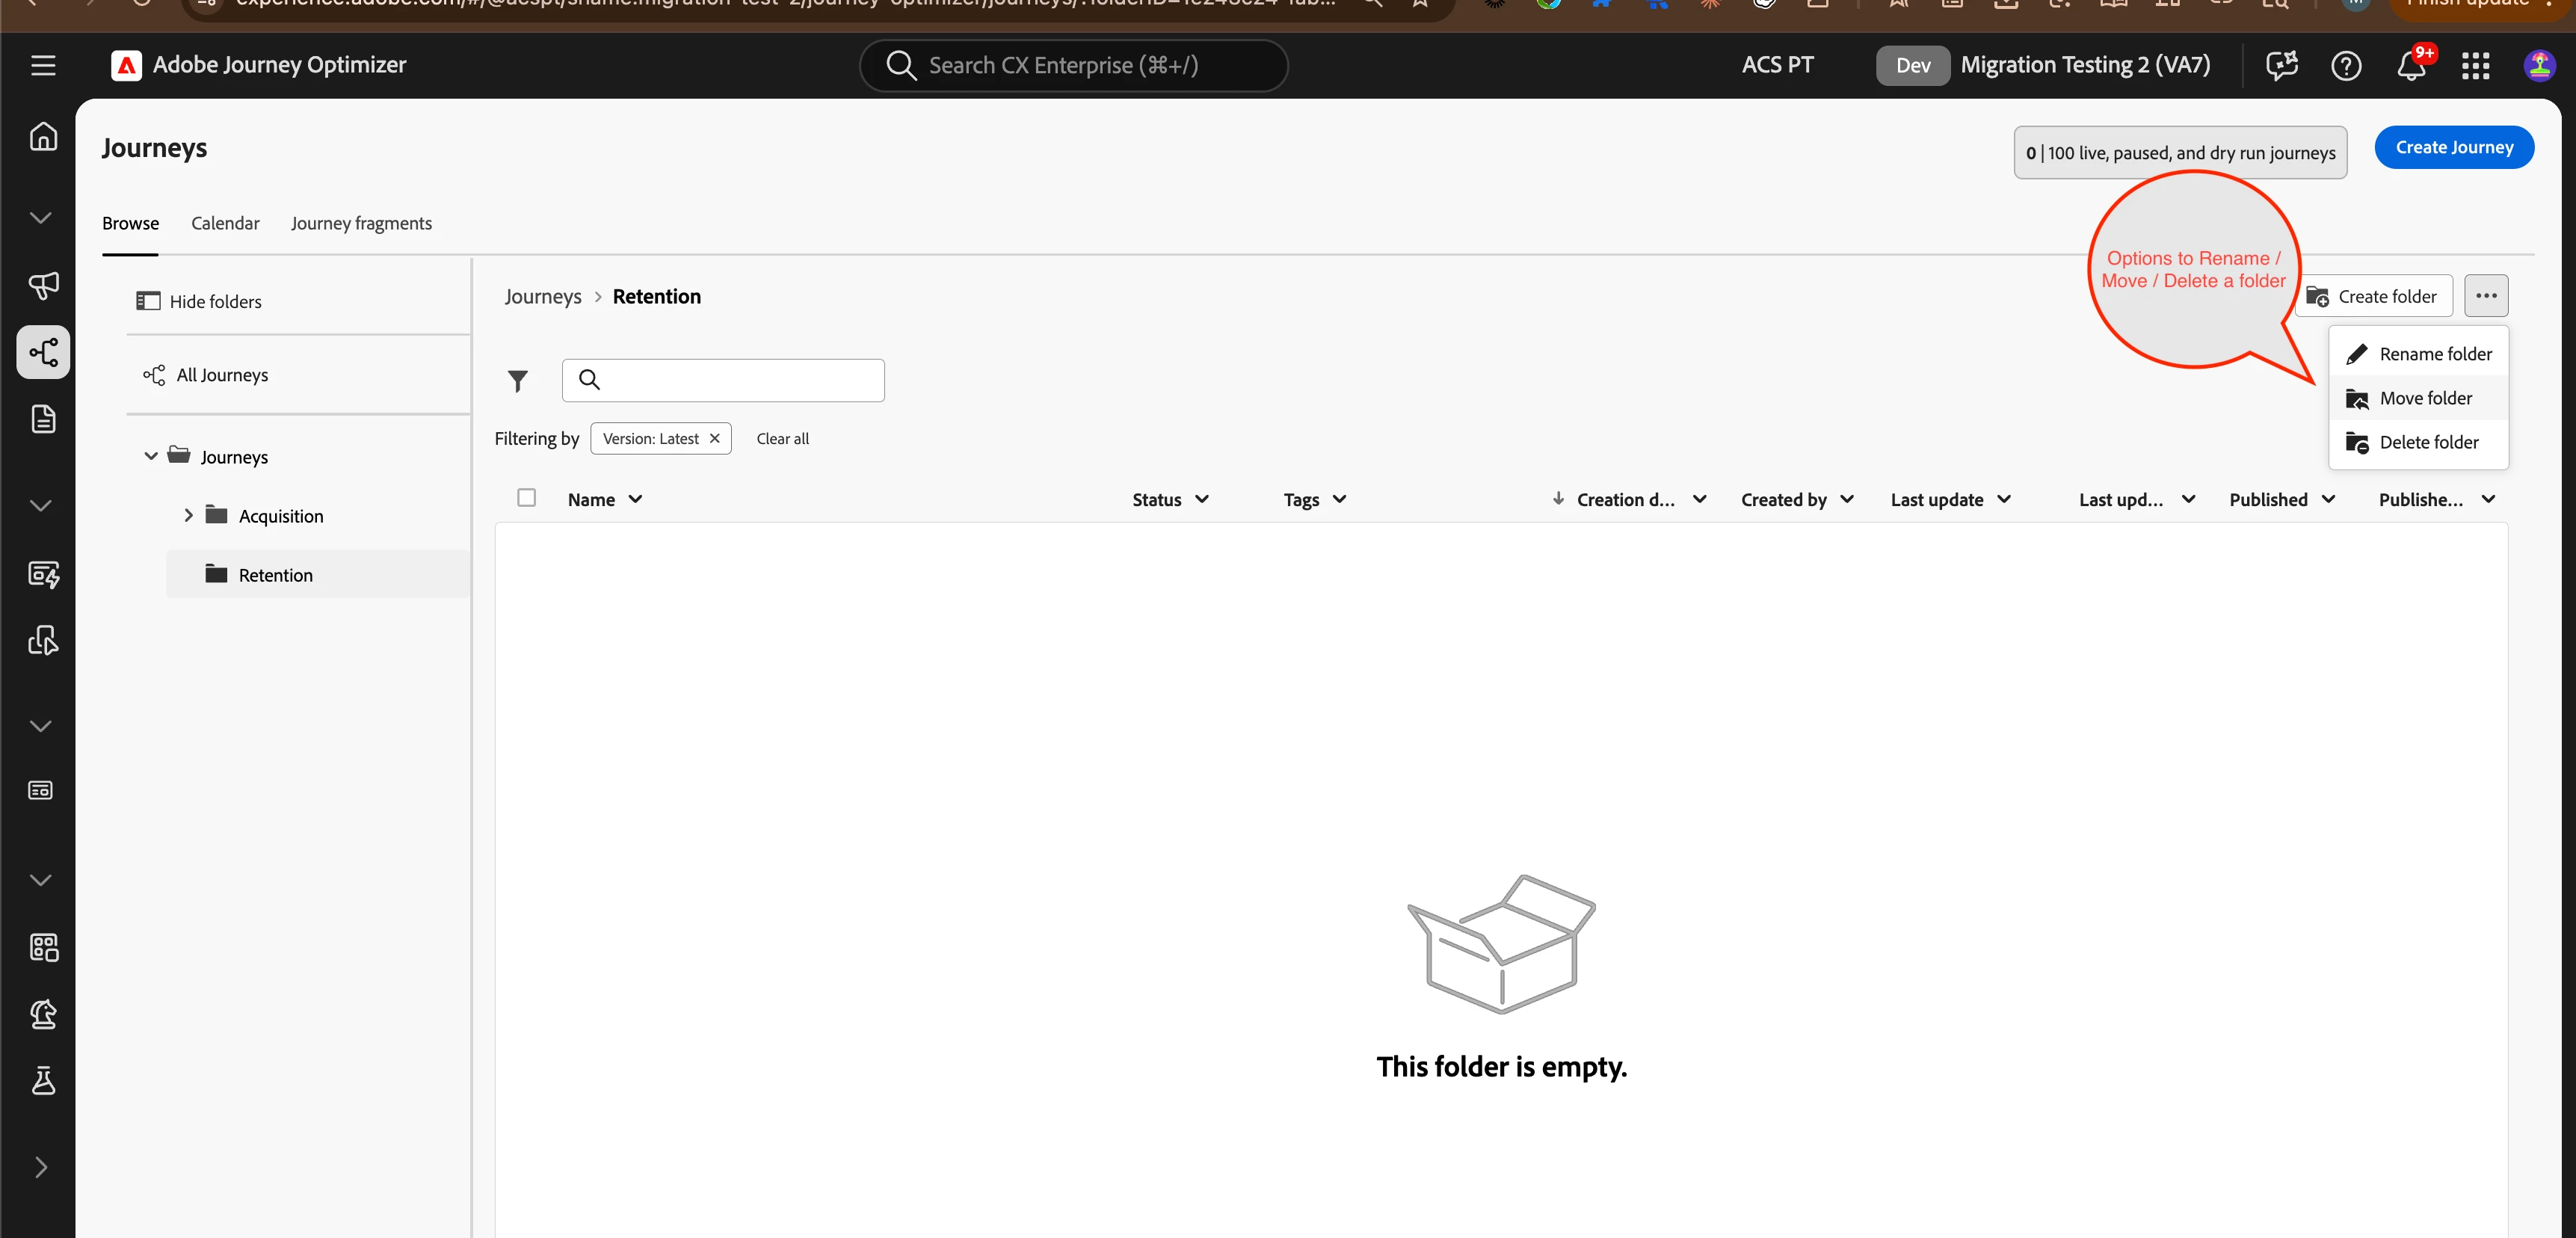
Full Folder Management: Rename, Move, Delete
Every folder has a ··· (more options) button in the sidebar tree. Clicking it exposes three actions:
- Rename folder — update the folder name; the breadcrumb and tree update immediately across all journeys inside it.
- Move folder — relocate the entire folder (and all its journeys) to a new parent, enabling you to restructure your hierarchy without re-moving journeys one by one.
- Delete folder — only available on empty folders; journeys are always protected and must be moved out first.
Best Practices
- Mirror your team structure. If your org has separate growth, retention, and re-engagement squads, create a top-level folder per squad. Nested sub-folders can reflect campaign or product area.
- Use the four-level limit intentionally. Folders support up to four levels of nesting — enough for most hierarchies. Resist the temptation to go deeper; a flat-ish tree is easier to navigate than a deeply nested one.
- Name folders by function, not by time. "Onboarding" ages better than "Q1 Onboarding" — add date context in the journey name instead.
- Clean up before deleting. Because folders must be empty to delete, you are naturally prompted to decide where each journey belongs before the folder disappears.
Get Started Today
Journey Folders is available now in Adobe Journey Optimizer. Open your Journeys inventory, click Create folder, and start organising. Your future self — staring at a list of 200 journeys — will thank you.
Have questions or want to share how you are structuring your folders? Drop a comment below.