Hi
As mentioned by Tihin, [1] is good article to understand what happens when PDF is uploaded into CQ DAM.
[1]:- http://cq-ops.tumblr.com/post/33794096940/what-happens-when-a-pdf-is-uploaded-into-cq-dam
//
1) The PDF is saved to /content/dam/pdf/water_quality_in_Ontario.pdf/jcr:content/renditions/original/
2) A “Node Created” event is fired by CQ's Java Content Repository (JCR)
3) The “workflow launcher” configured to listen to “Node Created” events in /content/dam(/.*/)renditions/original/ launches the workflow model called “DAM Update Asset”. See below for the serial worksteps in the workflow model “DAM Update Asset”.
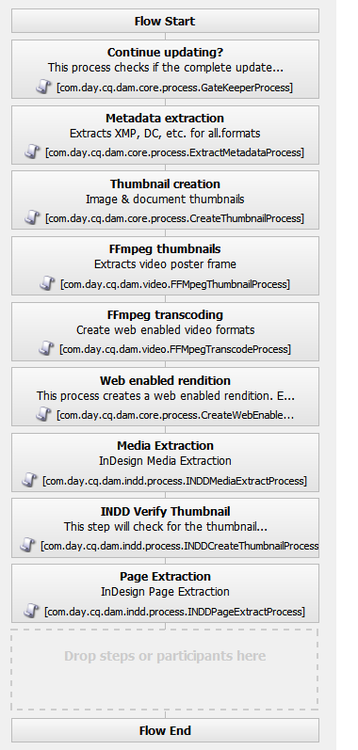
The “Continue Updating” step’s sole reason for existence is to check whether the workflow got kicked off because another version of the digital asset just got restored. If yes, the step will end the workflow right there and then.
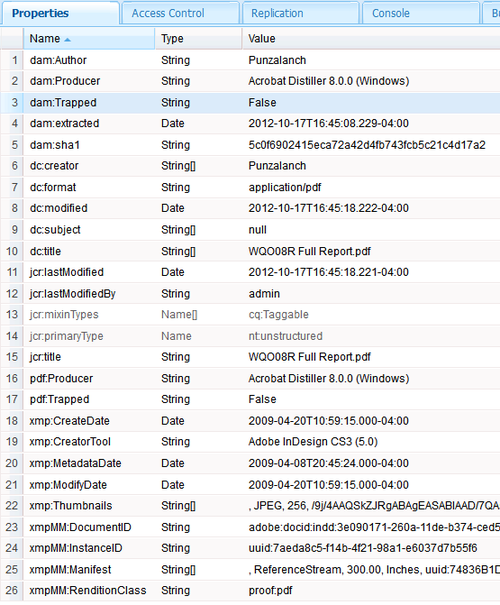
4) The “Metadata extraction” workstep extracts the PDF document’s metadata and saves it to /content/dam/pdf/water_quality_in_Ontario.pdf/jcr:content/metadata
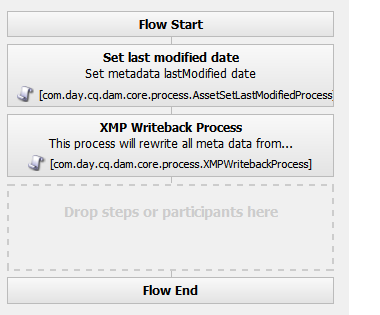
5) The “workflow launcher” configured to listen to “Node Modified” events in /content/dam(/.*/)metadata launches the workflow model called “DAM Metadata Writeback”. This creates additional See below for the serial worksteps in the workflow model “DAM Metadata Writeback”.
6) The “Thumbnail Creation” workstep creates three thumbnails (renditions) of the following dimensions (these dimensions are editable properties of the workstep):
- [140 pixels : 100 pixels]
- [48 pixels : 48 pixels]
- [319 pixels : 319 pixels]
7) The rest of the worksteps are skipped as they only relate to images and InDesign documents
8) Behind the scenes, Apache Tika converts the contents of the PDF into plain text
9) Apache Lucene then indexes the extracted plain text so that full text search of the PDF document contents is possible.
All of the above will create the following JCR structure:
The “metadata” JCR node will have the following properties (the property values will of course vary with the document):
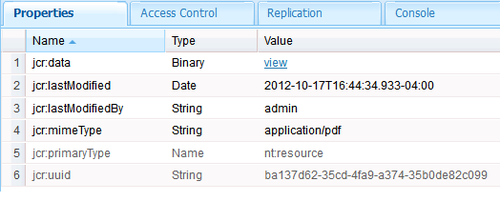
The node jcr:content under the “original” node will have a property called jcr:data of data type “Binary”. This property will hold the binary contents of the PDF. You can click the link “view” (property value) to download the PDF. See below:
I hope this would help you a bit.
Thanks and Regards
Kautuk Sahni
Kautuk Sahni